


I Am... A Super Simple Thai Basil Chicken Recipe
If you’re looking for a super flavorful quick and easy dinner, this Thai basil chicken stir fry is for you I LOVE Thai basil chicken. It gets my heart rate going not only because it’s perfectly spicy but also because it’s delicious. This is a super easy stir fry that is an incredible taste payoff for minimal prep. Goodbye delivery and hello home cooked meal!
What is Thai basil chicken?
Thai basil chicken is a super popular Thai stir-fry dish that’s eaten both at home, in restaurants, and from street food stalls. The main ingredients are chicken, Thai basil, garlic, Thai chilis, and sauce. Sometimes it’s served up with a crispy fried egg. It’s one of our go-tos when we’re craving Thai food.How to Make Thai Basil Chicken Stir Fry
1. Prep all of the ingredients: make the sauce by mixing together oyster sauce, soy sauce, dark soy sauce, and sugar in a small bowl. Mince the garlic (a garlic press is your friend!), chop the chilies, wash and dry the basil, and cut your chicken pieces up into even chunks. 2. Fry the aromatics: heat up some oil a wok or frying pan then very briefly lightly fry the garlic and chilis. 3. Fry the chicken: add the chicken and cook, stirring until golden and cooked. 4. Sauce: stir in the sauce and reduce. 5. Basil: take the pan off the heat and mix in the basil. Enjoy! Faster than getting your delivery order, am I right?!What You Need to Make Thai Basil Chicken
Sugar, oil, garlic, chicken thighs – you can sub chicken breast too but chicken thighs are juicier and more flavorful. Oyster Sauce Oyster sauce is a thick and flavorful brown sauce that can be found in the Asian aisle of any grocery store. If you see the Lee Kum Kee bottle with the two people in boats, go for that one. It’s the premium oyster sauce which lists oysters as its first ingredient, unlike the one with the red panda label which has oysters listed further down the list. Dark Soy Sauce You need both soy sauce and dark soy sauce for this dish - regular soy sauce adds salt and umami soy flavor; the dark adds a hint of caramel and color. If you don’t have dark soy sauce at home, you can skip out on it – your stir fry just won’t be as dark and glossy brown – but you should also give it a try. You can buy dark soy sauce easily online, and it will take your Asian/Chinese food to the next level. Once you buy a bottle, you can also use it for: Soy Sauce Chow Mein, Zha Jiang Mian, and Taiwanese 3 Cup Chicken. Thai Chilies Thai red chilies are very, very spicy. Frying them mellows out the spice a little, but if you’re not a spice fiend, seed your chillies (use gloves!) or decrease the amount. Thai Basil The correct kind of basil to use for pad krapow gai is Thai holy basil. It can be incredibly difficult to buy outside of Thailand so the best sub you can use is regular Thai basil. Thai basil has a very slight licorice/fennel flavor to it that is super distinct. They sell Thai basil at most Asian grocery stores but if you can’t find it, you can sub regular sweet basil instead.Ground chicken vs chicken thighs vs chicken breasts
You’ll see Thai basil chicken made with ground chicken or cut up pieces of chicken thighs or breasts. In Thailand, the meat is cut up quite small, which is why you see minced/ground chicken as the most used protein for Thai basil chicken in North America. I’ve made it with both and it’s really about what you prefer. If you don’t want to break out your knife to chop your chicken, using ground chicken is not just acceptable, pretty much standard everywhere including Thailand. And if you like your chopped chicken in larger or smaller pieces, that’s alright too! I tend to like my chicken pieces on the heartier side and Mike likes ground chicken so we make it both ways.What to eat it with
This recipe makes just enough sauce to coat the chicken plus a little extra for spooning on to your fluffy white rice. It’s a pretty flavorful (and by that I mean salty) so don’t be tempted to up the sauce amounts, it will be enough! Speaking of sauce, this is meant to be eaten with fluffy white rice! The sauce and chicken go perfectly with the blank canvas rice provides. Of course if you want you can have it over your grain of choice or even noodles. Add some cucumbers for a bit of freshness and crunch or a crispy fried egg for some extra savory goodness. Like all stir-fries, once you get going, it goes fast, so be sure to have all your ingredients prepped and sauces measured out before you even turn on the heat.Is it spicy?
Yes, traditionally it is, but it doesn’t have to be. If you aren’t a spice head, feel free to decrease the chili amount, de-seed the chilis, or leave them out entirely. chicken and rice forever, xoxo stephThai Basil Chicken Recipe
This quick and easy Thai classic is an incredible taste payoff for minimal work.
- 2 tsp oyster sauce
- 1 tsp soy sauce
- 1 tsp dark soy sauce
- 1 tsp sugar
- 1 tbsp oil
- 5 cloves garlic (minced)
- 3-4 Thai bird’s eye chili (deseeded and finely chopped, see note)
- 1/2 lb boneless skinless chicken thighs (cut into 1 inch chunks)
- 20-30 leaves Thai basil
- crispy fried egg (if desired)
- rice (to serve)
In a small bowl, mix together 2 tablespoons of water with the oyster sauce, soy sauce, dark soy sauce, and sugar.
Heat the oil in a wok or frying pan over medium high heat. When hot and shimmery, add the garlic and chili, stirring, for about 10-30 seconds – you don’t want them to burn or brown.
Add in the chicken and cook, tossing, until golden brown and cooked through.
Add the sauce and cook until the sauce reduces slightly and coats the chicken.
Remove the pan from the heat and stir in the basil.
Enjoy immediately with fluffy white rice and a crispy egg, if desired.
Estimated nutrition does not include rice or egg.

I Am... Creamy Spinach Chicken Pot Pie Pasta
If you love creamy, hearty pastas, this creamy chicken pasta with spinach is going to change your life, or at the very least, it'll make a really good dinner. Mike and I are avid skiers, and that means that in the winter, we’re always hungry. Well, maybe not Mike, but I’m always starving. After coming off the mountain, I need to eat, like, five minutes ago. As much as I love après, I love homemade food like this creamy, satisfying chicken and spinach pasta even more. It’s been my absolute food fixation as of late. It’s amazing because I prep it in advance so it’s ready to go. Mike cooks the pasta and sauces—saucing pasta is a true skill, and he’s the best at it—and then we’re ready to eat. By the way, if you love pasta recipes, check out our cookbook That Noodle Life for more of these!
Creamy Chicken and Spinach Pasta
This pasta is kind of a take on chicken pot pie. Essentially, it’s all the goodness of chicken pot pie: tender chunks of chicken and vegetables in a creamy sauce, but with pasta instead of pie crust. Somehow, it’s more filling and satisfying than pie. Plus, you don’t have to do any pie-crusting, which is a plus in my books. If you’ve ever made chicken pot pie filling, this recipe is essentially the same idea.Chicken Pot Pie Pasta Ingredients
- Chicken – I like buying skin-on, bone-in chicken thighs because they’re super economical and delicious. I’ll debone the thighs, cut up the meat and skin into bite-size pieces, and use the bones for stock. If that sounds like too much work, buy boneless, skinless thighs and cut them into bite-size pieces. Or, if you’re really in a rush, ground chicken can work too, although it'll be a different texture.
- Butter – We’re going to use butter two ways: to cook the aromatics and to make a roux to thicken the sauce.
- Aromatics – A mix of onions, garlic, and carrots adds sweetness and flavor.
- Flour – You need flour to make a roux, which is a fancy French way of saying you’re making a thickener for the sauce.
- Chicken stock and milk – Chicken stock adds an extra boost of chicken flavor, and milk adds creaminess.
- Cheese – Any kind of shredded cheese will work here, but it’s best if you stick to white cheeses: mozzarella, Parmesan, Gouda, Gruyère, and the like.
- Pasta – Short, spoonable pasta with lots of nooks and crannies for the sauce to hide in. Here we went with blah blah blah. Some shapes you can try are mezze penne, ziti, rigatoni, fusilli, and cavatappi.
How to Make Creamy Chicken Spinach Pasta
- Prep – Start by prepping the aromatics: peel and dice an onion and two carrots, then peel and mince the garlic. Roughly chop the spinach and shred the cheese, then set aside. Cut the chicken thighs into small, even pieces. You don’t need to be too particular about the size.
- Sauté – Sauté the onion, garlic, and carrots in butter until slightly soft and aromatic. Add the chicken to the pan, season with salt and pepper, and cook lightly, stirring as needed. At this point, the chicken doesn’t need to cook through, as it will continue cooking as the sauce thickens.
- Stir – When the chicken is lightly cooked, melt in some butter. Once melted, sprinkle in the flour and stir until it coats all the pieces of chicken and vegetables.
- Add – Slowly stream in the chicken stock and milk, stirring well. Let the sauce come up to a gentle simmer. When it starts to bubble, turn down the heat and let it simmer and thicken.
- Boil – While the sauce is thickening, bring a large pot of salted water to a boil and cook the pasta 3 minutes shy of al dente. Reserve some of the starchy pasta water, then drain the pasta.
- Finish – When the pasta is ready, add the shredded cheese and chopped spinach to the sauce. Stir until the cheese melts and the spinach wilts. Taste and season with salt and pepper if needed.
- Sauce – Add the drained pasta directly to the pot with the sauce. Stir and continue to cook over medium-low heat until the pasta is al dente, about 3 minutes. Loosen the sauce with reserved pasta water if needed.
- Enjoy – Serve it up and enjoy!
My fave pasta shape
We love any kind of pasta that has lots of nooks and crannies for the sauce to sneak into. No long noodles here—short, scoopable pasta is what we’re after. Some of our favorites are the mezze kind. Mezze, in pasta talk, means half sleeves, or short. Mezze pasta shapes are shorter and smaller. We love mezze maniche, mezze rigatoni, mezze rigate, and mezze penne. Other short pasta shapes work great too: macaroni, fusilli, gemelli, cavatapi, conchigliette (shells), and fiorelli.What to Serve with Chicken Pot Pie Pasta
This is an all-in-one meal with protein, vegetables, and carbs, so you don’t need anything else. But if you want to go all out, a simple kale salad and some homemade focaccia would take this from a weeknight dinner to a sit-down, semi-fancy affair. xoxo -stephCreamy Chicken Pot Pie Pasta
If you love creamy, hearty pastas, this simple creamy chicken pasta with spinach is going to change your life.
- 3 tbsp butter (divided)
- 1/2 medium onion (peeled and diced)
- 2 cloves garlic (minced)
- 1 carrot (peeled and diced)
- 1.25 lb boneless skinless chicken thighs (1/2 in cubed)
- 5 tbsp flour
- 1.25 cups chicken stock
- 3/4 cups milk
- 2 cups shredded cheese (of choice)
- 4 oz baby spinach (chopped)
- 1 lb pasta (of choice)
In a large Dutch oven, melt 2 tablespoons of the butter over medium heat. Add the onion and garlic and cook until soft and translucent. Stir in the carrots and cook for 2–3 minutes.
Add the chicken, season with salt and pepper, and lightly cook, stirring as needed. The chicken doesn’t need to cook through at this point, as the chicken will cook in the sauce as it continues to simmer.
Add the remaining butter and stir until melted. Sprinkle in the flour and stir into the chicken and vegetables until evenly coated.
Slowly stream in the chicken stock while stirring. Stir in the milk and let simmer until the sauce thickens slightly, about 5 minutes.
While the sauce is thickening, bring a pot of salted water to a boil and cook the pasta 3 minutes shy of al dente, according to the package directions.
Add the shredded cheese and spinach to the sauce. Stir until the cheese melts and the spinach wilts. Taste and adjust seasoning with salt and pepper.
Reserve 2 cups of the pasta water, then drain the pasta. Add the pasta to the sauce and continue cooking until al dente, about 3 minutes. Add reserved pasta water as needed to loosen the sauce. Stir and toss until glossy, creamy, and perfectly al dente. Enjoy hot!

I Am... Jordan Marsh’s Blueberry Muffins Recipe
These blueberry muffins were so dreamy. Cake-y and moist with pockets of blueberry jammy goodness and a crispy sugary top. Recently, I was plagued by a mad craving for muffins. Mike and I were on a walk and I had a muffin emergency. We hopped into a random bakery and I couldn't decide which muffin so I asked Mike what his go-to muffin choice was. He very decisively said, "blueberry." I asked why and it turns out that Mike used to exclusively bake blueberry muffins when he went through a blueberry muffin phase. He practically knew a muffin recipe by heart (this one) and it turned out to be so good I had to share.
Who is Jordan Marsh
I was determined to make the muffins that Mike made in his youth, so after a quick google search, he determined that they were the Jordan Marsh muffins. It turns out, Jordan Marsh's blueberry muffins are famous. Very famous, in fact. Jordan Marsh was a fancy New England department store with a flagship store in downtown Boston. That flagship store had a bakery on the top floor that was famous for blueberry muffins. They were gigantic, addictive, and worthy of making pilgrimages for.How to make blueberry muffins
- Cream the butter and sugar until light. Add the egg, beating well. Add the vanilla.
- Sift together the flour, salt and baking powder
- Add the flour mixture to the creamed mixture alternating with the milk: flour milk, flour, milk, ending on flour.
- Fold in the blueberries.
- Line a standard muffin tin with 6 liners, and fill equally with the batter.
- Sprinkle sanding sugar over the tops of the muffins,
- Bake at 375ºF for 30-35 minutes, or until the tops are golden and toothpick comes out clean.
- Remove muffins from the tin, cool, and enjoy!
What is sanding sugar?
Sanding sugar is coarse heat resistant sugar that you can use to add a crunchy texture and a little extra sweetness to cookies, muffins, and other desserts. While it's not absolutely essential, it definitely makes this recipe. You can find sanding sugar at most grocery stores, Michaels/other craft stores, and of course, online.When is blueberry season?
Blueberry season is different depending on where you live. In the southern parts of the USA, peak blueberry season is May to July and gradually goes longer as you go up north. Washington, Oregon, and BC blueberries can extend well into October. In the winter blueberries come from south of the equator which adds to pricing, and you might want to use frozen blueberries instead. If you do, thaw them out for about 15 min and roll them in flour so they won't turn the batter purple.Wild vs cultivated blueberries
Most blueberries at the store are cultivated blueberries (highbush), which are great. But, if you see them, wild blueberries (lowbush) are amazing: more flavorful and contain more anti-oxidants. Give them a try!Muffin Tins
PS - I couldn't find our muffin pan but made do with these little individual tins that I have that turned out to be perfect. To be honest, they kind of work just like a muffin pan but better because they stack. I also played around with using parchment paper instead of regular muffin papers and that worked too. I can't decide which I like better but it's nice to know that I can make muffins even if I don't have the papers.Blueberry Muffin Recipe
The very best blueberry muffins by the genius of Jordan Marsh
- 1/4 cup unsalted butter (room temp)
- 1/2 cup + 2 tbsp sugar
- 1 large egg
- 1/2 tsp vanilla extract
- 1 cup all purpose flour
- 1/4 tsp kosher salt
- 1 tsp baking powder
- 1/4 cup milk
- 1 cup blueberries (washed and dried)
- 1 tbsp coarse sanding sugar (or as desired, for topping)
Heat the oven to 375°F. Cream the butter and sugar until light. Add the egg, beating well. Add the vanilla.
Sift together the flour, salt and baking powder, and add to the creamed mixture alternating with the milk: flour, milk, flour, milk, ending on flour.
Fold in the blueberries.
Line a standard muffin tin with 6 liners, and fill equally with the batter. Sprinkle the sanding sugar over the tops of the muffins.
Bake for 30-35 minutes, or until the tops are golden and toothpick comes out clean. Remove muffins from tin, cool, and enjoy!

I Am... The Best Dishes We Ate in 2025
I can’t believe we are at the end of another year. Is it me, or is time flying by? So much food, so little time. Mike and I were lucky enough to enjoy so much amazing food in 2025, but these are our top 10 bites. This is our 2025, wrapped, food edition!
Japanese Musk Melon
2025 was the year that my Japanese musk melon dreams came true. We got one of those insanely expensive melons from a department store, on sale, nonetheless, and carefully carried it home on the subway. Slicing into it released an intense wave of sweet melon aroma and was instant melon love. Aside from a slice that Mike ate, I consumed the whole thing in one sitting, full of melon and happy beyond belief. Read more about musk melon here.Same Day Fresh Corn
If you haven’t had freshly picked corn - I’m talking about corn picked hours, or even minutes just before you eat it - you haven’t had corn. The feeling of a warm from the sun ear of corn wafting with the sweet smell of corn is amazing. Fresh corn is snappy and sweet. It’s almost like it’s a completely different vegetable. You can eat it raw, right off the cob and it makes me appreciate living in driving distance to fresh corn fields. Read more about our fresh corn drive-thru experience here.Takja BBQ House
Mike and I both love Korean BBQ and Takja, in Toronto does KBBQ right. If you love high-quality marbled beef, you’ll love it here. Unlike those all-you-can-eat places, Takja does not let you cook your own meat. It’s too precious. Once you have Takja’s perfectly cooked kalbi with house-fermented ssamjang and kimchi, you’ll be forever spoiled and never want to wield the tongs ever again. Read more about Takja here.Butter Tart from Bà Nội
If you’ve never had a butter tart and you have a chance to, I would skip it because to be honest, butter tarts are rarely good. But when they are, they’re transcendental. Such is the butter tart from Bà Nội, a tiny bakery in Toronto. The tart crust is firm, flaky, and almost crunchy. The filling is the perfect amount of squishy yet firm deliciously buttery caramelized butterscotch. I dream of this butter tart. I wish I had one right now. Read more about Bà Nội here.Kakigori at Azuki to Kouri
If you’re obsessed with kakigori (Japanese shaved ice) like I am, you NEED to go to Tokyo. The shaved ice is on another level. I told Mike about Azuki to Kouri in a “we’ll never get in but I dream of going” conversation. But! He surprised me by somehow scoring a reservation. I ordered TWO kakigori and trust me, it was the right move. I had the azuki (sweet red bean) and kabocha (pumpkin). Both of them were amaze but the kabocha was what I dream of. Layers and layers of perfectly airy, flaky ice, sweet and creamy roasted kabocha, crunchy caramelized puff pastry, candied nuts, and a crown of brûléed chiboust pastry cream all come together into a brilliant dessert filled with complementing and contrasting flavors, textures, and temperatures. Truly, it was one of the best desserts of the year and maybe even my life? Take me back!Sushi Mugen∞
Sushi just hits different in Tokyo. Combine omakase sushi with a vinyl listening bar and you get Sushi Mugen. Located in the backroom of an unassuming glass block adorned cafe space, the eight seat sushi counter is intimate and feels almost like you’ve been transported into the future, to what they think a modern retro sushi bar would look like. I love omakase and Mugen is an excellent example. You sit down, relax and enjoy as you eat your way through the ocean. The fish is incredibly seasonal and the shari (sushi rice) is firm, slightly warm, and pleasantly vinegary. Good music, good sushi, good drinks, and good company. This was, hands down, one of our favorite meals of 2025.Homemade Dubai Chocolate
Everyone’s forgotten about Dubai chocolate, but here I am, stuck in 2024, still making homemade Dubai chocolate bars, just mini. Somehow I convinced myself that I could be a chocolatier and got some acetate chocolate molds and a semi-professional chocolate smoothing paddle. Lil mini dark chocolate shells filled with pistachio goodness and crispy kadyif are so incredibly addictive. I have a supply in the fridge because I like my chocolate cold, like a monster. Make your own Dubai chocolate here.Udon in Tokyo
If you’ve ever perused must-go-to restaurants in Tokyo, you’ve most likely seen the viral wide udon located in Ginza. Mike and I have been there and it’s very good, but waiting for udon when there are so many other places to eat always seems like a tragedy. One of our favorite bowls of udon was in Ikebukuro at Himokawa-Kiryu. They specialize in himokawa udon, which is wide and slippery, thin, and chewy. At Kiryu, you can get a duo of udon, extra-wide and regular. The himokawa udon at Kiryu is extremely wide. We’re talking wider than a lasagna noodle wide. The tsuyu (dipping sauce) is delicate yet flavorful, the tempura is hot and crispy, and everything is just chef’s kiss.Yakiniku in Tokyo
If you love beef, you NEED to go to Japan for yakiniku. Yakiniku is the Japanese take on Korean BBQ. It’s same-same, but completely different. The quality of beef is insane. You know those stories you hear about cows being massaged and happily enjoying the best grass ever? They really are tastier. We ate our way through all of Tokyo's yakiniku restaurants (more on that soon) but our favorites were the misuji at Yoroniku, all the good vibes and creative dishes at the Ushigoro chain, and, just like the kakigori, Mike used his reservation scoring superpowers to get us a spot at the bar at Jambo and it lived up to all the hype I heard about and more. We had so many plans and restaurants to go to and somehow we just ended up at yakiniku every night in Tokyo.Air Fryer Chicken Thighs
Shout out to our air fryer chicken thighs. Super simple air-fried chicken thighs was our most go-to meal in 2025 when we were lazy and couldn’t come up with anything creative to make. Crispy, juicy, super simple and super satisfying with a side of rotating vegetables and ricej. Mostly we just seasoned bone in, skin on thighs with salt and pepper and popped them in at 390ºF for 23 minutes, but if you want a lemon-y, garlic-y version, we have a recipe for that! That’s it. 2025 was full of good food and I’m looking forward to 2026 being delicious too. Happy New Year and I hope your 2026 is full of deliciousness! -xoxo steph Read More →
I Am... Tiktok Creamy Udon Noodles
You need to try this viral creamy tiktok udon: silken tofu blended into a creamy, thick sauce poured straight over hot udon noodles and saucy, spicy ground pork. I love udon. It truly is the best Japanese noodle: thick, chewy, and just begging to be covered in sauce and slurped up. I feel like udon is having a moment and I am so happy for it! Forget ramen or soba, udon is the most elite of all the noodles because it is so thick. You can use udon in almost any recipe but lately I’ve been seeing creamy mapo tofu udon making its way across the internet universe and of course I had to try it.
What is creamy TikTok udon?
Creamy TikTok udon is essentially deconstructed mapo tofu with udon noodles. The sauce is simply silken tofu blended into a creamy, thick sauce that’s poured straight over hot udon noodles and saucy, spicy ground pork. Everything gets mixed up and it’s creamy, saucy, spicy, super addictive and protein forward. If you’ve ever had Sichuan food, specifically mapo tofu, then you can probably imagine what these noodles taste like.Who created creamy TikTok udon?
As far as I can tell, the original idea for creamy mapo tofu udon was first posted by @audreyishome. Blending up silken tofu is a pretty common thing in Asian recipes and combining silky tofu sauce with mapo seasoned meat over udon noodles is a truly genius idea.Creamy TikTok udon ingredients
If you regularly cook Chinese food at home, you’ll probably have all of these ingredients in your panty. If you don’t, you’ll need to make a stop at your friendly local Asian grocery store to pick stuff up. Trust me, it’s worth it!- aromatics - starting off with some standards, we’ll need minced garlic and some thinly sliced green onions.
- doubanjiang - doubanjiang is a spicy fermented mix of soy and broad beans. It’s been called the soul of Sichuan cooking and it’s what will give your spicy pork a glorious red hue. When shopping, look for the Pixian (an area in China) variety if you can. It’s kind of like how, if you can, you want to buy champagne from the Champagne region in France. But, like champagne, if you can only find sparkling wine, don’t sweat it, the more commonly found Lee Kum Kee also sells a Cantonese style doubanjiang that they call chili bean sauce/toban djan. Read more about here.
- ground pork - ground pork because ground pork is what’s typically used for mapo tofu. Super simple to find and it cooks up quickly.
- silken tofu - silken tofu is the key to this recipe. It’s what gives the udon the creaminess and coats each noodle with goodness. Look in the fridge aisle for soft or silken tofu. It should be very soft and jiggly and will blend perfectly into a creamy sauce.
- udon - the best udon to use are those frozen bricks of sanuki udon that you’ll find in the freezer aisles at Asian grocery stores. They taste WAY better than those sad vacuum sealed packages of udon you usually see. Typically they’re shipped straight from Japan or Korea and are really easy to prepare because they’re fully cooked. All you need to do before eating is reheat them fully.
How to make creamy TikTok udon
- Fry - Heat up a bit of oil in a frying pan over medium-high heat and sauté the minced garlic and sliced green onions. Add the doubanjiang and cook, stirring. Add the ground pork and cook, breaking up into small pieces. Continue to cook, stirring occasionally, until the pork is cooked through. Deglaze the pan with a splash of water, then remove the pan from the heat and set aside.
- Blend - Blend the silken tofu with a pinch of salt, until completely smooth and creamy.
- Boil - Boil the frozen udon noodles until heated through, then drain well.
- Assemble - Add the drained udon noodles to a bowl and top with the spicy pork and creamy tofu sauce.
- Enjoy - finish off your bowl of noodles with any desired toppings (sliced green onions, crushed Sichuan peppercorns), mix well, and enjoy while hot!
Pro version
In the version that Audrey makes, she uses also adds in Shaoxing wine, black vinegar, Sichuan peppercorn powder, and extra chili powder to season the pork mix. If you have these ingredients or pick them up, you should definitely use them, but sometimes even one extra ingredient to buy tips you over to the “do not make” category and I don’t want these noodles to be hard to make, so I’ve left them out of this version of the recipe. If you want to add Shaoxing wine and black vinegar, add 2 tsp of each to the pork while you’re frying it up. Taste the pork, then sprinkle on a bit of chili powder and Sichuan peppercorn powder to taste before continuing with the rest of the recipe.And if you want some more udon inspiration, try these recipes:
- udon carbonara (pictured below)
- Japanese yakiudon
- Everything bagel udon
- Thai curry udon
- cacio e pepe udon
- spicy kimchi udon
Creamy Mapo Tofu Udon
Silky tofu sauce with mapo seasoned meat over udon noodles is a truly genius idea.
- 2 tsp neutral oil
- 2 cloves garlic (minced)
- 1 green onion (thinly sliced)
- 1 tbsp doubanjiang (spicy bean paste)
- 1/2 lb ground pork
- 2 tsp Shaoxing wine (optional)
- 2 tsp black vinegar (optional)
- 1/4 tsp sichuan peppercorns (ground, optional)
- 14 oz silken tofu ((1 package))
- 2 bricks frozen udon (sanuki preferred)
Take the tofu out of the fridge and set aside. Fill a large pot of water and bring it to a boil.
In a frying pan, heat up 2 tsp of oil over medium heat. Add the minced garlic and sliced green onions and fry slightly, while stirring, until soft, about 1 minute.
Add the doubanjiang and continue to fry, stirring, until the doubanjiang oils start to render.
Add the pork to the pan and season with salt and pepper. Cook the pork, breaking it up and cooking it throughly. Add the Shaoxing wine and black vinegar, if using. If not, add a splash of (1 tbsp) water to the pan to deglaze. Remove the pork from the heat and set aside.
Add the tofu to a blender with a pinch of salt and blend until completely smooth then set aside.
Add the frozen bricks of udon to the boiling water and heat through, according to the package directions. When hot, drain well, and divide into two bowls, then evenly divide the spicy pork between the two bowls.
Top with the creamy tofu sauce. Finish with sliced green onions if desired, mix well and enjoy hot!

I Am... Best Brown Butter Chocolate Chip Cookies
I am straight up obsessed with chocolate chip cookies. Chocolate chip cookie day is today, Aug 4. Is another quintessential cookie out there? I think I would even go as far as saying that in a game of MFK of chocolate chip cookies, peanut butter, and oatmeal raisin, I’d definitely M chocolate chip cookies, F oatmeal raisin, and K peanut butter. Chocolate chip cookies just that good. If I could only ever have one cookie for the rest of my life, it would be a brown butter chocolate chip cookie.
I really, really love chocolate chip cookies
There are over 10 chocolate chip cookie recipes on I am a Food Blog (some of them are slight variations, but all with chocolate chip cookie bases) and I think it’s safe to say that I have tested, made, and eaten a LOT of chocolate chip cookies in my life. I’m even on a never ending quest to find the best store bought chocolate chip cookie in the world. [caption id="attachment_30570" align="alignnone" width="1450"] Slab's famous Chocolate Chip Cookie[/caption] The thing is, every single time I think I’ve found the one cookie to rule them all, I can’t help but wonder if there’s something better out there. Damn, now that I think about it, I have cookie commitment issues. But, I think I’ve found it guys. I think this homemade cookie is absolutely the one. I know I’ve said it before, so don’t think of me as some sort of thirsty cookie lover because this time I’m sure of it. This is the cookie I want to commit to.Why these are the best chocolate chip cookies
The caramelization of the combination of the two sugars, the nuttiness of the browned butter, the immense amount of pools of melted chocolate…swoon. It has slightly crisp buttery edges with a hint of toffee and a soft, dense and chewy center barely held together because of all the chocolate. The tops are craggy with those ever instagramable ripples and it’s just the perfect balance between sweet and salty. This cookie makes my heart beat a little faster. Cue the heavy breathing. SO GOOD. The recipe is an amalgamation of all the cookies that have come before it. It stands of the shoulders of giants. In honor of all the cookies I’ve loved before, this is it: my best salted brown butter chocolate chip cookie recipe.For the best chocolate chip cookies, use brown butter
Browned butter in chocolate chip cookies is definitely a thing and I happen to like the little hint of hazelnut nuttiness it adds, but only if you brown the butter just enough. Plus, there’s the bonus of not having to wait for your butter to come to room temperature when you want cookies. Just make sure you keep an eye on the butter –you can definitely go too far and have blackish bits in your browned butter, which are a big no for me. I like to brown just to the point where there are little flecks of brown. Of course, when you brown butter, you lose moisture, so that moisture is added back in with an extra pat or two of butter after the butter is browned. The extra pat of butter helps cool down the butter too, which is awesome because you don’t want your cookie dough too warm which will cause them to spread.What is brown butter?
Brown butter, also known as beurre noisette (hazelnut butter in French), is an out of the world delicious concoction originally used in savory French foods but is now used everywhere butter is used. It’s deeply golden, flecked with brown bits, nutty, and incredibly aromatic. Brown butter is perfection. Browned butter brings so much flavor to baked goods for just a tiny bit of extra effort. It’ll add a nutty caramel roundness and highlight the brown sugar making these chocolate chip cookies taste caramelized, deep, rich, and intense.How to brown butter
Brown butter is made by melting unsalted butter over very low heat, allowing it to separate into butter fat and milk solids. The milk solids fall to the bottom of the pan where they start to brown until they reach the color of hazelnuts. Here’s a step by step!- Warm: start your butter, cut in in small pieces in a cold pan and warm it slowly so that it melts evenly.
- Sputter: once the butter has melted, it will start to bubble and foam as the water is cooked off and the fat left begins to sputter. The butter will still be yellow. Stir gently and turn down the heat if it starts to splatter too much.
- Foamy: the butter will foam and the foam will change from pale to very yellow as the water is cooked off and you’re left with the milk solids, which you should see floating near the bottom of the pan.
- Brown: the butter will start to look deeply yellow and start to become golden and brown. The milk solids will become even more visible and your place will smell amazingly toasty, nutty, and caramel-y.
- Remove: Once your brown butter is to your liking, take it off the heat and pour it out into a liquid measuring cup as the milk solids will continue to toast in the residual heat.
- Bonus step: for these cookies, we need to add the water content that cooked out of the butter. Check the measurement on the butter and add in small pieces of room-temp butter until you get 1/2 cup of liquid brown butter.
How to make brown butter chocolate chip cookies
- Whisk together the dry ingredients, making sure they are throughly incorporated.
- Brown the butter then add in extra butter to make up for any liquid lost.
- Whisk the browned butter together with the sugars until lump free then whisk in the egg. Stir in the vanilla and fold in the flour and chocolate.
- Shape the cookies using 3 tablespoons of dough, placing one 1.5 tablespoon cookie dough ball on another 1.5 tablespoon cookie dough ball. Chill the dough while you warm the oven.
- Bake the cookies until golden and just firm around the edges, giving the pan a firm bang on the countertop when you take them out of the oven.
- Eat ALL the cookies!
Why these chocolate chip cookies work
Aside from the brown butter, I’d say I have a moderate amount of flour (the amount of flour is what determines if you have a thin or thick cookie) to a very specific amount of brown vs. white sugar. The amount of brown sugar is 3 times the amount of the white. According to the wisdom of the internet, cookies with more brown sugar end up tall and moist, while cookies with more white sugar end up thin and crisp. It’s a science thing. My kind of cookie is on the thicker side but not obscenely thicc like a Levain cookie – that just takes it too far.What kind of chocolate for chocolate chip cookies
Of course you can’t talk about chocolate chip cookies without talking about the chocolate. Chopped chocolate is key to these cookies. No more chocolate chips: just say no! Buy a chunk of semi sweet dark chocolate (we routinely have a Callebaut 811 semisweet dark chocolate slab in the pantry) and chop it yourself. You want that mix of large chunks and thin chocolate shavings to distribute themselves through the cookies so you have barely there streaks of chocolate in the dough to give the cookie a more chocolatey flavor and large chunks to melt into giant gooey pools. Eight ounces seems like the perfect amount of chocolate. You might feel like there’s not enough dough to take all the chocolate, but trust me, there is.How to shape chocolate chip cookie dough so they bake up extra pretty
Lastly, how you shape your cookies before baking is essential to how they come out after baking. If you want a thick and craggy cookie with ripples (like Sarah Keiffer’s famous pan-banging cookies) shape your cookies into little logs/cookie ghosties. These won’t come out quite as ripple-y and ridge-y as the pan banging cookies which are a bit thinner and have you removing and banging the cookies as they bake, but they do have a pleasing ripple or two on the outer edges making them pretty. My favorite way of shaping the balls of dough is using my trusty 1.5 tablespoon cookie scoop. I scoop out one ball of dough (with the dough flush to the scoop, so it’s flat bottomed), making sure to get a giant chocolate chunk in there, and place it on a parchment paper lined baking sheet. Then I scoop out another ball of dough (again with a large chunk of chocolate) and then smoosh it on top of the other ball, flattening the bottom ball just the tiniest bit. They end up looking like ghosties with a slightly larger bottom and a tall top. When you bake the ghosties, the bottoms spread out slowly and it’ll look like they won’t spread out as large as you want them too, but give them time. The tops of the ghosties will melt down during the final few minutes of baking until everything is uniformly level. When you take the cookies out of the oven, they’ll still be a bit soft and puffy. This is when you bang them against the counter to deflate them a little bit and give them the rings. One or two bangs should do it, then you let the cookies cool on the baking sheet.Tips and tricks for the best brown butter chocolate chip cookies
- Take your egg out of the fridge as your very first step so it can come to room temp. If your egg is too cold it will shock the warm butter and harden it and make your cookies extra puffy and mound up. Room temp ingredients are key. If you want to speed it up a bit, place your egg in a bowl of warm-ish tap water.
- Salted vs unsalted butter. go for unsalted butter so you can control the salt content of your cookies with both salt in the batter and sprinkled on top.
- Chill your dough. Chilling your dough helps develop a deep caramel flavor and gives you crispy edges, chewy insides and crackly tops. The butter has a chance to re-solidify in the fridge, which makes your cookies plush and thick.
- Don’t over mix. If your cookies are extra puffy and don’t flatten out it might be that you over mixed them and whipped in too much air when you were whisking the butter, sugar, and egg.
Other recipes with the delicious nuttiness of brown butter
- snickerdoodles
- dark chocolate macadamia cookies
- toffee chocolate chip cookies
- brown butter brownies
- blueberry oat bars
- pumpkin cupcakes with brown butter frosting
Please make this cookie, I beg you
There you have it! My all time new favorite, salted browned butter chocolate chip cookies. Essentially this is a remake of my ultimate chocolate chip cookie: made sexier with some brown butter, extra (and better) chocolate, and a more pleasing modern cookie shape. Cheers to always improving! I implore you to try this recipe and let me know what you think. Am I crazy or is this cookie the one?Brown Butter Chocolate Chip Cookies
These chocolate chip cookies are butter-ly amazing!
- 1.5 cup all purpose flour (200g)
- 1/2 tsp baking soda
- 1/2 tsp salt
- 1/2 cup butter (plus 1-2 tbsp extra, divided)
- 3/4 cup brown sugar (150g)
- 1/4 cup sugar (50g)
- 1 large egg
- 1 tsp vanilla
- 2 cup chopped semi sweet dark chocolate (about 8oz)
- flaky sea salt (to finish)
Whisk together the flour, salt and baking soda in a bowl and set aside.
Brown 1/2 cup butter in a saucepan, swirling, until butter foams and starts to turn brown and smells nutty. Transfer butter to a liquid measuring cup and see how much water content you lost. You want to have 1/2 cup of butter, so stir in the remaining 1-2 tablespoons of butter if you need it – the butter you add in should melt slowly and not foam up.
When the butter is melted and slightly cool, whisk in both sugars until incorporated with no lumps. Whisk in the egg until smooth and glossy. Stir in the vanilla and use a rubber spatula to fold in the dry ingredients until no dry spots remain. Fold in the chocolate.
Use a 1.5 tablespoon cookie scoop and scoop out two balls of dough, so that each cookie is 3 tablespoons large. Smoosh the two balls on top of each other – they should kind of look like a log and you should get about 14-16 cookies depending on how big your chocolate chunks are. Place the logs on a parchment paper lined cookie sheet, cover with plastic wrap and let chill in the fridge for 15-30 minutes, or as long as it takes for your oven to heat up.
Arrange the racks in the upper and lower thirds of the oven and heat to 375°F.
Space out the cookie logs (standing tall) on parchment paper lined rimmed baking sheets, leaving plenty of space in between. Bake, rotating and moving trays halfway if browning unevenly. Bake until golden brown and firm around the edges, 10-12 minutes.
Remove from the oven and bang the pan down against the counter top (this helps create a couple of ripples like you see on Instagram). Sprinkle with flaky sea salt, let cool on the baking sheets and enjoy!

I Am... 56 Last Minute Christmas Dinner Ideas
Did you wait too long to plan a Christmas/Holiday dinner? You don't have to resort to takeout or delivery, these recipes can all be done in a few hours and taste just as good as turkey.
Our Best Last Minute Christmas Dinner Ideas
Beef Tenderloin with a Giant Sauce Board
Like the best steak of your life: melt-in-your-mouth buttery, extremely juicy, and deliciously beefy and satisfying. [wprm-recipe-roundup-item id="36341"]A Hot Pot Christmas Dinner
The absolute best version of Chinese food for Christmas made even better because it's at home, no pants needed. [wprm-recipe-roundup-item id="36325"]Christmas Paella
The first time we had paella was in London at Christmas, it was so fun. What's more festive than gathering around a giant paella? [wprm-recipe-roundup-item id="32553"]Real Deal Swedish Meatballs
And the same goes for Swedish meatballs, doesn't it always seem like the nordic countries know how to do Christmas right? [wprm-recipe-roundup-item id="36094"]Cinnamon Rolls
Whatever you do for your mains and sides, cinnamon rolls are the ultimate dessert for your Christmas dinner. [wprm-recipe-roundup-item id="36119"]A Full Gravy Board for Christmas
Because if gravy is the best part of christmas dinner for you, then why not 6 different ones? You can make all these at the same time and have a full smorgasbord. [wprm-recipe-roundup-item id="35906"]Super Juicy Crock Pot Turkey Breast Christmas Dinner
A turkey that cooks itself perfectly feels a little bit like the future, but a utopian future instead of the weird dystopian one we live in now. [wprm-recipe-roundup-item id="35878"]Perfect Christmas Roast Potatoes
What makes these Christmas potatoes? Nothing, but they're definitely perfect, just like your Christmas will be. [wprm-recipe-roundup-item id="35838"]Brown Butter Chocolate Chip Cookies
The question is, do you start with these amazingly soft and crisp chocolate chip cookies, or end with them? Why not both? [wprm-recipe-roundup-item id="35771"]Honey Baked Ham
Honey baked ham like you've never had it with the flavors of Chinese bbq char siu honey glaze. [wprm-recipe-roundup-item id="35765"]Instant Pot Turkey Christmas Dinner
Pressure cooking is the way to go: juicy, perfect turkey every time, in only 20 minutes. [wprm-recipe-roundup-item id="35571"]Christmas Chicken Shawarma
If you're bored of turkey, this is a crazy flavor bomb that will make you forget all about plain turkey. [wprm-recipe-roundup-item id="35525"]A Korean BBQ Christmas Dinner
Or go really crazy with a smoky, hyper-flavorful and happily cheerful DIY Christmas Korean BBQ. [wprm-recipe-roundup-item id="35383"]Foolproof Spatchcock Turkey
But if you're dead-set on a full turkey, do yourself a favor and spatchcock it for the best whole turkey ever. You can even buy it in parts and put it together like a puzzle. [wprm-recipe-roundup-item id="35187"]Hainanese Chicken Christmas Dinner
Hainanese chicken and rice is like the ultimate Chinese version of the classic turkey and mashed potatoes Christmas dinner. [wprm-recipe-roundup-item id="29362"]The Ultimate Charcuterie Board
The prettiest appetizer, but so over the top you could do it as the main too. A little bit of luxury in a year that definitely needs it. [wprm-recipe-roundup-item id="35108"]Side Idea: Air Fryer Parm and Thyme Wedge Fries
These air fryer wedge fries taste like an adult version of the frozen wedge fries you might have had as a kid, and what's better than nostalgic food done right? [wprm-recipe-roundup-item id="35009"]Instead of dinner rolls: Parmesan Garlic Knots
Like garlic bread and dinner rolls had a baby who turned out to be Yao Ming. So good and so easy, you'll never go back to plain dinner rolls. [wprm-recipe-roundup-item id="34896"]Air Fryer Roasted Brussels Sprouts
Fun fact: If you hated brussels sprouts as a kid, it was a different (worse) varietal. Today's brussels sprouts are so good, especially when cooked right, like in the air fryer. [wprm-recipe-roundup-item id="34801"]Air Fryer Chicken Breasts
And while you have the air fryer out, try these juicy perfect-every-time chicken breasts too. [wprm-recipe-roundup-item id="34718"]Velveeta Mac and Cheese
The most perfect looking mac and cheese ever is also the tastiest. You'll never look at Velveeta the same way again. [wprm-recipe-roundup-item id="34521"]Traditional Soft German Pretzels
Whenever we get a chance to, we try to visit German christmas markets, and the best part of them are soft pretzels. We can't have markets this year, but we can still have pretzels! [wprm-recipe-roundup-item id="34555"]Chinese BBQ Pork (Char Siu)
Go a little crazy for your Christmas dinner main with this super easy Chinese BBQ pork, served up with bao, rice, or on its own. [wprm-recipe-roundup-item id="30890"]Air Fryer Lemon Pepper Chicken Thighs
Imagine a huge pile of juicy flavorful lemon pepper chicken thighs in the blink of an eye. Way easier and more cost effective than turkey. [wprm-recipe-roundup-item id="34490"]Baked Garlic Honey Mustard Chicken Thighs
And if you don't have an air fryer, these baked garlic honey mustard chicken thighs are just the thing. [wprm-recipe-roundup-item id="34224"]A Tomahawk Steak for Your Christmas Dinner
But if money is no object, nothing says celebration like a giant tomahawk steak whether traditionally with just salt and pepper, or Vietnamese salad roll like we did here. [wprm-recipe-roundup-item id="33862"]Christmas Barbacoa
If you've never had barbacoa as a festive meal, you're missing out: soft and tender beef coated in a savory red chile sauce, perfect with tacos or Mexican rice. [wprm-recipe-roundup-item id="33286"]Takoyaki Dinner Party
The best festive dinners are slow, lingering, communal dinners, like these Japanese octopus balls which are so fun to make and eat. [wprm-recipe-roundup-item id="33393"]Full English Breakfast
Fun fact: many people have their Christmas dinners on Christmas morning, and if you are one of those people, a Full English is the best "Christmas Dinner" ever. [wprm-recipe-roundup-item id="33530"]Salted Egg Yolk Fried Chicken
And even more people have fried chicken for their Christmas dinners. Take it to the next level with these Chinese cured egg yolk fried chicken nuggets. [wprm-recipe-roundup-item id="32785"]Side Idea: Sour Cream and Onion Pasta Salad
Regular pasta salad can be great, but this sour cream and onion pasta salad based on everyone's favorite chip flavor is phenomenal. [wprm-recipe-roundup-item id="32099"]Side Idea: Salt and Pepper Shrimp
You know this one: the delicious salty peppery shrimp you get from great Cantonese restaurants, now at home, for Christmas. [wprm-recipe-roundup-item link="https://weightloss-update.fit/salt-and-pepper-shrimp-recipe/" newtab="0" name="" summary=""]Side Idea: Shrimp Risotto Balls
While you're on the shrimp train, these shrimp and risosto arancini are super festive and crazy delicious. [wprm-recipe-roundup-item link="https://weightloss-update.fit/shrimp-risotto-balls/" newtab="0" name="" summary=""]Side Idea: Chinese Cucumber Avocado Salad
For people who hate leafy greens, this hearty salad is all buttery avocados, cool cucumbers, and lots of umami, soy, and black vinegar. [wprm-recipe-roundup-item id="32581"]Side Idea: Vietnamese Salt and Garlic Prawns
Crispy roasted prawns loaded up with salt, garlic, and chiles. A flavor bomb of a side dish. [wprm-recipe-roundup-item link="https://weightloss-update.fit/crispy-vietnamese-roasted-salt-garlic-prawns-recipe/" newtab="0" name="" summary=""]Side Idea: Instant Pot Mashed Potatoes
Perfect mashed potatoes, every time, as fast as possible. You'll never go back to making mashed potatoes any other way after reading this. [wprm-recipe-roundup-item id="34840"]Gochujang Honey Roast Chicken Dinner
Slightly spicy, slightly sweet Korean inspired chicken with creamy crispy roast potatoes [wprm-recipe-roundup-item id="30032"]The Potato Snack: 64° Eggs, 72° Potatoes, Toast
A tiny touch of fine dining at home when you want to bring the extra fancy: perfect eggs, perfect potatoes. [wprm-recipe-roundup-item link="https://weightloss-update.fit/potato-snack-64-eggs-72-potatoes-toast/" newtab="0" name="" summary=""]Christmas Turkey Pot Pie
A creamy and light Christmas-y take on shepherd's pie with turkey and white sauce and everything nice. [wprm-recipe-roundup-item link="https://weightloss-update.fit/potato-topped-turkey-pot-pie-recipe/" newtab="0" name="" summary=""]Rolls: Potato Sliders
Definitively, the best bread is potato bread, especially during the holidays. You can use these buns to make tiny Shake Shack burgers even. [wprm-recipe-roundup-item link="https://weightloss-update.fit/potato-slider-buns/" newtab="0" name="" summary=""]Salad Idea: Fully Loaded Baked Potato Salad
The best parts of a fully loaded baked potato and classic potato salad, together at last. Rich and bacon-y and creamy and fluffy, all at the same time. [wprm-recipe-roundup-item link="https://weightloss-update.fit/fully-loaded-baked-potato-salad-recipe/" newtab="0" name="" summary=""]Side Idea: Roasted Potatoes with Burrata
The crispy edges and fluffy insides of the roasted potatoes pair perfectly with the creamy burrata. [wprm-recipe-roundup-item link="https://weightloss-update.fit/crispy-roasted-potatoes-burrata/" newtab="0" name="" summary=""]Mini Hot Ham and Cheese Sliders
There's nothing better than taking a tray of these tiny slider buns fresh out of the oven to start your dinner. [wprm-recipe-roundup-item link="https://weightloss-update.fit/mini-hot-ham-and-cheese-sliders-recipe/" newtab="0" name="" summary=""]Rolls: No Fail Fluffy Dinner Rolls
But if you have to have the classics, these no-fail extra fluffy dinner rolls are just what you need. [wprm-recipe-roundup-item link="https://weightloss-update.fit/soft-and-fluffy-dinner-roll-recipe/" newtab="0" name="" summary=""]Side Ideas: Chicken Pot Pie Bow Ties
Pasta salad like you've never had: chicken pot pie pasta salad, done up in the instant pot in under 20 minutes. [wprm-recipe-roundup-item link="https://weightloss-update.fit/chicken-pot-pie-bow-ties-instant-pot-creamy-chicken-pasta/" newtab="0" name="" summary=""]Creamy Lobster Pasta
Why stop at a simple pasta salad though, when you can go all out with this creamy lobster pasta. It seems expensive and decadent, but all you need is one lobster to make this pasta. [wprm-recipe-roundup-item link="https://weightloss-update.fit/creamy-lobster-pasta-recipe/" newtab="0" name="" summary=""]Dessert: Mint Snowman Marshmallows
These mint snowman marshmallows are the perfect accompaniment to your Christmas morning hot chocolate. [wprm-recipe-roundup-item id="36236"]Mini Gingerbread Houses
And so are these tiny gingerbread houses, although you'll need to order a special mold for them unless you're really good with a knife. [wprm-recipe-roundup-item link="https://weightloss-update.fit/mini-gingerbread-houses/" newtab="0" name="" summary=""]Side Idea: Honeynut Squash
Honeynut squashes are the cuter, tastier, easier to make version of butternut squash. Just roast these and enjoy their sweet squashiness, no worrying about peels or tough fibers. [wprm-recipe-roundup-item id="34356"]Mushroom Herb Challah Stuffing
Stuffing done right with challah bread, sauteed mushrooms, and lots of thyme and rosemary. This stuffing will make your house smell like Christmas all by itself. [wprm-recipe-roundup-item link="https://weightloss-update.fit/mushroom-rosemary-thyme-challah-stuffing/" newtab="0" name="" summary=""]Creamy Spicy Hatch Green Chile Mac and Cheese
The Velveeta mac up top might be the classic, but this green chile one is our best mac and cheese: a love letter to the Southwest. [wprm-recipe-roundup-item id="29059"]Mac and Kimcheese Dolsot Bibim-mac
And this one is our love letter to kimchi and Korean stone bowls. You'll need to order a stone bowl for this one, but it's 100% worth it for those crispy bits of pasta and cheese. [wprm-recipe-roundup-item link="https://weightloss-update.fit/mac-and-kimcheese/" newtab="0" name="" summary=""]Dessert Idea: Japanese Cotton Cheesecake
People line up for hours for these in the cold and rain, but you can have it right in front of a cozy fire at home instead. [wprm-recipe-roundup-item id="29886"]Baked Tonkatsu Christmas Dinner
Shatteringly crispy breaded pork with rice and cabbage and sesame dressing might not sound like a traditional Christmas dinner, but it could the best one you've ever tried. [wprm-recipe-roundup-item id="29868"]Danish Aebleskiver Pancake Balls
Cereal pancake balls were a thing earlier this strange year. Ring in a more hopeful 2021 with these classic Danish pancake balls that are way easier and tastier to make. [wprm-recipe-roundup-item id="29309"]Basque Cheesecake
This Basque Cheesecake looks like this year feels, but tastes like heaven underneath that slightly bitter burnt crust. The perfect way to say goodbye to 2020 [wprm-recipe-roundup-item link="https://weightloss-update.fit/the-easiest-cheesecake-youll-ever-make-burnt-basque-cheesecake/" newtab="0" name="" summary=""]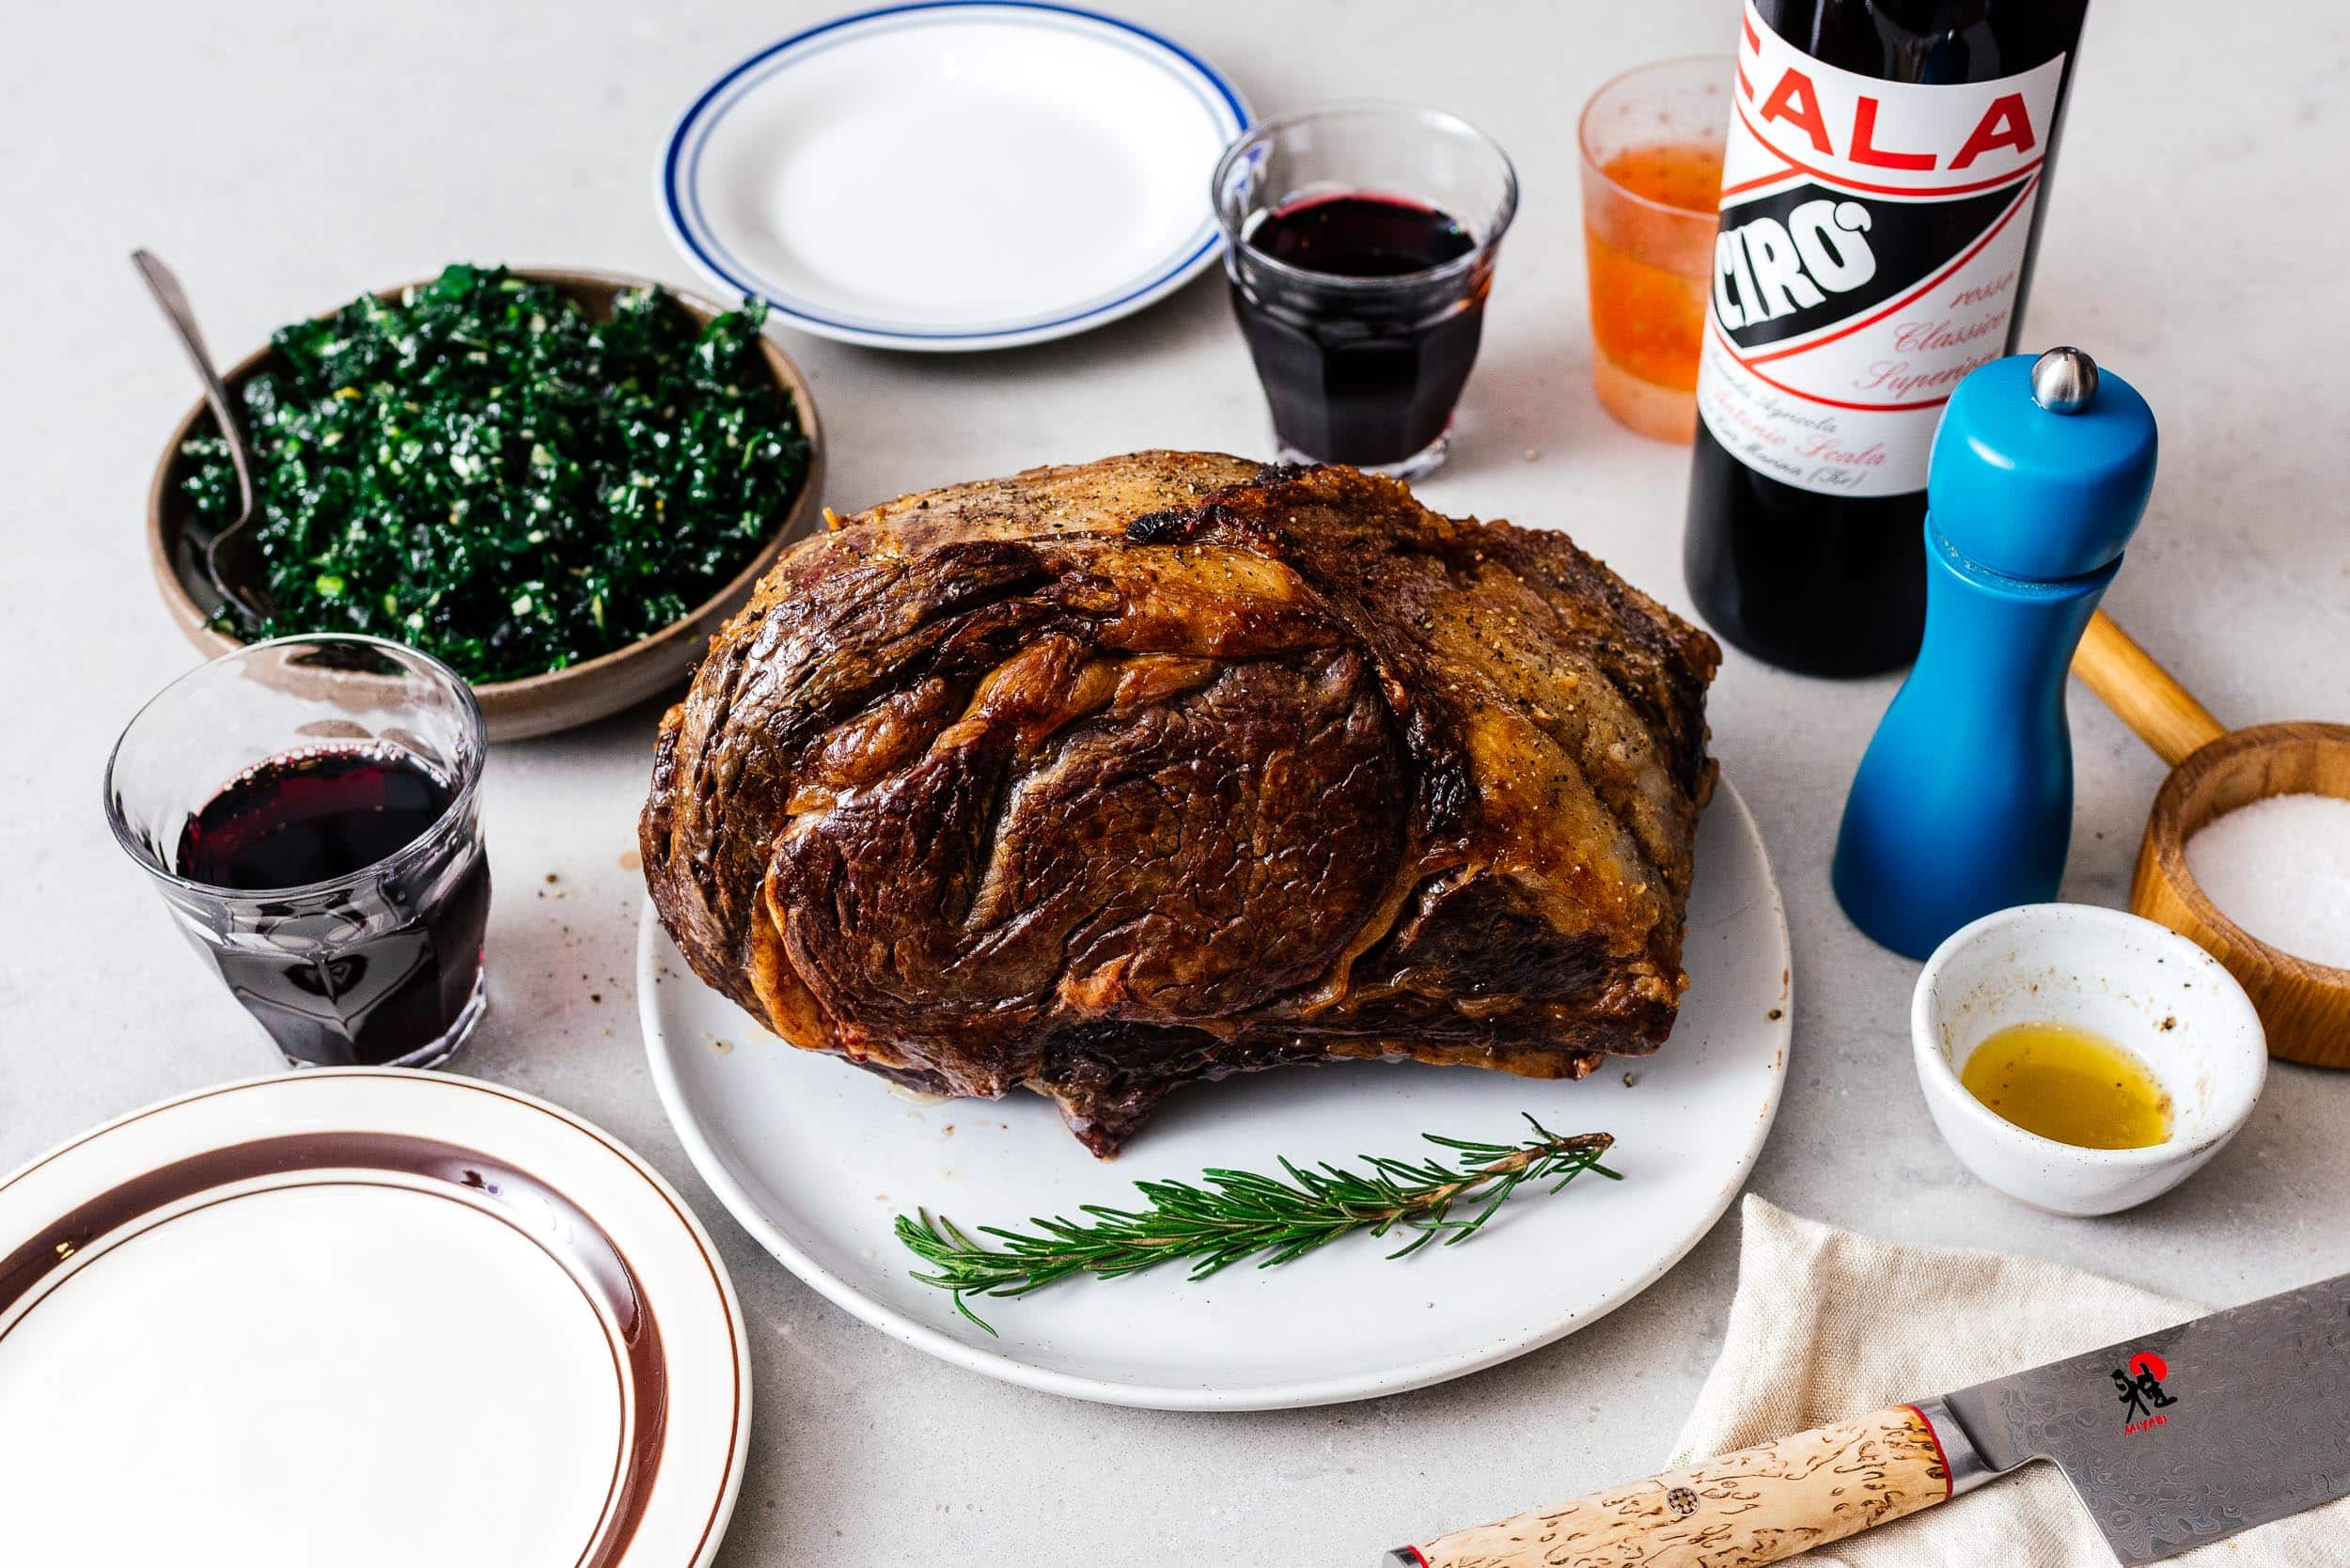
I Am... Classic Prime Rib Recipe
There is nothing more impressive than a slow roasted and deeply crusted prime rib landing squarely in the center of a full dinner table. Prime rib might be the perfect cut of beef. It’s got a little something for everyone. Intense well-marbled fat forward hits for the fat-is-flavor stans (that’s me). Supple, rosy tender parts for the filet/tenderloin fans. Savory beefiness in bulk for the ribeye-is-king crowd. And, last but not least, a deep dark crust for those guys who need to insert Maillard reaction into any conversation involving beef.
What is prime rib
Prime rib is one of the largest cuts of beef you can buy as a normal home cook. You buy it as a roast made of a full rack of 7 ribs. These ribs are commonly spoken of as being from ribs #6-#12. The best way to think of a prime rib is a super high quality tomahawk or bone-in ribeye, stretched out to a foot thick. It’s true: the meat that comes in a prime rib roast is the same stuff you make ribeyes and tomahawks from.How to cook prime rib
Here's how to cook a perfect prime rib, every time:- Preheat your oven to 450ºF.
- Brown the two sides in a cast iron pan: optional, but highly recommended, especially when you have a smaller roast that's easier to handle. The smoke detector may possibly go off.
- Brush with butter or oil, then sear in the oven at 450ºF for 15 minutes.
- Set the oven to 200ºF and open the oven door for about 15 minutes, or until the oven temp drops to 200ºF if you have an oven thermometer. The smoke detector may possibly go off, again.
- Cook for 20 mins per pound for medium rare, or until your meat thermometer goes off. Temperatures are below.
- Rest for 30 mins, then slice and enjoy!
Prime rib temperatures
Prime rib, like all roasts, continues cooking after it leaves the oven while the thermal energy redistributes. For us, this seems to be a 6 degree rise, but your results may vary based on how warm your house is. Basically, 6 degrees is a pretty good estimate, however, so you want to take your roast out 6 degrees before your target temperature. For a quick reference, my target temps are below.- Rare: 125ºF - remove at 119ºF
- Medium-rare: 130ºF - remove at 124ºF
- Medium: 135ºF - remove at 129ºF
- Medium-well: 140ºF - remove at 134ºF
- Well done: 🥵
Prime rib cooking time
If you are cooking for a hungry house and want to know how to plan on timing such a large roast to be just ready for dinner, there’s a super easy formula based on the doneless you prefer. This isn’t one of those pro-chef-speed formulas that no one can realistically achieve, it’s pretty loose with the times so you can depend on it, even if you are relaxing, drinking wine, and consulting your phone every so often for the next step of the recipe. That said, using a meat thermometer is vitally important. And, so is planning on serving appetizers and drinks before the main course for anyone who is extra hungry. The formula is simple - assume:- 2 hours for temper
- 30 mins for searing
- 15-30 minutes per pound (in 5 minute increments - medium rare is 20 minutes/pound)
- 30 minute rest
The importance of a meat thermometer
A meat thermometer is essential. That old adage about the feel of your ear or touching your thumbs to fingers? Not for important cuts of meat, in my opinion. I recommend an oven probe; one that beeps when the target temp is hit. They can be really cheap, extremely expensive wireless app driven, or something in between. If you have an instant read or thermocouple style, be sure to check often that the roast doesn’t get overcooked.Trimming
How much fat you need to trim away depends on how much you love fat. If you trim all the fat away from the edges, you’ll get a much better sear, but that fat is super flavorful and tender - nothing like the tough chewy fat you might encounter from lesser cuts. My butcher left the fat cap on the spinalis, so I removed and froze that, but left the fat on the iliocostalis for extra flavor.Parts of a prime rib
Prime rib looks like just one big homogenous hunk of meat, but it’s three delicious parts with their own taste and tenderness:- Spinalis dorsi aka rib cap: This is considered a well kept chef’s secret: the greatest cut of steak, bar none. All the complexity of a flank steak, the fatty marbling of a ribeye, and the tenderness of a filet, in one steak. This cut is separated from the main body of the prime rib by a large layer of fat. Back when people vilified fat, spinalis dorsi used to be cut off and saved for the butcher or kitchen so that the ribeye steak could be presented “cleaner”. These days, especially if you order a bone-in ribeye, they just leave it on. It really is the best part.
- Ribeye: This is the main body of a slice of prime rib. It’s literally the same as a ribeye steak. It will be well marbled, tender, and complex tasting.
- Iliocostalis: Some people liken this to a long thin tenderloin. It’s also called the lip or nose of a prime rib. It doesn’t have a good reputation because it’s often smaller, fattier, and not very toothsome, but I think it’s an intensely beefy and tender cut because it sits right next to the bone. Iliocostalis used to be cut off and not served with the prime rib, as it wasn’t considered ‘prime’ enough, but these days, most butchers will leave it on for you to decide on.
Why make prime rib?
But why go to all this trouble instead of just getting seven steaks? Because, prime rib is insanely delicious. It’s basically the cheapest bone-in ribeye you can get at an extremely high quality for price ratio. Done right, it’s easy, forgiving, impressive, and satisfying. The best part is the leftovers can be reheated as some of the best steaks you’ll ever have.Prime rib vs steaks
Why should you make prime rib instead of steak or some other cut? Because, it’s cheaper than steak by two- to three- times, it’s easier to make, and there’s nothing more impressive than a giant roast of beef landing squarely center on the dinner table. The advantage of steak is that you can cater to different doneness preferences, but there are so many disadvantages, such as steaks being more expensive, needing more pans (aka more dishwashing), and being so much messier, smokier, and splatterier. Besides, you can cut down a prime rib into steaks before or after cooking. You can't glue steaks together into a prime rib roast. Overall, if you can justify the initial outlay, prime rib beats steak every time.A smaller prime rib
In fact, prime rib is such a good competitor to steak that I think it’s worth it to consider a smaller prime rib, even if its just for two of you, or even if you live alone. Ask your butcher to cut you 2-3 ribs worth. Where we live, it’s half the cost vs bone in ribeye, and my butcher sells even two ribs, which is just two bone in ribeyes stuck to each other. If you are buying by the rib at a really nice butcher shop, you may get choice of which rib bones you want. The “front” is rib number 12, which is very tender with a large ribeye steak, and the “back” is rib number 6, which is more marbled and complex.Prime rib roast
A prime rib can actually be closer to 24 inches thick, although you don’t have to opt for the full rack. Any good butcher will cut you whatever thickness you need. If you can, you should go for broke and get the full rack because it’s way cheaper than individual steaks of the same quality. A prime rib roast can be split into steaks if you’re so inclined. Even if you are only cooking for 2 people, you can buy a whole rack for cheap and split it up into seven 2” thick steaks for much less than you’d pay if you'd just bought steaks. But, the whole point of a prime rib is to roast it to perfection, with a deep dark crust and tender, rosy pink insides, so I recommend you grab a 2-4 rib segment (or more if you want) and go to roasting town. Roasting is way easier than cooking 7 steaks and so much more impressive too. Even better, with the right tools, it's easy to do it perfectly, every time.Bone in or boneless or tied back
When you ask for prime rib, you might be presented with one of three options: bone-in, boneless, or the bones cut off, but tied back on. Each has its pros and cons:- Bone in: The most flavor, but also the hardest to handle. Besides the weight, you can only cut slices between the bones. If you don’t intend to use the bones, these will also be more expensive, because while they cost less per pound, you still pay for the bones. They have the most flavor by far.
- Boneless: The easiest to handle, the easiest to cook, but a little less impressive. Boneless is great if you’re a crust fan (who isn’t?) because you get maximum crust without any pesky bones getting in the way. You’re also able to slice it to any thickness you like. To me though, this option doesn’t really feel like prime rib, just fancy roast beef.
- Bones cut off and tied back on: This might actually be the version you’re most likely to run into depending on where you live. This one seems to sells the best, and some internet sources say it’s great for seasoning the meat because you can get under the bone.
Where to buy prime rib
Because it’s not a super popular cut and because of how expensive it is, outside of Christmas and Thanksgiving, and maybe Easter, you may have a hard time finding prime rib. The best place to get a prime rib, by far, is your local butcher. Not only will they often have it because they have the whole cow in stock, they'll be more willing to cut you exactly as much as you need. Your other option is a special order from a grocery store’s meat department. I checked with whole foods and they said they were able to get a prime rib the next day. I went with the local butcher, but whole foods was actually cheaper. You can also get some awesome (and awesomely expensive) prime ribs from online meat purveyors like snake river farms or costco. If you’re lucky, you might find some prime rib locally at costco in its appropriately named prime beef department - just ask.How to choose the best prime rib
Believe it or not, prime rib was named before the USDA settled on its grades. Depending on who you believe, prime rib is either called prime because it’s the best cut of beef, or because its a primal cut. Either way, prime rib is not always USDA prime. The difference between a USDA prime and a USDA choice (the second best) prime rib is between 25%-50% more money. Beyond that, if you go to a good butcher, you also have options for organic, dry aged, grass fed, wagyu, and more. So how do you choose a good prime rib? Decent marbling is usually a sign of a happy animal, and that means a good tasting cut of meat. Grass vs corn fed is a matter of opinion, and many people don’t like the extra floral and complex taste of grass fed beef, but I don't think there's anyone who doesn’t like tender, well marbled beef.Do you really need to temper the meat?
Unfortunately, yes, you do really need to temper the meat. Tempering the meat – which is really just a fancy way of saying "leave it out on the counter to come to room temp" – equalizes the temperature of the meat so it cooks evenly, plus it lowers cooking times. You can also use this time to briefly dry-brine the meat (below). For a smaller 2-3 bone roast, you can get away with 2 hours of tempering. For a full rack, you'll want to temper at least 4 hours.Dry brining
Dry brining is just liberally seasoning the meat and leaving it in the fridge for 12hrs to 4 days to let the salt penetrate the meat. This process is supposed to pull out the excess moisture from the beef for a more tender and tasty piece of meat. I'm not sure I personally agree with this. Salt never penetrates that much in a dry brine. But if you have a day or two before you want to cook the beef, it doesn’t hurt. Just lightly sprinkle some salt all around the roast, then place on something to catch the juices. Loosely cover and refrigerate until you are ready to use.Sauces
I don't do a rub with my prime rib. Because it’s such a large piece of meat, most likely you will not get a lot of extra flavor into the inside – just its innate beefiness. For some people that’s more than fine. For others, steak sauces are always welcome. If you’re in that crowd, you should check out our steak sauce roundup.How to reheat prime rib
You’ll probably likely have some leftover prime rib. You’ll also most likely hear that you should reheat the leftovers in a low oven. I disagree: by far the best way to reheat prime rib leftovers is to cut the remaining pieces into 2” thick steaks (if you can). Liberally season any cut sides, then sear 2 minutes per side in a cast iron pan. It makes for amazing steaks.Smoke alarms
Depending on many factors – if your smoke alarm is close to your kitchen, if your oven is less clean, or if your hood fan is a little weaker – you should be prepared for your smoke detector to go off during the browning stages. Be sure to check if your smoke detector has a hush button. Or, have a helpful assistant standing by with a large towel ready to fan when you first drop the roast into the cast iron pan to brown and again when you open the 500ºF oven door. And that's it, perfect prime rib, every time. I hope you enjoyed this guide and you're inspired to make a giant, super satisfying chunk of meaty goodness soon! -MikePrime Rib Recipe
Everything you ever wanted to know about prime rib: what it is, how to buy the best one, and how to cook a prime rib perfectly, every time.
- Meat thermometer with probe
- 6 lb prime rib (2 ribs, see notes)
- 1 tbsp butter (melted, unsalted preferred)
- 1 tsp kosher salt
- 1 tsp freshly ground pepper
Liberally season your roast with kosher salt and let temper on the counter for 2-4 hours. Near the end of the temper time, preheat your oven to 450ºF
Optional: Sear the sides in a cast iron pan with a generous amount of oil. Combine the butter and pepper together, then brush onto the roast. Roast for 15 mins at 450ºF.
Set the oven to 200ºF. Allow oven to cool down with the door open for 15 minutes (or until the oven temp hits 200ºF, then close door and cook at 200ºF until the internal temp hits your target temp (119ºF for medium rare, see post), or approx 2 hours.
Remove and rest for 30 minutes before slicing. Serve with sauces of choice, enjoy!
Bones are assumed to weigh 9oz

I Am... Garlic Pull Apart Christmas Tree
If you’re looking for a fun holiday appetizer that’s easy to make, this pull apart garlic knot Christmas tree is the answer. It’s the holidays and I don’t know about you, but for me, it’s always a lowkey competition when it comes to potlucks and bringing food over to holiday parties. Of course, it’s all in good fun, but don’t tell me it isn’t satisfying when your dish is the one that is licked clean. Wait, now that I think about it, maybe I’m the only one that is lowkey thinking it’s a competition? Maybe everyone else is just eating? Either way, this festive bread tree is my secret weapon. It’s super simple: garlicky, soft and plush bread knots with secret mozzarella centers arranged in a pull-apart Christmas tree shape that’s show-stopping and delicious. The best part is that this holiday appetizer is essentially assembly.
Holiday pull apart Christmas tree ingredients
- pizza dough - you could do homemade, but store-bought pizza dough is a life saver.
- egg wash - a bit of egg whisked with water gives your tree a nice shiny, golden brown finish that will make it irresistible.
- mozzarella sticks - cheese pulls for the win! Mozzarella cheese sticks cut into pieces and tucked into the pizza dough gives every ball a cheesy surprise.
- butter + garlic - all garlic knots need butter and garlic and here we’ll make a herby, garlicky butter for brushing on to the tree after baking. I like fresh basil to give the tree a more pizza vibe, but parsley and rosemary will work too.
How to make a holiday garlic knot pull apart Christmas tree
- Heat - Heat the oven to 450°F and line a large baking sheet with parchment paper.
- Cut - Cut the mozzarella cheese sticks into 1 inch lengths.
- Roll - Lightly flour a work surface and use a rolling pin to roll out the pizza dough until about a 1/4 inch in height. Cut the dough into squares, about 2 inches by 2 inches. You’ll need 30 squares for the tree.
- Shape - Take a piece of cheese and place it in the middle of a dough square. Pinch the dough around the cheese, wrapping it up tightly.
- Arrange - Place the ball, seam side down, on the parchment paper baking sheet. Repeat with all the squares of dough, arranging the finished balls into a Christmas tree shape, with two balls for the trunk, then 7 balls, then 6, 5, 4, 3, 2, and then 1 for the top. Make sure all the balls are touching.
- Bake - Brush the balls of dough with an egg was and bake until golden and cooked through, about 15-20 minutes.
- Make - While the tree is baking, make the garlic butter. Melt butter over low heat and stir in minced garlic, parmesan, and freshly chopped basil.
- Brush - When the tree is ready, remove from the oven and generously brush with the garlicky butter. Serve warm and enjoy!
Baking pan
You're gonna need a fairly large baking pan for this one. Plan on at least a 13"x18" pan. The one in these photos which you can't really see is the Great Jones Holy Sheet.Why you should make this tree!
This pull apart tree always brings a smile to my face, while I’m making it and while I’m eating it. I especially love that it’s all store-bought. December is an insanely busy month and waiting for dough to rise isn’t really in the cards. Store-bought pizza dough is a life saver. If you have a grocery store that makes it in house, even better. Essentially, it’s like homemade because they make in-store pizza dough on the regular, with just regular ingredients like flour, water, salt, and yeast. If your grocery store doesn’t sell ready made pizza dough, ask at a local pizza shop, they’re usually willing to sell you some dough.Dip
If you’re a dip lover, this tree is perfect for pulling apart and dipping. Go with classic pizza marinara and ranch. That’s it! What are you waiting for, get tree-ing! Hope you’re holidays are going well :) xoxo stephGarlic Pull-Apart Christmas Tree
If you’re looking for a fun holiday appetizer that’s easy to make, this pull apart garlic knot Christmas tree is the answer.
- 6 mozzarella cheese string sticks (cut into 5 even pieces each (30 pieces total))
- 1 lb pizza dough
- 1 large egg
- 4 tbsp butter
- 2 cloves garlic (minced)
- 1/2 cup finely grated parmesan
- 2 tbsp fresh basil (chopped)
Preheat the oven to 450°F and line a large baking sheet with parchment paper. Lightly flour a work surface and roll the pizza dough in an 8"x9"x1" rectangle. Cut the dough into 30 squares (6x5).
Take each square of dough and wrap a piece of mozzarella inside, pinching to seal into a ball.
Arrange the balls, seam side down, on the baking sheet, in a Christmas tree shape working upwards, with 2 balls for the trunk, then 7 balls, 6, 5, 4, 3, 2, and 1 for the top of the tree.
Whisk the egg with 1 tbsp water. Brush the tops of the balls with egg was and bake the tree until golden and cooked through, about 15-20 minutes.
While the tree is baking, make the garlicky butter. Melt the butter over low heat and stir in the garlic, Parmesan, and basil.
When the tree is ready, remove from the oven and brush generously with the garlic butter. If desired, finish with more Parmesan, basil, and red pepper flakes, if desired.
Enjoy warm!

I Am... Easy Perfect Spatchcock Turkey
A spatchcock turkey will be the easiest, fastest, prettiest turkey you will ever make.Turkey is one of those meats that I love, kind of like a very intense chicken. They're big and you will end up with a lot of leftovers, but I think it's worth it. You can do Christmas with a honey baked ham, prime rib (or any other) roast, or anything you want, but how often can you get a big fresh turkey, perfectly cooked? As a gentle reminder: Be sure to defrost your turkey in the fridge a few days in advance!
What is spatchcock turkey?
Spatchcocking is a fancy way of saying removing the backbone and flattening the bird before you roast it. It's superior to roasting a bird whole because it makes for even cooking, since the thighs aren't covered by the legs and the delicate white meat isn't exposed right up top. It also makes for crispier skin, better presentation, and lets you use the backbone and other bits to make gravy and stock right away.How to spatchcock a turkey
- Prep. Pat the turkey dry with paper towels. It might be best to work in a large clean deep sink or in a large roasting pan. Flip the turkey so that it's breast side down.
- Remove the backbone. Hold the turkey firmly and use a pair of kitchen shears (you definitely need kitchen shears) to cut alongside the backbone, starting where the tail meets the thigh. Cut all the way up until the turkey is split up to the neck. Push the turkey open slightly and then repeat on the other side, carefully cutting alongside the other side of the backbone. This side may be a bit trickier, so go slow.
- Trim. Trim off any excess fat or skin you might see. I took off the tail and the hood of fat near the neck. You can use the trimmings to make the best turkey gravy ever.
- Flip and flatten. Flip the turkey over so that the breast is facing up and push down on the ridge breast bone, hard. You should hear a couple of cracks and the turkey should be flatter. Tuck the wing tips behind the breast so they don't burn.
- Season. Place the turkey on your prepared rack and baking sheet and rub with 1 tablespoon of oil. Season with salt and freshly ground pepper.
How long to cook a spatchcock turkey
- 11-12lb turkey: about 75 mins
- 12-14lb turkey: about 1 hour 25 mins
- 14-16lb turkey: about 1 hour 35 mins
- 16-18lb turkey: about 1 hour 50 mins
- 18-20lb turkey: about 2 hours
Should you brine your turkey first?
Spatchcock turkey is always juicy and delicious anyway so you don't need to! If you normally brine your turkey, you should keep on doing you - this is no different than roasting the whole bird. If you never have brined a turkey before though, there's no need to and brining can often end up with saltier meat than you're used to.What size turkey does this work with?
It works best with smaller turkeys, not because larger turkeys don't work as well, but because a big turkey needs a really big oven to lay flat in (not to mention a big baking sheet). If your oven doesn't fit a full size baking sheet (18"x26") you might want to stick with the smaller 14lb birds and load up on sides instead.Reasons why you should make a spatchcock turkey
- When you cut out the backbone, you get to use it to make gravy and stock, right away without having to wait for the drippings off the bird.
- Flattening the bird helps it cook evenly and quickly – I'm talking about finishing a turkey in about an hour and twenty minutes all-in.
- The flatter profile means that all of the turkey skin is facing up, exposed to the heat which means crispier turkey skin. Bonus, the meat is juicier because the skin renders the fat right into the meat, instead of just falling down into the pan.
- Spatchcocking means even cooking. White and dark meat cook at different rates and flattening out the bird so that the legs and thighs aren't protected underneath the breast means that you're exposing the dark meat to heat that would otherwise not reach it.
How do you carve the turkey like that?
It's easier than it looks!- Break down the turkey by separating the thighs, drumsticks, and wings from the turkey.
- Debone the thigh meat and set aside.
- Remove the breast from the carcass and slice them nicely into even pieces about 1/2" thick.
- Finally, arrange the breast around the platter. Add the drumsticks and wings to the middle, and fill in the gaps with the deboned thigh meat.
- Save the trimmings for Turkey BBH or Turkey Pho.
What about sides and stuffing?
- Mushroom, Rosemary & Thyme Challah Stuffing
- Crispy Duck Fat Oven Roasted Potatoes
- Instant Pot Mashed Potatoes
- How to Make Crispy Air Fryer Roasted Brussels Sprouts
- Turkey Wontons in Turkey Mapo Sauce
Spatchcock Turkey Recipe
A beautiful roast turkey in under two hours with juicy meat and crispy skin, every time.
- Meat thermometer
- Kitchen Shears
Spatchcock Turkey
- 1 medium onion (peeled and quartered)
- 1 orange (halved)
- 1 lemon (halved)
- 2 stalks celery (roughly chopped)
- 10-12 sprigs fresh rosemary
- 1 11lb-12lb whole turkey (or the smallest you can find, see notes)
- 1 tbsp oil
- salt and freshly ground pepper
Rosemary Citrus Butter
- 1/4 cup butter (room temp)
- 1/4 cup fresh rosemary (leaves only)
- 6 cloves garlic
- 1 orange (zested)
- 1 lemon (zested)
- 1 tbsp fresh lemon juice
- 1 tbsp extra virgin olive oil
- 1/2 tsp kosher salt
- 1/2 tsp black pepper
Adjust your oven rack so that it’s in the middle of the oven. Heat oven to 450°F. Foil line a large deep baking tray. Place the onion, orange, lemon, celery, and rosemary sprigs on the foil, then place a wire rack on top of the vegetables.
Pat the turkey dry with paper towels. Flip so that it’s breast side down. Hold the turkey firmly and use a pair of kitchen shears to cut alongside the backbone, starting where the tail meets the thigh. Cut all the way up until the turkey is split up to the neck. Push the turkey open slightly and then repeat on the other side, carefully cutting alongside the other side of the backbone. This side may be a bit trickier, so go slow.
Trim off any excess fat or skin you might see. I took off the tail and the hood of fat near the neck.
Flip the turkey over so that the breast is facing up and push down on the ridge breast bone, hard. You should hear a couple of cracks and the turkey should be flatter.
Place the turkey on your prepared rack and baking sheet. Tuck the wing tips behind the breast and rub with 1 tablespoon of oil. Season with salt and freshly ground pepper. Transfer to the oven and roast, for about an hour and twenty minutes, rotating halfway, or until the deepest part of the breast is 150°F, and the thighs are at least 165°F.
While the turkey is roasting, blend or food process the rosemary citrus butter ingredients together. At the 50 minute mark, carefully and evenly brush on the rosemary citrus butter. If at any point the turkey skin starts to look too brown, you can tent it with foil and then remove the foil at the end to get the crispy brown skin. When the turkey is cooked, remove from the oven and let rest for 15-20 minutes.
How to carve a turkey
Using a medium sized knife, remove the legs by cutting through where the thigh meets the body. Find the joint between the thigh and the drumstick and cut through the joint. Find the joint of the wing near the top of the turkey’s breast and working the knife through it, removing the wings. You can leave the wings whole or spilt them by cutting along the joints.
Remove the breasts by slicing down the center, near the breast bone, using the tip of your knife to follow along the shape of the bone while peeling the breast away slowly. As you continue to slice, the breast should fall away in one piece. Repeat on the other side. Slice the breast into evenly thick pieces. Remove the thigh meat away from the bones, saving all the bones for stock or soup. Arrange everything on a platter and garnish with oranges, lemons, and rosemary. Enjoy!
See blog post for cooking times for other size birds.
inspired by Serious Eats

I Am... Scalloped Potatoes
Scalloped potatoes are rich, creamy, carb-forward, and the perfect accompaniment to any large format meat. They're a classic side dish for a reason, in fact, they’re rich and delicious enough to stand on their own, I say. I would be happy eating only scalloped potatoes for dinner: well seasoned, tender potatoes in a rich and vevelty cream sauce with a little bit of golden brown cheese. Pure potato heaven.
What are scalloped potatoes?
Scalloped potatoes are a gratin style casserole made from thinly sliced potatoes baked in a creamy sauce. The potatoes end up tender and soft and decadent, full of flavor. They’re called scalloped potatoes because they kind of look like scallops. The unique stacked texture is the best part of scalloped potatoes, kind of like a potato lasagna with layers of potatoes instead of noodles.How to make scalloped potatoes
For such a rich and flavor forward dish, making scalloped potatoes is surprisingly easy.- Peel and slice. Peel your potatoes and evenly slice the potatoes into “scallops” or rounds.
- Simmer. We’re going to give the potato slices a quick bath in some warm milk and cream.
- Arrange. Arrange the warm slices of potato (along with the cream mix) into a buttered casserole dish, layering with a bit of shredded gruyere.
- Bake. Bake, covered in foil, until the potatoes are tender and cooked through.
- Broil. Remove the foil and broil until the tops of the potatoes are burnished and beautifully brown.
- Rest. Let the potatoes rest so the cream thickens up and soaks into the potatoes.
Scalloped potato ingredients
- Potatoes. Try to grab potatoes that are all around the same size so your casserole ends up unified and pretty. More on potato choices below!
- Milk and Cream. We’re going to use a mix of milk and cream to create a light, yet rich cream sauce that the potatoes bake in.
- Garlic and thyme. Classic potato flavors accentuate the pure potato-y flavor of these scalloped potatoes.
- Gruyere. Gruyere adds just a touch of cheesiness and structure without overwhelming the potatoes with cheesiness.
What are the best potatoes for scalloped potatoes?
There are only two kinds of potatoes that are perfect for scalloped potatoes: Yukon golds (my absolute favorite) and Russets. Yukon golds are perfect for scalloping because they’re slightly starchy, beautifully yellow, and have a rich buttery potato taste. They’re dense potato with a thin skin, and when you use them, you get a more luxurious casserole. Russets (or Idaho) potatoes are those big potatoes with the dusty skin that most people use for baked potatoes. These are also excellent for scalloped: fluffy, dry, and starchy, when cooked right. Russets are the more mild potato of the two potatoes I recommend and if you’re a fan of lighter, fluffier potatoes, they make a scalloped potato with a more delicate, fall apart texture.- Yukon golds: dense, buttery, rich, more potato flavor, sauce won’t be as thick but the potatoes will hold their shape
- Russets: light, delicate, fluffy, mild potato flavor, will thicken the sauce more, but fall apart
How thick to slice your potatoes
You don’t want to slice your potatoes too thick or thin. A uniform 1/8 to 1/4 inch is perfect. A mandoline is your best friend here, making scalloping the potatoes super quick and easy. You’ll get perfectly even slices which helps the potatoes cook at the same rate and they slices end up super pretty. I have this mandoline and I love it.Cheesy scalloped potatoes
There seems to be a great debate on whether or not scalloped potatoes should have cheese or not. Purists say scalloped potatoes are just potatoes in a roux-based sauce. Cheese lovers pile on the cheese. I’m a potato lover so I love all scalloped potatoes. I like this particular recipe because there isn’t SO much cheese that it overtakes the potato flavor. It’s as good balance between a pure scalloped potato and a cheesy scalloped potato.Should I rinse or soak potatoes for scalloped potatoes?
No! Don’t wash away all that potato starchy goodness. It’s what thickens up the cream and helps the potatoes cook evenly.Tips and tricks
- Warm the milk and cream mixture with the potatoes. The purpose of this step is pure genius: you thicken and infuse the cream mixture with garlic and thyme while warming the potatoes through so they’re pliable when you’re arranging them in the baking dish. Warming the potatoes in the cream helps distribute the starch from the potatoes helping the cream thicken naturally. Warming the potatoes also helps them cook more evenly.
- Use the right dish. A shallow dish is best for scalloped potatoes - it lets the tops of the potatoes brown nicely. Traditional potato gratins, which are the grandfather of scalloped potatoes, were very thin and using a shallow dish will mimic this nicely.
- Let it rest. As your scalloped potatoes rest, the cream sauce thickens up and so the potatoes hold their shape when you cut into them. The sauce will firm up and reincorporate itself back into the potatoes and you’ll get a nice stack instead of potatoes sloppily falling all over your plate. Perfect scalloped potatoes are creamy, velvety and silky. Letting them rest and eating them when they’re not piping hot will let you appreciate their pure potato-ness and texture.
Make ahead:
Scalloped potatoes are the perfect make ahead side. You can arrange the entire dish and just hold off on baking OR you can go ahead and bake the dish before hand and then just warm it, covered in foil, in a 350°F oven until warmed through, about 15-30 minutes.How to store:
Wrap them tightly and keep them in the fridge for up to 5 days.How to reheat:
You can simply reheat them in the microwave for 1-2 minutes until heated through or warm them, covered in foil, in a 350°F oven until heated through, about 15-30 minutes.Serve these with:
Best Scalloped Potatoes Recipe
Scalloped potatoes are a classic side dish for a reason. They’re rich, creamy, carb-forward, and the perfect accompaniment to any large format meat.
- 2 tbsp butter (divided, room temp)
- 2 lbs potatoes (Yukon Gold preferred, about 4)
- 1 cup heavy cream
- 1 cup whole milk
- 3 cloves garlic (crushed)
- 1/2 tbsp fresh thyme
- 4 oz Gruyère cheese (coarsely grated, about 1.5 heaping cups)
Heat the oven to 375°F. Generously butter a small 2 quart baking dish. Peel the potatoes and slice into 1/8 inch thick rounds.
Place the potatoes with the cream, milk, garlic, and thyme into a large pot. Season with salt and freshly ground pepper. Bring to a boil over high heat then reduce to medium and simmer for 1 minute. Remove from the heat and let stand for 10 minutes.
Spoon 1/3 of the potato mix into the prepared dish and sprinkle with 1/2 of the cheese. Add another 1/3 of the potatoes and top with cheese. Dot with butter. Finish on a potato layer and loosely cover with foil.
Bake until the potatoes are tender and cooked through, 35-40 minutes. Remove the foil and broil until bubbly and brown, 3-5 minutes. Let rest for 15-30 minutes before serving.
inspired by Martha Stewart’s Creamy Scalloped Potatoes

I Am... Takoyaki Recipe
Takoyaki literally translated means octopus fried, but they aren't just fried octopus.They're tiny, piping hot balls of batter filled with green onions, ginger, crispy tempura bits and octopus. They're crisp, they're gooey, and they're delicious.
The best Japanese street food
Takoyaki is one of Osaka's quintessential street foods. Thankfully, you don't have to travel to Osaka to try them - they're basically found everywhere in Japan and are quite popular in North America too. If you ever come across a takoyaki stand, stay awhile and check out the takoyaki makers. They're mesmerizing. Professional takoyaki chefs have rows and rows of cast iron pans with half spherical molds. A dashi flavoured batter is poured into the molds and then each ball gets a piece of octopus, some ginger, and green onions. When the bottom of the balls are cooked, they're flipped with skewers so that the inside batter flows out to create the other side of the ball. It's amazing to watch a real pro. They're fast, furious and churn out the little balls like there's no tomorrow.Why you should make takoyaki at home
Takoyaki need quite a few ingredients and a specialized pan, but I think it's worth it. You can find a takoyaki pan on amazon.com or you can use an ebelskiver (Danish pancake) pan. As for the insides, octopus is classic, but feel free to put in shrimp, chicken, or whatever savoury filling you like. I like to do a combo of octopus, squid and shrimp. I also throw in some mozzarella cheese to get an crispy toasted cheese outside with an extra gooey cheesy inside. If you've never seen takoyaki being made, do a youtube search, it'll give a good starting point for how to flip the little balls around.What is takoyaki?
Takoyaki are a Japanese street snack that originated in the city of Osaka. They are little round balls of batter that are slightly crispy on the outside and a bit soft and gooey on the inside, stuffed with a little nugget of octopus, tempura bits, and green onions. Typically they serve them up in little wooden boats, brushed with takoyaki sauce, drizzled with Japanese kewpie mayo, and topped with bonito flakes and seaweed. They come with skewers or chopsticks to pick them up. They’re super popular and probably one of the most well known Japanese foods out there. Charmingly, you can almost always see people standing around the stands fanning their mouths because the takoyaki is too hot. Takoyaki is pure comfort food.What does takoyaki taste like?
Takoyaki are delicious! They’re super savory and full of umami. They’re piping hot when they are served, so be careful when you eat them. The outsides are just a touch crispy and the inside batter is seasoned, soft, and kind of gooey that melts in your mouth. The little nugget of octopus inside is supposed to contrast with the softness of batter. Green onions add a bit of freshness, beni shoga (pickled ginger) adds a hint of sweet and sour, and crispy tempura bits add even more richness. The sauce and mayo on top adds another layer of flavor. Takoyaki are so incredibly full of umami. The perfect bite! On mushiness: sometimes people are surprised by the texture of takoyaki. Is takoyaki supposed to be mushy? The answer is, yes, it’s supposed to be a little runny and gooey inside. It’s not exactly mushy, it’s more gooey like melty cheese. The gooey-ness is what most vendors aim for because the contrast is what makes takoyaki special. But, if you’re not a fan of gooey, you can be cook them all the way through. It just means that your balls will be a tiny bit more firm and structured than the ones you’ll find in Japan.What is takoyaki made of?
There are a lot of ingredients needed for takoyaki, but don’t let that stop you – it’s absolutely worth it. In fact, one of my all time favorite activities is making takoyaki at the table. I have so many fond memories of Mike and I making takoyaki and chatting the night away.Here’s what you need:
- Eggs. Eggs make up the majority of the batter and help it get crisp.
- Flour. Flour binds everything together into a very loose batter.
- Dashi powder. Dashi powder is what gives the batter it’s flavor - it’s a simple shortcut way of incorporating dashi (Japanese soup stock) into the base. You can buy dashi powder in the Asian grocery store or online. It adds a bunch of flavor and umami.
- Soy sauce. This is just to add some extra flavor.
- Octopus/tako. The reason why we’re here! You can buy already cooked tako at the Asian grocery store in the seafood section. Cut the tako up into cubes.
- Green onions. These add a bit of freshness to the takoyaki.
- Tenkasu. Tenkasu is tempura bits! They add texture and aroma. If you don’t have any (they sell them in bags at the Asian grocery store) then you can sub in rice krispies.
- Takoyaki sauce. A thick brown sweet and savory sauce.
- Kewpie mayo. This is essential and gives your octopus balls that iconic look.
- Bonito flakes. These flakes are what make your takoyaki look like it’s dancing! They are delicate, paper thin shaved dried fish that wave around from the hot steam. They are super savory.
- Seaweed. A little green sprinkle of powdered seaweed.
- A takoyaki pan. You can buy them for not too much money online, or if you have a Danish-style ebelskiver pan, that'll work great too.
How to make takoyaki
- Mix. Mix the batter up with a whisk making sure there are no floury bits.
- Prep. Prep all of the fillings. Cut up the octopus, slice the green onions and make sure you have everything at the ready: a little dish of oil, all your ingredients, some skewers to flip the balls, and a plate to serve on. Heat up the pan.
- Pour and fill. Generously oil the pan with a brush or a paper towel dipped in oil. Give the batter a whisk then pour into the individual compartments all the way up to the top. It’s okay if they overflow a bit. Add in the fillings and let cook until the edges start to look more solid and opaque.
- Flip. Use your skewers to turn the takoyaki 90 degrees. If they don’t easily move, they need more time to crisp up. Once they’re at a 90° angle, pour in a bit more batter to ensure a super round ball. Let cook, stuffing in any excess batter that’s outside the ball, then turn again. You should have a round ball. Cook until the balls are crispy and brown, moving the balls around from mold to mold to evenly cook (this is because most pans will have uneven heating). As the balls crisp up, it will be easier to flip them.
- Sauce. When the balls are golden and crisp, pop them on a plate and brush with takoyaki sauce and squeeze on some mayo. Top. Finish with a sprinkle of bonito and aonori. Enjoy!
Takoyaki tips and tricks
- Pre-make the batter. It can hang out in the fridge, covered and the flour can really get hydrated, making the batter smooth. It’ll help the crispiness of the outsides.
- Use a lot of oil. Oil is what is going to make the outsides crispy and easy to flip.
- Use a generous amount of batter. Professional takoyaki vendors almost always overfill the rounds of their grills and stuff the excess inside the ball so that each ball is perfectly round. Top up the batter if needed.
- Move the balls around. After the balls are lightly grilled and hold their shape, move them around the pan. Lots of home takoyaki pans have uneven heat so moving them around with help with browning.
Do I have to put octopus in takoyaki/what can you put in takoyaki?
If you don’t like tako, you’re in luck because you can put literally anything you want in takoyaki. Technically it won’t be called takoyaki anymore, but it’ll still be delicious! In Japan they have lots of varieties. Some ideas:- shrimp
- chicken cubes
- ground beef
- ground pork
- sausage
- bacon
- tofu
- cheese + anything else because everything is better with cheese
- mochi + tako
- kimchi + cheese
- diced ham + tomato sauce + cheese for a pizza version
- taco meat + diced tomatoes + cheese for a taco version
- vegetables: diced carrots, corn, peas, cabbage, zucchini, mushrooms, etc
What sauces go on takoyaki?
Once you have made the balls, finish by brushing on super savory takoyaki sauce and squeezing on kewpie mayo.Kewpie mayo
Kewpie mayo is a Japanese mayo that is sweeter, a little bit acidic and so much more delicious than regular mayo. It’s made with just yolks as opposed to all other mayos which are made with whole eggs, giving Kewpie an extra rich custard like texture. It’s slight sweetness comes from rice vinegar. It comes in an iconic super soft squeeze bottle with topped off with a little red flip cap.What is takoyaki sauce made of?
Most Japanese people buy their takoyaki sauce at the store and I do too! It's a thick brown sauce that’s similar to Worcestershire sauce but more fruity and thick. It comes in a handy squeeze bottle with a cute octopus on it. It’s really similar to okonomiyaki and tonkatsu sauce, so if you have those in the fridge you can use them too. Takoyaki sauce is sold online and in Asian grocery stores. If you need to make a sub at home, make this easy version: mix together 2 tablespoons ketchup, 1 tablespoon Worcestershire sauce, 1 tablespoon mirin, 1 tablespoon soy sauce, 1 tablespoon ketchup, 2 teaspoons oyster sauce, and 1 teaspoon sugar.What goes on top of takoyaki?
After the sauces, a handful of katsuobushi and a sprinkle of aonori are added for the finishing touch. Katsuobushi is dried bonito flakes and they’re those little whisps that look like they’re dancing when your takoyaki is hot. Aonori is a powdered seaweed. They sell both katsuobushi and aonori online and in Asian grocery stores. If you don’t have aonori, you can use seaweed strips! Unfortunately there isn’t really a sub for katsuobushi.Aonori: those pretty green sprinkles of seaweed
Aonori is green seaweed that’s been dried and powdered into small flakes. It’s used to finish dishes like okonomiyaki, yakisoba, and takoyaki. It’s not quite the same as regular roasted nori/seaweed - it’s a different variety, much like how romaine and iceberg are both lettuces, but they taste quite different. Aonori is full of umami and a robust briny flavor that will remind you of the sea. You can find it in Asian grocery stores or online.Where can I buy a takoyaki pan?
We actually have two takoyaki pans, one that my friend gifted me and one that we bought on amazon. You can also purchase them in Japan and sometimes in Asian supermarkets. I love the electric takoyaki pan but if you have an ebelskiver pan you can also make larger takoyaki on the stove. They also sell cast iron takoyaki pans too.How do you make takoyaki without a pan?
Unfortunately you can’t - you need the half-sphere shapes to really make that round ball shape.How to store takoyaki?
You might be wondering, how long does takoyaki last in the fridge? If you happen to make extra, you can keep it in the fridge in a covered container for a day or two and heat it up in the microwave but it won’t taste as good as fresh, especially if it has all the sauces on it. What you should do, if you have extra batter is just put everything in the fridge as is and then make takoyaki again, fresh, the next time you want to eat it. The batter and toppings should last up to two days in the fridge.FAQ
Does takoyaki always have octopus?
Nope, like it says earlier in the post, there are lots of takoyaki in Japan that don’t actually have octopus. They sell shrimp and squid varieties too. You can put any protein inside and even just leave them plain if you don’t want anything in the middle.Where is takoyaki from?
Takoyaki originated in Osaka in the early 1900s then became popular as street food. Nowadays it's sold by street food venders, as well as being sold in combini (convenience stores), supermarkets, food courts, bars/restaurants, and specialized restaurants all over Japan.How do I make perfectly round balls?
Make sure you over fill the rounds. Generously oil the pan, pour in the batter, add the fillings, then top up the batter so that you have extra batter to stuff into the balls, so that they fill out and become perfectly round.Which pan do you recommend?
I like this electric takoyaki pan that is super cute and has an octopus on it. A word of warning: The heat on these cheaper pans isn’t perfectly even so I always make sure to move my takoyaki around so each ball gets grilled evenly.Where to get takoyaki
If you don’t want to make takoyaki at home, your best bet to try it would be to check out a Japanese izakaya restaurant in your home town. They might have it on the menu. You can also try frozen takoyaki, which they’ll sell at Japanese supermarkets. But those aren’t quite the same. It’s really easy to make them at home so I hope you give it a try!Takoyaki Recipe
How to make the ultimate Japanese street snack in your own home.
- Takoyaki Pan
Takoyaki Mix
- 3 large eggs (lightly beaten)
- 4.25 cups cold water
- 2 tsp instant dashi
- 2 tsp soy sauce
- 1/2 tsp salt
- 2.5 cups all purpose flour (about 300g)
Takoyaki Filling
- 1/2 lb boiled octopus (0.5" cubed)
- 1 bunch green onions (sliced)
- 1 cup tempura bits (or rice krispies)
- beni shoga/pickled ginger (if desired)
- shredded or cubed cheese (if desired)
Takoyaki Toppings
- mayo (preferably Japanese/Kewpie Brand)
- takoyaki sauce
- bonito flakes
- aonori (or seaweed strips)
Beat the eggs and add the water and stock granules. Add the egg-water-dashi mixture to the flour and salt and mix well. Heat up your pan and oil the individual compartments with a oil brush or use a paper towel dipped in oil.
When the pan is hot, pour the batter into the individual compartments up to the top. Don’t worry if the batter over flows a bit.
Add green onions, your protein, tempura bits/rice krispies, ginger, and shredded cheese (if using).
After a while, the bottom of the takoyaki will be cooked through. At this point, you can use a skewer or two to turn them over 90 degrees. If you can’t turn the takoyaki easily, it probably needs to cook for a bit longer. If needed, add a bit more batter to the balls to fill them up. Let cook for a minute or so and then do another 90 degree turn. The balls will become easier to turn the more they cook.
The takoyaki are done when they’re lightly brown and crispy on the outside and they turn easily in their holes. Overall I’d say it takes about 10-15 minutes per batch, from start to finish, depending on how crispy or soft you like your takoyaki.
To serve, place the takoyaki on a plate and drizzle with Japanese mayonnaise and takoyaki sauce. Genrously sprinkle on the bonito flakes and aonori. Enjoy, but be careful, the insides are hot!
Makes approx. 64 balls

