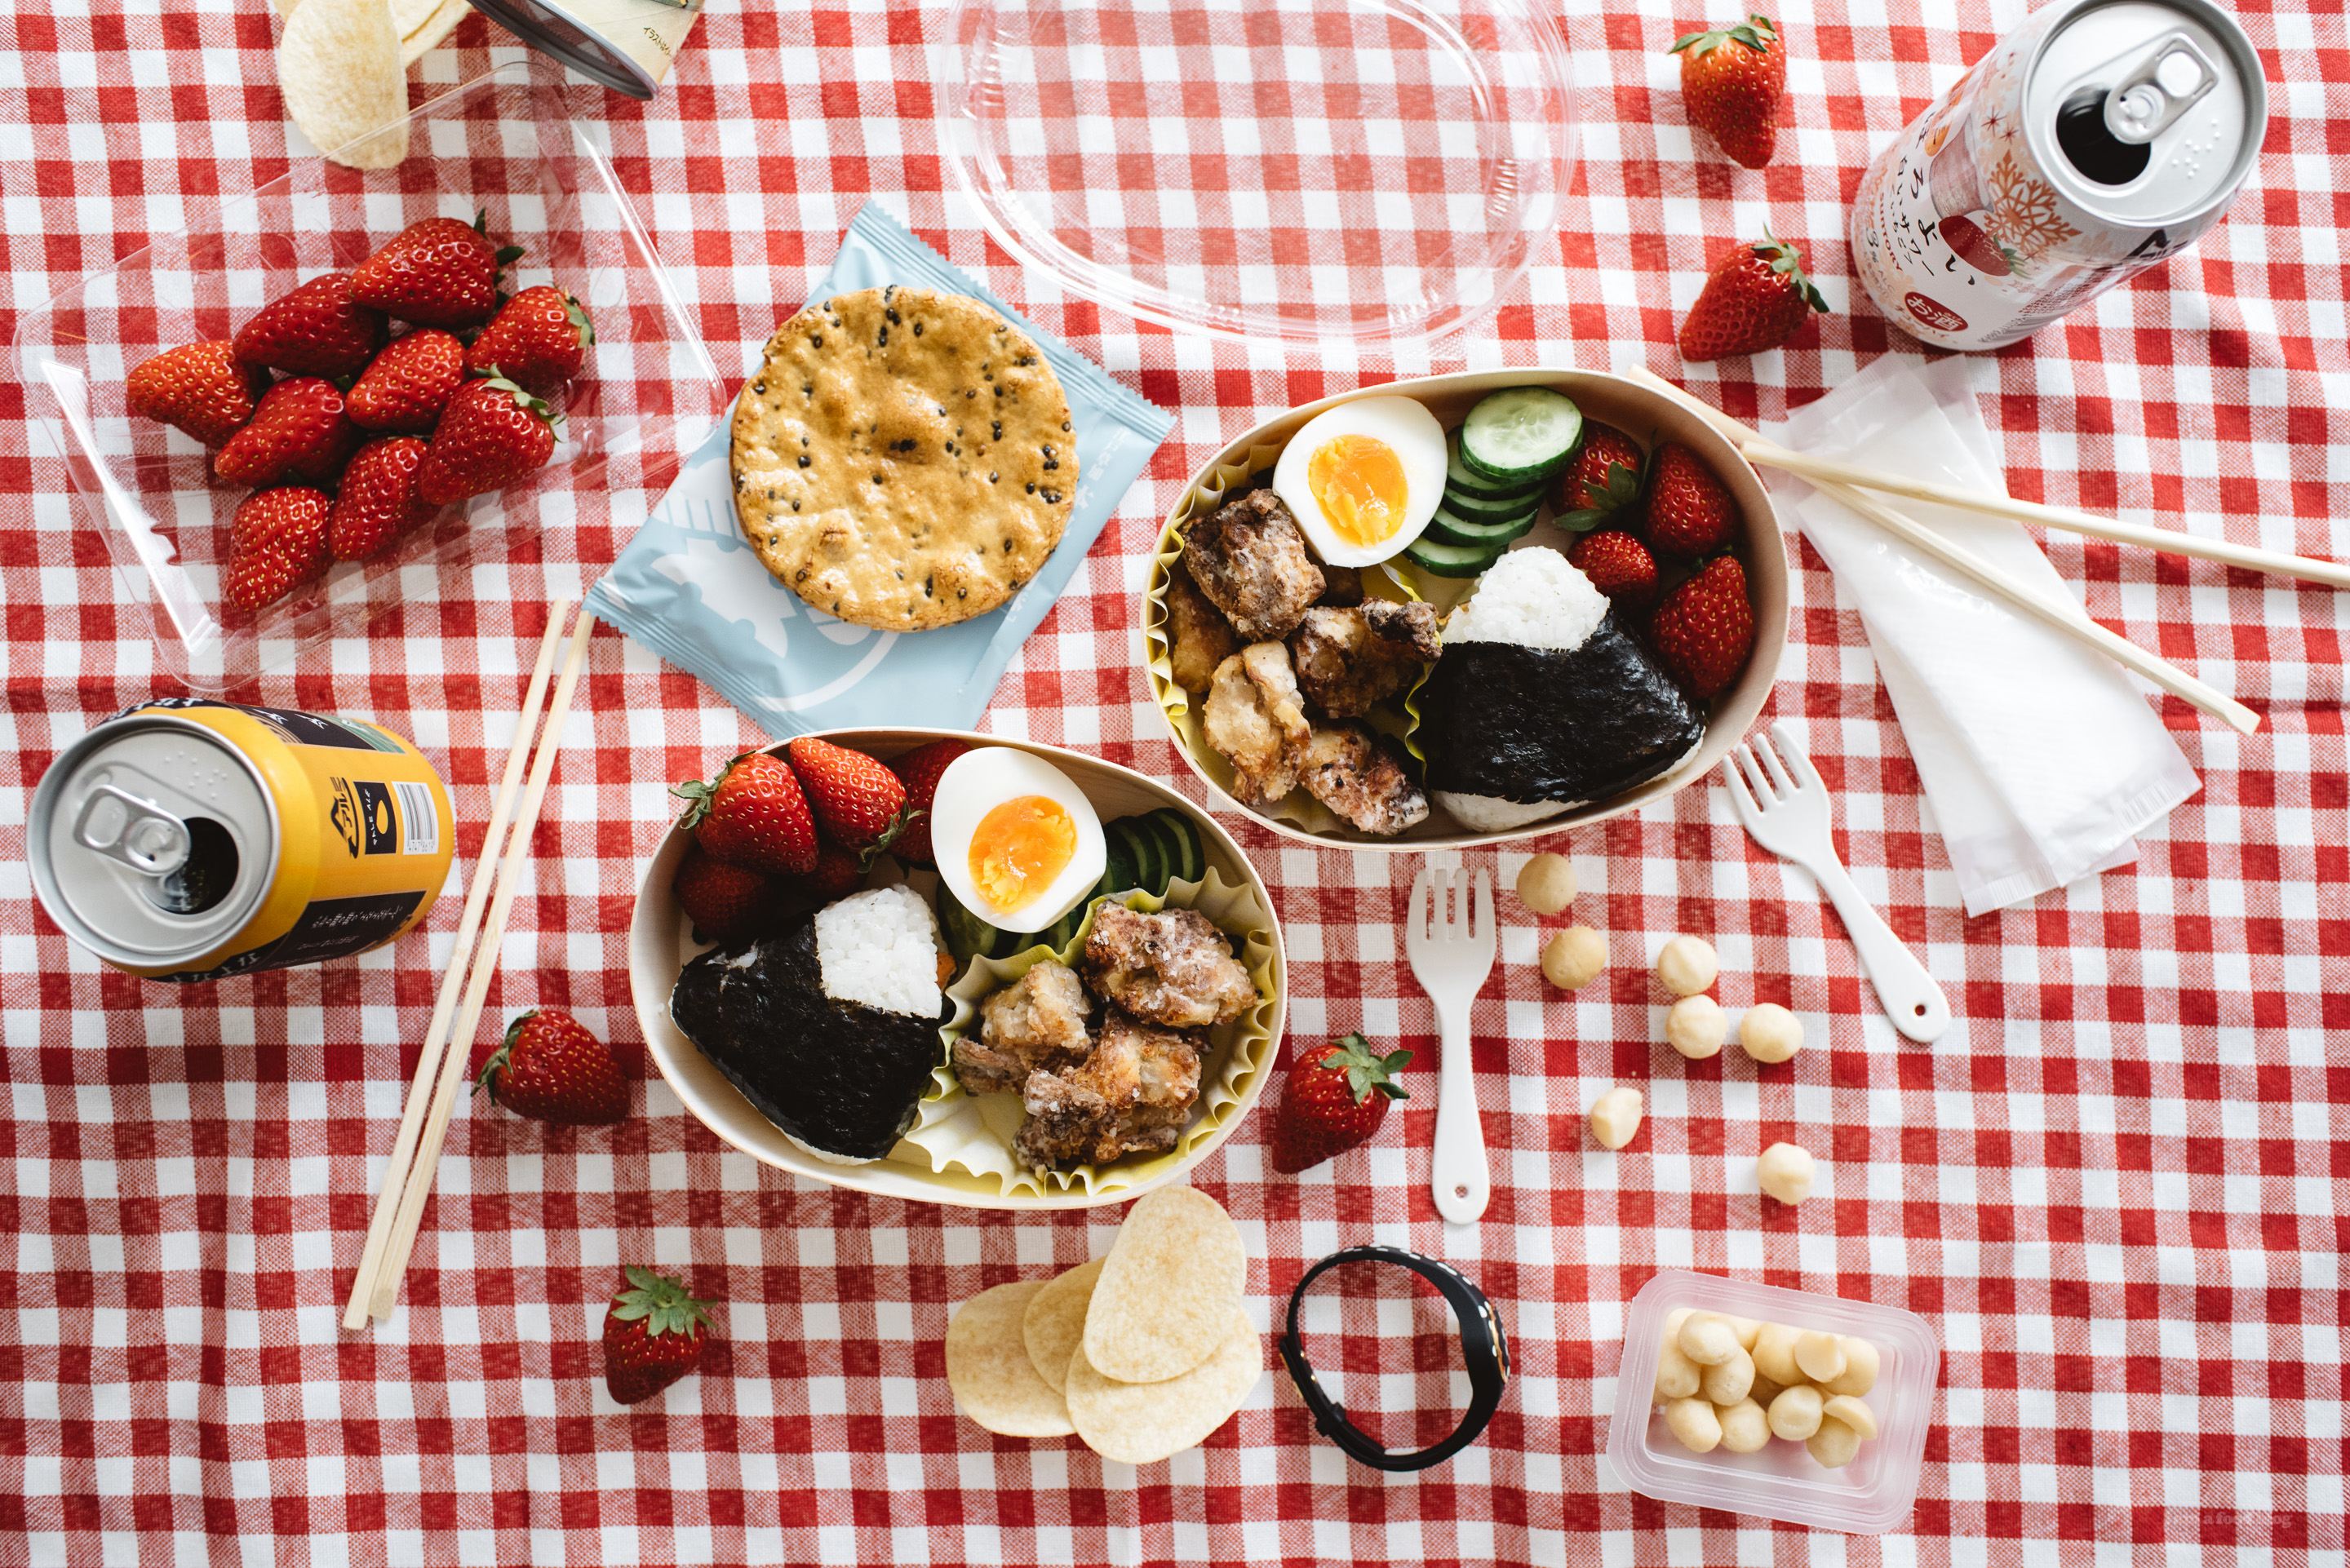
I Am... 12 Things to Make and Take on a Japanese-Inspired Picnic!
It’s not officially summer yet but I’m all about the summer picnics this year! I just want to make and pack up all the cutest foods, pop it into a basket and head on out to the park or the beach. For some reason, themed picnics really appeal to me. Imagine an all chip picnic? Or maybe an only dips and dippers picnic? Seriously sounds like the best. We haven’t gone on any elaborate picnics yet – more like a bag of chips from the store or takeaway – but when we do the first one is going to be Japanese themed for sure. I can’t wait to make a cute lil picnic bento!
Read More →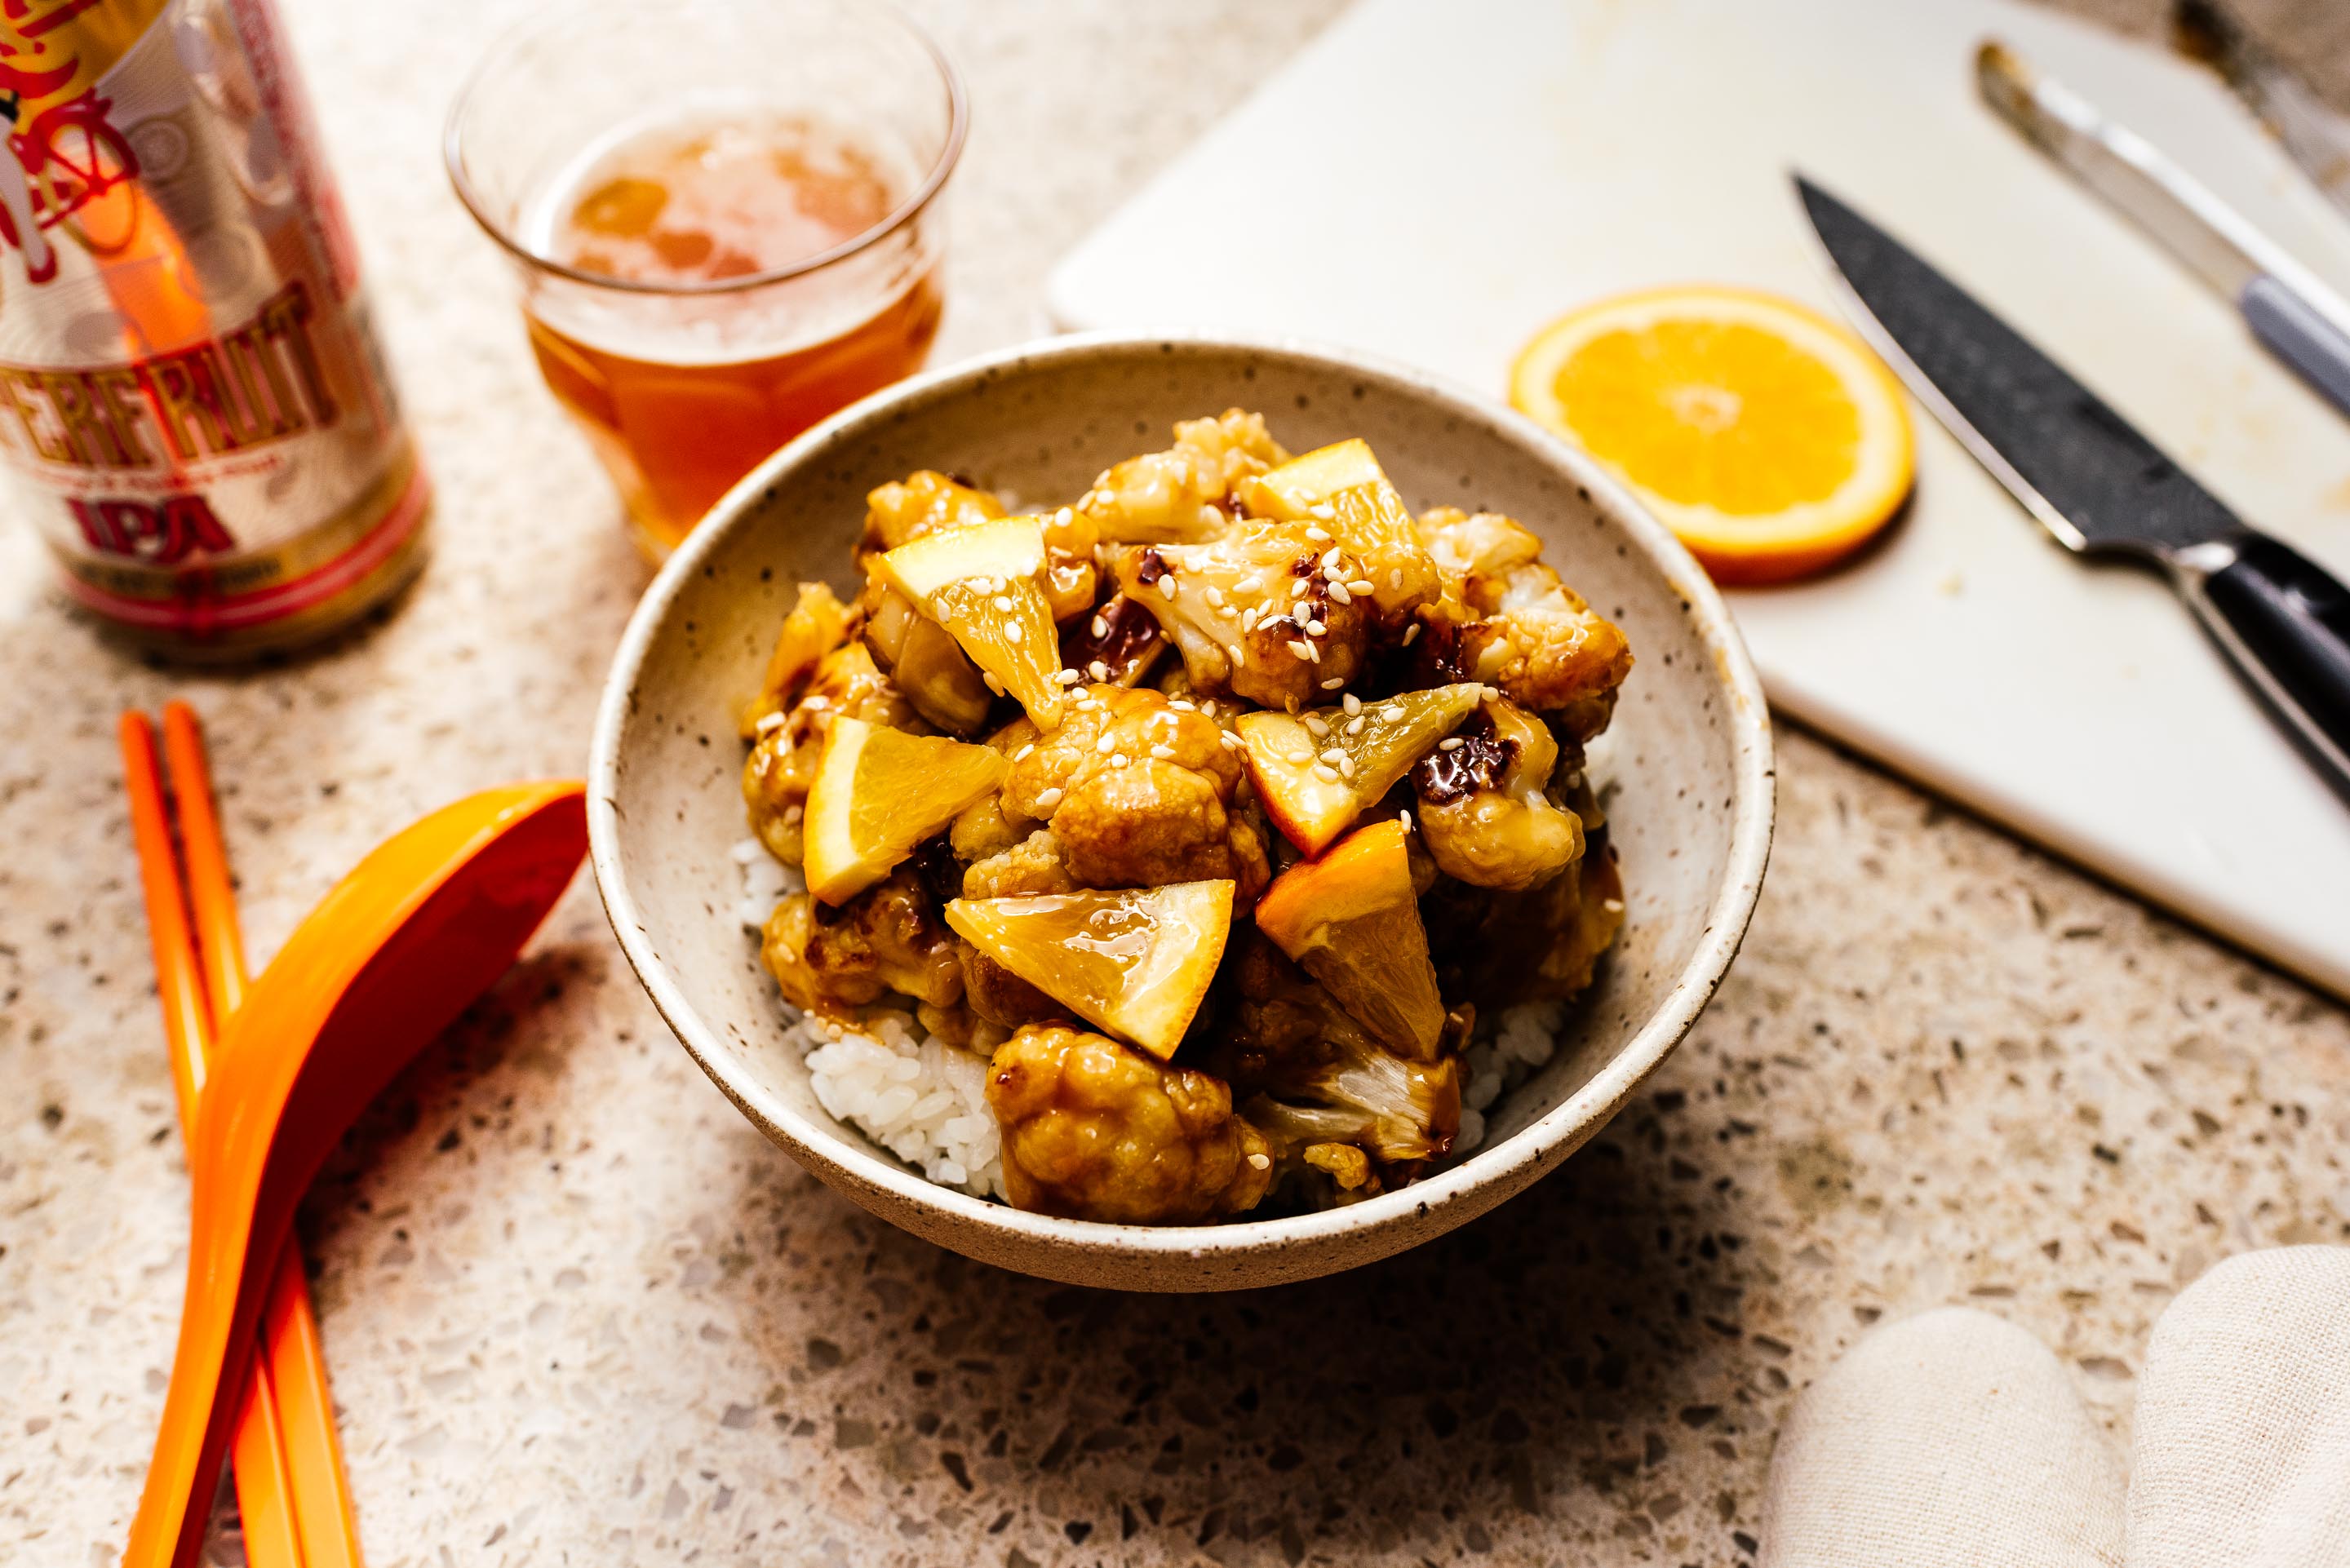
I Am... A Really Easy Healthy Orange Cauliflower Recipe
Pretty much everyone knows and loves orange chicken, Panda Express's greatest dish. This is a slightly more authentic, much much healthier vegan version that you can feel good about eating every night if you want. It's not deep fried, oily, or difficult, and it's utterly, utterly delicious. A tangy, bright, and slightly sweet sauce comes together with lightly crispy cauliflower and forms something that tastes not even close to just vegetables. If you're not used to eating veggies as a main, this could be a dangerous gateway to a whole new world of veggies for dinner. If you are, well you're in for a treat. Cooking Notes You may need to adjust the sugar content to suit you because it's not possible to predict the sweetness of the orange you end up with. Taste the sauce before you toss in the cauliflower and go for a little sweeter and richer if you'd like; unlike meat, the neutrality of the cauliflower can absolutely absorb the extra flavor. Cauliflowers should be cut fairly small; the smaller, the crispier, the more satisfying, within reason. We're looking for about inch wide pieces. What do you need? A non stick skillet and a baking sheet. Cooking spray is highly recommended. How do you serve it? Serve with rice, fried noodles, and maybe a healthy side salad.
The Dinner & Chill Oven Baked Orange Cauliflower Recipe Serves 1-21. Preheat your oven to 450ºF and cover a baking sheet with aluminum foil. Add a little oil to the foil and rub it around with a paper towel to coat. Break up your cauliflower into small florets, then coat with oil (preferably with cooking spray; toss in a large bowl if not) and season well with salt and pepper. 2. Transfer your cauliflower to a ziplock/plastic bag along with 2 tablespoons of corn starch and shake well. Arrange the cauliflower onto your foil lined baking sheet. 3. Bake your cauliflower for 30 minutes at 450ºF. 4. While the cauliflower is baking, add the remaining 1 tablespoon of cornstarch to 1 tablespoon of water in a cup and stir into a smooth slurry. 5. Make your sauce by combining orange juice, soy sauce, rice vinegar, and sugar. Add the corn starch slurry to it and bring to a boil, then take off the heat and stir until a smooth and glossy sauce forms. Set aside and relax with a glass of wine until the cauliflower is done. 6. When your cauliflower is crispy and brown, toss it in the sauce until everything is evenly coated. Top with sesame seeds and chopped green onions with a side of rice, and enjoy!
- 1 large cauliflower, cut into small florets
- 3 tablespoons corn starch
- 1/4 cup orange juice (about half an orange)
- 1/4 cup soy sauce
- 1/4 cup sugar
- 1/4 cup rice vinegar

I Am... Green Chile Enchilada
Green chile chicken enchiladas forever because who doesn’t love salsa verde, chicken, tortillas and cheese all baked up into a delicious mess. The best part is, if you don’t have the time to make the green chile sauce, it’s okay to buy it. Ditto on using leftover rotisserie chicken – this is meant to be easy! This easy chicken enchilada recipe is effortlessly customizable, so get creative and make it your own. Here are some suggestions:
Read More →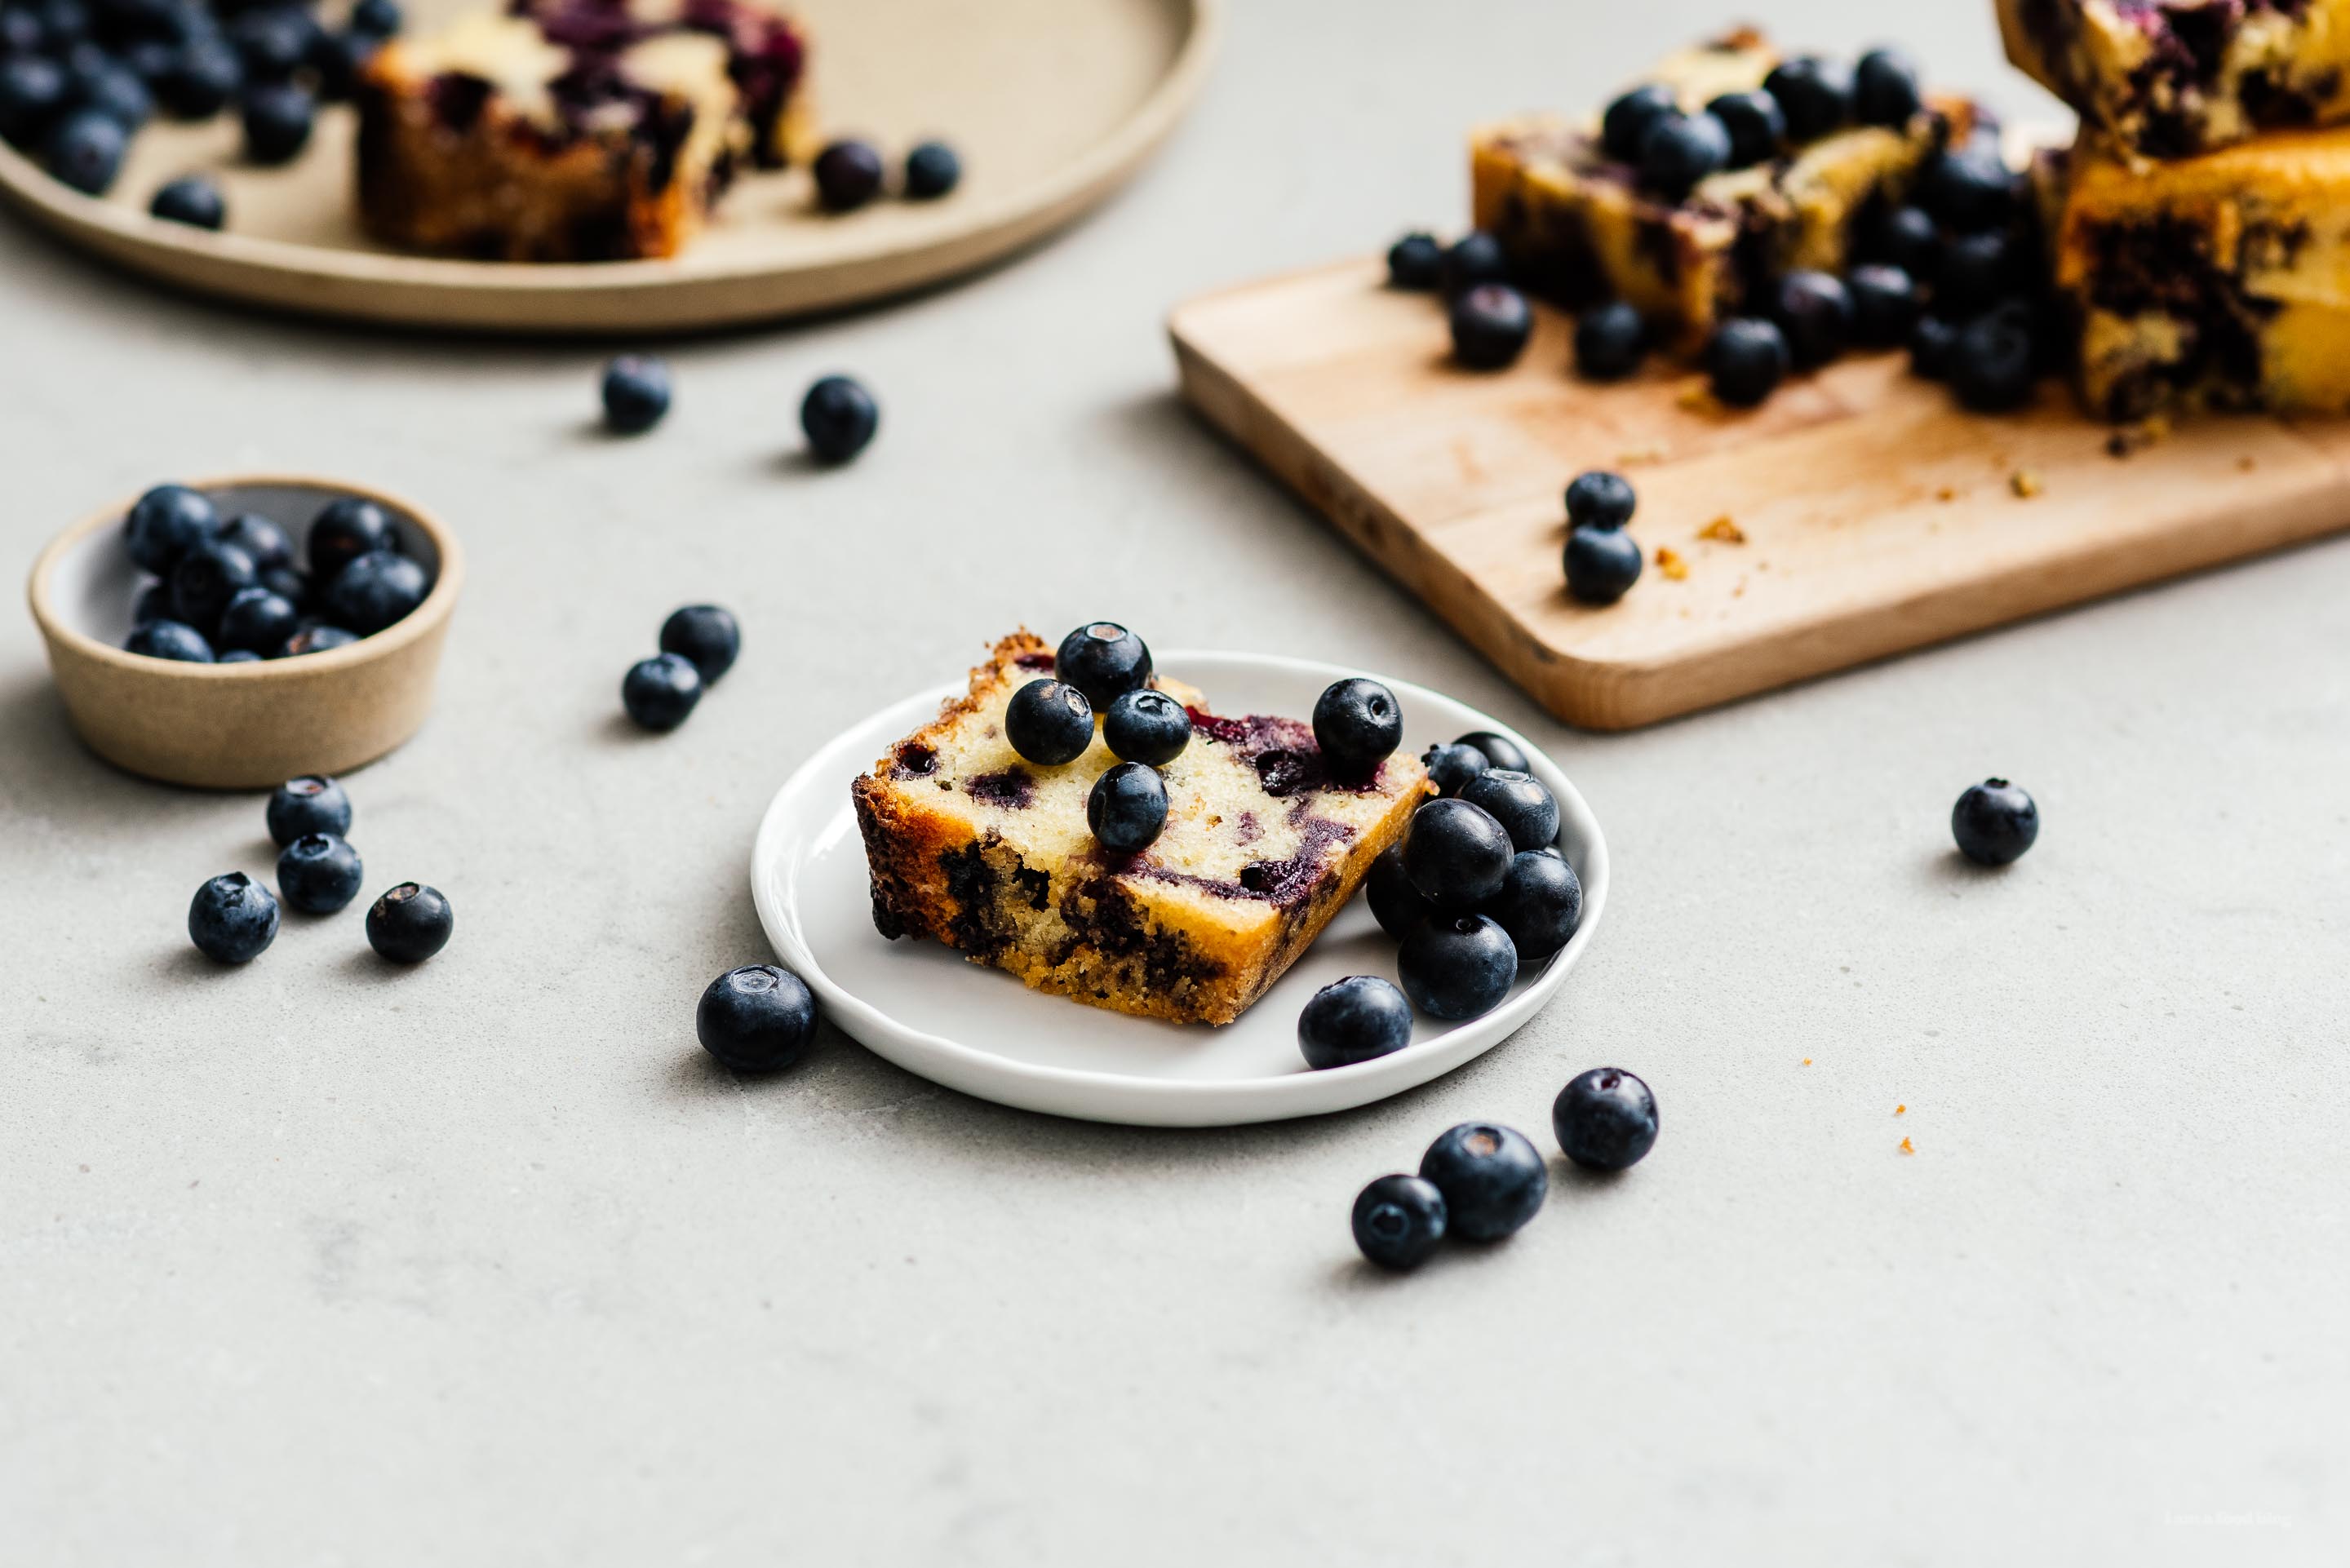
I Am... Small Batch Sundays: The Best One Bowl Blueberry Bread Recipe
Now that local blueberries are starting to pop up everywhere, I’ve got blueberries on the brain. I love blueberry muffins, but since I’m still obsessed with loaves, I decided to take my favorite blueberry muffin recipe and loaf it up, small batch style. It came out wonderfully – cake-y and moist with pockets of blueberry jammy goodness and a crispy sugary top. I baked it up on a Tuesday, just in time to slice it up and wrap it into individual pieces to bring on our first summer camping trip!
Read More →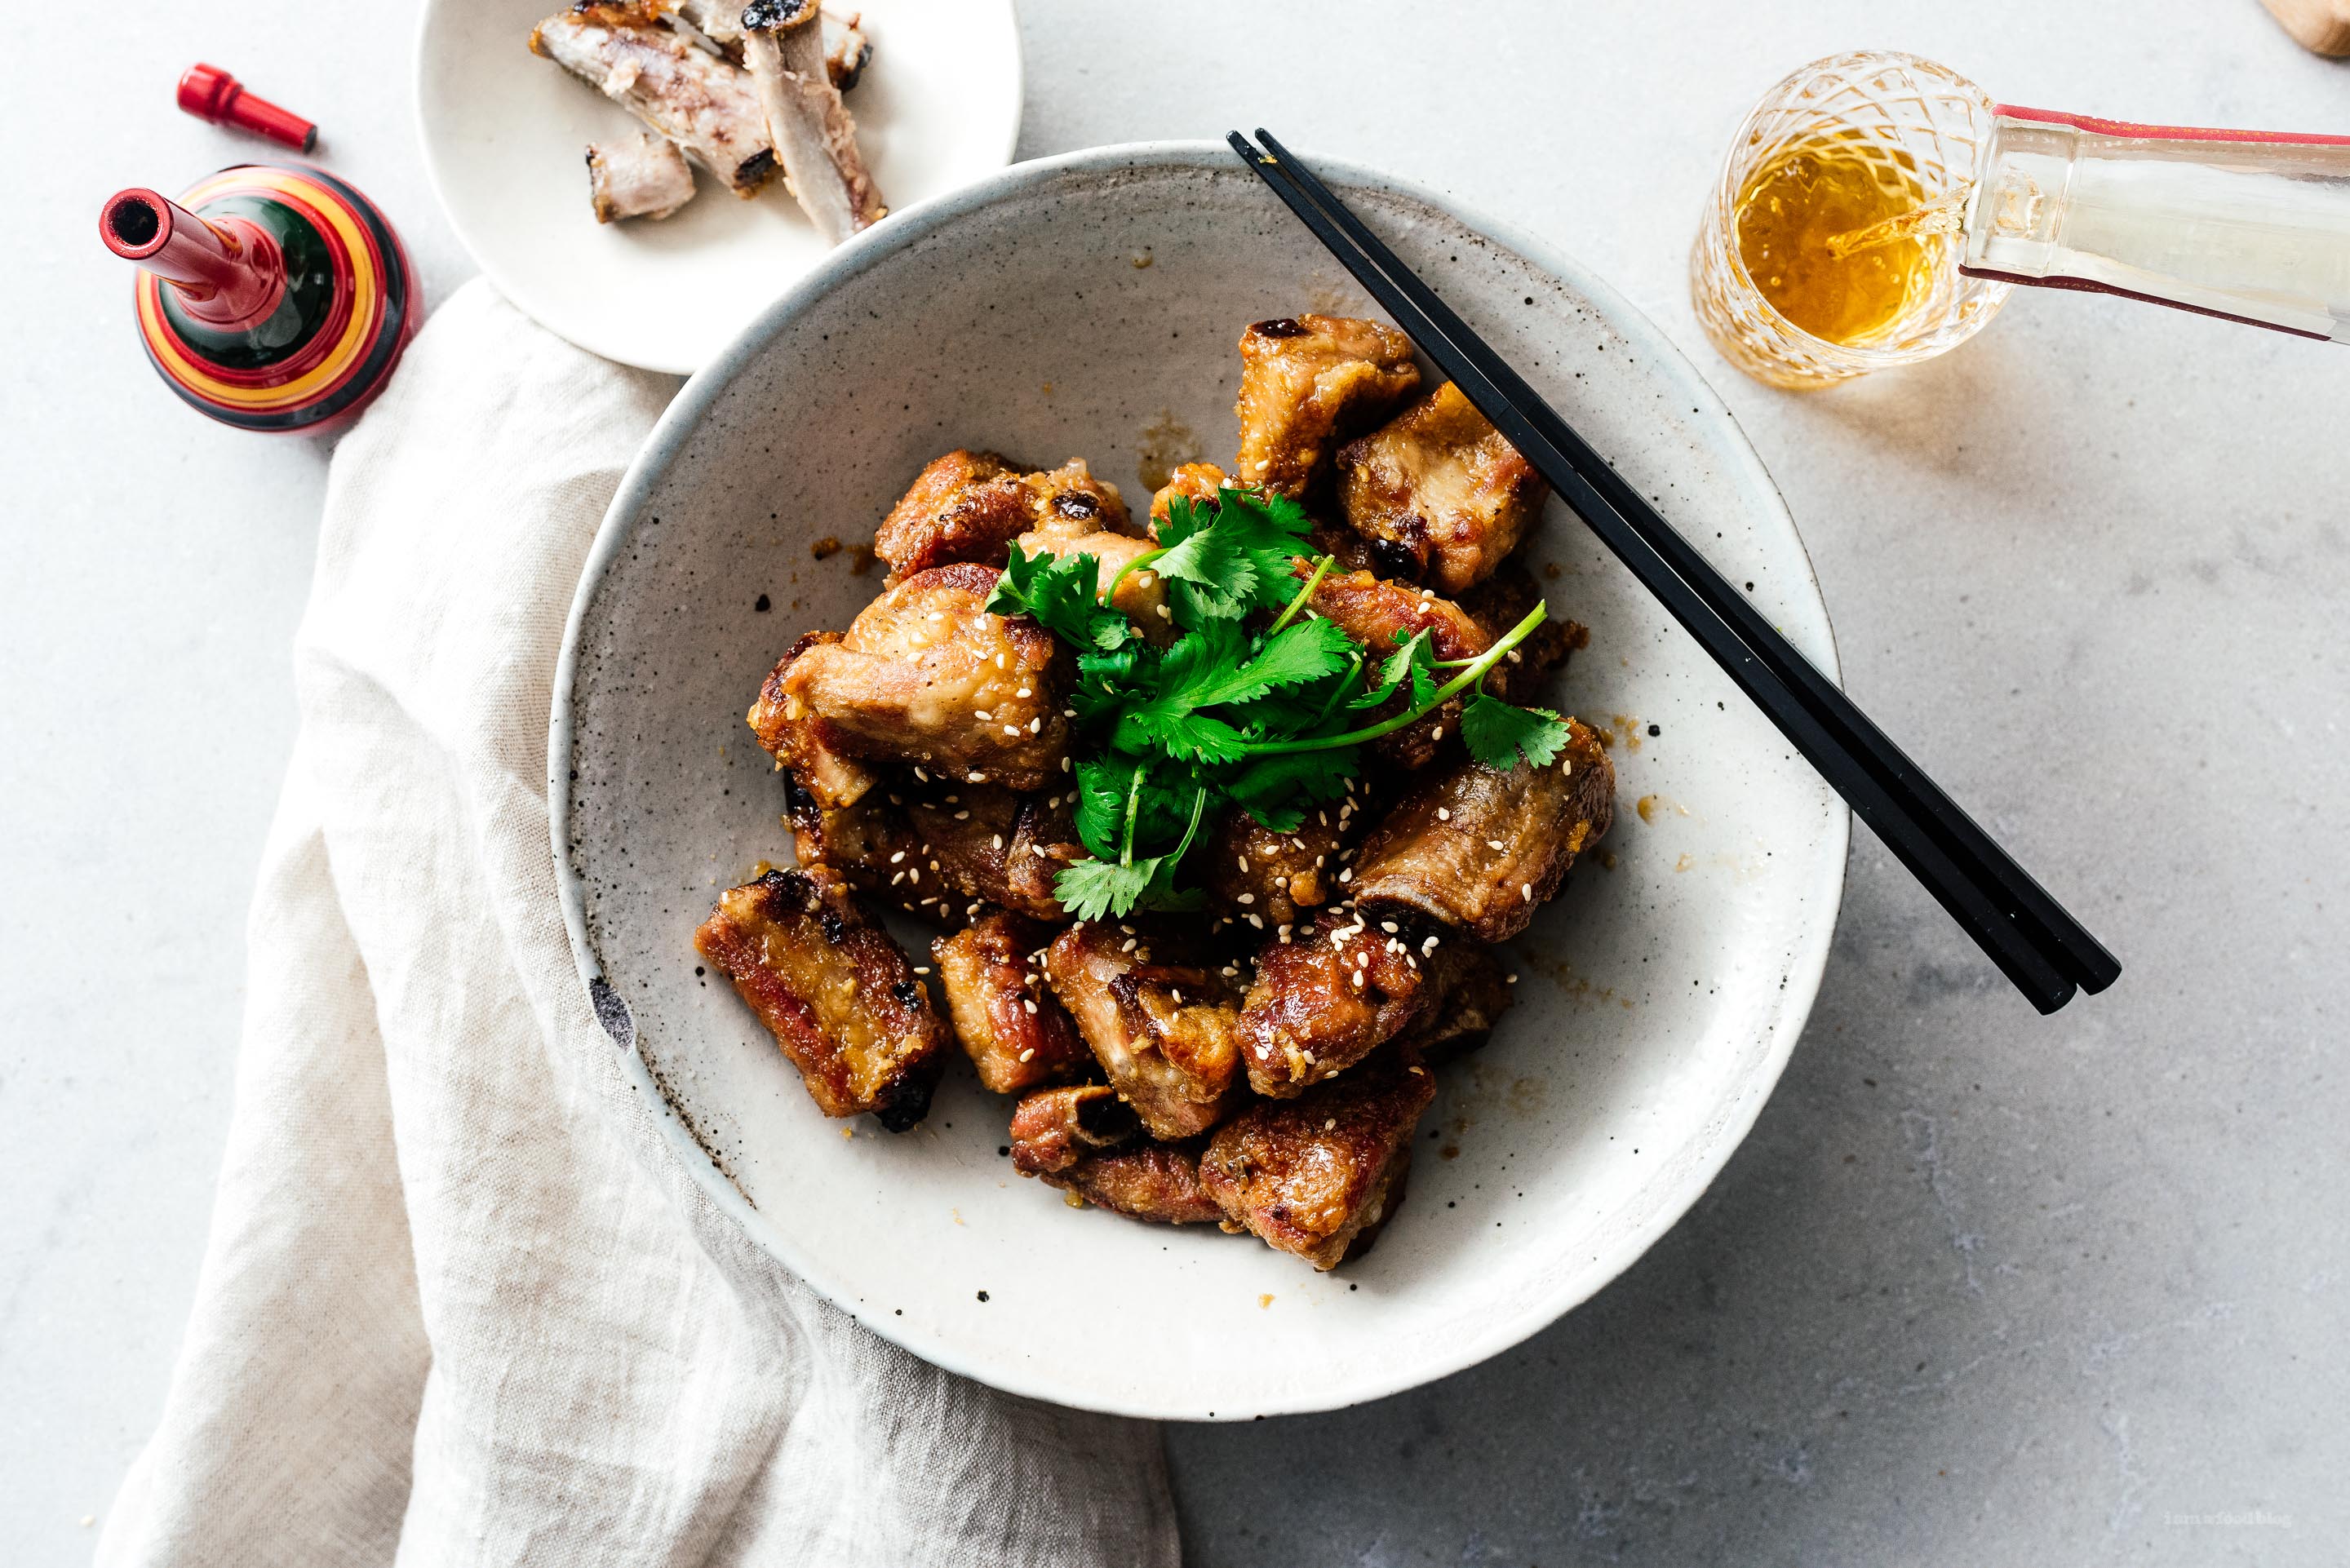
I Am... An Easy Oven Baked Crispy Honey Garlic Ribs Recipe
You’re gonna want to make these ribs because they practically make themselves.
Read More →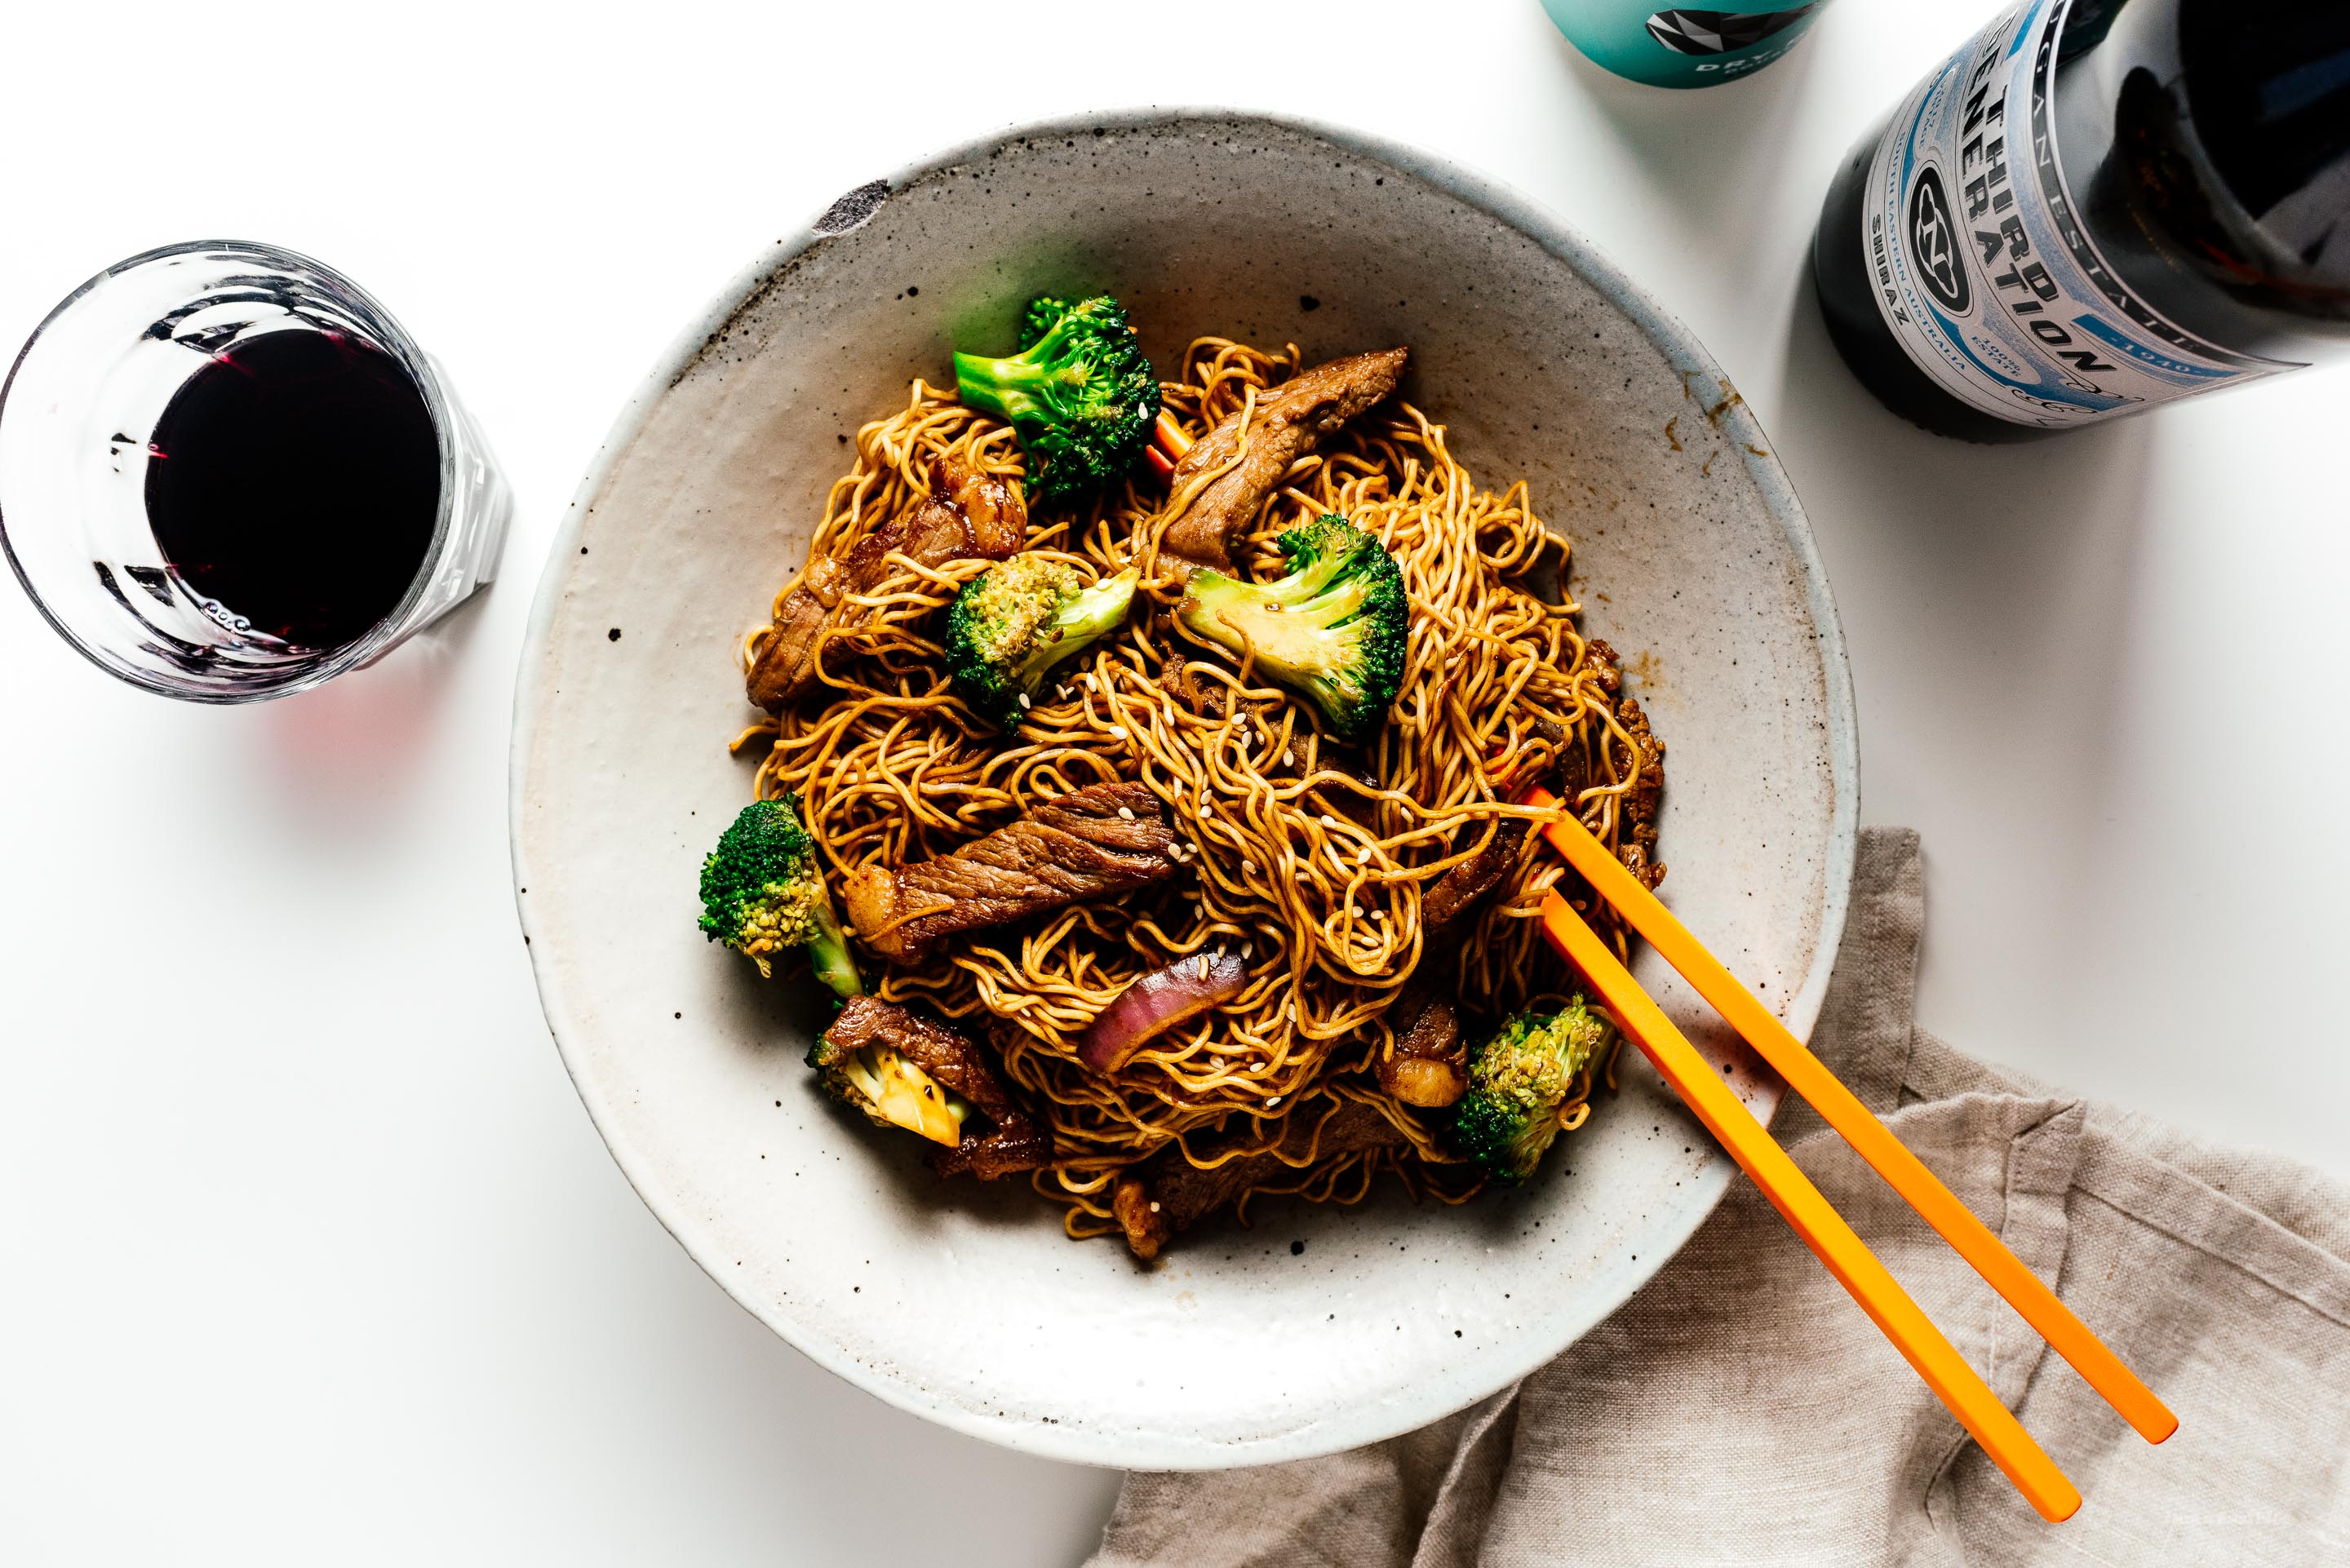
I Am... Easy Beef and Broccoli Chow Mein Recipe
Anyone else think that they could live on takeout? I definitely feel like I can because give me ALL the Chinese food. When I was a kid, my favorite food days were the days that my mom was too tired to cook. We’d order delivery and there would always always be some sort of chow mein dish. It’s funny because even though we are Chinese and my mom makes perfectly delicious chow mein, there’s something about delivery chow mein that is so much better.
Read More →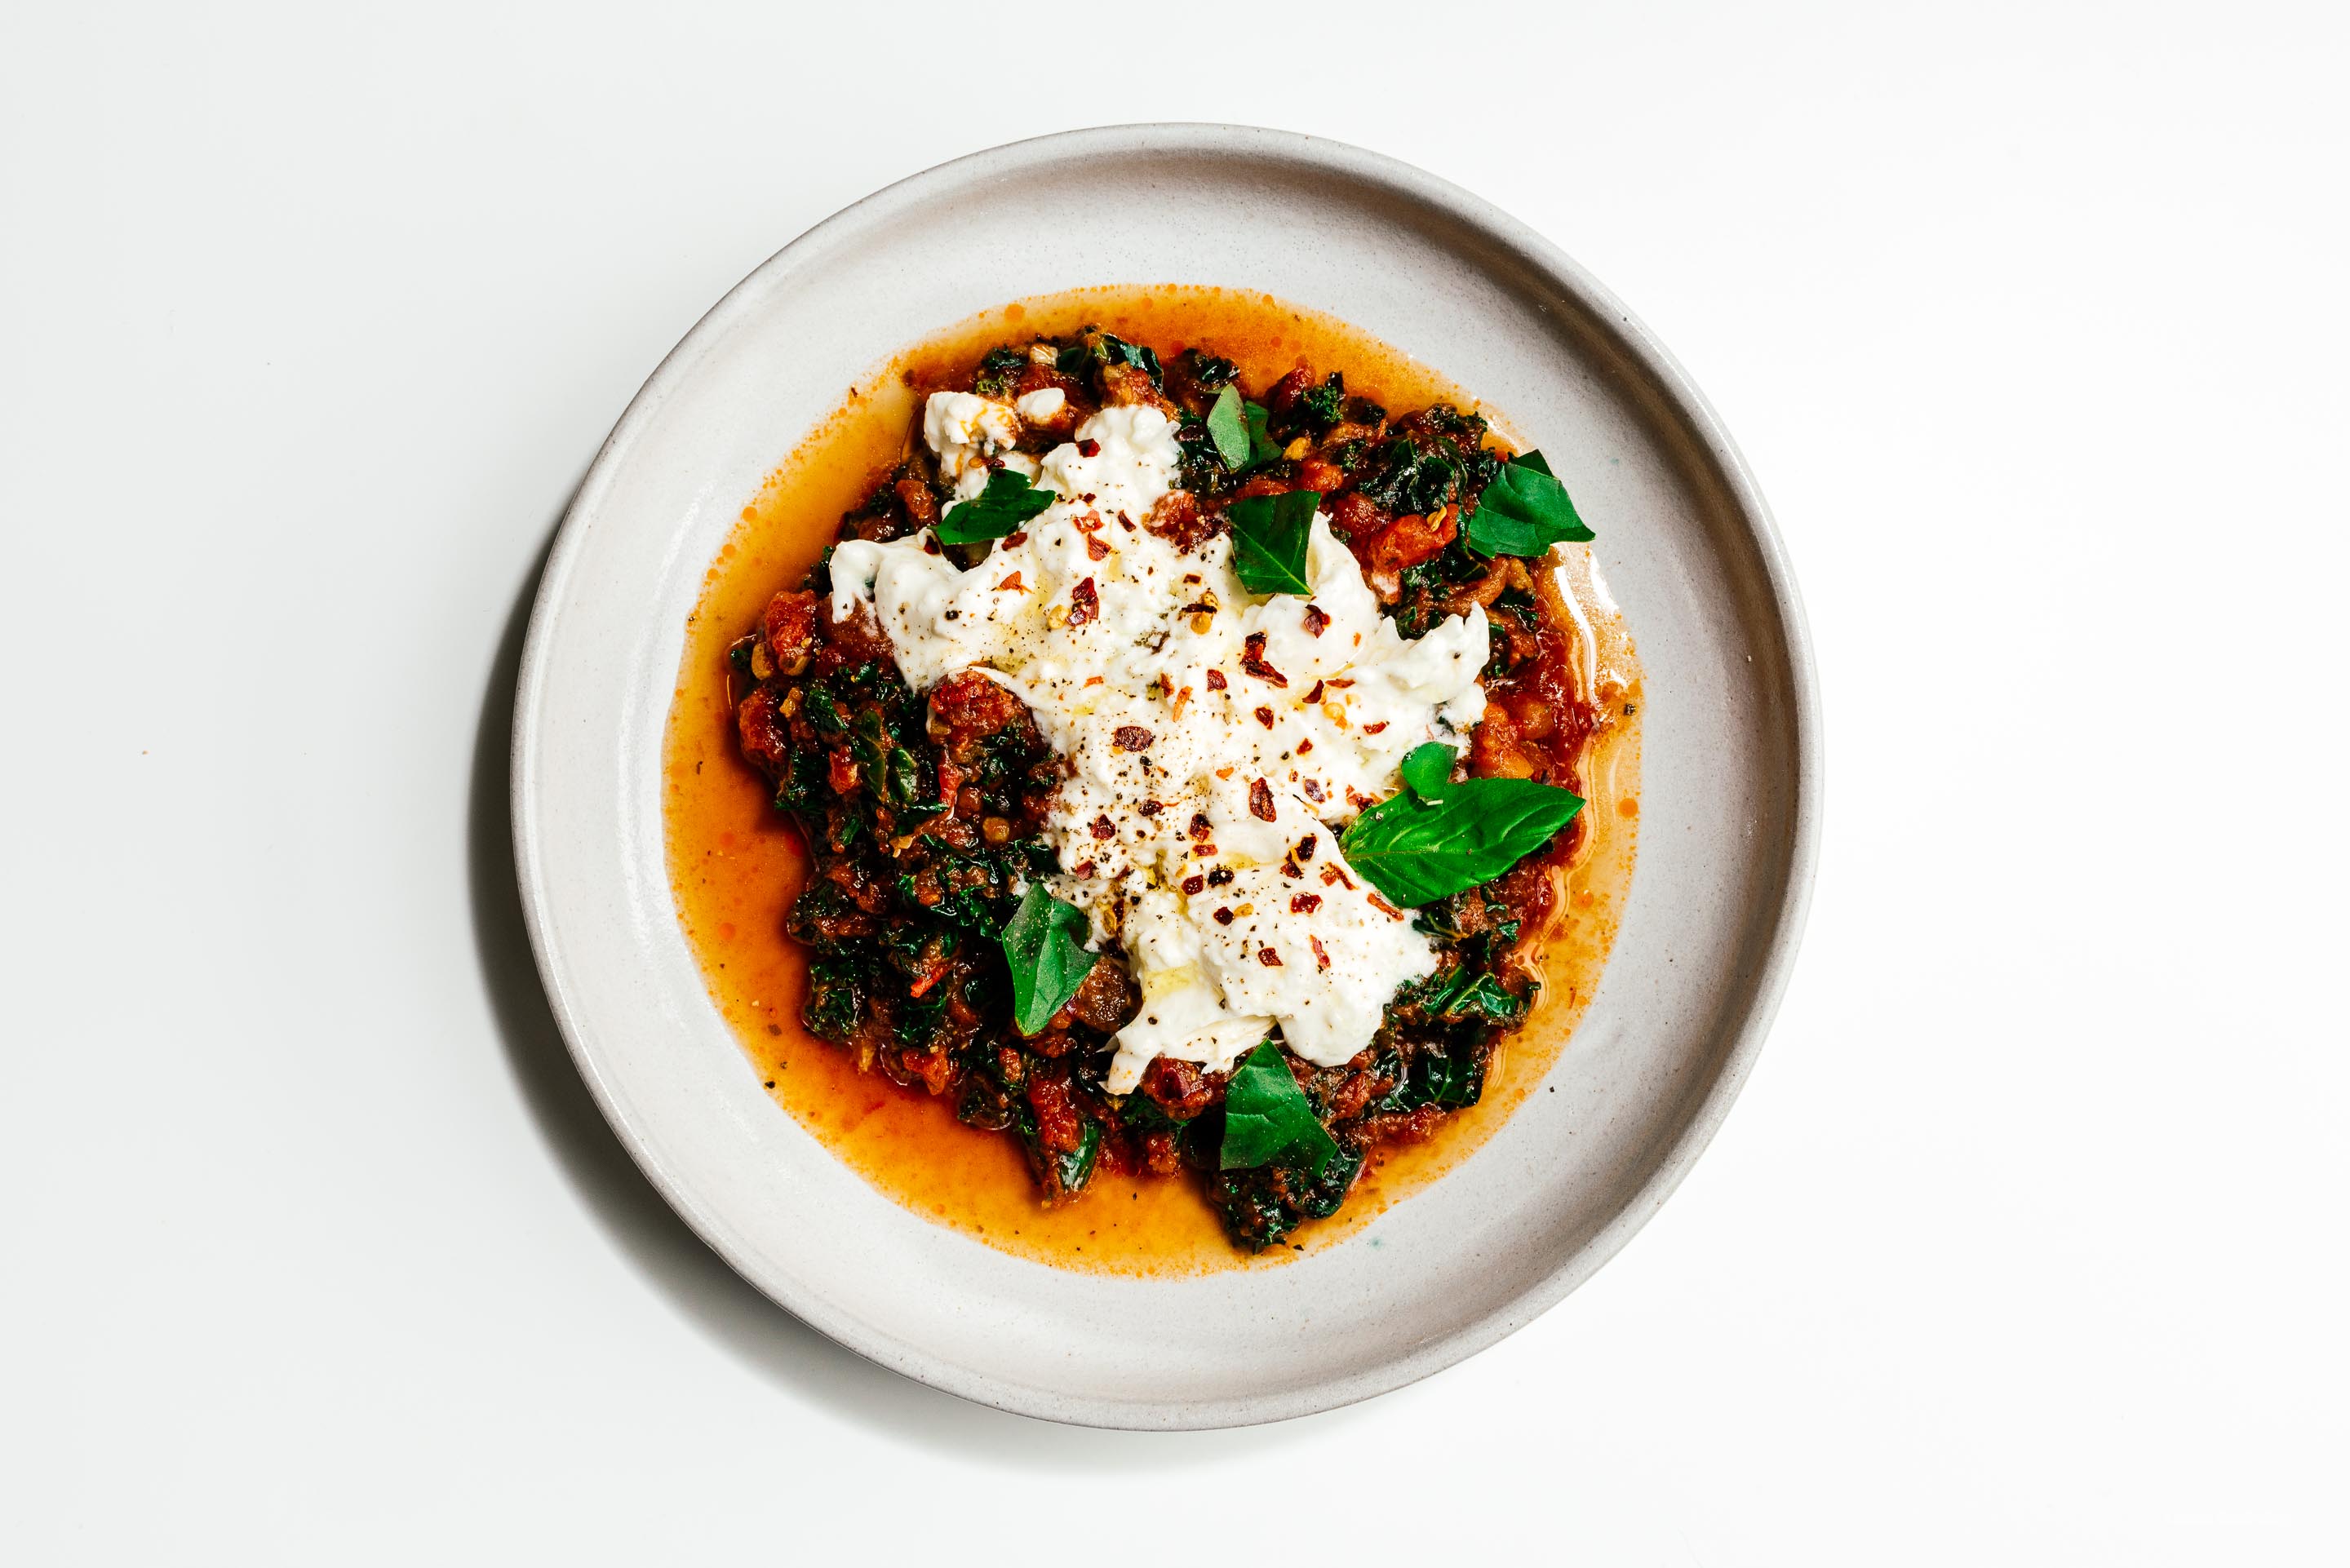
I Am... Burrata and Kale
If you’re looking for a quick and easy snack that still has a bit of luxury, look no further than burrata and kale. Burrata is everywhere these days and I’m still obsessed with its creamy, luscious, soft curds. It’s always burrata season!
Read More →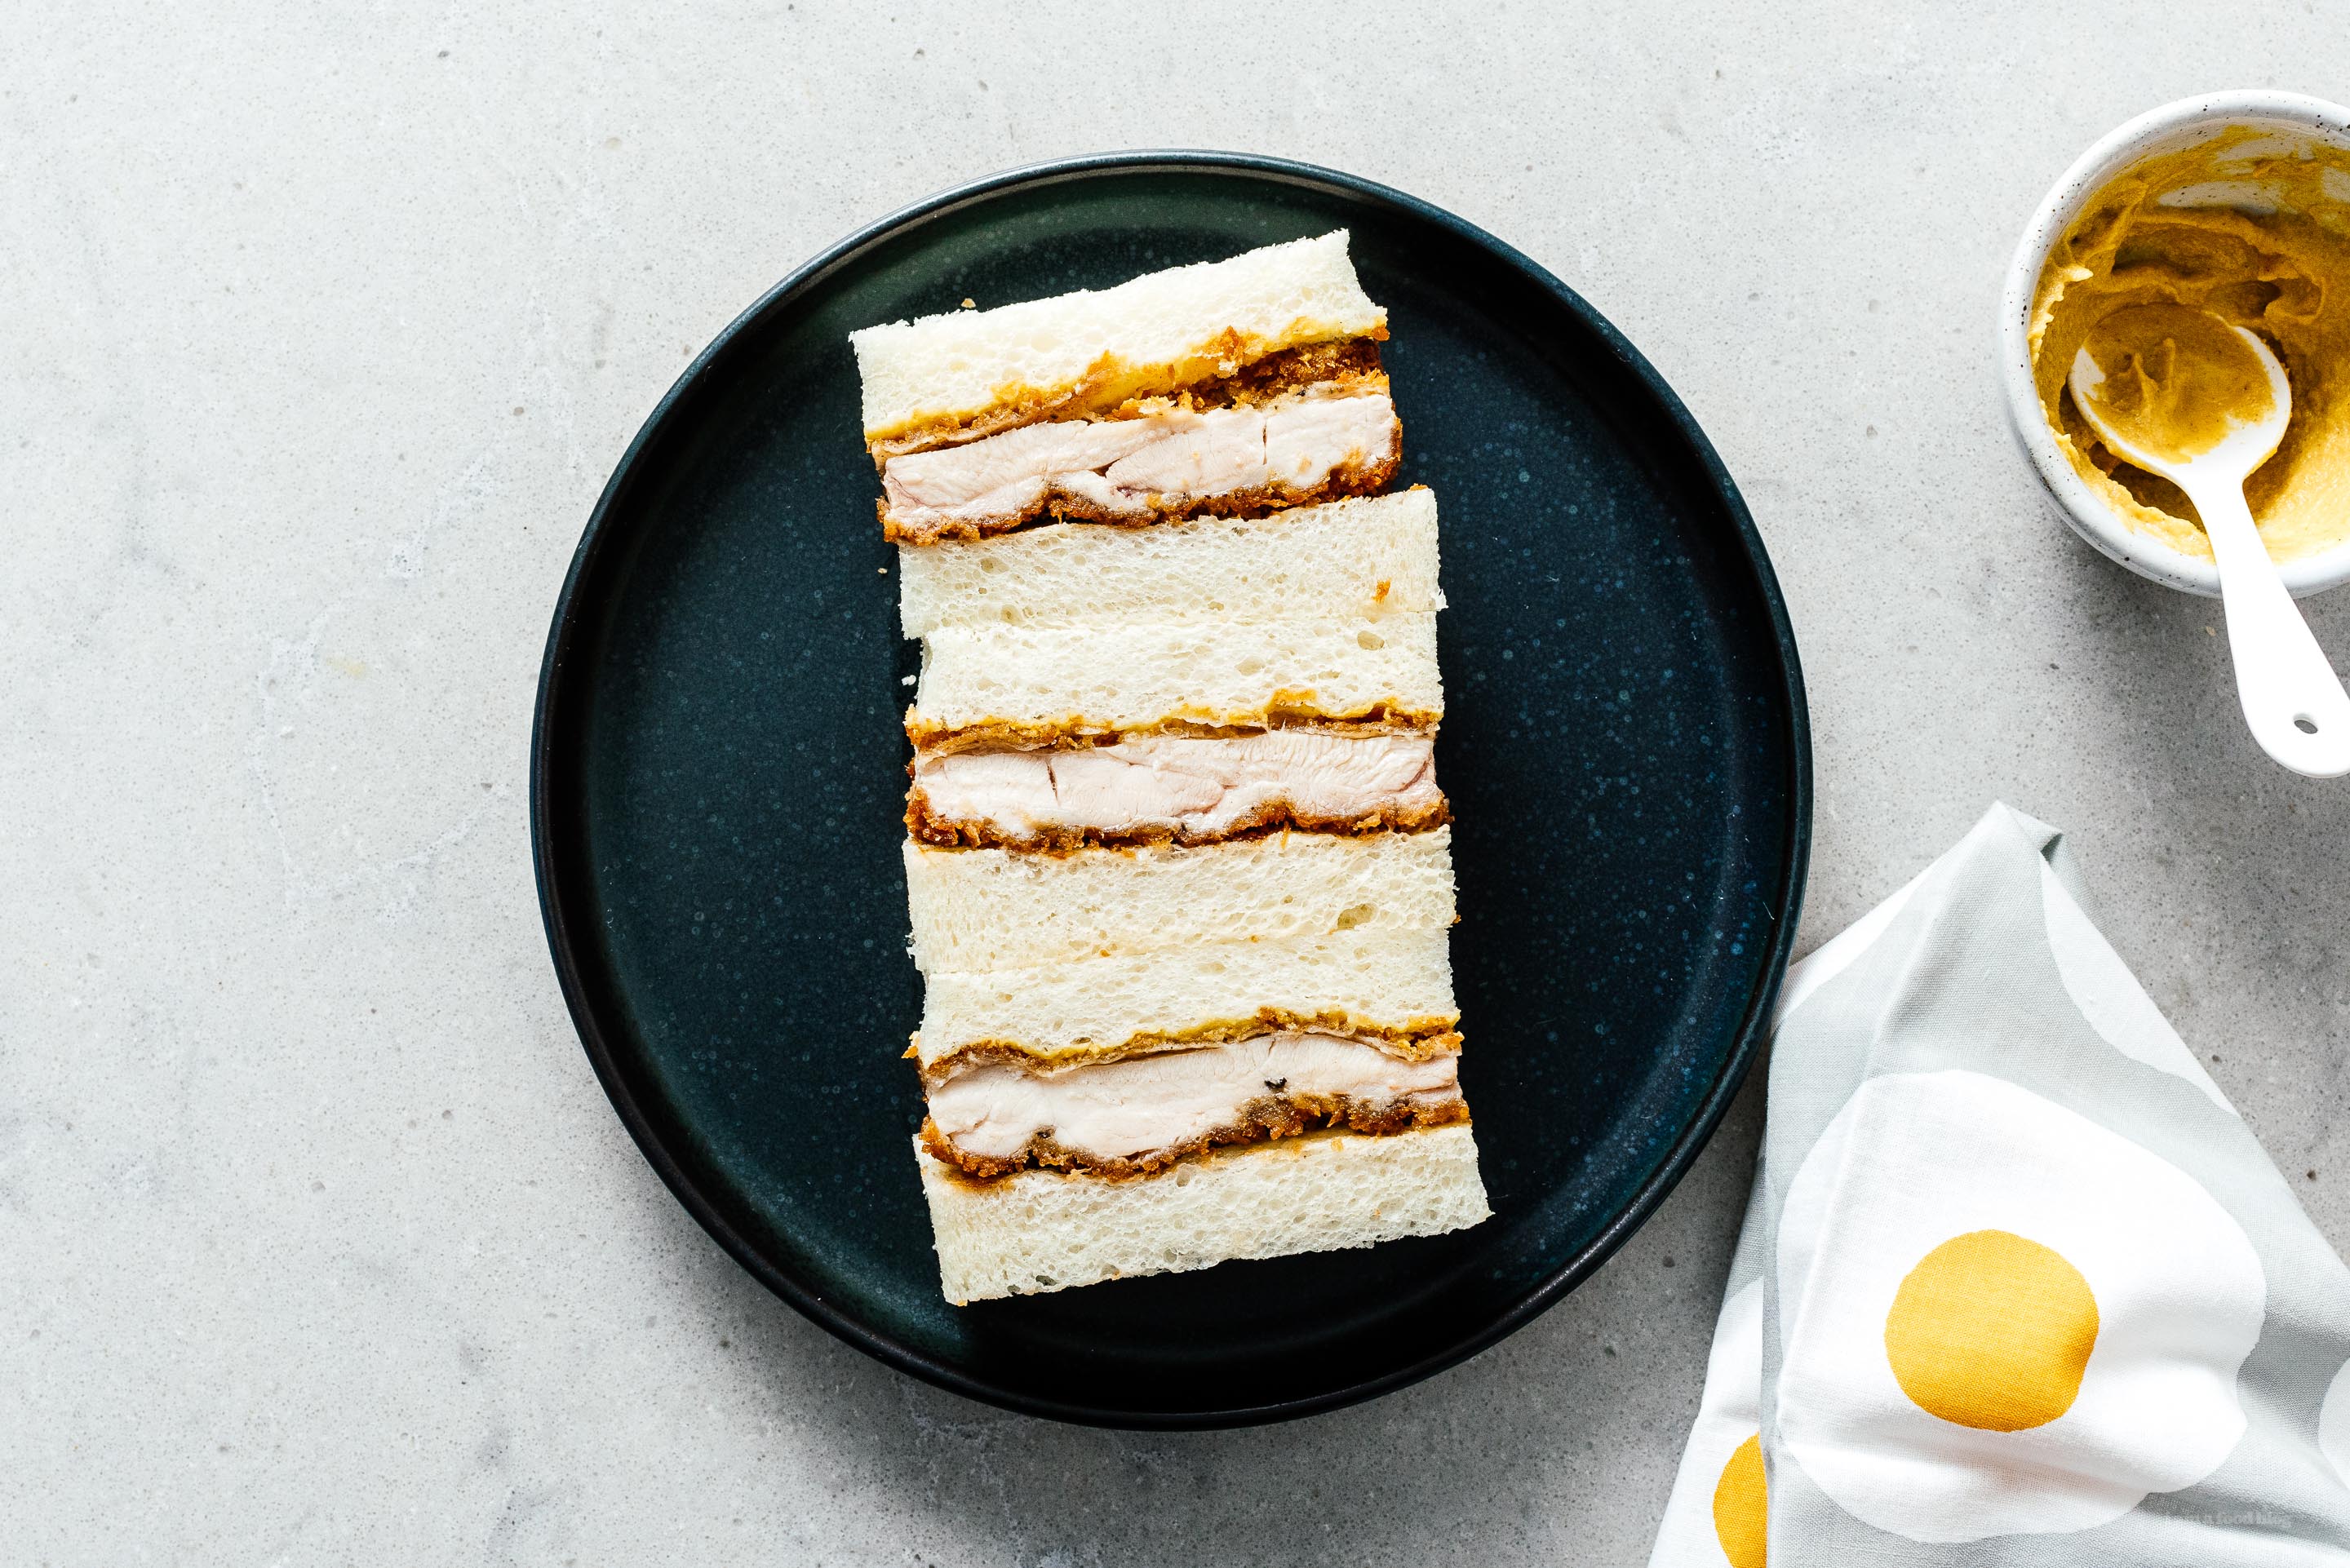
I Am... Chicken Katsu Sando: Crispy Japanese Chicken Sandwich Recipe
Shatteringly crispy panko crusted katsu-style chicken cutlets with kewpie mayo and karashi mustard between two slices of fluffy white Japanese milk bread.
Read More →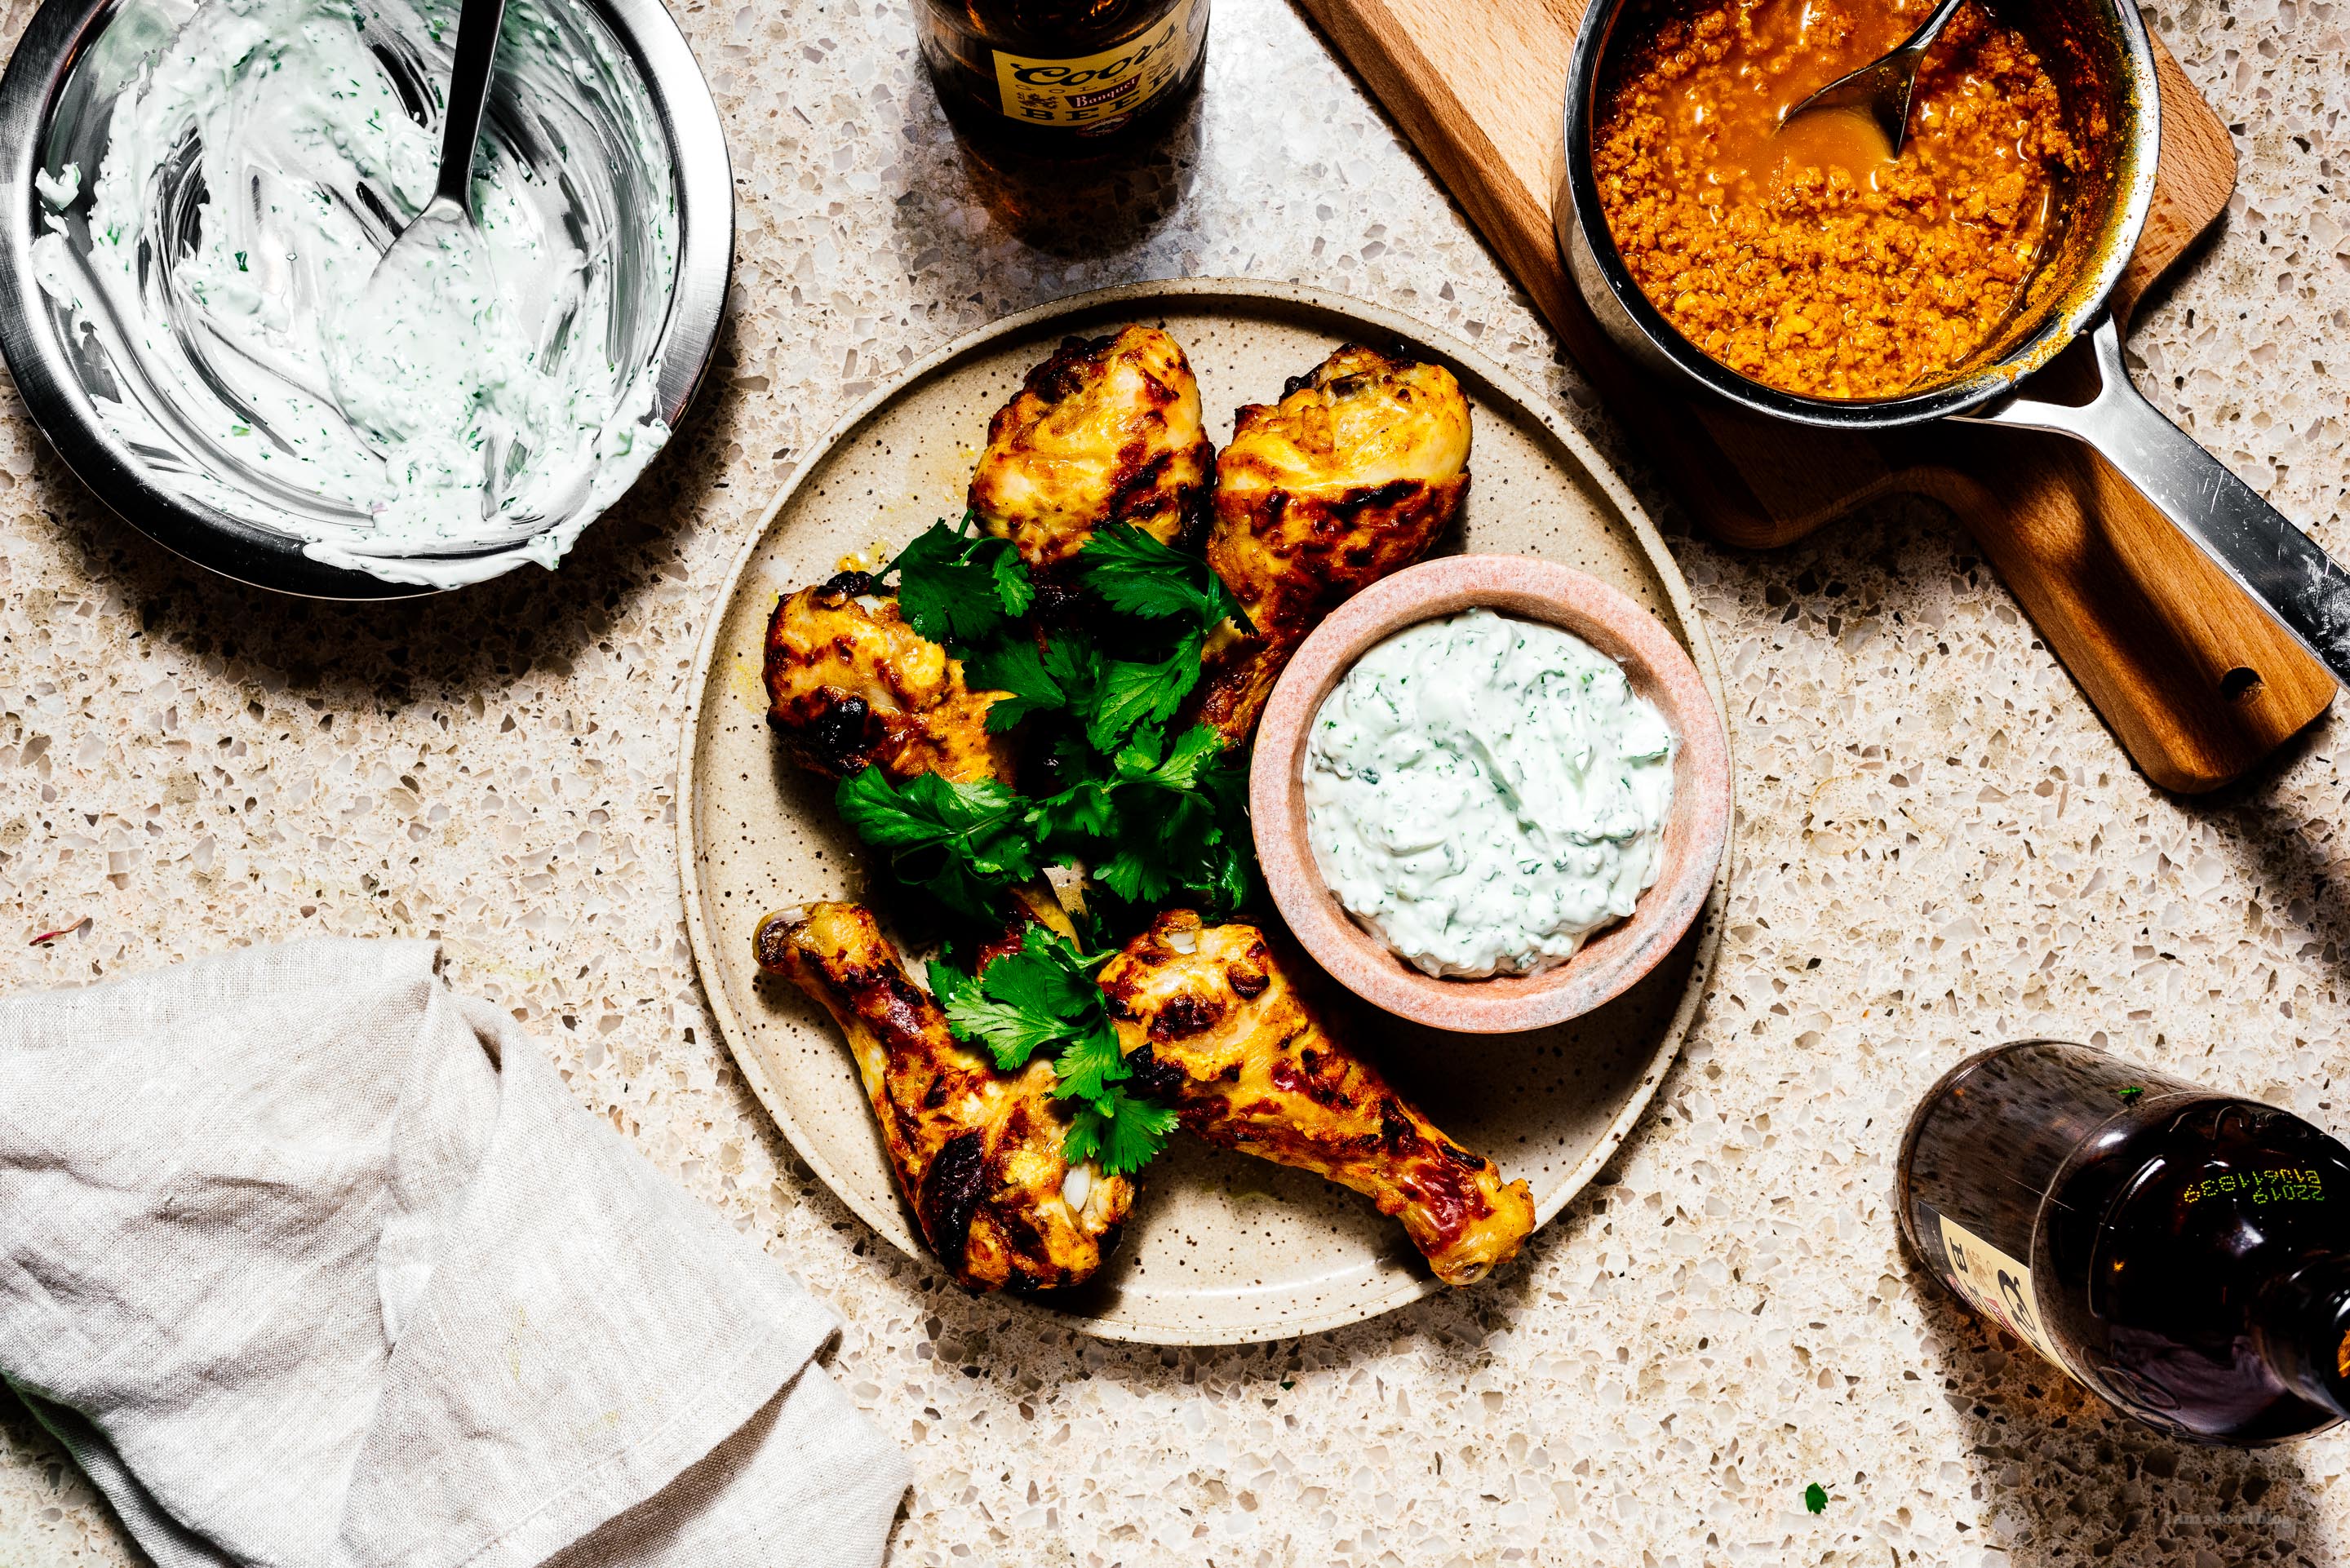
I Am... The Easiest 8 Ingredient Oven Broiled Tandoori Chicken Recipe
Next to Chicken Tikka Masala and Butter Chicken, Tandoori Chicken is probably the best known Indian chicken recipe. This is a super easy, super delicious, and just really pretty oven grilled chicken recipe that can also be grilled over charcoal if you have that handy. Spicy, fragrant perfectly cooked chicken served with a quick two ingredient kind-of raita. We polished these off in nothing flat with a side salad. So, so good. Cooking Notes Garam Masala is a generic Indian spice blend. Properly in India everyone makes their own and they are often family secrets. Here in the west it’s probably easier just to try to buy a quality garam masala, like Simply Organic's Garam Masala. Garam masala includes pretty much all the traditional Indian spices. Why the other spices then? Like store bought chili powder, because garam masala is generic, it’s often not tuned to your specific dish, and the spices are often not as strong and fresh as they could be. In this case, I wanted more cumin and coriander flavor, and also wanted the chicken prettier, so added turmeric too (which has loads of health benefits, besides being pretty). Although this is dinner and chill, crushing your own coriander is still a great idea. Whole coriander keeps longer in your pantry, and the difference is like freshly crushed pepper vs ground pepper. There’s no contest, it’s not even the same spice. On the other hand, crushing cumin is a major pain , and fresh turmeric stains everything you own, so stick with the ground versions of these spices. Buy small amounts and seal tightly. Dry roasting the spices blooms them and opens up their flavors. You can really smell the difference after just a minute. Be sure to turn on your hood vent for this step. Lastly, traditionally tandoori chicken is colored red from either red food coloring or kashmiri chili, neither of which are dinner and chill style ingredients, but feel free to use these if you have them. What do you need? A baking sheet with a rack that fits, and an oven. How do you serve it? We served ours simply, with a two ingredient raita made of the remaining yogurt and equal parts chopped cilantro. You can also serve with naan, basmati rice, or go really nuts and have an Indian feast with biryani, daal, and butter chicken meatballs.
The Dinner & Chill Super Easy 8 Ingredient Tandoori Chicken Recipe Serves 21. Season your chicken with salt and pepper. 2. Toast your spices in a dry pan over medium heat until fragrant (1 min) 3. Combine with yogurt, ginger, and garlic, and marinate chicken for a minimum of 30 minutes. 4. Preheat your oven to 500ºF. Brush off as much marinade as possible and place chicken on a rack over a foil lined baking sheet. 5. Broil your chicken for 15 minutes, checking back every few minutes to ensure your chicken isn’t burning. 6. Flip the chicken and broil 15 minutes on the other side, or until chicken hits 155ºF in the center. 7. Serve immediately.
- 1 tsp ground cumin
- 1 tsp coriander (preferably fresh crushed)
- 1 tsp tumeric
- 1 tablespoon garam masala
- 1 tsp Indian chili powder or cayenne powder (very optional)
- 1/2 tub (8oz) yogurt (preferably Greek)
- 2 cloves garlic, crushed
- 1/2” ginger, crushed
- 1lb chicken drumsticks

I Am... Mile High Mini Japanese Soufflé Pancakes Recipe
Aren’t these the cutest pancakes ever?! Ever since I made the regular size Japanese soufflé pancakes, I’ve been wanting to make mini ones. Well, what actually happened was that I was talking about them so much, trying to figure out what other ways I could make them fun that Mike suggested mini. And here we are. I think I might even like the mini ones more than the regular.
Read More →
I Am... Friday Finds: 5.24.19
It’s the last Friday in May! No, wait, I just checked the calendar, it’s the second last Friday in May. Regardless, the weather has decided that it is summer and the days are hot and long – not a bad thing but also just a touch worrying with all the global heat-up that has been going on. Anyway, what have you guys been up to lately? I’ve been working a bunch, as well as lurking around on the internet. I”m looking forward to maybe watching the new Aladdin? I’m not sure if we’re going to catch it in theaters but I kind of want to but kind of don’t want to? I’ve also been watching various Youtube videos of all the BTS rage. I’m not ARMY (that’s what BTS fans call themselves) because they seem too hardcore for me, but it think it’s super interesting how they’re everywhere these days and I kinda like their music. Anyway, here are a bunch of articles I’ve read lately. This weekend I’m planning on making some soufflé pancakes – wish me luck! I hope they turn out fluffy ;) Webstuff:
- Wholesome internet friends.
- I would definitely give this a try but I don’t know about strawless bubble tea.
- I’ve watched a couple episodes of Netflix’s Street Food and I like them! This one was particularly good.
- This is an insane story.
- Why?! Something needs to be done about the rotting fish sauce on the East coast of Canada.
- I know it’s trashy, but I love Buzzfeed listacles. This one of summer reads has me excited to get some new books.
- Apparently if you love La Croix, you’ll LOVE Spindrift.
- I’m not Gen Z but I passionately love closed captioning.
- We’re on the verge of the Age of the Slacker.
- Ultra-processed foods are even more bad for you than you thought they were.
- There’s CBD everything these days – can it really do everything?
- Move over soy, peas are here to push their way onto the plant based protein scene.
- LOL. AirPods still going strong.
- These lil potato dumplings are right up my alley.
- Crispy potatoes with garlicky yogurt and pickled red onions? Sign me up!
- Oh hello Instant Pot smoked gouda mac and cheese.
- I kinda really want a Cricut so I can do custom t-shirt’s. Does anyone have one? Do you love it?
- Thinking of trying out this face sunscreen this face sunscreen because I just ran out. It looks promising. I hate greasy sunscreen face so I figure oil free is the way to go.
- This book has been getting a lot of buzz – it’s on my want to read shelf.
- We’ve been eating jia jiang mian noodle bowls all week long.
- I love lemon-y zoodles!
- Make this sauce and put it on everything, especially if you’re grilling this weekend.
- Chocolate chip cookies for the win.
- I miss Japan.
- Orange chicken is my friend.
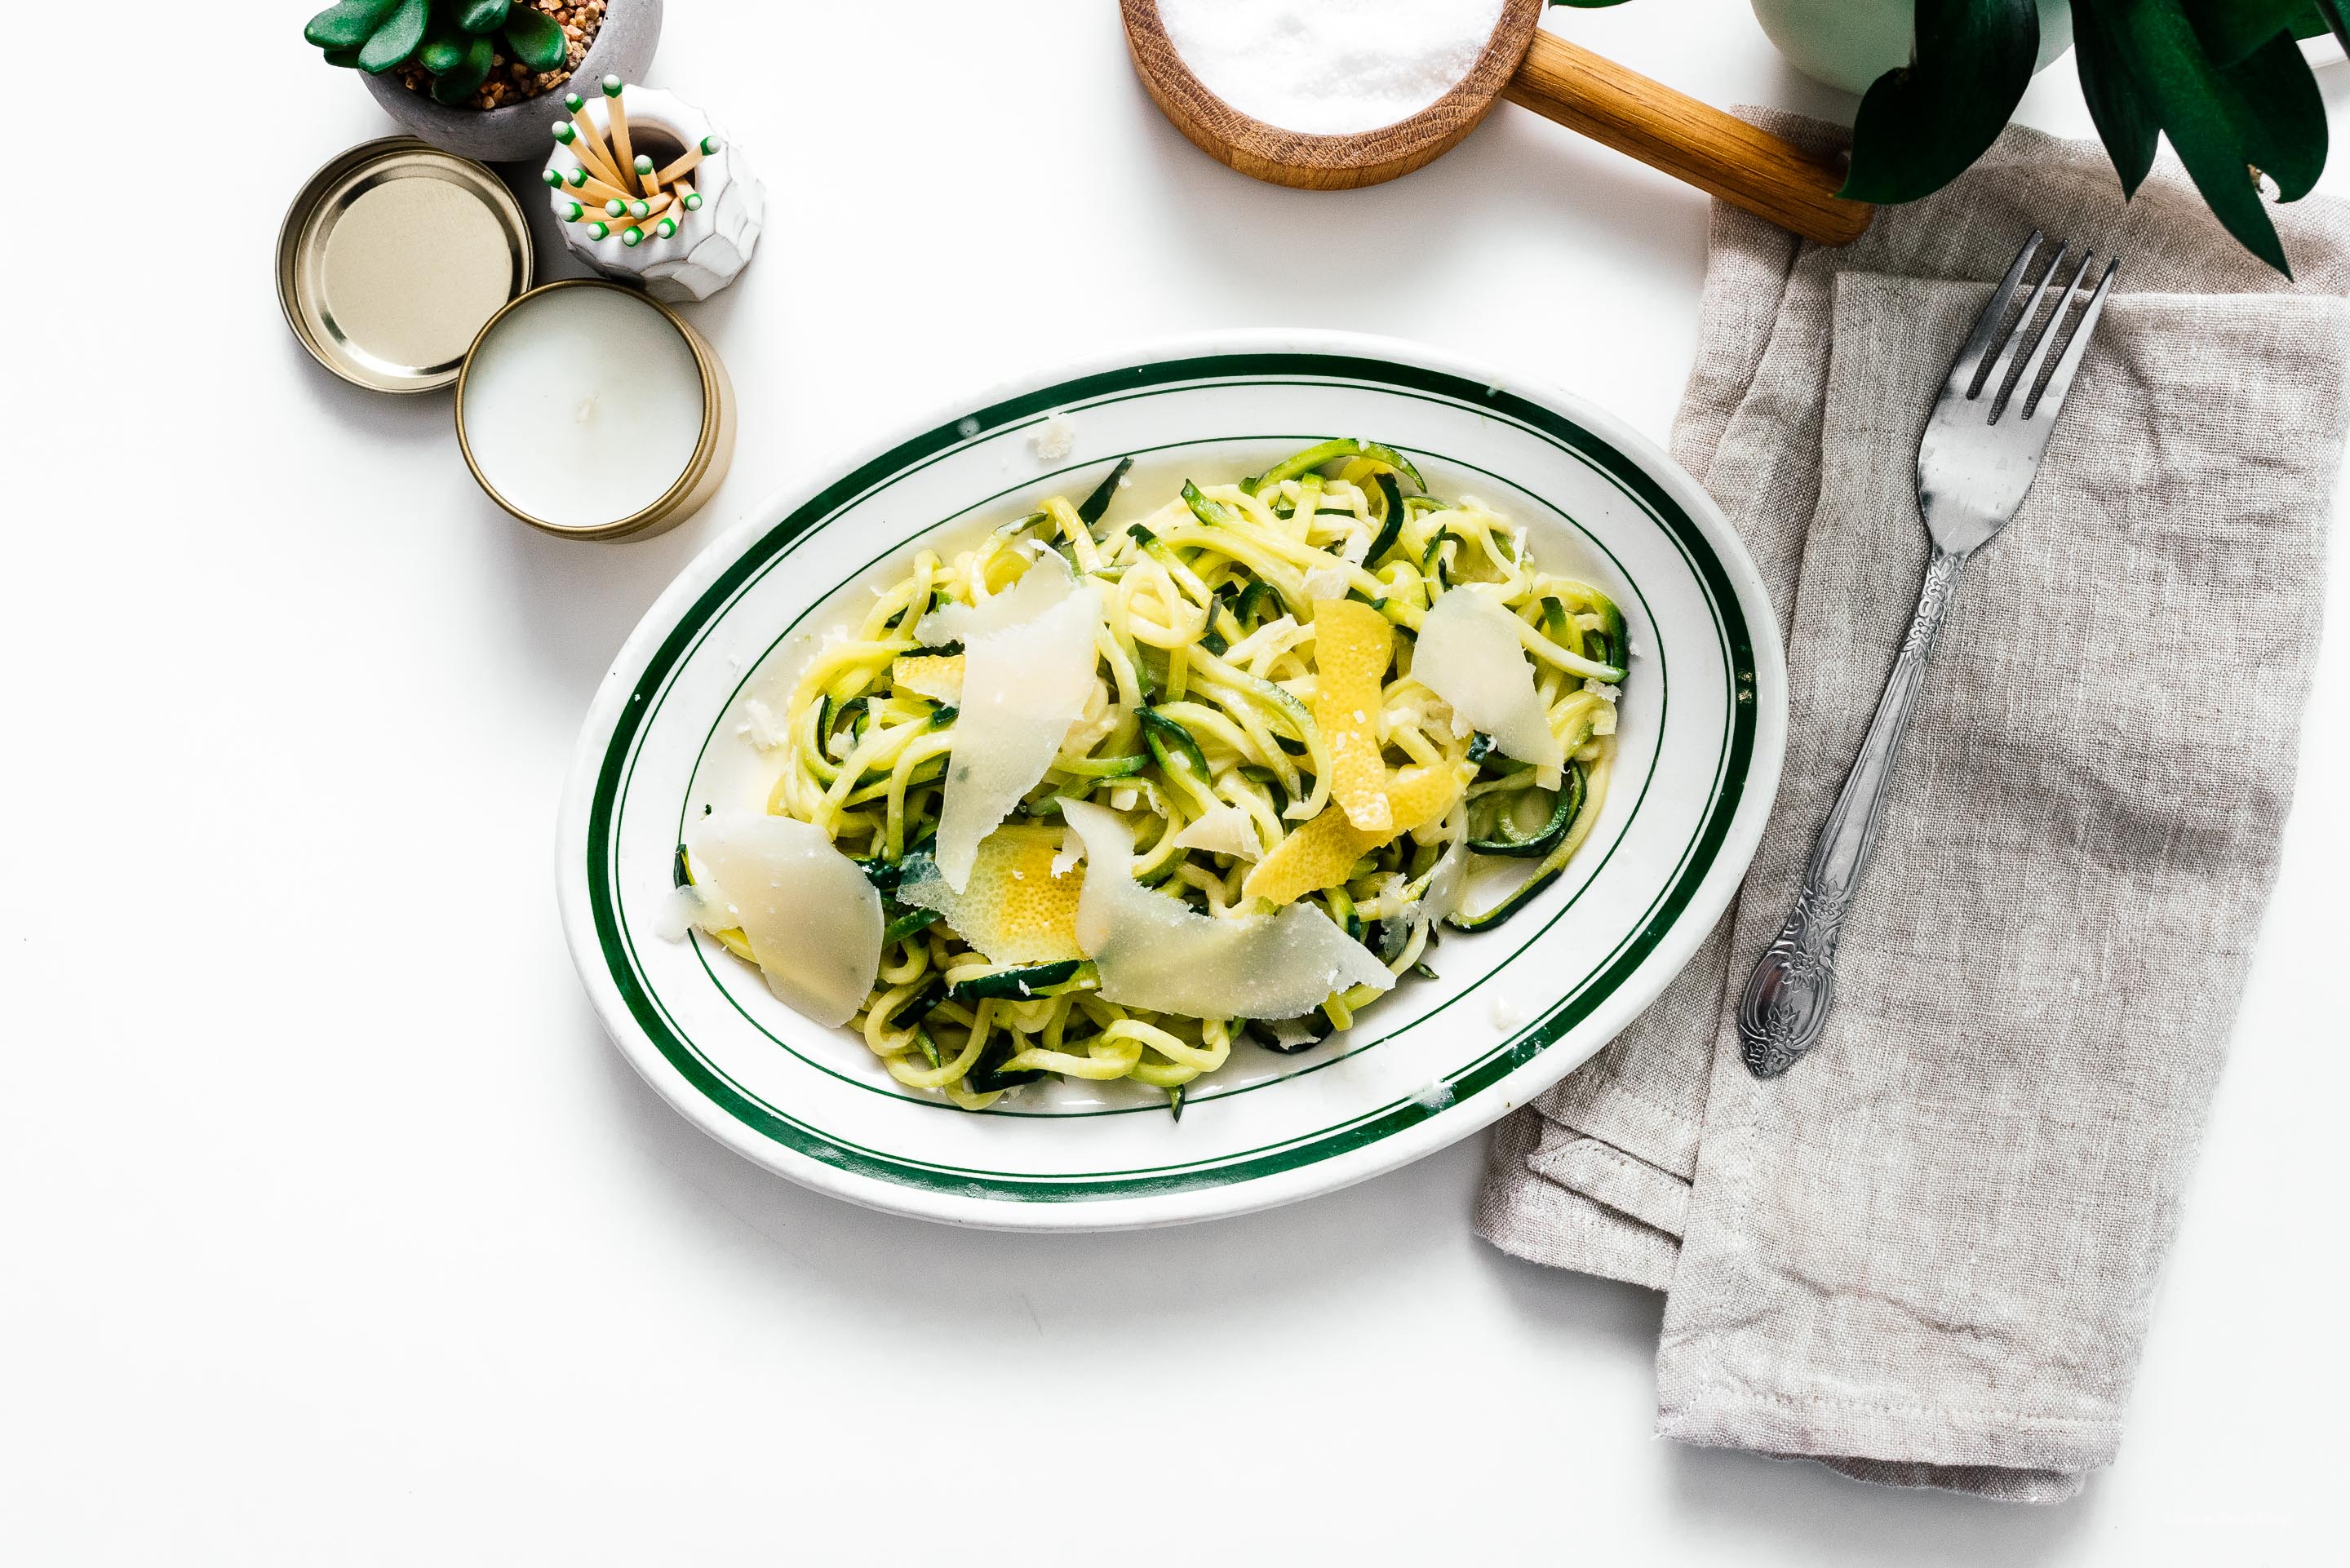
I Am... Keto Friendly Creamy Lemony Zoodles
I love zoodles. I know they’re not noodles, but somehow, just the fact that they are zucchini in noodle shape fools me enough – I find them super satisfying. When I’m feeling fluffy and want to cut down on carbs, I use them wherever noodles are used: in pho; with tomatoes, basil, and burrata; and in a shrimp pasta minus the pasta. My latest thing is creamy lemon zoodles, just like creamy lemon pasta! By happy coincidence, this happens to be a keto-friendly dish! One of our friends is currently on a crazy keto, intermittent fasting diet and he was telling us everything that was okay to eat and while he was describing everything, I was thinking, “Hey, my dinner last night was keto!” This is super quick to whip up – the cream and butter are simmered for a short while to thicken then the zoodles are tossed in the pan for a quick cook before finishing everything off with parmesan. Salt and pepper and a bit of lemon zest for prettiness and dinner is done!
Keto Friendly Creamy Lemony Zoodles serves 1-2Read More →Melt the butter and the cream together in a non-stick pan over medium high heat, until the butter is melted and the cream starts to bubble and thicken slightly. Add the zoodles and lemon juice. Cook, tossing, until the zoodles are cooked but not mushy. Remove from the heat and stir in the parmesan, tossing so that it melts and coats the zoodles. Season with salt and pepper to taste and finish with lemon zest and more parm, if desired.
- 2 tablespoons butter
- 2 tablespoons cream
- 1 large zucchini, spiralized
- 1 tablespoon lemon juice
- 1/4 cup finely grated parmesan
- salt and freshly ground pepper, to taste
- lemon zest, to finish
