


I Am... Mummy Dogs
Mummy dogs are not only cute and spoopy, they’re also super delicious. I’m obsessed with Halloween food. Give me all the themed parties with foods dressed up as other things. Halloween is one of the best – if not the BEST – holidays for dressing up food. Think: chewy chocolate cookies with googly eyeballs, sushi that looks like Totoro, and of course, mummy dogs! Imagine juicy hot dogs wrapped up with strips of buttery pastry and baked to golden brown perfection. Serve them up with mustard or sweet-n-spicy ketchup for the perfect handheld snack on your Halloween table.
What are mummy dogs?
A classic favorite for Halloween parties, mummy dogs are a take on pigs-in-a-blanket, but with a fun twist. Instead of making a blanket of pastry dough it’s cut it into strips. The strips wrap around hot dogs and bake up to look like a bandaged wrapped mummy. When you add on eyes, they’re unbearably cute.How to make mummy dogs
- Cut pastry into strips. You want about 1/4 inch strips of either puff pastry or crescent dough. If you’re feeling especially industrious, you can even make your own pie crust or rough puff pastry.
- Wrap the strips of pastry around the hot dogs, leaving a space for eyeballs about 1 inch down from the top of your mummy.
- Place the wrapped hot dogs on a parchment paper lined baking sheet and bake in a 375°F oven until golden brown.
- Remove, put on some eyeballs, and enjoy!
Mummy dog ingredients
This is the best part: you only need 2 ingredients: pastry and hot dogs. If you’re going to use candy eyes, you’ll need those as well.What kind of hot dogs?
Your favorite hot dog brand will work best. Classic all beef, pork, chicken, or turkey dogs work. You can even go with mini smokies for mini mummies.What kind of pastry for mummy dogs?
- Crescent dough - the classic mummy dog. You can either buy crescent rolls or crescent roll sheets. If you can find crescent dough sheets, they work well because you don’t have to roll out the dough or pinch together the triangle seams.
- Puff pastry - puff pastry is delicious and will give you a slightly puffier mummy with a flaky shattering bite.
- Pizza dough - pizza dough tends to bake up thick and is more filling. You can use your favorite pizza dough recipe or buy store bought dough.
- Pie crust - strips of pie crust are perfect for mummy dog pies.
How to make the eyes
I like using candy eyeballs because they’re so cute. Plus they’re so small that they don’t really effect the taste. You can also pick them off if you’re adverse to eating them. If you don’t want to buy candy eyes, you can also just dot on mustard. Or, use a small cookie cutter to cut out eyeball whites out of a slice of mozzarella cheese and use seaweed for irises.How to serve
These little guys taste great warm out of the oven or at room temp. Place them on a platter with small dipping bowls of ketchup and mustard. Mummy dogs are also perfect on Halloween platters.Variations
Cheesy mummy dogs Cut slices of cheese the same size as your hot dogs. Place the cheese under the hotdog and wrap with the crescent dough. Bake as per the recipe. Everything bagel spice mummy dogs Make the recipe as per below adding a sprinkle of everything bagel spice.Make ahead
You can bake these ahead of time and serve them at room temp. You can also wrap them, freeze them, then bake from frozen.How to reheat mummy dogs
If you’re going to reheat the mummy dogs, make sure you don’t attach the eyes until after reheating. To reheat, bake for 3-8 minutes in a 375°F oven or until heated through. Happy mummying! xoxo stephMummy Dogs
Mummy dogs are not only cute and spooky, they’re also super delicious.
- 8 oz crescent rolls (1 can)
- 8 hot dogs
- 16 candy eyes
Heat the oven to 375°F and line a baking sheet with parchment paper. Open the crescent roll dough and use a rolling pin to lightly roll it together so it forms one sheet. Pinch together the perforated parts, if needed.
Cut the dough into 1/4 inch strips.
Wrap the strips around the hot dogs irregularly, leaving gaps so they look more like bandages. Leave some space an inch from the top of the hot dog for the eyeballs.
Place the wrapped mummy dogs on the prepared baking sheet and bake for 10-15 minutes or until golden brown.
Remove from the oven and use a dot of mustard or ketchup to adhere the eyeballs. Enjoy dipped in mustard or ketchup.
If you can find crescent dough sheets, you can use those too, they’re easy to cut into strips.
PS - If you love Totoro and cute food, please check out all our Totoro themed foods! Throw an October Totoro movie night complete with snacks :)
I Am... Best Kitchen Buys for Prime Day
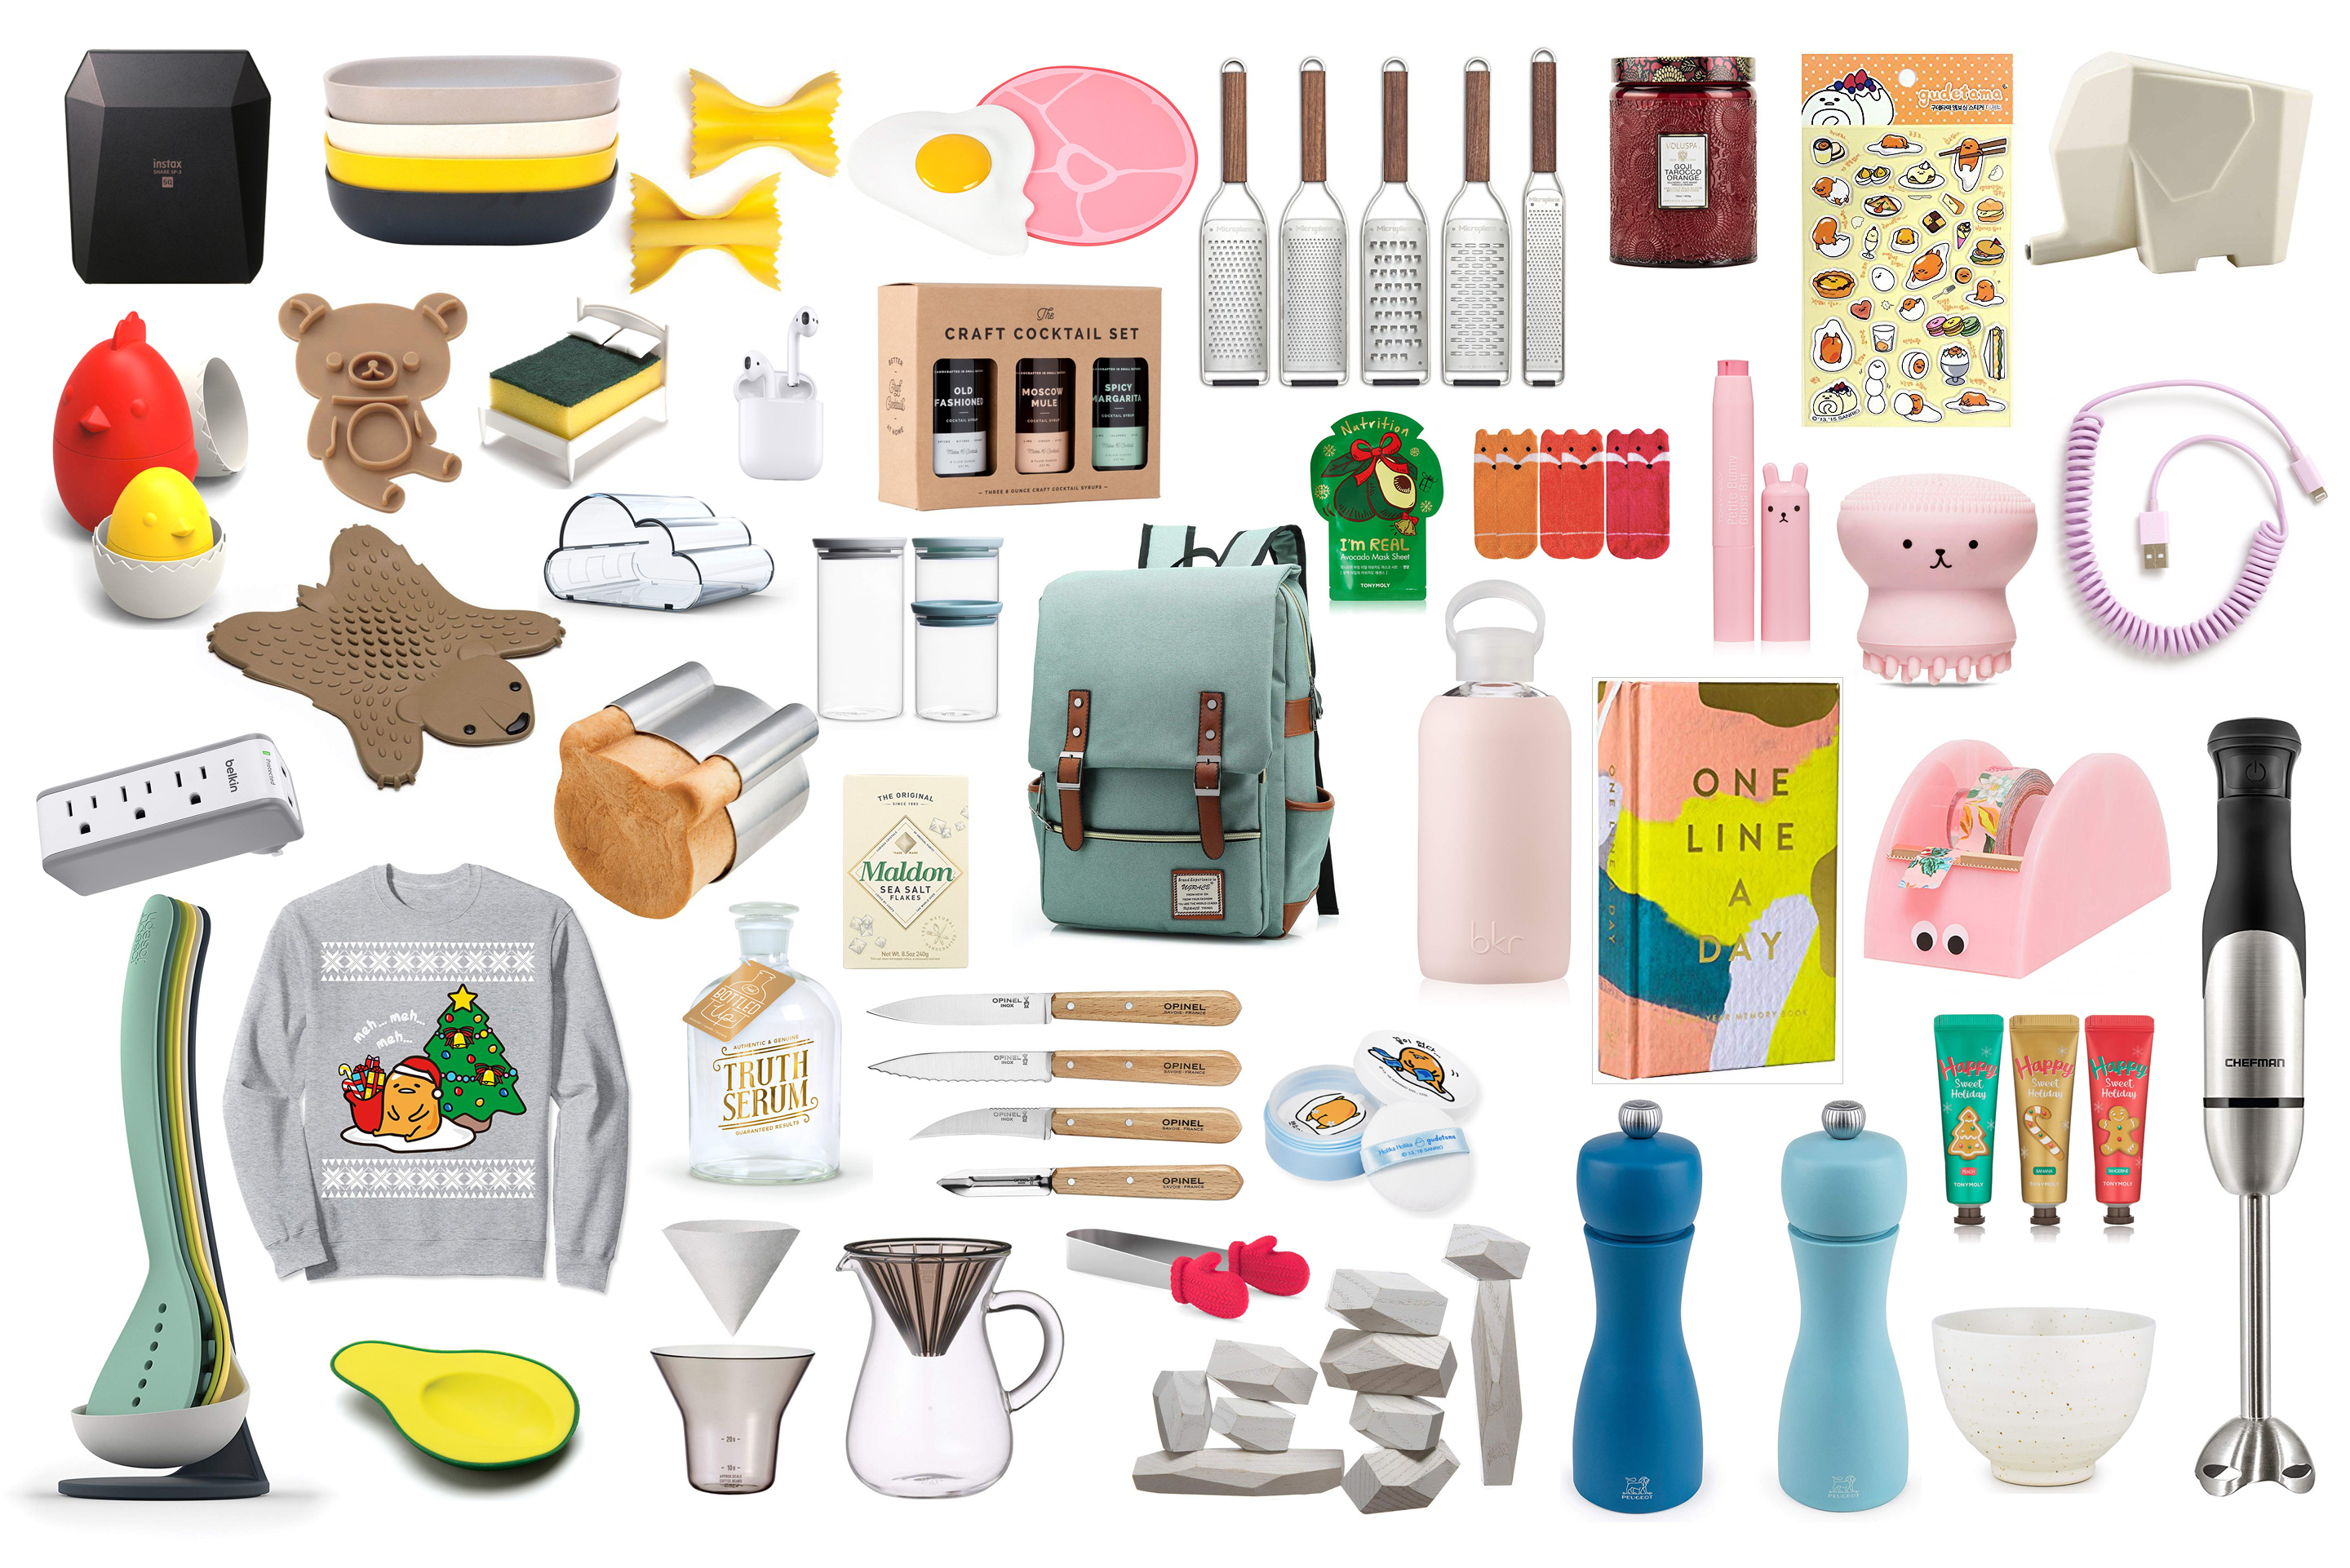
Prime Day is coming! It’s time to finally buy all the things you’ve been saving in your cart. Prime day is the best time to stock up on basic kitchen deals and treat yourself to kitchen steals. Why not do a little early holiday shopping and treat yourself! Here are some of the best things to get for your kitchen on Prime Day. If you, like me, thought there was only one Amazon Prime Day, you’ll be happy to know that there’s an October even called Prime Big Deal Days! Everyone just calls it Prime day though. It’s a two-day event and this year it’s October 8th and 9th. There will be both early kitchen deals and lightning sales, so get your keyboards and fingers ready. Prime Day deals sometimes sell out, so if you have your heart set on something, don’t hesitate. Pro tip, do a little (or a lot) of shopping before Prime Day comes along. If you really want something, put it in your cart and when the 8th hits, buy it right away without waiting. There are a couple of Prime Day deals happening right now, that you can buy, here are some deeply discounted, highly rated items.
Best Prime Day deals for home and kitchen stuff
KitchenAid Stand Mixer
The classic, classy 4.5 quart KitchenAid stand mixer is on a massive sale right now. It’s the #1 best selling in stand mixers on Amazon for a reason: it’s incredibly strong, versatile, and long lasting. It’s 18% off for its early Prime Day deal and who knows, maybe it’ll be even more on sale in October? One can hope. If you’ve had your eye on a stand mixer, definitely take advantage!Vitamix Blenders
The gold standard in blenders is Vitamix. We love and use ours every 2 days or so and we’re not even smoothie drinkers. There are so many things blenders can do in the kitchen to make your life easier, from blending sauces to making soups. Vitamix currently has some featured early Prime Day deals, and if I were to choose a new Vitamix, the 64 oz low-profile A2500 would be on my wishlist. It’s 30% right now and like all Vitamix blenders, is highly rated and built to last. Check here for other Vitamix featured deals.Instant Read Thermometer
Every home cook and kitchen NEEDS and instant read thermometer and this ThermaPro is 40% off. We’ve used this exact model recently while at a friend’s house and were impressed buy the speed and accuracy. We did a side by side with a Thermapen because we’re nerdy like that. At under $15 we’re definitely grabbing one to add to our camp/travel kitchen.Staub Cast Iron Braiser
I LOVE braisers. If you’re going to have only one cast-iron pan/pot/casserole in your kitchen, it should be this one. The high sides are perfect for searing, it’s deep enough to deep-fry in, you can use it on the stove top and in the oven, and it’s beautiful enough to bring right to the table. The glass lid is just the chef’s kiss on top, allowing you to peek at what you’re cooking without opening the lid. We have this exact braiser and I reach for it all the time. I prefer the insides of Staubs compared to Le Creuset because the insides are a smooth black enamel that doesn’t stain and is easy to clean. It’s 33% off right now, run, don’t walk. Bonus: grab this multifunctional spatula spoon that’s on sale too. It’s a high heat BPA-free matte silicone, has a large scoop and flat scraping side, and an acacia wood handle.COSORI Air Fryer
We love our air fryer so much that sometimes we joke about getting a fleet of air fryers that we’d keep out the countertop so we could air fry all the things at the same time. We updated to a COSORI air fryer recently and are seriously impressed with how air fryer technology has improved. Our current guy is this one which we are in love with, but it’s not on a Prime Deal right now. So, if you’re looking for a deal and want to try COSORI, this one is 33% off and looks like the perfect size for a couple. If you need bigger air fryer, this COSORI is bigger and is an early Prime Day sale.Nespresso
Addicted to iced coffee? Hot coffee? Any coffee!? Yup, me too. The Nespresso Vertuo POP is 23% off right now and it makes iced coffees and espressos so you can unleash your inner barista. The POP is cute and compact and will add a splash of color to your kitchen and caffeine to your life.CAROTE Non-Stick Pots and Pans Set
Full disclosure, I haven’t tried these pans, but I’m always looking at the covetously because I love how sleek and aesthetic they are. This set is 50% as an early Prime Day deal so maybe now is the time I convince Mike to get a set? They’re highly rated, non-stick, stackable, and have removable handles for ease of storage. They look like a great starter set for the kitchen or amazing for anyone who’s looking to update their non-stick cookware.KitchenAid Oven Mitts
I find one of the many things people overlook in their kitchen are oven mitts. We’re guilty of it too - our oven mitts are old. These soft silicone mitts are 47% off, wipe clean, and are rated up to 500 degrees F. Plus they come with both mittens. Did you know that sometimes you only get one?! Treat yourself to some new oven mitts. You and your hands deserve it.Knives and Knife Blocks
Knives are very personal so I hesitate to suggest Prime Day deals for them, but the beautiful thing about Amazon is that they do offer returns. I feel like knifes are the kind of purchase that needs to be done in person to feel the heft and handling, but if based on looks and reviews alone, these two knives look interesting to me: this 8 inch Damascus Kitori chef’s knife: 40% off and this 7 inch Damascus nakiri: 50% off. As for knife stands, we have a double-sided magnetic wooden block, much like this one that is 27% and we love it.The best prime day buy: Cutting Boards
Most people don’t change their cutting boards nearly enough, especially if they’re using plastic ones. Take advantage of Prime Day and grab one (or more). Truly, it’s one of the kitchen’s small luxuries to have multiple cutting boards without having to constantly be washing them. BPA free, highly rated, dishwasher safe and cute to boost, this set of three is 17% off for Prime Members. The best buy though if you’re looking for a commercial grade style cutting board, are these awesome guys. They’re up to 59% off, textured, BPA free, come in multiple large sizes, and are color coded, just like in professional kitchens (and ours too).Peelers
Have you ever used a vegetable peeler that just isn’t sharp anymore? Is it the vegetable peeler that’s in your kitchen drawer right now? The joy of peeling through vegetable skins with ease is 37% off for Prime Day. They come with carbon steel blades and are the superior Y-shape of peelers.Kitchen Towels
If there’s one thing I absolutely loathe, it’s a lack of fresh, clean kitchen towels. They’re the workhorse of the kitchen and having a huge, clean stack is a life saver. Really, any 100% cotton dish towels will do, but this set of 6 is 36% off and is highly rated, so they will do nicely. Truly the best savings are on items that you would regularly purchase anyway, but now as a bonus, they’re on sale! That’s it for now! I’ll be updating this page as I discover more deals, so hop on back before prime day! xoxo steph we may earn a smol commission from these links Read More →
I Am... Air Fryer Chicken Thighs
Tasty, quick, juicy air fryer chicken thighs are here to save you from hunger. These air fryer chicken thighs are juicy, quick, and best of all, delicious. When you want food and you want it fast, air fryer chicken thighs are just the thing. These guys are seasoned with one of the best chicken flavors out there - lemon pepper chicken. It makes a great base chicken for any sauces or side pairings you might like, and it's so good all on its own too.
Why is the air fryer better for chicken thighs?
- If you like super juicy baked or roasted chicken, air fryer chicken tastes just as juicy and tender, maybe even more so
- Air frying chicken thighs is faster than roasting/baking
- It’s also more energy efficient because you don’t need to preheat or turn on your oven
How long to cook chicken thighs in the air fryer?
- Boneless skinless chicken thighs: Air fry at 360°F for 12-15 mins, flipping halfway.
- Bone in skin on chicken thighs: Air fry at 360°F for 18 mins, flipping halfway, then add an extra 5 minutes at 400°F to crisp up the skin.
- Frozen chicken thighs: Air fry from frozen at 360°F for 25 mins, flipping halfway, then add an extra 5 minutes at 400°F to crisp up the skin.
Bone in skin on vs. boneless skinless
You can go with either: extra juicy or extra easy, the choice is yours! This recipe defaults to boneless skinless chicken thighs because they are my go-to: they cook quickly and are never dry because the cooking time is so short. Plus, when I’m eating, I can just shove them in my mouth without thinking or use them shredded in tacos or on salads. Bone in skin on chicken thighs are delicious as well though – I use them in a huge amount of recipes and you can easily use them here too. The skin crisps up beautifully and also self-bastes the meat underneath, which makes it tastier. They're not a second class citizen at all. [caption id="attachment_34498" align="alignnone" width="1450"] left: boneless, right: skin on[/caption]How to air fry chicken thighs
I switch between making bone-in skin on chicken thighs and boneless skinless thighs in the air fryer. I like both, so which chicken thigh you choose is up to you.- Pat dry. Use a clean kitchen towel or paper towels to dry the skin of your chicken. You want a dry surface so that it can crisp up - this is especially important if you’re making bone in, skin on chicken thighs. Moisture is the enemy of crispiness.
- Season. Place the thighs in a bowl and season with a lemon juice, spices and a touch of oil. The oil helps conduct heat which makes the skin crispy and the lemon juice and seasoning adds flavor.
- Air fry. Place the chicken in the air fryer in a single layer and air fry, flipping halfway through, until the internal temp reaches 165°F. (See below for times)
The secret to juicy air fryer chicken thighs
The secret to juicy air fryer chicken thighs is…there is no secret! It always comes out juicy!Do I need to preheat the air fryer for chicken thighs?
Unlike using a regular oven, you don’t need to preheat the air fryer, which means dinner gets on the table faster. If you wanted to get that last little bit of speed or juiciness, or if your air fryer takes a little longer than you’d like to come to temp, you can preheat the air fryer before starting any of the other steps, and it’ll be hot enough by the time you have the chicken ready to go.Do you need to flip the chicken in the air fryer?
Technically you don’t need to because the air in an air fryer circulates around, but for even crispiness and presentation, especially for bone-in skin-in, I recommend it. Start cooking the chicken skin side down then flip it to finish skin side up so the skin looks pretty and crisp.What can I serve with air fried chicken thighs?
Since you have the air fryer out, why not pair the chicken thighs with:- Air fryer asparagus
- Air fryer brussels sprouts
- Air fryer roasted broccoli
- Air fryer parmesan wedge fries
How do I reheat chicken thighs in the air fryer?
To reheat already cooked chicken thighs in the air fryer, let the thighs heat up at 350°F for 2-3 minutes.What’s the best air fryer?
Our air fryer is discontinued ? but we love it so much. The Philips XL (ok actually the XXL) is what we’d get if ours ever broke though.Can I make these in the oven?
Yes!- Boneless skinless chicken thighs: Bake at 425°F for 18-20 minutes.
- Bone in skin on chicken thighs: Bake at 425°F for 25-30 minutes if properly tempered.
- Bone in skin on chicken thighs: Bake at 425°F for 35-40 minutes if they’re coming right out of the fridge.
Air Fryer Chicken Thighs
Tasty, quick, juicy air fryer chicken thighs are here to save you from hunger!
- air fryer
- 1/2 lemon
- 1 tbsp olive oil
- 1 tsp garlic powder
- 1 tsp onion powder
- 1/2 tsp paprika (smoked paprika preferred)
- 1/4 tsp freshly ground pepper (or 1/2 tsp as desired)
- 1.5 lbs bone in skin on chicken thighs (or 1lb boneless skinless, see notes)
Optional paprika oil for extra shine
- 2 tbsp olive oil
- 1 tsp paprika (smoked paprika preferred)
Slice half of the lemon and set aside, then juice the other half. Mix in 1 tbsp olive oil into the lemon juice and stir in the garlic powder, onion powder, paprika, and pepper.
Lightly pat the chicken dry with a paper towel. Season with salt and pepper. Toss the chicken in the lemon-pepper sauce.
Cook at 360°F for 12-15 mins or until the internal temperature reaches 165°F and the juices run clear. Halfway through, flip the chicken and add lemon slices. Remove from the air fryer immediately when done.
See notes for bone-in skin-on or frozen cooking times.
Optional: make some paprika oil to drizzle/brush on after the thighs are done: heat up 1 tsp paprika with 2 tbsp oil in a small pan over low heat, until it starts to bubble. Remove from the heat and brush onto the cooked thighs.
For bone-in skin-on: Cook at 360°F for 18 mins, or until the internal temperature reaches 165°F and the juices run clear. Halfway through, flip the chicken and add lemon slices. Remove from the air fryer immediately when done. Optionally, add an extra 5 minutes at 400°F for crisp skin (for a total cooking time of 23 mins).
For frozen chicken thighs, cook at 360°F for 25 mins, or until the internal temperature reaches 165°F and the juices run clear. Halfway through, flip the chicken and add lemon slices. Remove from the air fryer immediately when done. Optionally, add an extra 5 minutes at 400°F for crisp skin (for a total cooking time of 30 mins).

I Am... Bulgogi: Super Savory Korean Grilled Meat
Bulgogi is the easiest, most flavorful dinner main you'll make this week, and you won't believe how quick it comes together. It's tender sliced meat marinated in a subtle sweet and spicy sauce, chargrilled to perfection. Bulgogi is one of the greatest things ever and a perfect introduction to Korean food. Bulgogi is one of the easiest Korean dishes to make at home. Whether or not you have an authentic Korean BBQ grill or just a non-stick skillet on your stove, it’s an addictive savory melt in your mouth weeknight-compatible dinner.
What is bulgogi?
Bulgogi is a classic Korean BBQ meat item. It’s typically a thinly sliced cut of beef that’s been marinated in a pear-soy-onion mix. The meat is then quickly charred on a Korean BBQ plate over an open flame. At home, people crisp it up in a pan on the stove. It’s served up with rice, lettuce, and little kimchi-forward appetizers and pickles.Spicy bulgogi
To make spicy bulgogi, just stir in a bit of gochujang (Korean red pepper paste). I would start with 1 heaping teaspoon, taste, and go from there based on your spice tolerance. Do this before adding the marinade to the meat, of course.The best cuts for bulgogi beef
The best cuts of beef for bulgogi are sirloin, rib eye or brisket. It’s the thin slicing that’s the real secret to great Bulgogi. You can find perfect presliced meat at H-Mart or most other asian grocery stores. If your supermarket has a good meat department, you can usually ask them for thin slices. As a last resort, you can buy a hunk of beef, quickly chill it to almost frozen, and slice as thin as you can.Do you need a grill?
Bulgogi tastes best flame grilled over butane gas or charcoal (bulgogi means fire-meat in Korean) - although most people don't do charcoal at home since it will be very smoky and possibly dangerous if you have poor ventilation. The best bet is a nonstick or cast iron skillet over high heat.How to make bulgogi
- Roughly chop an onion, core and chop an Asian pear (you want about 1 cup of rough dice), and peel your garlic.
- Blend all the marinade ingredients until smooth.
- Marinate your meatfor 2 hours or up to overnight.
- Grill or fry your meat.
- Eat with lettuce, rice, and lots of banchan!
Bulgogi sauce ingredients
Asian pear
Asian pears, sometimes called apple pears, are light golden yellow, round, and firm with a crisp crunch (crispier than ordinary pears), lots of juice and more sweetness. If you can’t find an Asian pear, you can sub a regular pear (like Bosc) or sweet apple (like Fuji).Soy sauce
Believe it or not, soy sauces are different for each Asian country. Go for a Korean soy sauce such as Sempio if you can. If you can’t, a Japanese soy sauce is next best, such as Kikkoman.Toasted sesame oil
Toasted sesame oil is dark, nutty, and can’t be used for frying unlike it's clear sibling. You can find it in the Asian aisles, at an Asian grocery store, or online. Our favorite brand is Kadoya.Rice vinegar
Rice vinegar is a little nuttier and a lot sweeter than most other vinegars. Many rice vinegars you find will be seasoned sushi rice vinegar, with sugar, salt, and possibly other items in its ingredients list. This isn’t exactly what you want but can still be used. Actual rice vinegar only has one ingredient. Any other vinegar you love will work too.Ginger
If you hate mincing ginger, we use a Japanese ginger grater. They are very effective and pretty cheap – if you live near a Daiso, you can even get them for $1.Bulgogi Recipe
Super Savory Korean Grilled Meat
- blender
- 1/2 medium onion (roughly chopped, about 1 cup)
- 1/2 pear (cored and quartered, Asian pear preferred, about 1/2 cup)
- 4 cloves garlic (peeled)
- 1 tsp ginger (minced)
- 2 tbsp water
- 1/4 cup soy sauce
- 2 tbsp brown sugar
- 1 tbsp toasted sesame oil
- 2 tbsp rice vinegar
- 1/2 tsp black pepper
- 2 lbs ribeye (thinly sliced, or other meats, see notes)
- 1 tbsp gochujang (or to taste, optional)
Blend the onion, pear, garlic, ginger, and water.
Mix the onion-pear mix with soy sauce, brown sugar, toasted sesame oil, vinegar, and black pepper. Add gochujang, if using.
Mix the marinade throughly with the meat and marinate for 2 hours to overnight.
Cook the meat on a hot plate/grill, cast iron pan, or nonstick skillet, flipping as needed.
Other good choices for meats are brisket, sirloin, or any other thinly sliced meats you can find at an Asian grocery store. You can also use thinly sliced pork belly, collar, jowl, or thickly sliced chicken breast, or cubed chicken thighs.
You can julienne the rest of the pear as a garnish.

I Am... Better Than Takeout Sesame Noodles
Sesame noodles are a thing. Sesame noodles are many people’s ride or die. What’s your go to order when you’re getting Chinese take out? Mine is beef chow fun (OMG I love the heck out of that stuff) and Mike goes between black bean beef chow mein and yang chow fried rice. What we never ever order is sesame noodles. Don’t get me wrong, I love sesame noodles. But I just never order them because, why? They’re incredibly easy to make at home - it’s literally faster than ordering takeout.
The easiest noodles to make at home
Once you make your first bowl of homemade sesame noodles, I guarantee you won’t be ordering them anymore. Slurpable strands of chewy noodles tossed in a creamy, nutty, savory, sweet sauce. SO GOOD. Plus, these are pretty much pantry noodles so you can make them any time, any where.Sesame noodles: not so spicy
These aren’t the spicy kind of noodles by the way. If you’re looking for those, you’re probably wanting to make cheater’s dan dan noodles. These are a sweet and savory nutty noodle that everyone will love. There’s creamy richness from the sesame paste, umami from the soy sauce, tang from the rice vinegar, a bit of bite from the raw garlic, and sweetness thanks to a bit of sugar.What noodles are these?
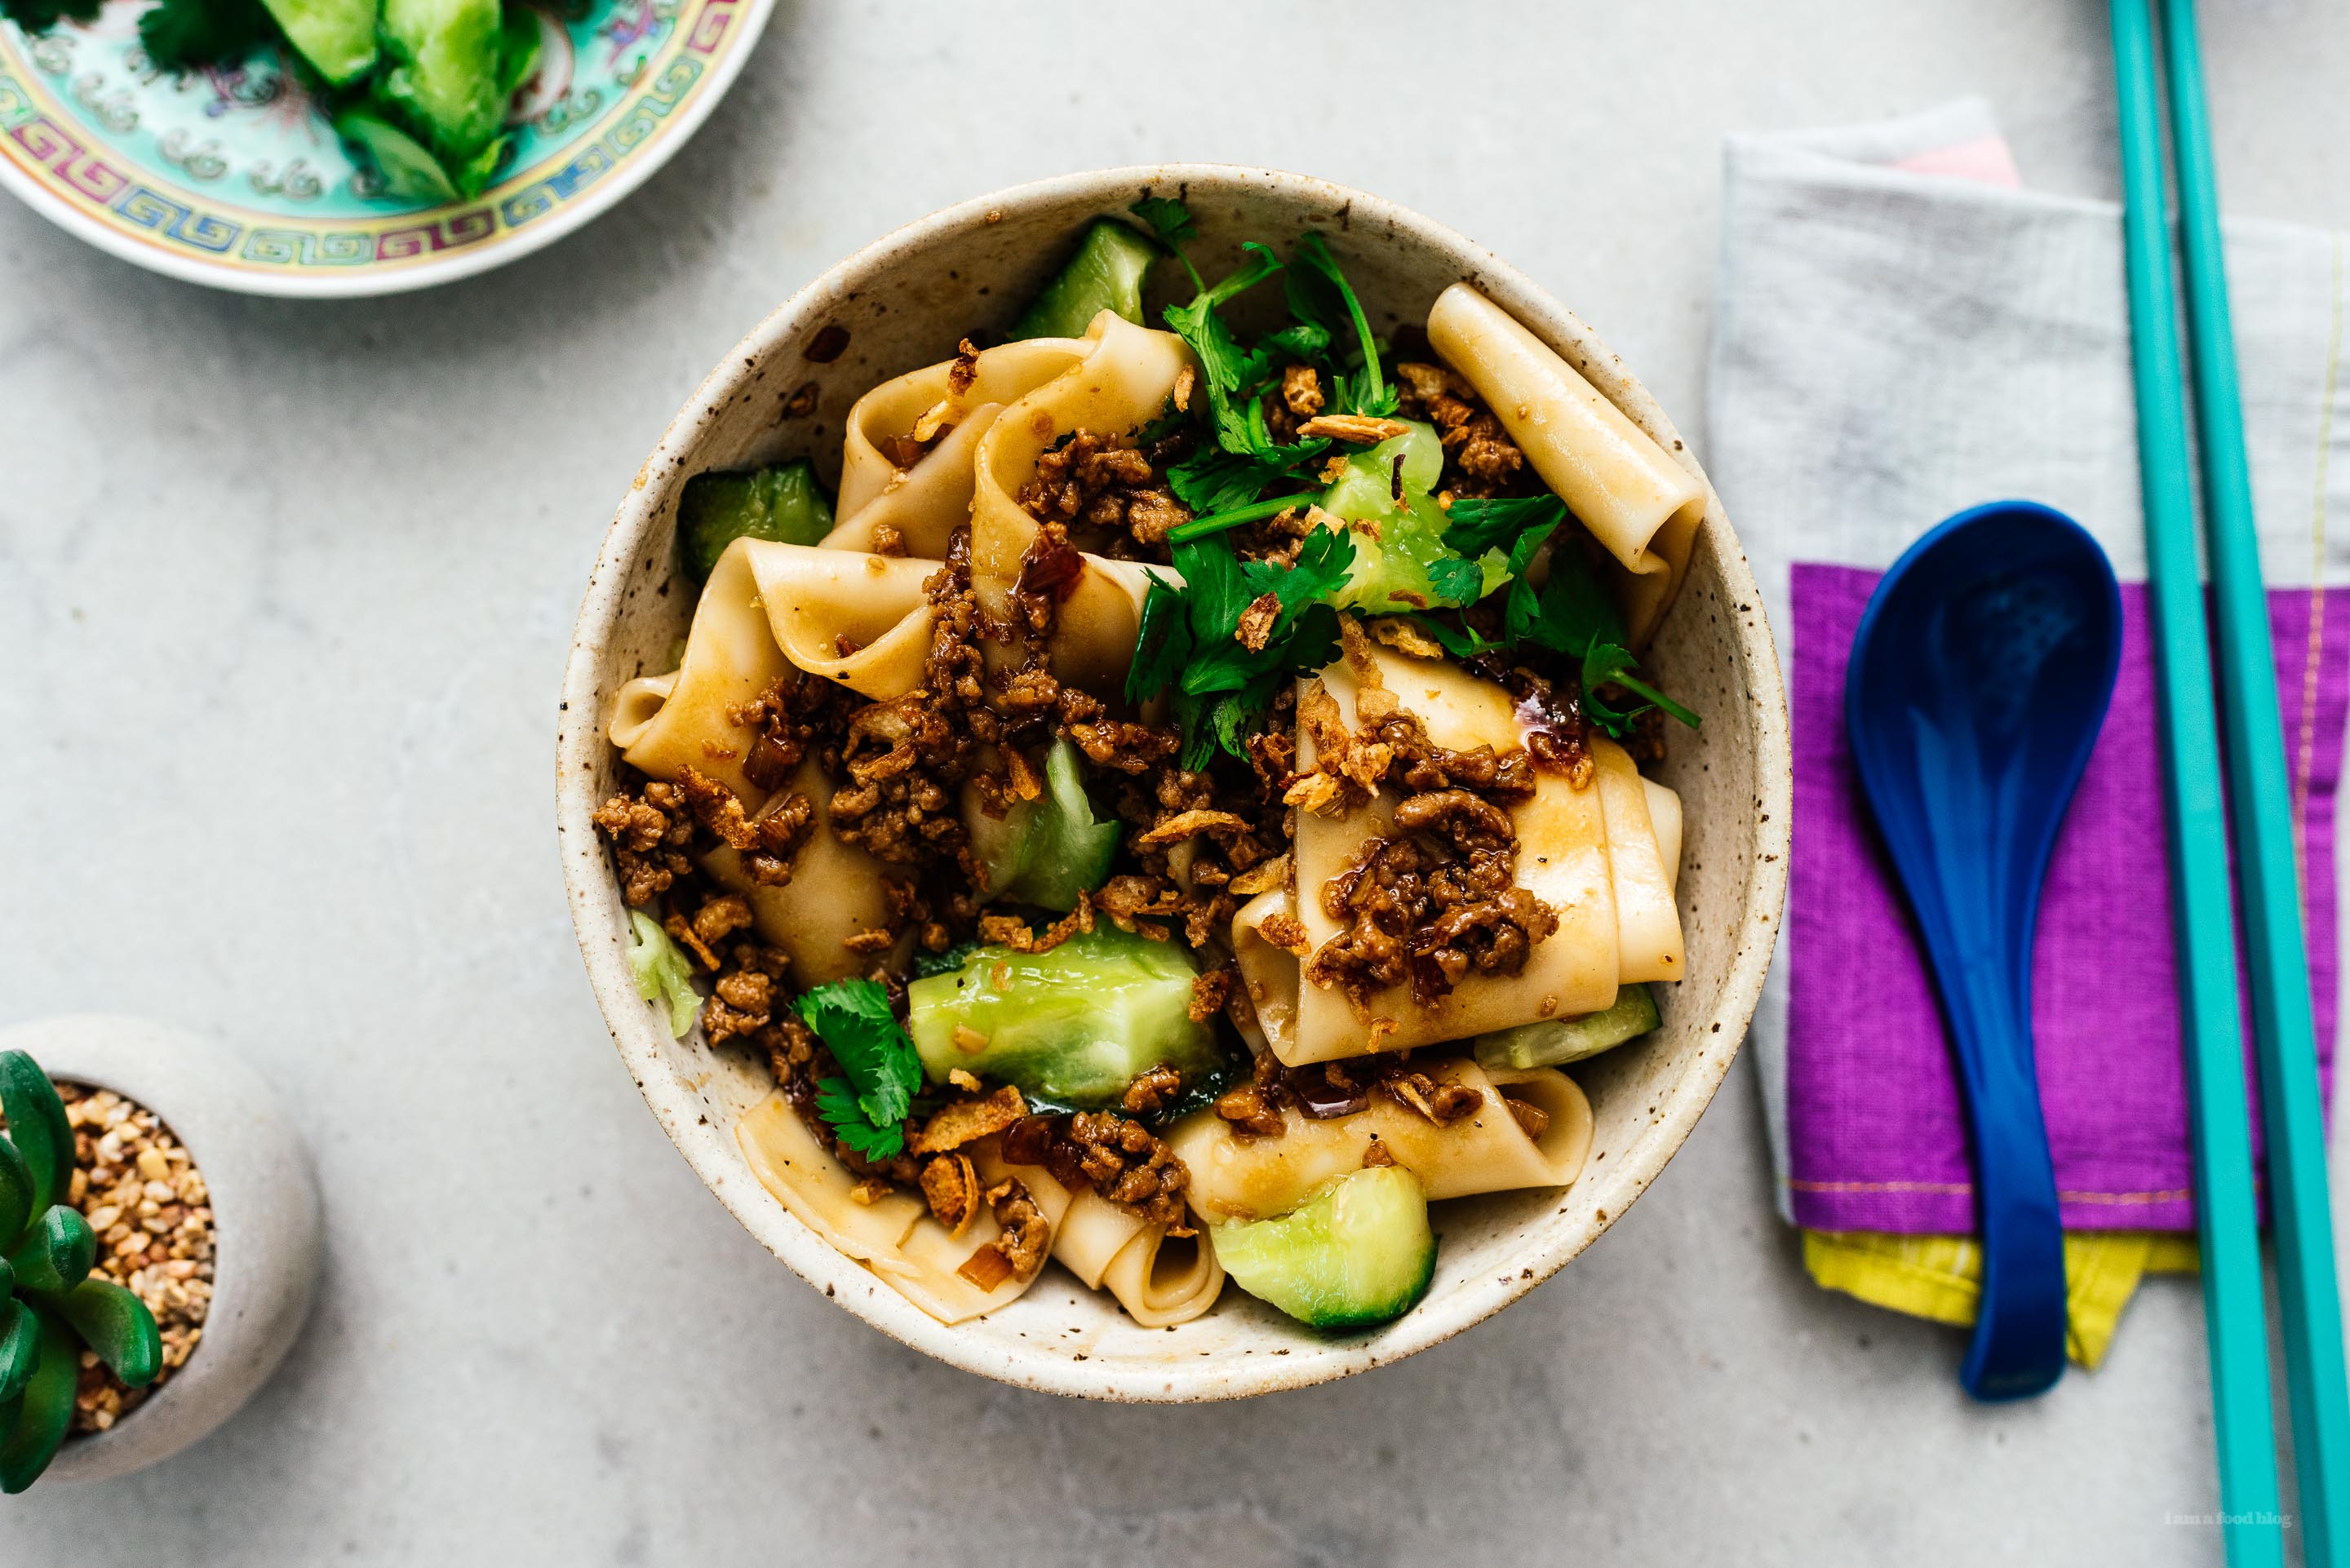
You can use any noodle you like or have on hand, but if you would like the ones in the picture, they are called Chinese knife sliced or knife cut noodles and you can get them at your local asian supermarket or online.Happiness is a bowl of (sesame) noodles
These couldn’t be simpler to make. I like mixing up the sauce right in the bowl I’m going to eat it in, that way I have only one bowl to wash. Make it a big one so you have lots of room to toss your noodles, then slurp away. Happiness is a bowl full of noodles, am I right?Better Than Takeout Sesame Noodles
Creamy sesame noodles, made faster than it takes to order in!
- 2 tbsp Chinese sesame paste
- 1 tbsp soy sauce
- 1 tbsp rice vinegar
- 1 tbsp toasted sesame oil
- 2 tsp sugar
- 1 clove garlic (minced)
- 4 ounces dried noodles of choice
- toasted sesame seeds (to finish)
- chili flakes (to finish)
In a large bowl, mix together the sesame paste, soy sauce, rice vinegar, sesame oil, sugar, and garlic.
Cook the noodles according to the package instructions. Save 1/4 cup of the cooking water, then drain well.
Toss the noodles with the sauce, loosening with hot noodle water if too thick.
Enjoy topped with toasted sesame seeds and chili flakes if desired.
I Am... Zha Jiang Mian Recipe
If I had to choose a noodle that I could name as my number one top comfort food and eat forever and ever it would be zha jiang mian aka "fried sauce noodles." It’s an absolute breeze to make the sauce and it keeps well in the fridge which means bowls of salty, sweet, and savory noodles are ready in a flash.
What is zha jiang mian?
Translated, zha jiang mian means “fried sauce noodles” in Mandarin and essentially that’s what it is: a bunch of sauces fried up together and served tossed with noodles. It’s originally from Beijing and made with two types of fermented bean paste: ganhuang jiang (fermented yellow soy bean paste) and tianmian jiang (sweet fermented flour and bean paste). These two pastes combine together into an AMAZING salty, sweet, punchy, complex sauce. The meat sauce is kind of reminiscent of a Chinese Bolognese except it only takes 15 minutes to make. For this version we’re going for quick and easy. This zha jiang mian is crazy delicious even when it’s simplified by using easy to find Chinese ingredients – the kind you can find at Target. Make a double batch and keep it in the fridge: you can add as much or as little sauce as you like to your noodles. If you love noodles and meaty sauce, you’ll love this. It’s full of umami, sweet and salty flavors, and it tastes like comfort in a bowl. The deep punch of flavors is offset but crunchy, juicy cucumbers and the contrast between the freshness of the cucumbers, the savoriness of the sauce, and the chewiness of the noodles will make you want to eat more and more.Zha jiang mian ingredients
- shallots and garlic - shallots and garlic together are the ultimate aromatics. Shallots are sweeter and more pungent yet mellow compared to onions and garlic, well, everyone knows how amazing garlic is. Simmered in hot oil until soft, the aromas of shallots and garlic let you know something good is on the way.
- ground pork - ground pork is my favorite meat for zha jiang mian because of it’s sweet porky flavor and fat content. It’s more tender than using ground beef and has more flavor than ground chicken or turkey. You can use any minced meat you like, but pork is the classic.
- hoisin sauce - hoisin sauce is a Classic Chinese sauce that adds so much flavor. Hoisin is pretty much sold everywhere now, from Target to your basic grocery store, and of course, online. It’s a thick, sweet brown sauce that’s used in marinades and as a dipping sauce. It’s super flavorful: sweet, savory, and slightly tangy.
- oyster sauce - this is the secret ingredient that adds a huge amount of umami and seafood flavor to the sauce. more on this below
- dark soy sauce - not just your regular soy sauce, more on this below
- sugar - a little bit of sugar adds some sweetness making this dish one that both kids and adults love
- noodles - you’ll find zha jiang mian served with wheat noodles in Beijing, but you can serve them with any noodle you like. If you want to go the traditional noodle, look for a white wheat noodle in the fridge section at your local asian grocery store.
- cucumbers - julienned cucumbers add crunch and freshness that contrasts with the meaty sauce, highlighting the sauces savoriness.
Oyster sauce
Oyster sauce is sweet and thick and full of complexity. It can be found in the Asian aisle of any grocery store or online. If you see the Lee Kum Kee bottle with the two people in boats, go for that one. It’s the premium oyster sauce which lists oysters as its first ingredient. Oyster sauce doesn’t taste super seafood-y but it definitely adds an extra oomph to this sauce that you won’t be able to put your finger on.Dark soy sauce
This is a thicker, darker soy sauce that’s not as salty as light soy sauce and it’s used mostly to add a beautiful color to your noodles, but it also has a caramel note too it. It’s readily available online and at well stocked grocery stores. You can sub regular soy sauce if you don’t have dark, but it’s what gives these noodles their gloss.How to make zha jiang mian
- Fry the aromatics. Fry some shallots and garlic in oil until soft and fragrant.
- Cook the pork. Add the ground pork and cook it, breaking up, until browned.
- Fry the sauces. Add hoisin, oyster, dark soy sauce, sugar, and a bit of water and simmer until the sauce thickens and all the flavors meld.
- Mix. While the sauce is doing it’s thin, cook your noodles and drain well. When the sauce is ready, mix a generous portion with the noodles.
- Enjoy. Slurp and enjoy topped with cucumbers and green onions or cilantro!
What kind of noodles?
I love this meat sauce with all sorts of noodles. Traditionally zha jian mein comes with thick wheat flour based noodles (look in the fridge section of your local Asian grocery store), but the sauce tastes fantastic with spaghetti and I’ve been known to mix it up with rice noodles as well. Go wild, it’s a tasty savory meat sauce that pairs well with virtually any noodle. Try it with:- Chinese wheat noodles
- udon
- rice noodles
- vermicelli
- egg noodles
- lo mein noodles
- pasta
Vegetables
Usually you’ll see zha jiang mian served with fresh vegetables, a rarity in Chinese food, but the freshness of cucumbers goes so amazing with the super umami meaty flavors - the contrast is just insane. Some other vegetables you can try:- shredded carrots
- shelled edamame
- sliced radishes
- bean sprouts
- thinly sliced celery
- shredded cabbage
- green onions
- cilantro
- shredded zucchini
Zha jiang mian vs jajangmyeon
If you’re a fan of Korean food, you’ve most likely had jajangmyeon, those super flavorful noodles covered in black bean sauce. Jajangmyeon is a Korean take on zha jiang mian using the ingredients they had back when globalization wasn’t quite was it is today. Jajangmyeon is noodles covered in a thick sauce made with diced pork chunjang (black bean paste) served with vegetables.Vegetarian zha jiang mian
If you’re vegetarian, you can absolutely make this zha jiang mian with tofu. I find that extra firm tofu, crumbled, is the best in terms of texture and flavor. Crumbled tofu really mimics ground meat and the ground tofu soaks up all the sauce ingredients perfectly.Zha Jiang Mian Recipe
Bouncy noodles in an AMAZING salty, sweet, punchy, complex sauce.
- 2 tsp neutral oil
- 2 shallots (diced)
- 4 cloves garlic (minced)
- 1/2 lb ground pork
- 2 tbsp hoisin sauce
- 2 tbsp oyster sauce
- 2 tbsp dark soy sauce
- 1 tbsp sugar
- freshly ground pepper (to taste)
- 2 portions noodles (of choice)
- cucumbers (to finish)
- fresh cilantro (roughly chopped, to finish)
In a pot, heat up the oil over medium heat. Add the shallots and garlic and cook, stirring, until soft and fragrant. Add the pork and cook, breaking up, until no longer pink. Stir in the hoisin, oyster, dark soy, sugar, and 2 tablespoons of water. Let simmer over low heat for 5-10 minutes, stirring occasionally. Taste and adjust seasoning if needed. Season with pepper.
While the sauce is cooking, prep the cucumbers and cilantro. I smashed the cucumbers and broke them into small pieces, but traditionally the cucumbers are julienned.
Cook the noodles according to package instructions and drain well. Toss with the sauce and serve with cucumbers and cilantro on top. Enjoy immediately.
Estimated nutrition doesn't include your noodles of choice.

I Am... Air Fryer Chicken Breasts
If you want juicy, air fryer chicken breasts are the way to go. No more dry meat, just juicy, moist, perfectly cooked chicken breasts every time. Air fryer chicken breasts are juicy, quick, and never dry. I usually meal prep a bunch of chicken breasts at the beginning of the week (especially if I have a really busy week) and I find that the air fryer is the best, most consistent way to make them. I then use the cooked chicken breasts in salads, wraps, burritos, tacos, sandwiches, noodle bowls, pasta, or even on their own as a no-carb snack.
How to make air fryer chicken breast
How to air fry ALL the chicken breasts: boneless skinless chicken breasts, boneless skin on chicken breast, bone in skinless chicken breast, and bone in skin on chicken breast.- Season. Place the breasts in a bowl and season with a drizzle of oil, salt, pepper, garlic powder, and paprika. The oil helps conduct heat and seasoning adds flavor. Feel free to use your favorite chicken seasoning, like these !
- Air fry. Place the chicken in the air fryer in a single layer and air fry, flipping halfway through, until the internal temp reaches 165°F. (See below for times)
How long to cook chicken breast in the air fryer?
- Boneless chicken breasts: Air fry at 400°F for 12-15 mins, depending on size, flipping halfway.
- Bone in chicken breasts: Air fry at 400°F for 25-28 mins, depending on size, flipping halfway.
- Frozen boneless chicken breasts: Air fry from frozen at 360°F for 25-30 mins, depending on size, flipping halfway.
Why make air fryer chicken breast?
- If you like super juicy baked or roasted chicken, air fryer chicken tastes just as juicy and tender, maybe even more so
- Air frying chicken breasts is faster than roasting/baking
- It’s also more energy efficient because you don’t need to preheat or turn on your oven
- Super easy cleanup
Bone-in skin-on vs. boneless skinless
Both work: if you care about presentation and want really pretty chicken breasts, use skin on, bone in chicken breasts because the skin crisps up beautifully and also self-bastes the meat underneath. The bone in helps it keep it’s shape. Boneless skinless chicken breasts are delicious as well though – I use them in a huge amount of recipes and they are my go to.The secret to juicy air fryer chicken breast
The secret to juicy air fryer chicken breasts is…there is no secret! Well, there is a secret, actually, it’s to not over cook them. Definitely invest in an instant read thermometer, it will ensure that your chicken is cooked to the right temp every time. If you over cook your chicken breast you’ll end up with dry chicken. Sometimes I even pull breasts out when they reach 155-160°F because the carry over heat while the breasts are resting will bring them up to 165°F. The best kind of thermometer is a thermocouple style, but you don't have to spring for the fancy expensive ones: this one is nice and inexpensive and still super fast. The other tip I have is, letting the breasts rest a bit before slicing or shredding. Letting them rest for 2 minutes will let the juices settle, keeping the breasts juicy, instead of spilling everything out on to the plate. Also, I like putting the rounded side of the breast down first (the side that would have had the skin on it) so that when it’s flipped over, the presentation side gets a bit more time to brown.Do I need to preheat the air fryer for chicken breasts?
Unlike using a regular oven, you don’t need to preheat the air fryer, which means dinner gets on the table faster.Do you need to flip the chicken in the air fryer?
Technically you don’t need to because the air in an air fryer circulates around, but for even crispiness and presentation, I recommend it. Start cooking the chicken rounded side down then flip it to finish rounded side up so it looks pretty and golden.How do I reheat chicken breasts in the air fryer?
To reheat already cooked chicken breasts in the air fryer, let the breasts heat up at 350°F for 2-3 minutes.What can I serve with air fried chicken breasts?
Since you have the air fryer out, why not try:- Air fryer asparagus
- Air fryer brussels sprouts
- The best air fryer roasted broccoli
- If you're tired of frozen fries: Air fryer parmesan wedge fries
- And even dessert: Air fryer donuts
Air Fryer Chicken Breasts
Juicy chicken breasts in air fryer deliciousness.
- air fryer
- 2-3 chicken breasts
- 1 tbsp olive oil
- 1 tsp garlic powder
- 1/2 tsp smoked paprika
In a bowl, toss the chicken breasts with oil, garlic powder, paprika, and salt and pepper to taste.
Place the breasts, without overlapping, rounded side down and air fry per the temperatures and times below, flipping halfway, or until the the internal temperature reaches 165°F or until the juices run clear.
- For boneless chicken breasts (skinless or skin on): 12-15 mins @ 400°F
- For bone in chicken breasts (skinless or skin on): 25-28 mins @ 400°F
- For frozen boneless chicken breasts (skinless or skin on): 25-30 mins @ 360°F
(All times dependent on size)
Remove from the air fryer immediately and let rest for 2 minutes before enjoying.

I Am... Mayo Ramen
If you’re looking to up your instant ramen game with a luxurious and creamy broth, mayo ramen is the recipe for you! All you need is a pack of your favorite instant ramen, a squirt of kewpie mayo, minced garlic, and an egg.
You’ve got to try this!
There’s a Japanese ramen Tiktok hack that’s going viral: kewpie mayo in ramen. The kewpie mayo adds a rich and creamy flavor to the ramen broth and people are going wild over it, saying that it makes instant ramen taste just like long-simmered ramen broth from a legit ramen restaurant. So, if you’ve ever wondered, is mayo good in ramen, the resounding answer is yes!Where is mayo ramen from?
Ramen and mayo is not a new thing - in Japan they even sell mayo flavored ramen. Not surprising, considering Japan is obsessed with Kewpie mayo. But recently, a squirt of mayo in instant ramen has been trending on Japanese Youtube and Tiktok.What does mayo ramen taste like?
It tastes like instant ramen with a luxurious boost of umami and richness thanks to the kewpie mayo and garlic. Instead of your typical thin instant ramen broth, the kewpie mayo and egg help thicken and give body to the broth, making the soup cling to the noodles better.Why it makes sense
Adding an extra bit of fat to ramen broth is classic in ramen making, usually in the form of aroma oil (that’s the little packet of fat you get in instant ramen seasoning) By boosting the fat content by using kewpie mayo, your instant ramen will instantly (LOL) become thicker and more flavorful. The kewpie adds complexity, mouthfeel, and a huge amount of flavor by helping the broth stick to the noodles as you pull them up.How to make mayo ramen
- Make the sauce. In a large bowl, whisk together mayo, a raw egg, 1 clove garlic minced, and the seasoning packet from an instant ramen pack.
- Cook the instant ramen. Bring 2 cups of water up to a boil and cook the noodles according to the package time. When your timer goes off, remove from the heat.
- Add the hot water to the sauce. Pour the hot water into the sauce, swirling as you go - the hot water will cook the egg and emulsify it into a creamy soup.
- Add the noodles. Carefully add the noodles to the soup.
- Serve. Top with sliced scallions and toasted sesame seeds, as well as any other toppings you’d like. Enjoy immediately!
Mayo ramen ingredients
- ramen - this one is pretty simple, just grab your favorite instant ramen! More on the best ramen to pick, below.
- Kewpie mayo - the key to this magical ramen hack is kewpie mayo, a Japanese mayo. It’s rich creamy, and just a touch sweet.
- garlic - a bit of raw garlic in the sauce adds a hit of garlicky flavor. It’s cooked and mellowed out a bit by the hot soup, so it’s not raw when you eat the ramen, it ends up being just garlicky goodness.
What is kewpie mayo
Kewpie mayo is Japan’s favorite mayonnaise and salad dressing brand and you’ll pretty much find it in every Japanese household. It’s rich, yet light, and incredibly delicious. Kewpie mayo is so beloved in Japan that they even had specialty kewpie mayo cafes to celebrate all things kewpie. You can find it, in its signature squeeze bottle with a red flip top at most grocery stores these days, in the Asian aisle. The mayo itself is a bit more golden that your standard mayo and much more creamy and luxurious. Kewpie mayo is made with just egg yolks – as opposed to regular mayo which is made with whole eggs – and rice vinegar for a hint of sweetness. It’s absolutely addictive and we always have a bottle in the fridge. Read more about Kewpie mayo here.Where to buy kewpie mayo
They sell kewpie mayo at all Asian grocery stores, in some major grocery stores, and onlineKewpie mayo substitutes
If you can’t find kewpie mayo but you absolutely want to make this ramen, you can sub regular mayo and add a bit of rice vinegar and sugar.Kewpie mayo recipe:
- 2 tablespoons mayonnaise (Hellmann’s/Best Foods)
- 3/4 tsp rice vinegar
- 1/4 tsp sugar
The best instant ramen to use
For this particular ramen hack, you’ll want an instant ramen that comes with a soup base. Go for a Japanese brand if you can: Sapporo Ichiban makes a huge variety of flavors that are widely available. Nissan (Top Ramen), the original creator of instant ramen, is really popular too. The original ramen mayo hack was made with Nissan Sapporo miso ramen, so if you can find that, you’re golden. It’s super common so you can probably find it quite easily and like most instant ramen it’s pretty cheap too.Toppings for instant ramen
Everyone knows that toppings make ramen even better. Add some to make your bowl even more luxurious:- toasted sesame seeds
- thinly sliced scallions
- ramen egg
- veggies
- seaweed
- corn
- cheese
- kimchi
- protein: tofu, sliced chicken, ground meats, sausage, bacon
Things to make with kewpie mayo
Now that you have a bottle of kewpie mayo, here are some other things you can make!- takoyaki
- Japanese potato salad
- chicken karaage
- Japanese egg salad sandwiches
- Sushi bake
- Tiktok Salmon Rice Bowl
Mayo Ramen
Up your instant ramen game with a luxurious and creamy broth that tastes just like tonkotsu
- 1 package instant ramen (miso or tonkotsu flavor preferred)
- 1-2 tbsp kewpie mayo
- 1 clove garlic (crushed)
- 1 egg
- 1 tbsp green onions (sliced)
In a large bowl, whisk together the seasoning packet from the instant ramen with the kewpie mayo, garlic, and egg until it comes together in a thick sauce.
Cook the instant ramen in 2 cups of water according to the cook time on the package.
Carefully pour the hot noodle water into the sauce, whisking as you go so it emulsifiers into a smooth, thick broth.
Add the noodles to the soup, top with scallions and toasted sesame seeds and enjoy hot!
Because all instant ramen is different, estimated nutrition does not include ramen. Please add to the ones on your ramen package.

I Am... Air Fryer Dry Ribs
If you’ve had dry ribs at the pub and want to make them at home, these ribs are for you. If you’re a pub-lover just for the pub food, you’re my kind of person. I always, always happily agree to go to the bar or the pub because bar food! Bite-sized, usually deep-fried, and always delicious - I’m down.
What are dry ribs?
Dry ribs are deep-fried, seasoned pork riblets. They’re crispy, juicy, and completely addictive. I’m pretty sure dry ribs aren’t a popular menu item, but whenever I see them I’m excited because they’re so good. Usually, I see riblets served as saucy ribs but trust me when I say, dry riblets are superior. First off, they’re faster and easier to make and second, they aren’t super sticky and saucy which makes them a better finger food. These ribs are perfect for game day, a snacky-snack, or even a meal if you make a vegetable side dish and some rice. I love them because they’re pretty hands off thanks to the air fryer. Traditionally dry ribs are deep-fried but I’m on the air fryer train and I’m not getting off anytime soon.How to make dry ribs
- Cut - cut the ribs into individual rib pieces. Super simple, just cut between the rib bones to create single rib bites.
- Season - place the riblets in a bowl and add 1 tbsp of oil, some soy sauce or oyster sauce, Shaoxing wine, garlic powder, and sugar, mixing until coated.
- Dust - Take the ribs, shaking off any excess marinade and toss in cornstarch.
- Air fry - Lightly oil the air fryer basket and preheat the air fryer to 350°F. You don’t necessarily need to preheat, but I find that food gets more crispy when you do. When hot, carefully arrange the ribs, in a single layer, in the basket and drizzle the tops with a bit of oil. Air fry for 10 minutes, then shake or flip and fry for another 10 minutes or until crispy, golden, and cooked through.
- Enjoy - Let cool slightly and enjoy!
Dry rib ingredients
ribs - this is the essential ingredient. Look for riblets, pork spare ribs, rib-tips or even a rack of baby back or spare ribs that you ask the butcher to cut for you in half length-wise. oil - a little bit of oil is going to help with browning and heat transfer. These dry ribs will be air fried so a coating of oil around each rib will help it cook evenly and keep the ribs juicy. seasoning - how you season your dry ribs is up to you. This recipe goes in a more asian style (more on that below) but you can season them any which way you like, from old bay to your favorite chile rub to even just salt, pepper, and garlic powder is amazing. coating - a simple coating of cornstarch is going to give these dry ribs a very light crispy crust. It’s barely there and that’s how we want it. These guys aren’t even remotely battered, just lightly dusted so you get a little bit of a crust that gives way to a juicy, meaty rib bite.Dry rib seasoning
I went with a simple mix of oyster sauce, Shaoxing wine, garlic powder, and just a smidge of sugar. The result is savory and a touch sweet with lots of garlic notes. The key is to season with a savory mix with just a bit of sweetness. The Shaoxing wine adds a slightly complex note. It’s a little hard to describe, but a really fun and tasty backbone ingredient in Chinese cooking that you can read more about here. If you don’t have Shaoxing wine on hand and want to substitute in something similar, you can go for sherry vinegar. Or, if you have rice vinegar, you can use that and increase the sugar a bit. That being said, I’ve seasoned these ribs with so many different combinations.Are dry ribs pork or beef?
In this case, dry ribs are pork, specifically pork riblets, which are essentially shortened ribs. They’re cut from the same part of a pig, the ribs. Instead of leaving the ribs long, they’re cut cross-wise so the rib bones are short making them perfectly bite-sized.What kind of ribs for dry ribs?
Pork spare ribs, riblets, pork rib pieces, pork bone-in rib tips, and the names go on and on. Essentially, these pork ribs are just pork ribs that are cross cut so the rib bones are only 1 to 1.5 inches in length (see below). Asians love this cut of ribs so you’ll find the cut commonly at the butcher counter at Asian grocery stores. You’ll see them at national grocery store chains too, depending on how well stocked the meat department is. If you don’t see them, you can always ask the friendly butcher in the meat department if they can cross-cut a package of pork baby back ribs or pork spare ribs. The best part of riblets is the fact that they cook quickly.Our favorite air fryer
I love deep-fried food and I love our air fryer because it gets us about 75% of the feels of deep frying with about 10% of the effort. We recently got this air fryer and both Mike and I are in love. It replaces our old air fryer which was over 5 years old and wow, there is a HUGE difference. Everything is so much more crispy and brown and there is a bunch more space.How to make dry ribs in the oven
If you don’t have an air fryer, you can bake dry ribs in the oven. Follow the recipe then place the coated ribs on a lightly oiled rack in a rimmed baking sheet. Bake the ribs in a 400°F preheated oven for 15 minutes, then flip and continue to bake for another 5-10 minutes or until crispy and cooked through.How to deep fry dry ribs
If you don’t have an air fryer, you can deep fry these guys as well. Heat up 2 inches of neutral oil in a heavy bottom pot over medium-high heat until it reaches 350°F. Carefully deep-fry in batches, for 7-9 minutes per batch, until golden, crispy, and cooked through. Drain on a wire rack.What to serve with dry ribs
I love sauce and these guys would be amazing dipped in: You can also serve them up with:How to reheat dry ribs
To reheat any leftovers, simply air fry for 5-8 minutes at 350°F or warm in a 350°F oven for 10-15 minutes. Enjoy! I hope you’ll have a lil appetizer/bar food day. These guys are great for game day or an indulgent home happy hour. I hope they make you as happy as they make me. xoxo stephAir Fryer Dry Ribs
Crispy, juicy, completely addictive ribs done in the air fryer in minutes.
- 1 lb pork spare ribs (cross-cut and cut into individual ribs)
- 2 tbsp neutral oil (divided)
- 1 tbsp soy sauce (or oyster sauce)
- 1 tbsp Shaoxing wine (optional)
- 1/2 tsp garlic powder
- 1/2 tsp sugar
- 2 tbsp cornstarch
Cut the riblets into individual bite-size pieces.
Add the ribs to a bowl, with 1 tbsp of oil, the soy sauce/oyster sauce, Shaoxing wine, garlic powder, and sugar.
Remove any excess marinade from the bowl with the ribs and discard. Add the cornstarch to the ribs and toss to coat.
Preheat the air fryer to 350°F. Carefully oil the basket of the air fryer and lay the ribs out in a single layer, being sure not to crowd. Drizzle the remaining oil over the ribs.
Air fry for 10 minutes, then flip and air fry for an additional 10 minutes or until golden, crisp, and cooked through.
Remove from the air fryer and enjoy!
Serves 4 as an appetizer or 2 as a main
I Am... Yaki Udon
Yaki udon, with its thick and chewy noodles, super savory sauce, crisp vegetables, and slices of seared pork is my idea of pure comfort food. It’s super easy to put together and I can’t imagine a better one pan meal. I LOVE yaki udon. It reminds me of long lazy nights, huge piles of noodles steaming on a flat top grill, and the sounds of happy people chatting and enjoying festival food in Japan.
What is yaki udon?
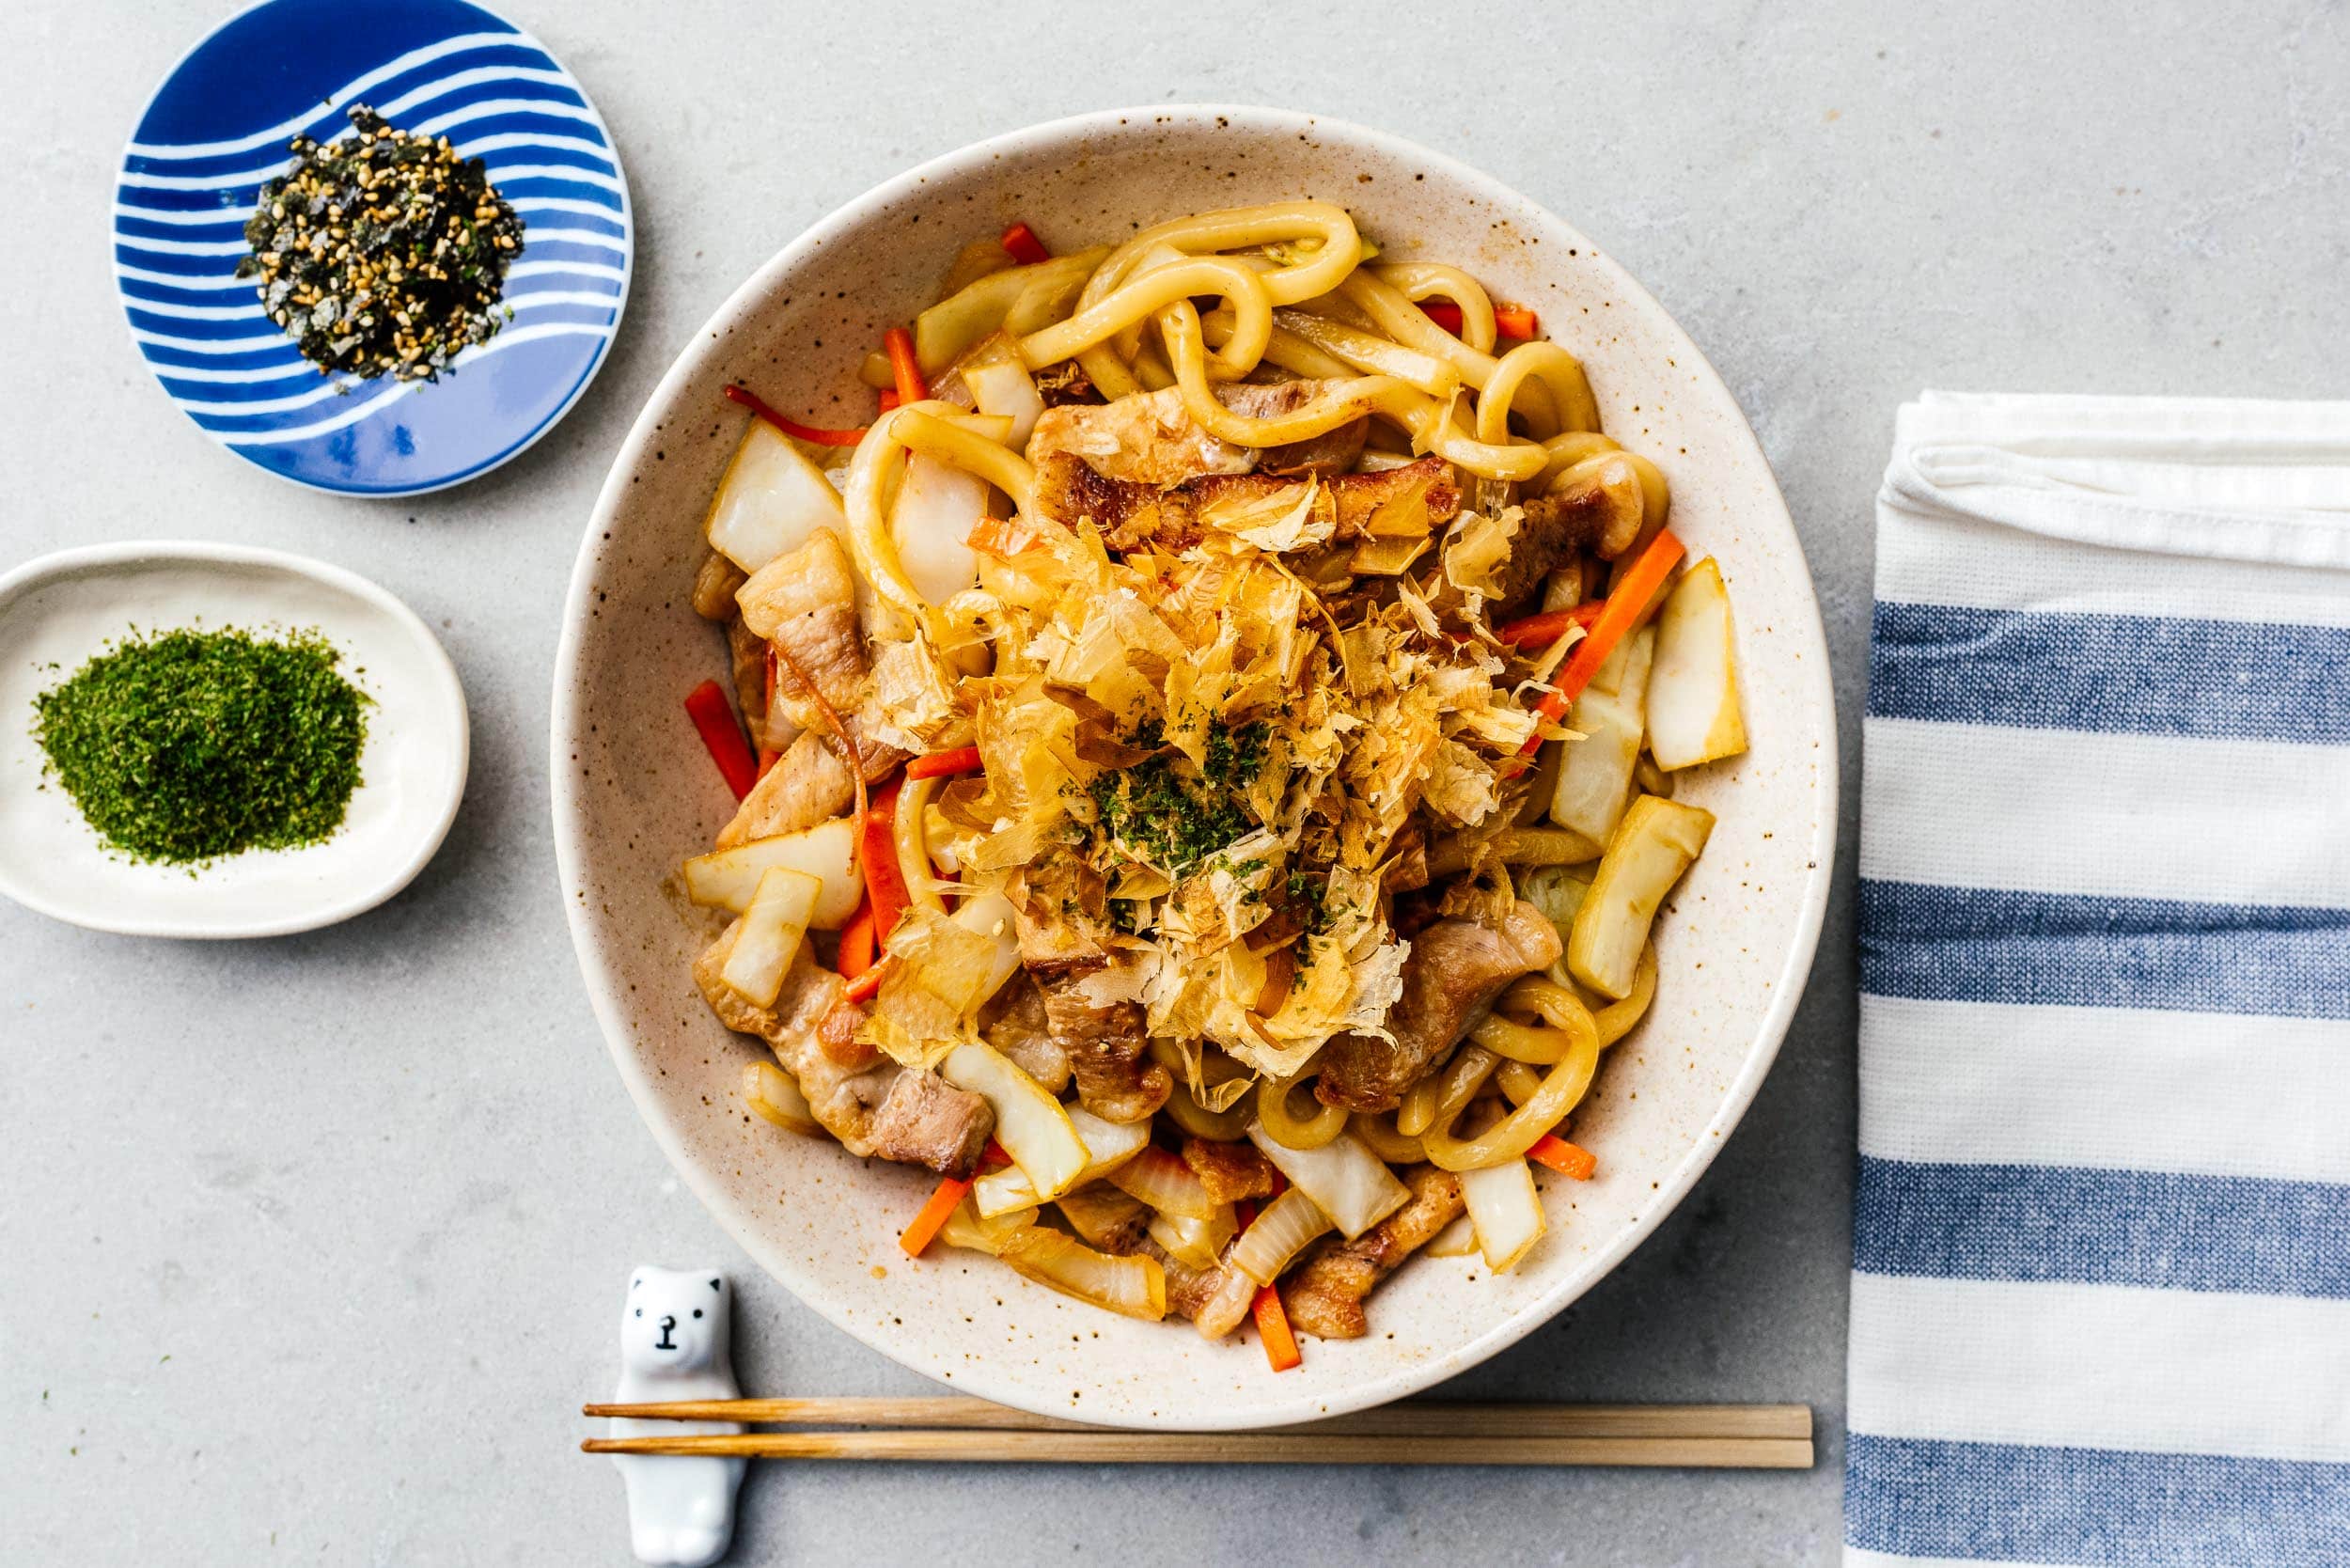
Yaki udon, literally translated, is fried udon. Thick and chewy udon noodles are fried with pork, cabbage, onions, and carrots, in a slightly sweet, super savory soy and mirin based sauce. It’s usually topped off with seaweed and bonito flakes that gently dance in the heat of the noodles. It’s almost just the same as yakisoba, but with udon noodles. Yaki udon is super popular at Japanese festivals, at izakaya (Japanese pubs), and just about anytime.How to make yaki udon
You’re just 5 minutes away from pure noodle satisfaction.- Soak. The easiest way to defrost frozen udon noodles is to give them a quick soak in some warm water. Use your hands or a pair of chopsticks to loosen them up, then drain.
- Fry the pork. Add a touch of oil to a pan and cook the pork slices, flipping as needed, until golden and cooked through.
- Cook the vegetables. Stir fry the vegetables until slightly soft.
- Add the noodles. Fry the drained noodles, along with soy sauce, mirin, and dashi, tossing until the noodles are glossy and coated with sauce.
- Enjoy! Top off with some bonito flakes and nori and enjoy!
Ingredient notes
- Udon noodles - my all time favorite kind of udon noodles are the frozen ones! They’re called sanuki udon and essentially, they’re fresh udon noodles that are cooked, then flash frozen. Read more about frozen udon below.
- Dashi powder - dashi is a super savory, clear, umami rich stock made from seaweed and dried fish. You can make it from scratch or, there are amazing dashi packs and instant dashi powder/granules, kind of how there is chicken stock powder or bouillon. More on that below too.
- Mirin - mirin is Japanese sweet rice wine and a key ingredient in Japanese cooking. Compared to sake, it has a lower alcohol content and higher sugar content that occurs naturally from fermentation. It’s used as a seasoning and glazing agent. They sell mirin in the Asian aisle, at Asian grocery stores, and online. If you don’t have mirin, you can sub the same amount of sugar.
- Katsuobushi - this is an optional ingredient but it will make your yaki udon super umami forward and authentic! Katsuobushi are dried, thinly shaved bonito flakes that they put on top of yakisoba, yaki udon, and takoyaki. They’re those little pale whisps that look like they’re dancing when the food is hot. You can find katsuobushi at Asian grocery stores and online.
Yakiudon vs yakisoba
If you asked me to choose between yakiudon and yakisoba, I would choose yakiudon every time, hands down! Udon noodles are a joy to eat: thick and chewy and SO satisfying. Mike and I love udon so much that we went on an udon pilgrimage to the birthplace of udon, Kagawa, Japan. They don’t have yakiudon there, but they do have the best udon in Japan. Udon is truly the best noodle to make in saucy stir fry. The noodles soak up so much flavor and hold up without getting soggy. With yakisoba sometimes you get sad broken noodles. You’ll never have that problem with udon. Udon noodles are hearty, thick, and a joy to eat!Frozen Udon is the Best Udon
Frozen udon is the best: it’s practically instant and takes on all the flavors of whatever you’re cooking it with. We always have a pack (or five) of frozen udon bricks in the freezer. Of course, you could use those instant udon packs, that come shrink-wrapped, but if you want udon on another level, head to your local Asian grocery store, take a peek in the freezer and do yourself a favor and buy the frozen udon. Frozen udon is sold in bricks, with usually 5 bricks in a package. They’re super easy to prepare: just thaw and go. And best of all, most of the frozen udon that’s sold in North America is actually imported from Japan. We often see brands sold here that are the same as what we buy at the grocery store in Tokyo. They taste infinitely better than the shelf-stable cryovac udon. Basically, look for the words Sanuki Udon somewhere on the package.Dashi powder
Dashi powder is the quickest way to add dashi flavor to any dish. Essentially, it’s a flavor booster. You can buy dashi powder in the Asian grocery store or online. It adds a bunch of flavor and umami. If you don’t have any on hand, you can substitute it with chicken stock powder, but if you do, your udon may end up saltier than if you use dashi.How to customize yaki udon
Yaki udon is a super customizable noodle dish. Make it your own!- Beef yaki udon: sub 1/2 lb thinly sliced beef
- Chicken yaki udon: sub 1/2 lb sliced chicken
- Shrimp yaki udon: sub 1/2 lb peeled and deveined shrimp
- Vegetable yaki udon: leave the pork out and add 1 cup extra vegetables, such as: mushrooms, bell peppers, broccoli
- Plain yaki udon: leave the pork and vegetables out
More udon recipes
If you’re looking for other udon-inspiration, try these recipes:- Everything Bagel Pesto Stir Fry Yaki Udon
- Weeknight Thai Curry Stir Fry Udon Noodles
- The ultimate 10 minute spicy beef weeknight stir fry udon
- Spicy, Savory, and Completely Addictive Mentaiko Kimchi Udon
- Chewier, Better, Faster, Stronger: 4 Ingredient Cacio e Pepe Udon
- Chicken Udon Recipe
- Turkey Curry Udon Recipe
- Sunday Brunch: Bacon and Egg Yakiudon
We even went to Kagawa
And if you want, check out our trip to the birthplace of udon. -StephYaki Udon
Super easy and pure Japanese comfort food.
- 1 brick frozen udon (about 250g/8.8oz)
- 1 tbsp soy sauce (Japanese preferred)
- 1 tsp instant dashi
- 1 tsp mirin (or sugar)
- 1 tbsp neutral oil (eg. grapeseed)
- 1 pork chop (about 1/2lb)
- 1/4 medium onion (sliced)
- 1 cup cabbage (chopped or shredded)
- 1/2 carrot (julienned or shredded)
- 1/2 cup katsuobushi (shaved dried bonito flakes, optional)
Soak the frozen udon in a bowl of warm water, loosening to make sure the strands of noodles are separate. Drain and set aside. Mix together the soy sauce, dashi powder, and mirin (or sugar) with 1 tablespoon water in a small bowl. Set aside.
Heat up the oil in a skillet over medium heat. Add the sliced pork and cook until the pork is seared and cooked through, 2-4 minutes.
Add the onion and sauté, stirring, until soft, but not brown. Stir in the cabbage and carrot, cooking until soft, but still a bit crunchy, 1-2 minutes.
Add the drained udon noodles and bowl of sauce. Toss everything together, over medium-high heat, until the sauce reduces and coats the noodles, 1-2 minutes. Remove from the heat, and season with salt and pepper. Finish with sliced nori and bonito flakes, if using.

I Am... Rice Paper Croissants
If you’re on Tiktok you’ve seen rice paper croissants. The good ones look just like crispy, golden, flaky croissants with layers upon layers. I admit, I doomscroll way too much. I love a good Tiktok hack, I love rice paper, and I love croissants, so testing out rice paper croissants was a no brainer.
What are rice paper croissants?
They’re just what they sound like, croissants made of rice paper. Classic French croissants are a multiple day affair with yeasted dough and copious amounts of butter, so these technically aren’t croissant-like at all, except in name and shape. They do share the layers though! Think crispy, crunchy outsides with multiple chewy, mochi-like layers inside. They’re delightful.Who invented this hack?
I’m not sure who technically invented them, but they’ve gone viral thanks to @twaydabaeb who first saw the recipe on @tastyjapan’s account. Since then, they’ve gone legitimately viral with tonnes of people trying them out for themselves.What do rice paper croissants taste like?
They’re crispy on the outside and chewy on the inside, so nothing like a croissant. That being said, they taste good, like a sweet treat that’s reminiscent of a combination of French toast and mochi. If you’ve had Japanese mochi or Hawaiian butter cake before, this rice paper croissant will remind you of that.Why rice paper croissants though?
Why not?! Sure, these are technically far away culinarily from croissants, but for our purposes, they have layers like croissants and they kind of look like croissants. Plus, if you have someone gluten-free in your life, you can surprise them with some gorgeous golden rice paper croissants.How to make rice paper croissants
- Heat and prep - preheat your oven to 350°F and prep a rimmed baking sheet by lining it with parchment paper.
- Make the custard - In a bowl, whisk together the eggs, milk, sugar, melted butter, baking powder, vanilla extract, and cinnamon (if using). To go the extra mile, strain your egg batter through a fine mesh strainer.
- Soak the rice paper - Pour the egg mix into a bowl that’s shallow enough to let you place the rice paper rounds in flat. If you don’t have a large enough bowl, use a rimmed baking sheet. Take a single sheet of rice paper and dip it into the egg custard briefly, flipping.
- Stack - Place the egg-soaked rice paper on a cutting board. Repeat 2 more times so you have a stack of 3 sheets of eggy rice paper stacked up.
- Cut into thirds - Cut (using a sharp knife or kitchen scissors) the stacked rice paper into thirds. The middle piece should be a triangle while the two outer pieces will be half moon/circles.
- Roll - Take one of the side stacks of rice paper and lay it directly on top of the middle triangle. Take the remaining side stack and lay it on top of the middle triangle, so that it’s perpendicular/horizontal to the triangle shape. Roll the rice up from the wide bottom up to the point of the triangle.
- Bake - Place the rice paper croissant on the prepped baking sheet and curve in the sides slightly to make it crescent-shaped. Bake in the preheated oven for 30-35 minutes. The rice paper croissants will be golden and crispy on the outside.
- Enjoy - Let the croissant cool down a bit and enjoy while still warm! The outer shell will be crispy and crunchy and the inside layers will be slightly gooey, chewy, and mochi-like.
Ingredients for rice paper croissants
- Rice paper - Grab a package of round rice paper, it doesn’t matter which size you get, but most of the tutorials online use the larger size. More on rice paper and where to buy it below.
- eggs - the base of rice paper croissants is eggs. Rice paper croissants are more reminiscent of French toast rather than the flaky butter bread-iness of regular croissants.
- milk - the milk helps thin out the eggs and make the batter more of a custard instead of simply beaten eggs.
- sugar - sugar is for sweetness, obviously, but it will also help with browning and crunch.
- butter - you can’t have croissants without butter! Plus the butter aids in coloring and browning. You’ll have to melt the butter so you can easily add it to the batter, the microwave is your friend here.
- baking powder - this is going to help give the batter a little bit of rise, as well as help with crisping and browning.
- vanilla and cinnamon - Vanilla adds a nice creaminess to the rice paper croissants and helps make them taste more like a pastry. If you don’t have any though, I would say optional. As for the cinnamon, I think it’s completely optional. Cinnamon is in the original recipes I’ve seen on Tiktok, but regular croissants don’t have cinnamon in them, so this is completely up to you. If you’re looking for more of a French toast flavor, add in some cinnamon. For the croissants in this post, I opted for no cinnamon.
What is rice paper?
Rice paper, or bánh tráng in Vietnamese, is a standard in Vietnamese cuisine. Rice paper is exactly what it sounds like: thin, edible wrappers made of rice. They come dehydrated and are rehydrating with water when it’s time to eat. Rice paper consists of rice that’s steamed, made into a batter, then dried into a thin sheet. Contrary to the one-ingredient name, sometimes rice paper also contains tapioca starch. Either way, rice paper is always gluten-free which makes it an amazing choice to use as a wrap or when sliced up, gluten-free noodles.Where to buy rice paper
If you live in a city with a grocery store that has a large international aisle, you’ll be able to find rice paper in the Asian aisle, near the rice vermicelli. All standard Asian grocery stores will carry several kinds of rice paper in the dry noodles aisle. If you’re lucky enough to live near a Vietnamese grocery store, you can also find a whole aisle of rice paper varieties from small to extra large. If you can’t find rice paper locally, it’s also readily available online.Other recipes that use rice paper
I LOVE rice paper. Honestly, it is one of the most versatile and best ingredients out there. Try it in these recipes:Do Tiktok rice paper croissants work?
Yes! They are fun, easy to make, and unique. I love the contrast between the crispy outside and the mochi-like chewy insides. They don’t taste like croissants in any way, but I throughly enjoyed making and eating them. Enjoy! These rice paper croissants aren’t like the other croissants. They’re very demure, very mindful, very cutesy ;) xoxo stephRice Paper Croissants
This tiktok croissant hack makes crispy, golden, flaky croissants with layers upon layers.
- 2 eggs
- 1/4 cup milk
- 1.5 tbsp sugar (plus extra for sprinkling)
- 1 tbsp butter (melted)
- 1/2 tsp vanilla extract
- 1/4 tsp cinnamon
- 1/4 tsp baking powder
- 6 sheets rice paper
Preheat the oven to 350°F and line a baking sheet with parchment paper.
In a shallow bowl (large enough to lay the rice paper in), whisk together the eggs, milk, butter, vanilla, cinnamon, and baking powder. Make sure everything is well combined and there are no streaky egg bits. Strain the egg custard through a fine mesh strainer if desired.
Take a single rice paper sheet and dip it into the egg mixture, flipping once. Lay the coated rice paper sheet on a cutting board and repeat with 2 more sheets of rice paper so they are directly on top of each other.
Cut the stacked rice paper into 3 pieces, with the middle being a triangle and the two sides being half circles.
Take one of the side half moons and lay it directly on top of the middle triangle.
Take the last half moon and lay it down perpendicular/horizontal to the triangle.
Roll the rice paper up and place on the prepared baking sheet.
Slightly shape the tips of the rice paper croissant into a crescent shape. Repeat with the remaining rice paper then sprinkle sugar on top if desired.
Bake both croissants in the preheated oven for 30-35 minutes, or until golden brown and crispy. Remove from the oven, let cool and enjoy.

I Am... Easy Chicken Enchiladas
If you’re looking for a cozy, warming, filling, all-in-one dish, enchiladas are it. Corn tortillas wrapped up around a super savory meaty filling, smothered in homemade enchilada sauce and topped off with cheese, what could be better? I first fell in love with enchiladas in New Mexico. Mike and I were on a road trip and boy oh boy did I fall hard for the the land of enchantment – which handily happens to be the state slogan. One of the best meals we ate was at Mary & Tito’s: the enchiladas (extra chile please!) are something I still dream about. If you love enchiladas that are plump, juicy, full of filling, with a lot of sauce and cheese, this is the enchilada recipe for you!
How to make enchiladas
They may seem complicated, but if you can roll up a tortilla, you can enchilada!- Prep the sauce. We’re going to go all out and make a homemade green enchilada sauce but if you’re in a hurry, you can used jarred enchilada sauce - you can find both red and green sauce in the Mexican aisle at the grocery store.
- Make the filling. Don’t go rolling up just plain meat inside your enchiladas! You want the filling to be flavorful, juicy, and moist. Give your filling an extra boost by mixing in a good amount of enchilada sauce and cheese.
- Roll. Lightly heat up your tortilla, the spoon some filling in the center. Roll the tortilla up tightly and place it seam side down in an oven safe baking dish.
- Sauce. Spoon on some extra enchilada sauce and finish with generous amount of cheese.
- Bake. Bake the enchiladas until they are heated through and the cheese is melty and delicious.
- Top and enjoy! Finish everything off with some toppings: cilantro, onions, salsa, sour cream, extra chiles. Enjoy hot!
Ingredient notes
Enchilada sauce - enchilada sauce is surprisingly easy to make, especially because a blender does all the work for you. That being said, you can use store bought sauce if you’re in a hurry. Chicken - I like to air fry the chicken because air fried chicken is so easy and good, but you can also use leftover rotisserie chicken or baked chicken too. Cheese - A blanket of melty cheese on top as well as cheese inside the enchiladas make these guys extra cheesy comfort food. Tortillas - I like to use corn tortillas, which is traditional, but enchiladas with flour tortillas are popular too and flour tortillas are a lot softer, making them very easy to roll. If you are using corn, be sure to heat up the tortilla first (preferably in a nonstick pan, or if not, a microwave) to make them soft and pliable. Toppings - What are enchiladas without toppings? Sour cream is a must. I also like a squeeze of lime, diced red onions, sliced avocados, and chopped cilantro.Red vs green enchiladas
Generally, there are two kinds of enchiladas: red or green. Red enchiladas have red enchilada sauce, made from dried red chile peppers. Green enchiladas have green chile sauce, made from roasted green chile peppers. We’re going to make green enchiladas because I am obsessed with green chile!What is an enchilada?
If you haven’t had the pleasure of having one before, an enchilada is a rolled corn tortilla stuffed with meat (or beans or vegetables), covered with sauce, and baked. Enchiladas are originally from Mexico, but a lot of people associate them with American Tex-mex, even though you can find them across the entire Southwest.Variations
I love chicken enchiladas, but to be honest, you can fill these with almost anything, including all the meats: seasoned ground beef, barbacoa, carnitas, chicken tinga (shown below), al pastor, or carne adovada.What to serve with enchiladas
- who doesn’t love Mexican rice?!
- quick and easy homemade salsa verde
- better than store bought tortilla chips
Best Chicken Enchiladas
From scratch green chile enchilada sauce makes this the best ever chicken enchiladas.
- 1 lb tomatillos (paper skins removed)
- 4 Anaheim chiles (or Hatch, when you can get them)
- 1/4 medium onion (roughly chopped)
- 6 cloves garlic
- 1 cup fresh cilantro (roughly chopped)
- 1 tsp dried oregano (Mexican preferred)
- 1/2 tsp ground cumin
- 4 cups cooked shredded chicken
- 2 cups shredded cheese (of choice, divided)
- 18-20 small corn or flour tortillas (or 8-10 big ones)
- fresh cilantro (chopped, optional, to serve)
- lime wedges (optional, to serve)
- hot sauce (optional, to serve)
Make the enchilada sauce: set the oven to broil. Wash and dry the tomatillos and chiles. Toss with a bit of oil and toast on a foil lined baking sheet until charred, flipping once, about 15-20 minutes.
When the tomatillos and chiles are done, remove the tomatillos from the baking sheet, placing in a blender. Carefully wrap the foil up around the peppers so they are in a little package so they can steam. Let steam for 10 minutes and then peel off the skins and remove the stems and seeds. Add the peppers to the blender, along with the onion, garlic, cilantro, oregano, and cumin. Blend until finely chopped. Taste and season with salt.
Set the oven to 375°F and lightly oil or use non-stick spray on a baking dish.
Add 2 cups of the green enchilada sauce to a bowl with the shredded chicken and 1 cup of cheese. Mix well, and season with salt and pepper to taste. Lay a tortilla flat (warm them up in the microwave briefly if they need to be more pliable) then spoon on some filling in the center. Roll up tightly and place seam side down into the prepared baking dish. Repeat with the remaining tortillas and chicken mixture.
Top generously with the remaining enchilada sauce and cheese. Bake in the oven until cheese is melted and bubbly, 20-30 minutes. Top with cilantro and serve with hot sauce and lime.

