

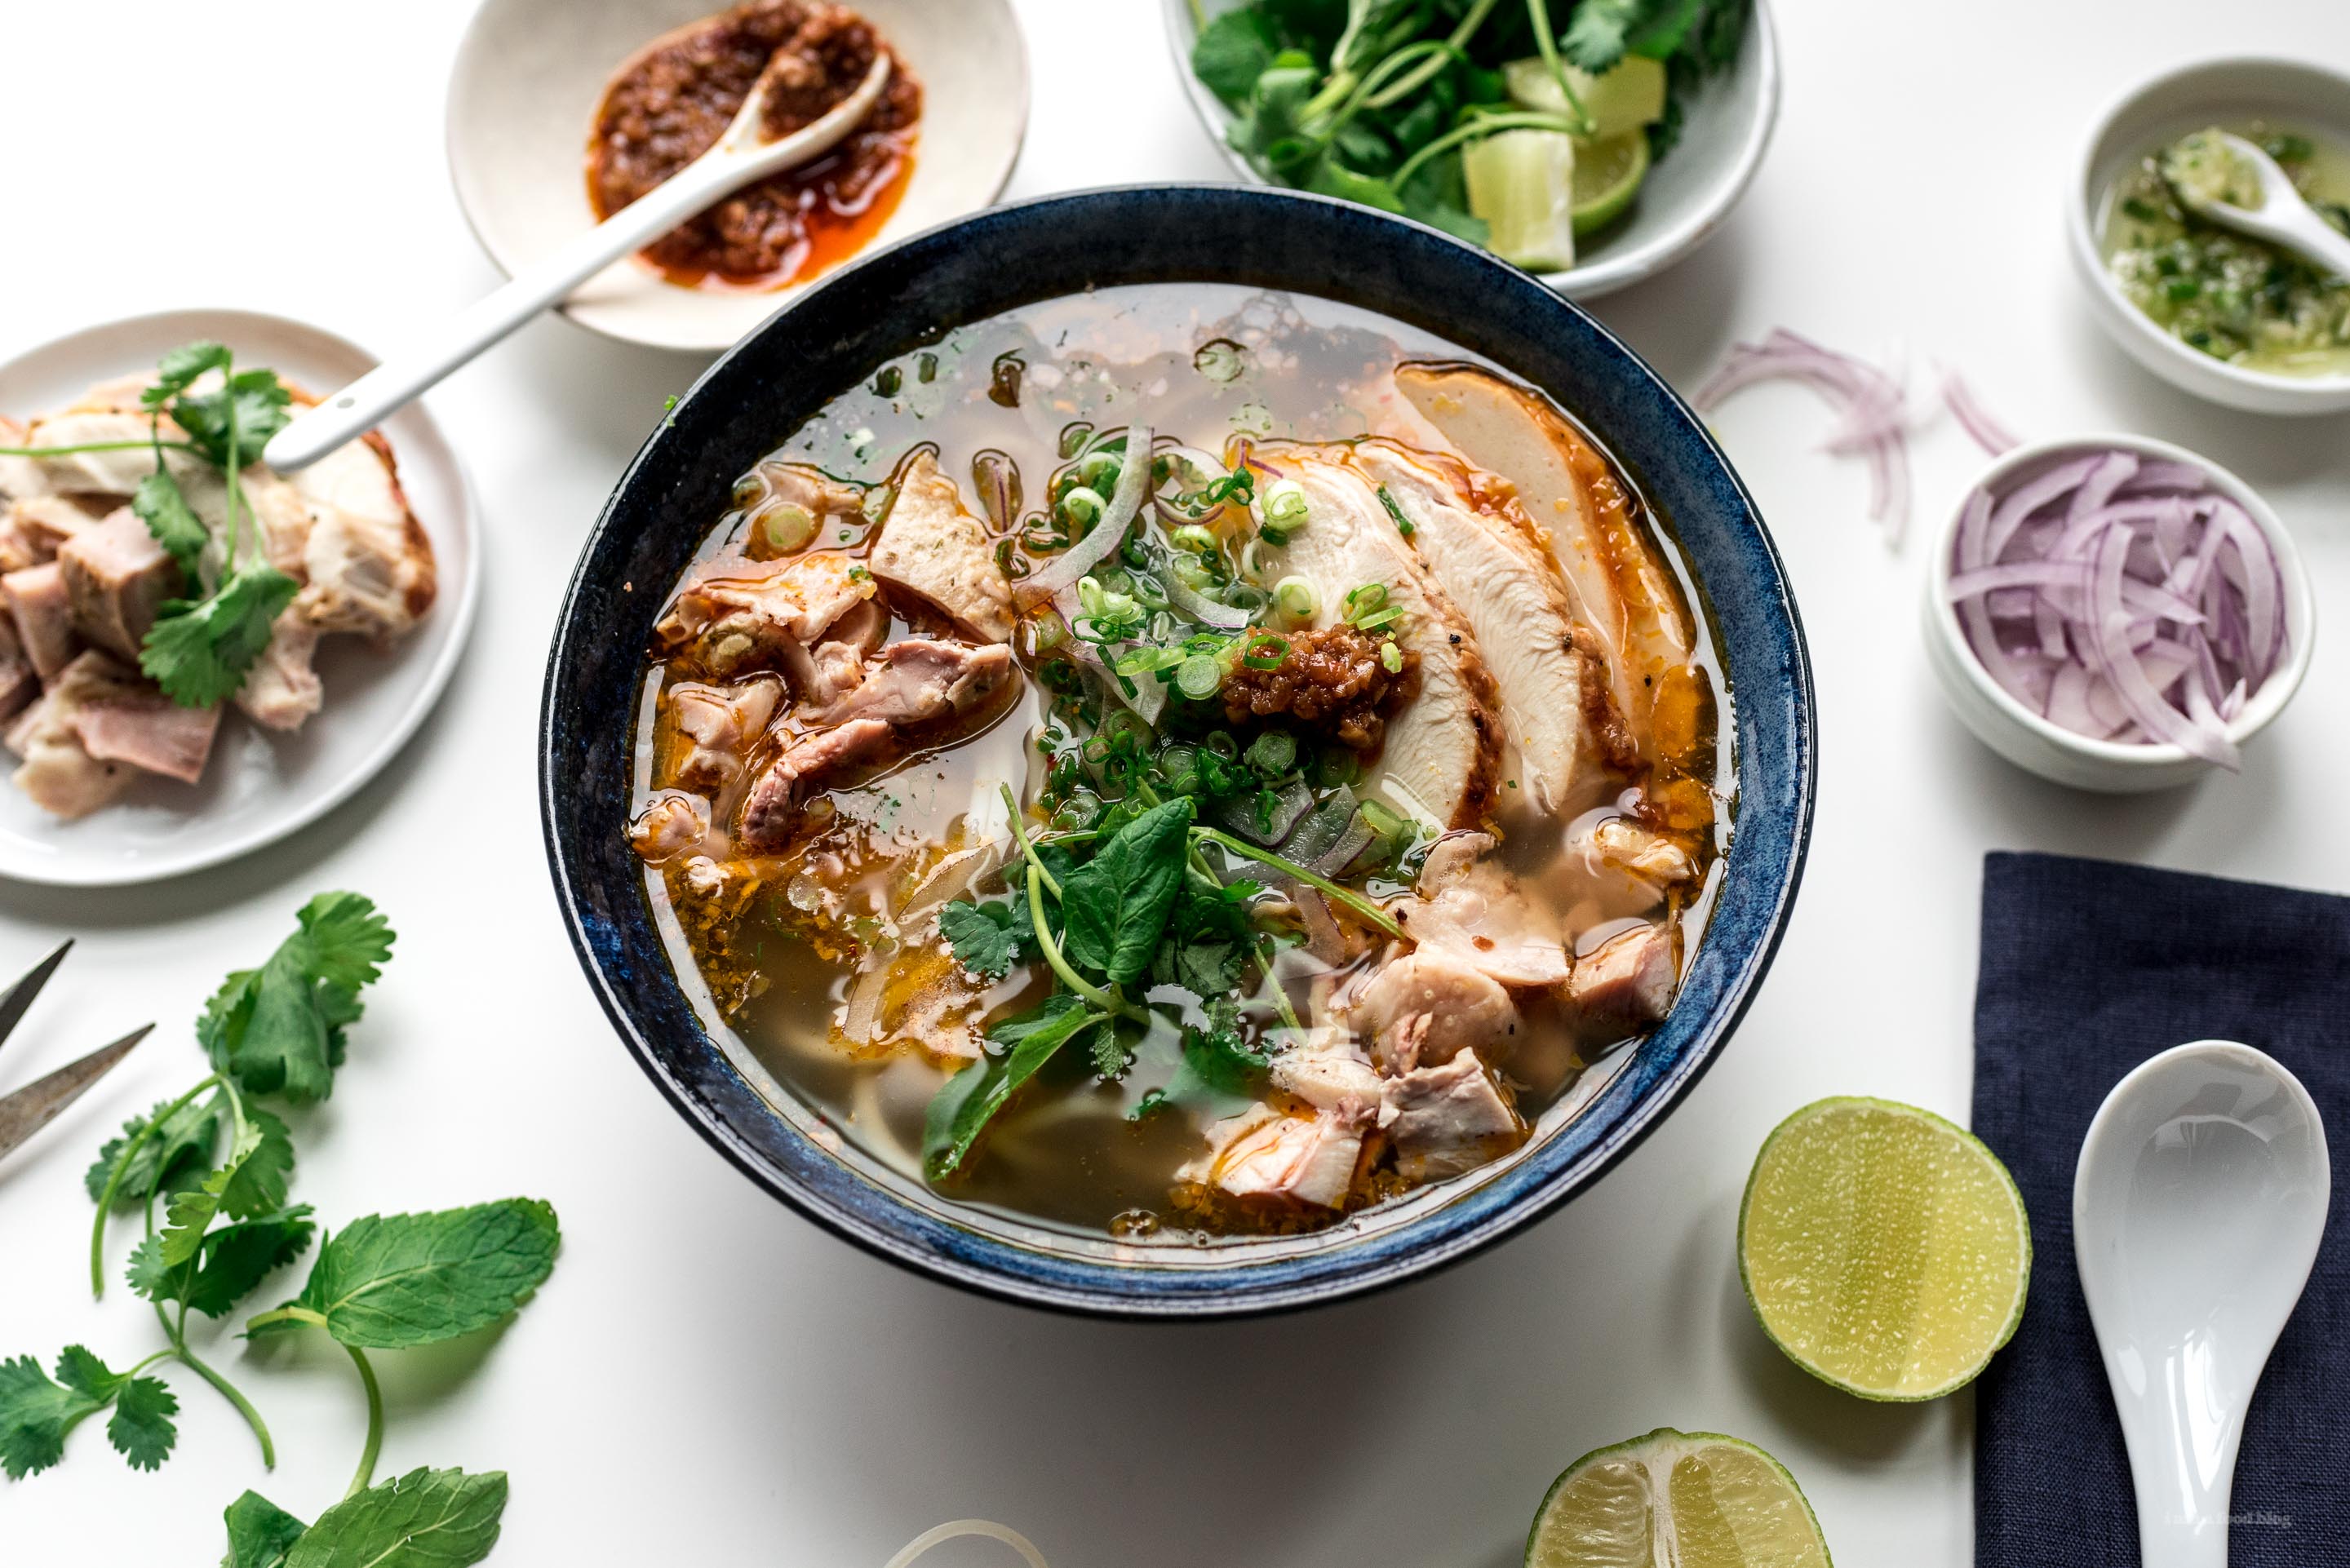
I Am... The Best Part of Thanksgiving is Leftovers
There are two types of people in the world: those whole live for Thanksgiving dinner and those who live for the leftovers. I always waffle between the two but I think I’m a leftovers person. I just love having food in the fridge that can easily heated up for when I’m in those hangry moods. And when I’m in the mood to make leftovers into something even better like bestovers...oh man, that’s where I like to shine. Give me all your roast turkey carcass because here I come turkey congee and turkey noodle soups! I think we all know that the best part of Thanksgiving is leftovers, right?
Read More →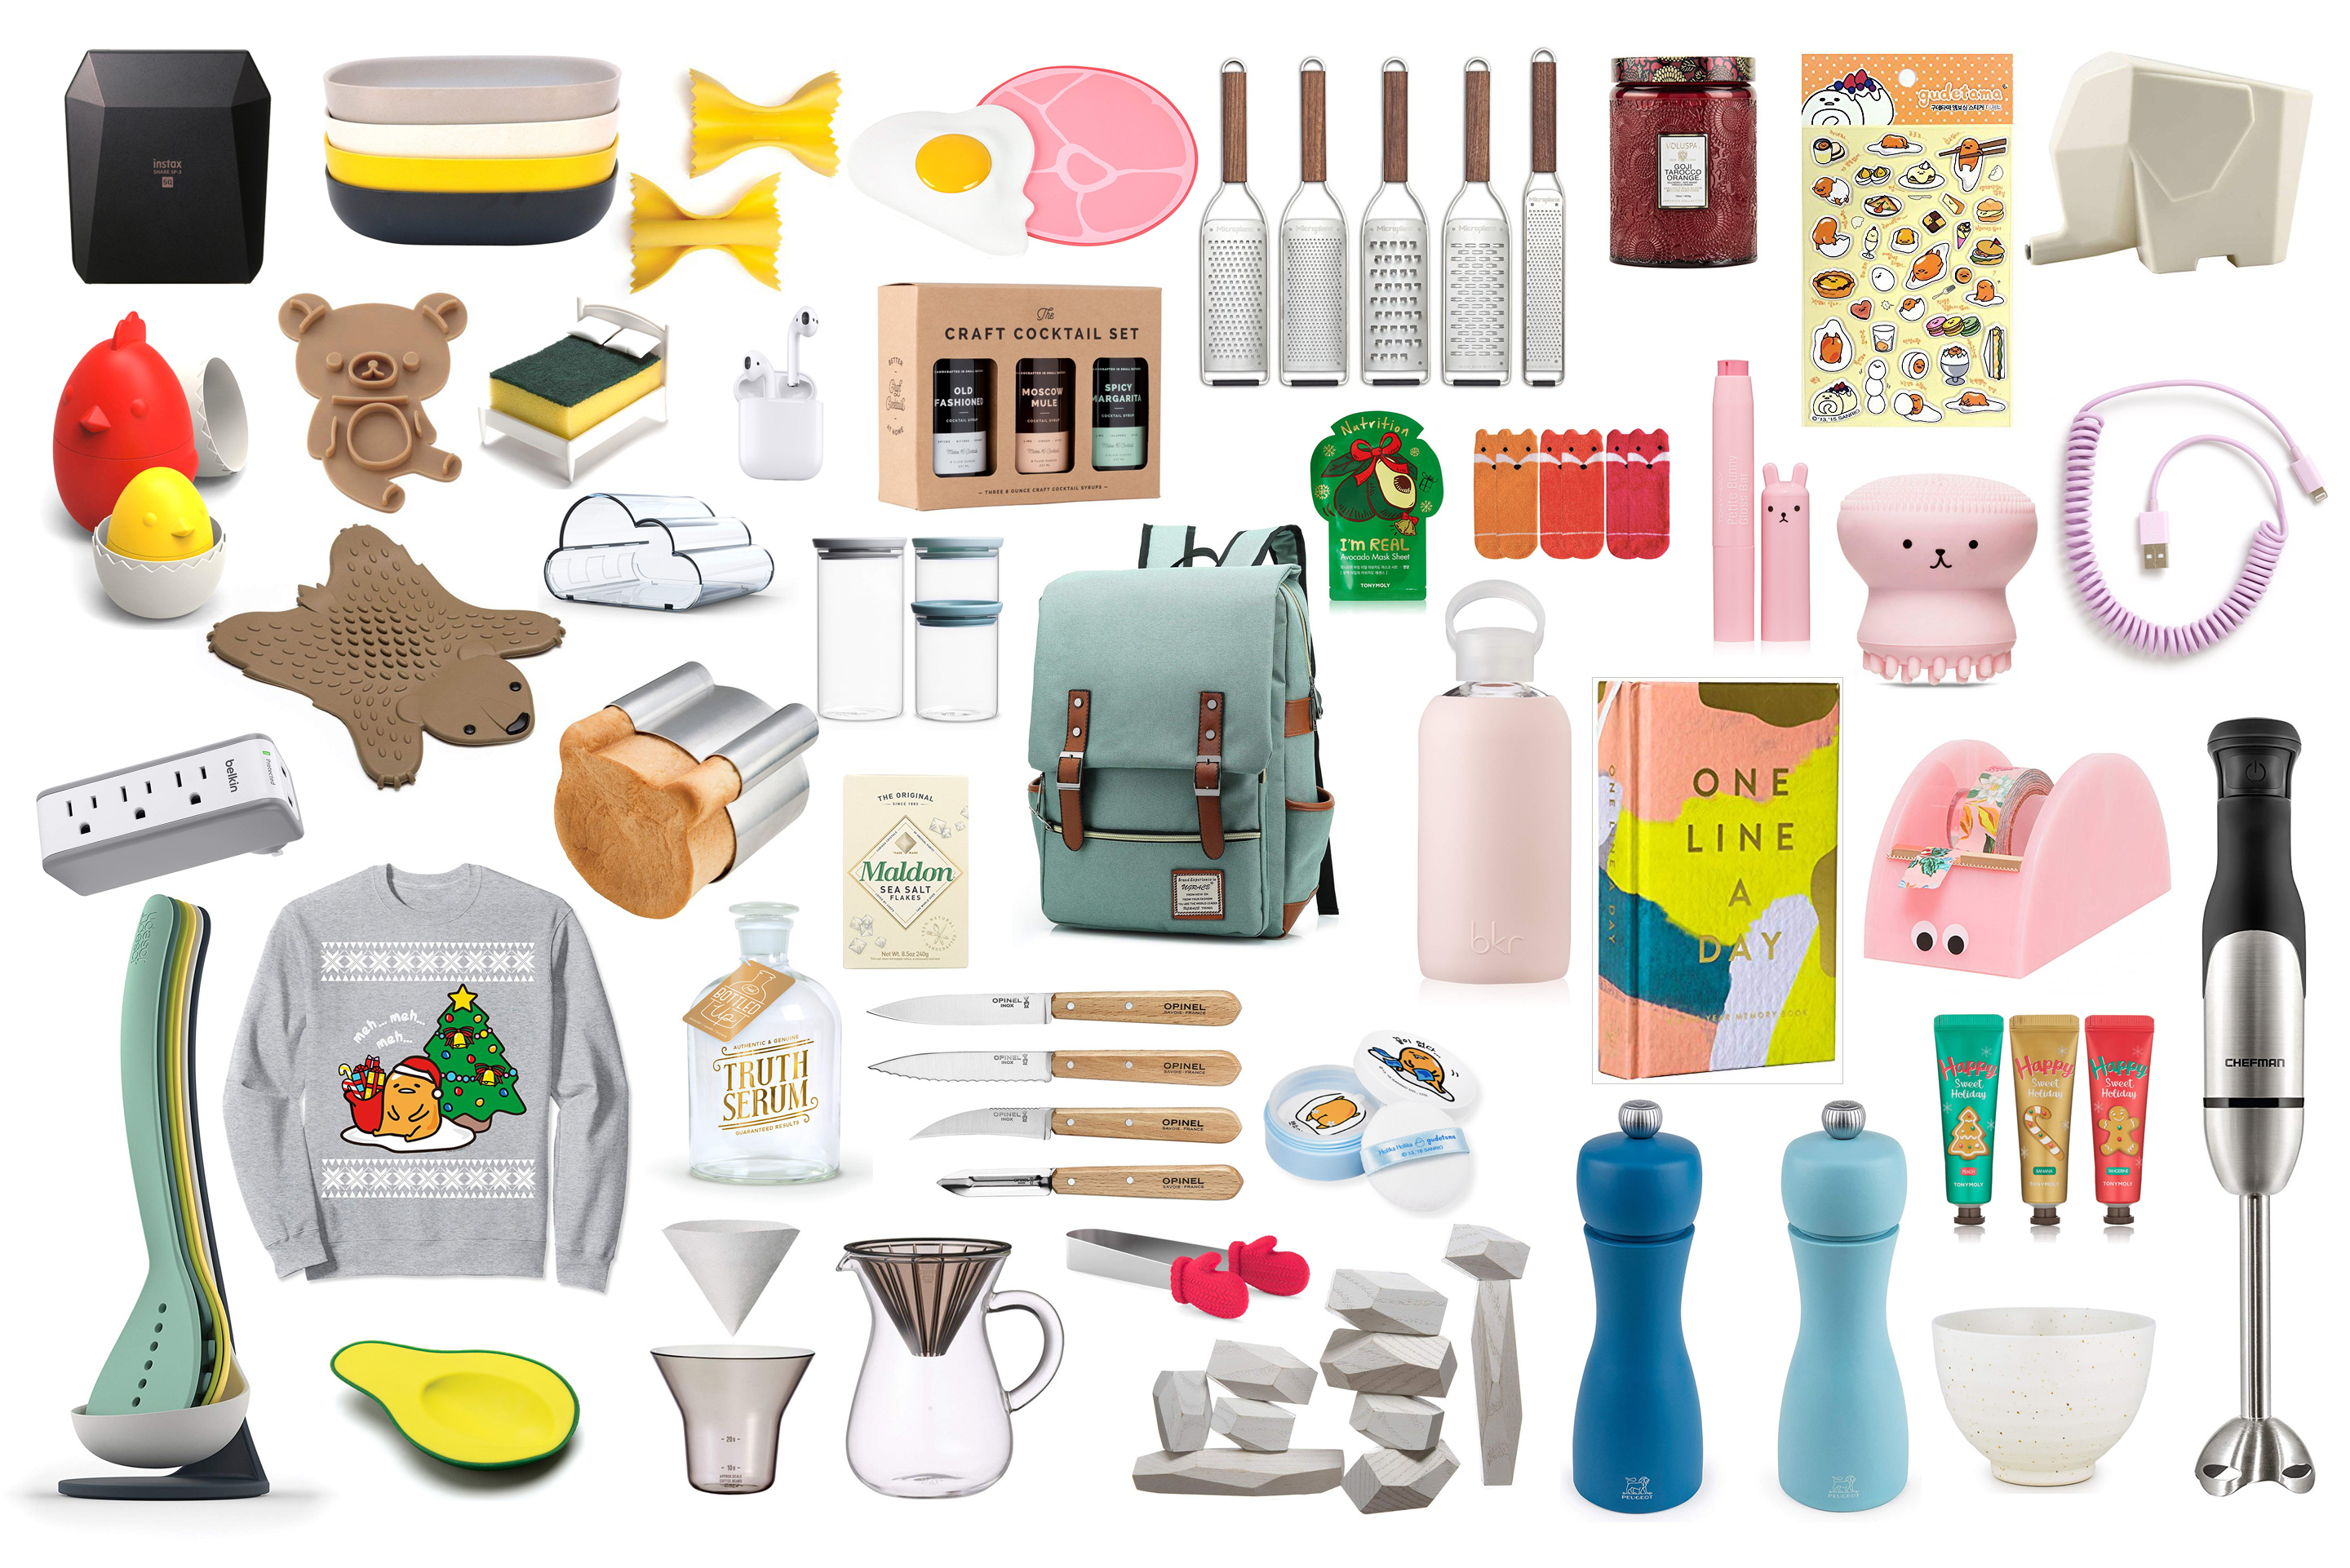
I Am... Best Black Friday Kitchen Deals
It’s time to unbutton your jeans and finally buy all the things you’ve been saving in your cart with these Black Friday kitchen deals. Black friday is the best time to stock up on basic kitchen deals and treat yourself to kitchen steals. Why not do a little early holiday shopping and treat yourself! Here are some of the best things to get for your kitchen on Black Friday/Cyber Monday:
Best Black Friday deals for home and kitchen stuff
KitchenAid Stand Mixer
The classic, classy 4.5 quart KitchenAid stand mixer is on a massive sale right now. It’s the #1 best selling in stand mixers on Amazon for a reason: it’s incredibly strong, versatile, and long lasting. If you’ve had your eye on a stand mixer, definitely take advantage!Vitamix Blenders
The gold standard in blenders is Vitamix. We love and use ours every 2 days or so and we’re not even smoothie drinkers. There are so many things blenders can do in the kitchen to make your life easier, from blending sauces to making soups. If I were to choose a new Vitamix, the 64 oz low-profile A2500 would be on my wishlist. It’s deeply discounted right now and like all Vitamix blenders, is highly rated and built to last. Check here for other Vitamix black friday deals.Instant Read Thermometer
Every home cook and kitchen NEEDS and instant read thermometer and this ThermaPro is 40% off (plus a little extra). We’ve used this exact model recently while at a friend’s house and were impressed buy the speed and accuracy. We did a side by side with a Thermapen because we’re nerdy like that. At under $15 we’re definitely grabbing one to add to our camp/travel kitchen.Staub Cast Iron Braiser
I LOVE braisers. If you’re going to have only one cast-iron pan/pot/casserole in your kitchen, it should be this one. The high sides are perfect for searing, it’s deep enough to deep-fry in, you can use it on the stove top and in the oven, and it’s beautiful enough to bring right to the table. The glass lid is just the chef’s kiss on top, allowing you to peek at what you’re cooking without opening the lid. We have this exact braiser and I reach for it all the time. I prefer the insides of Staubs compared to Le Creuset because the insides are a smooth black enamel that doesn’t stain and is easy to clean. It’s 33% off right now, run, don’t walk.COSORI Air Fryer
We love our air fryer so much that sometimes we joke about getting a fleet of air fryers that we’d keep out the countertop so we could air fry all the things at the same time. We updated to a COSORI air fryer recently and are seriously impressed with how air fryer technology has improved. Our current guy is this one which we are in love with. If you’re looking for something a little smaller, this one looks like the perfect size for a couple.Nespresso
Addicted to iced coffee? Hot coffee? Any coffee!? Yup, me too. The Nespresso Vertuo POP is 25% off right now and it makes iced coffees and espressos so you can unleash your inner barista. The POP is cute and compact and will add a splash of color to your kitchen and caffeine to your life.CAROTE Non-Stick Pots and Pans Set
Full disclosure, I haven’t tried these pans, but I’m always looking at the covetously because I love how sleek and aesthetic they are. This set is 54% off so maybe now is the time I convince Mike to get a set? They’re highly rated, non-stick, stackable, and have removable handles for ease of storage. They look like a great starter set for the kitchen or amazing for anyone who’s looking to update their non-stick cookware.KitchenAid Oven Mitts
I find one of the many things people overlook in their kitchen are oven mitts. We’re guilty of it too - our oven mitts are old. These soft silicone mitts are 47% off, wipe clean, and are rated up to 500 degrees F. Plus they come with both mittens. Did you know that sometimes you only get one?! Treat yourself to some new oven mitts. You and your hands deserve it.Peelers
Have you ever used a vegetable peeler that just isn’t sharp anymore? Is it the vegetable peeler that’s in your kitchen drawer right now? Vegetable peelers are the forgotten stepchild of kitchen tools. The joy of peeling through vegetable skins with ease is 37% off. They come with carbon steel blades and are the superior Y-shape of peelers.Kitchen Towels
If there’s one thing I absolutely loathe, it’s a lack of fresh, clean kitchen towels. They’re the workhorse of the kitchen and having a huge, clean stack is a life saver. Really, any 100% cotton dish towels will do, but this set of 6 is deeply discounted and is highly rated, so they will do nicely. Truly the best savings are on items that you would regularly purchase anyway, but now as a bonus, they’re on sale! We have a giant stack of towels (I'm talking over 30) in the kitchen and it's so nice to just be able to grab a new one when you need it without interrupting your kitchen flow. xoxo steph we may earn a smol commission from these links Read More →
I Am... Tiktok Salmon Rice Bowl
Flaky salmon, fluffy rice, soy sauce, kewpie mayo, sriracha, avocado, kimchi, and seaweed come together in the perfect Tiktok salmon rice bowl. Sometime in 2021 a Tiktok from Emily Mariko making a salmon rice bowl got viral and everyone was making salmon rice bowls. The tiktok is long forgotten now but the salmon rice bowl is still a quick and tasty snack to make. It's my fave go-to meal when we have salmon for dinner. Mike will have some fancy crispy salmon dinner and I'll have this. Emily’s Tiktok shows her flaking up leftover cooked salmon, topping it with rice from the fridge, adding an ice cube, covering it with parchment paper and warming it up in the microwave. The ice cube melts a bit and steams, making the salmon and rice moist and hot. Then, it’s just a question of adding soy sauce, kewpie mayo, and sriracha. The rice bowl finishes with slices of avocado and a side of kimchi. Open up a package of Korean seaweed/laver and use a pair of chopsticks to scoop up a bit of seaweed and rice and enjoy!
How to make a salmon rice bowl
- Flake up your cooked salmon. Use a fork and mash the salmon into flakes.
- Add the rice on top. Top off the salmon with some leftover or fresh rice.
- Nestle in an ice cube into the rice and cover everything with parchment paper and warm in the microwave until warm. The ice cube melts in the microwave and adds moisture to the salmon and rice.
- Remove the ice cube, add a drizzle of soy sauce and mix everything up. Top with mayo, sriracha, and avocado slices.
- Enjoy with roasted seaweed and kimchi!
Do you need to do all this?
This recipe is meant for leftovers, but if you're making it from scratch, you don't need to follow most of it. Honestly I just make fresh rice and air fry some salmon and go to town. Just be inspired by the essential flavors of salmon, rice, avocado, kimchi, sriracha, and mayo. And seaweed, that's the best part!What is the Tiktok salmon rice bowl?
Popularized by Emily Mariko, a Japanese American Tiktoker, the Tiktok salmon rice bowl is a rice bowl made from flaked salmon mixed with rice and soy sauce, topped with kewpie mayo, sriracha, and avocado. To enjoy it, you scoop up a bite of mixed rice with roasted seaweed and enjoy it with kimchi.Tiktok salmon rice bowl ingredients
- cooked salmon - any leftover salmon is perfect for this. You can even used canned if you don’t have a leftover salmon filet
- rice - cold rice straight from the fridge, don’t worry, it’ll get nice and fluffy when you steam it up in the microwave.
- ice cube - a single ice cube helps steam the rice and salmon. It won’t melt completely, it’ll just add a bit of moisture.
- soy sauce - add soy sauce to taste, remember to get the good stuff.
- kewpie mayo - I’m in love with kewpie mayo, it’s the best mayo out there, fight me.
- sriracha - optional but if you love spicy sushi, a squirt or two is *chef’s kiss*
- avocado - perfectly ripe slices of avocado adds a nice creaminess.
- roasted seaweed - roasted seaweed snacks are key, more on this later!
- kimchi - a bit of kimchi on the side adds acidity, crunch, flavor, and spice.
Why does this rice bowl work?
It’s the combination of flaky salmon, fluffy rice, umami filled soy sauce, and creamy kewpie mayo that works so well. If you love Japanese rice balls or onigiri, this is like eating a deconstructed onigiri. The seaweed stays nice and crispy and you can change the flavor with each bite, adding kimchi or avocado. Plus, the idea of using an ice cube to steam your leftover cold rice and salmon is genius.Is the Tiktok salmon rice bowl worth the hype?
YES! I mean, I love scooping up rice with seaweed and all the flavors work together perfectly, kind of like a deconstructed salmon kimchi sushi roll. Microwaving your salmon and rice with an ice cube and parchment paper is a game changer. I think people are in love with this recipe because it’s easy, fast, and it tastes good. It’s taking leftovers and making them into bestovers and what’s not to love about that?Which seaweed for Tiktok salmon rice bowl?
The seaweed is one of the most important parts! I like roasted Korean seaweed packs, the kind that you can grab at Whole Foods or even Costco. It’s not the same as nori or seaweed for sushi, it’s lighter, crispier, and are pleasantly salty. Conveniently, seaweed snacks are the perfect size for scooping up bites of rice and that’s how a lot of Koreans enjoy them. As with all and any Tiktok recipes there’s always a lot of controversy. It’s no different with this one. People are all over Tiktok split between saying that this is the most amazing thing that they’ve ever made and that Emily didn’t invent anything new. In the end, she’s the one who brought the world’s eyes on it so I don’t really understand why people are so salty about how they’ve eaten this at home forever. In the end, it’s a quick and easy way to make your leftovers taste amazing so thanks Emily for sharing your love for salmon rice bowls with the world!Tiktok Salmon Rice Bowl
Leftover salmon and old rice combined with soy sauce, kimchi, and mayo make the yummiest trend from Tiktok so far.
- 1/2 filet salmon (cooked, about 2 ounces)
- 1 cup cooked rice
- 1 ice cube
- 1 tbsp soy sauce (or to taste)
- 1 tbsp kewpie mayo (or to taste, sub regular mayo if needed)
- 1 tsp sriracha (or to taste, optional)
- 1/2 avocado (sliced or diced, optional)
- 1/4 cup kimchi (optional)
- 1 package roasted seaweed snack
Use a fork to flake up your salmon filet.
Top your salmon with cold rice from the fridge and nestle in one ice cube.
Cover with parchment paper and microwave for 1 to 1.5 minutes. Remove the parchment paper and any ice cube remaining.
Add soy sauce to taste and mix everything up.
Top with kewpie mayo, sriracha, and avocado slices.
Enjoy with a side of kimchi and roasted seaweed, using the seaweed to tuck it around a bite of rice. Enjoy!

I Am... A Guide to Skiing in Banff
If you’ve ever wanted to ski in a Canadian National Park, skiing in Banff is for you. Located within Banff National Park there are three distinct ski resorts: Mt Norquay, Banff Sunshine Village, and Lake Louise Ski Resort. The area is considered a must visit destination for skiers and snowboarders.
How long does the skiing season last in Banff
The season starts early and ends late. It’s one of the reasons why the area is so renowned. Running from late November to early and sometimes even late May, the snow in Banff is reliable and abundant. Once you add in the amazing scenery, you’ll understand why so many speak breathlessly about Banff.What are the three ski resorts in Banff National Park?
The three Banff ski resorts are:Banff Sunshine Village
Skiable acres - 3,358 Vertical - 3,510 ft Lifts - 12 Runs - 137 marked Ability breakdown - 20% beginner, 55% intermediate, 25% expertLake Louise Ski Resort
Skiable acres - 4,275 Vertical - 3,250 ft Lifts - 11 Runs - 164 marked Ability breakdown - 25% beginner, 45% intermediate, 30% expertMt. Norquay
Skiable acres - 190 Vertical - 1,650 ft Lifts - 6 Runs - 60 All three resorts are accessible from the town of Banff, Lake Louise Village, and the nearby town of Canmore. Best of all, Banff and Lake Louise are only a couple hours detour off the Powder Highway.Beginner, Intermediate, and Expert Skiing in Banff
If you’re skiing or boarding with a group of mixed levels, you’ll be happy to hear that all three resorts have something for everyone, from total beginner to deep and steep avalanche-gear-needed terrain.How to get to Banff for Skiing
Banff National Park is in Western Canada, boarding two provinces, BC and Alberta. It’s a mere 100 km west of Calgary and if you’re flying internationally, the Calgary airport, YYC, is the airport you’ll want to hit up. From YYC, it will take about 1.5 hours on the Trans Canada Highway (aptly named Highway 1) to reach the town of Banff. We recommend renting a car (with snow tires!), but you can also use a bus service.Do I need a parks pass for Banff when skiing?
Yes, any vehicle stopping in Banff needs a valid parks pass. You can buy it online ahead of time on the Parks website or right at the gates to the park. You can get either a Day Pass, which is best if you’re not going to be skiing for too long, or you can get a Discovery Pass which lasts for 1 year. The Day Pass cost $11 per person per day and the Discovery Pass costs $151.25 per year for a couple or family.Where to stay in Banff for Skiing
There are three main areas people stay when visiting Banff for skiing: Banff Township, Lake Louise Village, or the nearby town of Canmore. Budget-wise, it is going to be most expensive to stay in either the town of Banff or Lake Louise Village. There are a variety of choices from luxury hotels to simple motels. Banff has a lot of dining and après choices while Lake Louise Village is a bit more sleepy. Personally, we love staying in Canmore. It’s a short drive from Canmore to the park and once you’re in the park, it’s not too far to all three mountains. There are a lot more accommodations in Canmore and if you’re the kind of person who likes to have a kitchen and laundry, then there are ton of vacation rentals. We especially like the Spring Creek area. Canmore is a quaint little mountain town and decidedly less busy and touristy compared to Banff.How do you get to the Banff ski areas?
If you’re staying in Banff and you don’t have a car rental, you can take public transport or resort complimentary shuttles.How to get to Banff Sunshine Village
Banff Sunshine Village has a free daily bus from the town of Banff to the base of the resort. If you’re driving, it’s an easy drive to the base and there’s plenty of free parking. Look here for more info on how to get to Sunshine Village.How to get to Lake Louise Ski Resort
Lake Louise also offers a daily free shuttle, both from Lake Louise Village and the town of Banff. Like Sunshine Village, they have plenty of free parking if you’re driving there. For more info on Lake Louise, check here.How to get to Mt. Norquay
Just like the other two, Norquay also has a free shuttle. You can take it from the town of Banff to the Norquay base. If you have your own vehicle, there’s lots of free parking. For more about Mt. Norquay, check here.SkiBig3
What is SkiBig3?
SkiBig3 is a skiing challenge put on by Banff Tourism to encourage all ski and board visitors to go to all three mountains. You can ski all three resorts within one day, all on the Big 3 ski pass. They also have multi-day tickets for all three mountains, so you don’t actually have to go to all three mountains in one day.SkiBig3 Trifecta Callenge
Once you visit all three mountains of Banff, you can visit the Adventure Hub in Banff or Canmore and get a SkiBig3 trifecta trail sign, patch, or sticker. You also get a coupon for a free pint of beer with purchase.Are the Banff ski resorts on the IKON pass?
Yes. All three resorts are on the IKON pass and the number of days and blackout dates depend on which pass you get.Which Banff Ski Resort is Best?
Personally, out of the three, we liked Banff Sunshine Village the best. Mt Norquay is a pretty small mountain and the terrain is not really varied. We went to it just so we said we did it. The next best, after Sunshine Village, is Lake Louise. When we visited, they were in a bit of a snow drought, so the snow quality at all three mountains was questionable. That being said, we definitely saw the potential of both Sunshine Village and Lake Louise. I would say that if you like a variety of terrain, including steep, difficult off piste runs, then Sunshine Village is the place to go. It has trees, bowls, chutes, and extremely wide - literally the whole mountain wide - low to medium pitch runs. Plus, Sunshine Village has a Beaver Tails stand! There’s nothing better than a ski break with hot and fresh deep-fried dough dusted in cinnamon sugar. Oh, and you can ski between provinces on the run called The Great Divide, located on top of the Continental Divide, which boasts amazing views of Banff’s backcountry areas. Lake Louise is more known for its long, wide open groomers and cruisers. For a wide-open scenic run with views of Mount Temple, Lake Louise, and the Victoria Glacier icefields, try Charlie’s choice. It’s a gentle blue run with to-die-for views.Things to do in Banff if you don’t ski
If you’re not a skier or snowboarder, don’t worry, there are so many things you can do in Banff.Banff Village
If you haven’t been to Banff, the village, you’re in for a treat. It literally looks like a Hallmark Christmas movie. The mountains juxtaposed against the town streets is so incredibly picturesque, especially when the mountains are snow-topped. You can wander the streets, just soaking in the vibes, stop in at a cafe or bar for a drink, and just pretend you’re in a winter movie. Make sure you bring your camera because every corner is a potential photo.Northern Lights
No promises, but sometimes, if you’re very lucky, and there’s a high KP index, you’ll maybe get to peep the Northern Lights. Some popular spots to chase the aurora are: Lake Minnewanka, Vermillion Lakes, and Bow Lake. The show starts late and you never know if you’re going to see it, but when you do, it’s life-changing. Dress warm, pack a snack, be patient, and check the KP forecast before heading out.Winter Sunrise
Sunrises hit different in Banff and winter is the best time to see them, in my humble opinion. First off, they happen later in the day so you don’t have to wake up as early. Second of all, the mountains make for a gorgeous backdrop. Hopefully, the colors will be amazing: the dusty pink alpenglow against the blue-white of snow is beautiful.Lake Louise
Lake Louise is one of the main areas in Banff and in winter, it absolutely shines. Winter tends to be not as busy as summer and the winter wonderland vibes are to die for. Walk the Lake Louise shoreline, explore the iconic lakeside Fairmont Chateau Lake Louise, or ice skate on the lake!Ice Skating on Lake Louise
The lakes in Banff are legendary and if you go in the winter, you have the chance to experience the wonder of a frozen Lake Louise. From most affordable to expensive: bring your own skates, rent skates from Wilson Mountain Sports, or rent from the lakeside Fairmont Chateau Lake Louise. It’s absolutely free to skate on the lake, but make sure to check the lake conditions. You do need a Parks Canada Pass, as detailed above, and it’s probably a good idea to take the to take public transit (thre’s a small fee) because while there is parking, it’s pretty limited. If you’re staying at a hotel in Banff, your hotel might also have a complimentary shuttle. Pro tip, bring a helmet. Safety is no joke.Winter Wonderland Lunch
Stop in at the Lakeview Lounge inside the Fairmont and request a spot next to the gorgeous arched windows. If you’re there on a sunny day, the blue of the sky next to the white snow and frozen lake is unbelievable. If you’re not staying at the Fairmont, be sure to make a reservation as walk-ins aren’t available. It’s not cheap, but truly, it’s a once in a life time dining experience. Have a cocktail, admire the view, and just soak in the Canadian vibes.Sightseeing Gondola
Just because you don’t ski or board doesn’t mean you can’t enjoy the views from the top of the mountain. Take Lake Louise Ski Resort’s Winter Sightseeing Gondola and take a breathtaking ride up the mountain to the top. At the top, you’ll get a 360 degree view of the lake and surrounding mountains. This gondola is a purely sightseeing trip, so make sure to dress warm and note that there are no facilities at the top, so packing a lil snack and a hot drink in a thermos is a great idea.Tubing
If you want to experience a little bit of speed but not ski or snowboard, try tubing! You can tube at either Mt. Norquay or Lake Louise Ski Resort. The resorts provide everything you need, from the tubes to a magic carpet lift that carries you back to the top of the tube runs.Self-Care
Spas in the mountain and winter go hand-in-hand. A little bit of self care at a spa is a welcome break from the cold. The very newly opened BASIN at the Fairmont Chateau Lake Louise is a quiet, relaxing, luxury thermal bathing experience. We haven’t been but it looks amazing, both in cost and views. If you want to treat yourself, I think you should put it on your bucket list. If you want a more low-key spa experience, The Banff Upper Hot Springs is a naturally fed, mineral rich pool. In the winter, the steam off the pool and the snowy mountains in the background is super dreamy. Note: They’re doing a renovation so it’s currently closed, but scheduled to open in early 2026.Places to eat in Banff after skiing
These are our favorite restaurants and places to eat in Banff. Mike and I have spent so much time in Banff, from camping to skiing, leaf peeping, and all the things in between. We’ve tried a huge swath of the restaurants, bars, pubs, and cafes. This is our go to list, in no particular order.Good Folk
Good Folk, Banff’s newest opening, located in the Otter Hotel, is not just a hotel restaurant. The room is intimate and cozy and the menu features delicious classic Canadian flavors, updated with seasonal twists. It’s the perfect place for date night.Bluebird
For some reason, the mountains always have me thinking about steak. Bluebird is a classic, retro steakhouse set inside a mid-century mountain chalet. A roaring fireplace sets the scene and their all-day slow-roasted prime rib with Yorkshire puddings is not to be missed. Plus, they have a fondue happy hour! I love their branded plates, their gorgeous interior, and most of all their vibes. They do breakfast/brunch, lunch, and dinner. Don’t miss out!The Fat Ox
If you’re looking for inspired Italian food with a hearty, alpine flair, Fat Ox is where you want to be. It’s one of the newer restaurants in Banff and quickly becoming a local favorite. The space is airy and bright and the food is pure comfort.Pizzeria Sophia
If you have a pizza craving, wood-fired pizza at Pizzeria Sophia is sure to hit the spot. Rustic and warm with eclectic textures and decor, the rooms makes you want to sit down and chill a while. The menu features modern Italian classics, with a focus on pizza, pasta, and antipasti. Shout out to their 50 layer lasagne bolognese and the crispy calamari. Be sure to check out their pizza happy hour for half priced pizzas!Lupo
If you love Italian design, walking into Lupo will bring a smile to your face. Black and white tiles, bold Italian typeface signs, and a bar reminiscent of an Italian grocer will make you feel like you’re stepping into an Italian marketplace, right in the middle of the Rockies. Lupo was named one of the top Canadian restaurants by Canada’s 100 Best and I can’t say I disagree. Wood-fired pizzas, fish, and meats, house-made pasta, and a curated cocktail and wine list makes Lupo a must visit when you’re in Banff.Shoku Izakaya
Sushi? In the mountains? Yes and yes. Don’t think Tokyo-level omakase, think Osaka-style izakaya. An eclectic menu full of innovative rolls, small plates, and cocktails is the perfect way to end your night after a night skiing or exploring. Shoku is a first-come, first-serve place that serves all the classic izakaya dishes like ebi mayo, takoyaki, and chicken karaage.Banff Poutine
Did you even visit Canada if you didn’t get poutine? Drop by Banff Poutine to experience an exemplary sample: fresh hand-cut fries, squeaky cheese curds straight from Quebec, and savory, hot gravy. Nothing hits like poutine in winter.Bridgette Bar
This eatery is technically in Canmore, not Banff, but if you have a car, it’s not far at all. The Canmore location is an outpost of a beloved Calgary dinner destination. Bridgette is cute, modern, chef-driven spot that focuses on wood-fired family style dining. The mid-century inspired room is cozy and warm, with lots of dark wood, marble, and plush banquettes. We like the pizzas (especially when they’re half-off during happy hour), the vegetable dishes, and the banana pie.Alpine Social
This is the restaurant located in the Fairmont Chateau Lake Louise. Essentially, it’s an upscale mountain eatery in a gorgeous room with leather banquettes, custom millwork, gold accents, and lots of cute mountaineering details. The food is comfort focused and the drinks are innovative. To be honest, all of the dining at the Fairmont Chateau Lake Louise is great — typically hotel restaurants aren’t usually on the top of best eats lists, but truly, the Fairmont restaurants shine.Banff Skiing Insider Tips and Tricks
Make sure you secure your National Park Pass. Anything you do in Banff needs a park pass and you can easily purchase one online in advance. If you’re driving, make sure your vehicle has snow tires. Not all season tires, not all weather tires, strictly snow tires. It snows in Banff and while they do their best to clear the snow, it exists and driving in snow is going to be inevitable. That’s it! I hope you visit Banff in the winter season. There’s so much to do and so much to eat. It’s truly magic! That’s it! I hope you get a chance to ski in Banff. Banff is truly a national treasure. From the turquoise blue lakes to the snow covered peaks and quaint mountain villages, it’s a ski vacation you’ll never forget. Read More →
I Am... Cheesy Miso Stuffed Mushrooms
Stuffed mushrooms are the cutest appetizer out there, and definitely one of the most underrated holiday sides. So round, so poppable, and so delicious. I absolutely love stuffed mushrooms. They’re easy to make (and make ahead if you need to) and they’re always a hit. I love stuffed mushrooms and how infinitely customizable they are. They’re kind of like the vegetarian version of a deviled egg! I’m all about tiny bite-sized stuffed things and stuffed mushrooms fit the bill perfectly. These cheesy miso stuffed mushrooms are particularly good because they’re triple umami: mushrooms, miso, and parmesan cheese! They’re so full of flavor and satisfying.
How to make stuffed mushrooms
- Start off by washing your mushrooms. Yes, we’re going to wash them, more on that below.
- After you wash them, trim the very tip of the stem and discard, then gently break the stems from the caps.
- Place the caps on a parchment paper lined baking sheet.
- Mince the stems then sauté them in butter until golden then let cool.
- While the stems are cooling, mix together cream cheese, mayo, and a bit of white miso.
- Stir in the sautéed stems then stuff the mushrooms, topping them with parmesan.
- Bake until golden and piping hot then enjoy!
Stuffed mushroom ingredients
- mushrooms - I like using brown mushrooms because I think they’re prettier but white mushrooms are exactly the same so go with whichever you prefer. Try to choose mushrooms that are on the bigger side, but not too big, 1 - 1.5 inches.
- butter - mushrooms sautéed in butter are a dream come true. You can use oil if you don’t have butter on hand.
- cream cheese - this is what is the bulk of the creaminess in these stuffed mushrooms. It’s easier to mix if your cream cheese at room temp.
- kewpie mayo - my secret ingredient! Kewpie mayo adds extra creaminess and when you bake it, it is SO delicious. If you don't already know about it, read more about kewpie mayo here.
- white miso - white miso adds extra umami and flavor. If you don’t have any on hand and don’t want to go to the store, you can skip it, but it really boosts all the savoriness of this dish.
- parmesan - finishing with finely grated parmesan is always a pro move!
How to pick good mushrooms
I like buying mushrooms loose so I can go through and choose ones that are about the same size so they all cook at the same rate. Look for whole, intact caps without discoloration. They should feel spring-y and light, not spongy.To wash or not wash mushrooms
If you do a quick internet search on this, people are divided. Some people wash, some people don’t wash, some people peel. The reason why people don’t wash mushrooms is that they’re worried they’ll get soggy. But the truth is, like all plants, they can take a bit of a shower and be okay, especially if you’re washing them while they’re whole.How to clean mushrooms
Wash mushrooms right before you use them. Place whole mushrooms in a sieve (I use the sieve in the salad spinner basket) and use the spray function and cold water to spray off any dirt. Spin or pat dry with paper towels. Use immediately.What to serve with stuffed mushrooms
- The best green bean casserole
- Super smooth and fluffy mashed potatoes
- Garlicky parker house rolls
- Velveeta mac and cheese
- The ultimate fall kale salad
- Fool-proof super juicy turkey
Cheesy Miso Stuffed Mushrooms
Stuffed mushrooms are the cutest appetizer out there.
- 16 large mushrooms (white or brown)
- 2 tbsp butter
- 4 oz cream cheese
- 1/4 cup mayo (kewpie mayo preferred)
- 1 tbsp white miso
- 1/4 cup Parmigiano Reggiano cheese (finely grated)
- parsley (finely chopped, to finish)
Heat the oven to 400°F. Line a baking sheet with parchment paper. Trim the bottom of the stems of the mushrooms, then gently break them off. Place the mushroom caps on the prepared baking sheet.
Finely mince the mushroom stems. In a medium skillet over medium heat, melt the butter and sauté the mushroom stems until soft and golden. Remove from the heat and let cool slightly.
In a bowl, mix together the cream cheese, mayo, and white miso until smooth. Stir in the sautéed mushroom stems, taste and season with freshly ground pepper.
Scoop the filling into the mushroom caps and top with grated parmesan.
Bake for 20 minutes or until the cheese melts and the mushrooms are piping hot. Finish with parsley, remove, let cool slightly and enjoy!

I Am... Instant Pot Mashed Potatoes
These instant pot mashed potatoes are so good and so easy they're dangerous. Mashed potatoes are the ultimate comfort food and now that I have a hands off way of making them, I'm pretty sure I'm going to be eating so many potatoes that I'm going to turn into one. I love how you just set everything in one pot and you're done. Just pop your potatoes in, cook on high pressure for 7 minutes, mash, season, and eat. So simple and so good. My tip here is using a sieve (or a ricer) to push your potatoes through instead of mashing. You end up with super smooth and creamy mashed potatoes.
How to make the best instant pot mashed potatoes
- Prep the potatoes: Scrub and peel (or leave the skins on if you’re into that) the potatoes and cut into quarters.
- Place in the Instant Pot with garlic and a bit of chicken stock. Pressure cook on high for 7 minutes, then quick release.
- Mash by pushing the potatoes and garlic through a fine mesh sieve or ricer. If you like a lumpier mash, use a masher.
- Stir in room temp butter, then the milk. Taste and season with salt (and pepper if desired) and serve warm!
Instant pot mashed potato ingredients
- Potatoes: Like I mentioned above, I always use either Yukon golds or Russet potatoes. Either are a solid choice and if you like you can even mix them for the best of both worlds.
- Garlic: Who doesn’t love garlic mashed potatoes? Give it gives these potatoes a warm garlicky flavor. Feel free to increase or decrease the amount of cloves used.
- Butter: Butter is essential so use a good one - we love grass-fed butter.
- Milk or cream: I almost always use whole milk for my mash, but if you want an extra indulgent potato, use half and half or heavy cream.
- Salt: Don’t forget to season!
- Toppings: I keep it pure with just a butter pool, but chopped chives or sliced scallions look pretty and add some color and herbaceous. Cracked black pepper is always good. You can always customize as you wish and stir in cheese, top with bacon bits, and jalapeños, or everything bagel seasoning.
4 secrets to the best mashed potatoes:
1. Water is the enemy
Waterlogged potatoes mean gluey mashed potatoes. To avoid this, we’re going to steam the potatoes in the Instant Pot with just the minimal amount of liquid, which will make them fluffy, cooked through, and full of potato-y flavor.2. Season!
Season at every step. I like to steam/cook the potatoes in chicken stock so it adds an extra layer of flavor. If you don’t want to use chicken stock, you can use vegetable stock or just make sure to salt the water you cook the potatoes in. You want to season when you’re cooking the potatoes and afterwards when you add in the butter and milk so you have layers of seasoning.3. How you mash matters.
I love the way mashed potatoes taste when you push the potatoes through a fine mesh sieve. It gives you the smoothest, most luscious mashed potatoes you’ve ever eaten. But, if you like a slightly chunkier mash, use a potato masher. There are even different kinds of mashers: smooth mashers or chunky mashers depending on how you like your potatoes.4. Don’t over mix.
Once your potatoes are mashed, you want to just stir in the liquids (butter and milk or cream) without over mixing, which can lead to gummy potatoes.How much water for Instant Pot mashed potatoes?
The minimum amount of liquid Instant Pot needs for pressure cooking is 1 cup. You can use either 1 cup of chicken stock or salted water. This is a lot less liquid compared to almost all the other Instant Pot mashed potato recipes hanging out on the internet. It’s superior for two reasons.- Cooking potatoes in a large amount of water makes them water-logged and soggy, which results in less potato flavor.
- Less water means less time for the pot to come up to pressure.
How many potatoes do you need per person?
For a side serving of mashed potatoes, the general rule is: 1 medium to medium-large potato per person. Potatoes come in various sizes, but a good rule of thumb is that you’ll need a medium to medium-large potato that fits in the palm of your hand for each person. Aim for a 1/2 lb individual servings of mashed potato.Vegan Instant Pot mashed potatoes
If you’re vegan, or have guests who are, it’s super easy to make flavorful, smooth, rich mashed potatoes. Follow the recipe as below, but make these ingredient substitutions. Instead of chicken stock, cook the potatoes in 1 cups mushroom dashi stock or your favorite vegetable stock. Instead of butter, use vegan butter or white miso. Instead of milk, use your favorite milk alternative, mushroom dashi, or white miso paste mixed with water.What are the best kind of potatoes for instant pot mashed potatoes?
There are only two kinds of potatoes that are perfect for mashed potatoes: Yukon golds (my absolute favorite) and Russets.- Yukon golds are perfect for mashing because they’re starchy, beautifully yellow, and have a rich buttery potato taste. They’re also a more dense potato with a thin skin, and when you use them, you get a more luxurious mash.
- Russets (or Idaho) potatoes are those big potatoes with the dusty skin that most people use for baked potatoes. These are also excellent for mashed: fluffy, dry, and starchy, when cooked right. Russets are the more mild potato of the two potatoes I recommend and if you’re a fan of lighter potatoes, they make a mash with a more delicate texture.
Skin on or skin off?
Because I’m in the smooth mash camp, I don’t think potato skin belongs in mashed potatoes. But some people love that texture contrast. And for those people, I say, feel free to leave the skins on!What if I don’t have an Instant Pot?
You can still make these mashed potatoes, all you need to do is steam: place the cut up potatoes on a plate or in a steamer basket. Boil 1-3 inches of water in a large pot and place the potatoes in the pot. Cover and steam on medium until very tender, 30 to 35 minutes. Check this post out for more. Best mains to serve with mashed potatoes- The Best Cajun Butter Steak
- The Juiciest Baked Chicken Thighs
- One Pan Creamy Dijon Mustard Mushroom Chicken
Instant Pot Mashed Potatoes
Smooth and fluffy mashed potatoes in under 20 minutes!
- instant pot
- 2 lbs potatoes (peeled and quartered)
- 1 cup chicken stock (no sodium preferred)
- 2-4 cloves garlic (optional)
- 2 tbsp butter (or to taste)
- 1/4-1/2 cup milk (or to taste)
- salt and freshly ground pepper
Place the potatoes, chicken stock, and garlic (if using) in your Instant Pot/pressure cooker. Put the lid on, set the pressure to high and cook time to 7 minutes. Quick release the pressure when cooking time is completed.
Remove the potatoes from the liquid and mash or push through a ricer or a sieve. Optionally add a bit of the leftover chicken stock that the potatoes were cooked in for a bit more flavor.
Stir in the butter, milk, and salt and pepper to taste. Enjoy!

I Am... Tiktok Frozen Gummy Bears
TikTok food trends are back with viral frozen gummy bears. People love gummy bears. People love crunchy things. Why not crunchy gummy bears? All you really need is time and two ingredients: Sprite and gummy bears. After they’re frozen, they're a combination of hard and soft with a frozen candy texture. They’re kinda fun and quirky and I think they’re adorable because the gummy bears double in size.
What are frozen gummy bears?
Just what they sound like! Gummy bears that are frozen. They popped up on my for you page on TikTok so I’m not sure who invented them because I’ve seen literally hundreds of people making and crunching them for AMSR crunching videos. They don’t really sound crunchy thought - they’re more of an icy chew. Anyway, they looked fun and cute and gummy bears are delicious.What do frozen gummy bears taste like?
They taste just like regular gummy bears but with a different texture. Crisp and cold and smooth. Kind of hard and soft at the same time. If you’ve ever had gummy candy that has been left out in the cold, the texture is somewhat similar, but a bit softer because of the Sprite soak. They’re simultaneously chewier and softer. You would think they would be hard, but they don’t come out like ice cubes, more of a cold soft crunch, like nugget ice. Because of the sugar and gelatin content of the bears, they stay kind of soft, which is nice because it’s what gives the bears their soft and icy texture. As you chew, the frozen bears start to melt in your mouth. I like them!How to make frozen gummy bears
- Lay out your gummy bears in a shallow container that has a lid. You can do them in neat little rows or just spread them out, just as long as they’re in one layer, you’re good.
- Pour Sprite (or your choice of soda) on top over the bears, making sure they’re completely submerged. Cover the container and place it in the fridge overnight.
- The next day your bears will double in size. Strain them and arrange in a single layer on a parchment paper lined tray. Freeze for 3 hours or until firm and frozen.
- Enjoy the frozen gummy crunch!
Frozen gummy bear ingredients:
- gummy bears - everyone knows the superior gummy bears are Haribo. I dream of going to Germany to visit a Hairbo factory one day. My favorite are the twin cherries. Anyway, any bears will do, buy your favorite gummies.
- Sprite - you don’t need to use Sprite obviously, any clear soda will work, so choose your favorite. I think maybe the frozen gummy bear trend came from Japan and originally they used Mitsuya Cider, which is a kind of cream soda-y citrus-y soda.
What other gummies can I freeze?
Any really! I’ve seen frozen peach rings, cola bottles, sour patch kids. This will work on any sort of chewy, soft, gummy candy.What other sodas can I use?
Again, any soda will work for this. The soda is for carbonation and liquid soaked up into the gummy bears, so choose a soda that you like. I’m pretty sure the main choice is Sprite/7Up because they’re clear so the gummy bears stay the same color.Best gummy bear brands
Personally, I love Haribo Gold Bears, which is what we used in this post. Haribo invented gummy bears in 1922 and they’re the original and best! They’re a little firmer than most gummy bears and I think they have the tastiest flavor and chew. I also like how pretty and pastel they turn out after freezing them. Mike’s partial to Albanese Fruit Bears https://amzn.to/3C9gy4h which are pretty darn good too. They’re a bit softer than gold bears which isn’t for me, but I admit that they are very soft and chewy and they have elite flavors like Fuji Apple, Asian Pear, and Alphonso Mango. Another bear I’m interested in trying, but can’t vouch for are Black Forest gummy bears https://amzn.to/3YB9uVA. They have a different gummy bear shape which would be fun to see frozen. I’ve heard they taste really good and are a good amount of chew. That’s it! This is a fun little quick treat - if you ignore the overnight soak and freezing - and I think it’s worth it to try. The holiday season is coming up and a bowl of seasonal colored frozen gummy bears is a cute, conversation starter. Happy freezing! xoxo stephFrozen Gummy Bears
How to make the adorable viral gummy bear treat
- 1 package gummy bears (about 6oz)
- 1 can Sprite ( (or other clear carbonated drink))
Place your gummy bears in an air tight container. If you want your bears to be pristine and nicely shaped, spread them out in a single layer.
Carefully pour the Sprite over the gummy bears, covering them completely. Place the cover on the container and place in the fridge overnight.
The next day, the bears will double in size and be quite soft.
Scoop the bears out of the Sprite and place them in a single layer on a parchment paper lined plate or tray. Freeze until firm, about 3 hours.
Enjoy frozen!
Estimated Nutrition based on Haribo brand gummy bears

I Am... Hot Pot at Home
One of my all time favorite meals is hot pot. We eat it at least once a month, if not more. It can be a cold and cozy night or a warm summer evening – it doesn’t matter because hot pot is always the answer. It’s a fun and filling way to spend the night eating and chatting because you’re literally hanging around a hot pot at the table where you cook and eat together. Essentially, all you do to prepare hot pot is make a soup that is simmered at the table. You load up the table with a bunch of raw sliced meats, veggies, tofu, seafood, and noodles. Everyone cooks what they like, right at the table. Then it's scooped out of the pot, dipped into your own customized sauce, and devoured. Hot pot is all about choosing your ingredients/what you’re going to put into your pot. There’s a huge variety of hot pot, even within China – there’s mind numbing spicy hot pots, herbal hot pots, curry hot pots, soothing plain hot pots, really there’s no wrong way. Here’s an in-depth guide to get you started!
What is hot pot?
If you’re new to hot pot, it’s a low stress way to have a fun and interactive meal with the people you love. Hot pot is a social way of eating: a variety of food is cooked in a communal simmering pot of flavored broth. The meal starts with the pot coming to a boil. The meat, seafood, vegetables, tofu, and noodles are added and cook quickly (and sometimes slowly) in the bubbling broth. Everyone scoops out whatever their heart desires and adds more to replace it. Fun times, yummy food, and much laughter is shared. At its core, Hot pot is a Chinese way of way of cooking food in a simmering pot of soup at the table. It’s similar to fondue, except instead of cheese or hot oil, you have a flavorful soup stock. Raw ingredients are cooked in the soup, then eaten with dipping sauces. It’s a fun and communal way of eating and super popular both at home and in restaurants. Hot pot is near and dear to Chinese people across the world and is starting to become more mainstream and popular. Hot pot creates a cozy, warm atmosphere and really brings people together as you sit around a pot, cooking, eating, talking, and relaxing. The food is important but also important are the feels and the feels of hot pot can’t be beat.Is it really this complicated?
NO! This is an all encompassing how-to guide but the tl;dr of it all is that you can just go to your local Asian supermarketand buy from their hot pot selection. If you live somewhere far away from one, you can buy the hot pot soup mix online, thinly slice some proteins, wash some veg, and have at it. It doesn't need to be hard.Where does hot pot come from?
Hot pot originated in China but it’s now all over Asia in different incarnations. There are bubbly Korean stews, Japanese shabu shabus, Vietnamese hot pots, and more!How to have hot pot at home
- Decide on the broth. Go homemade or store bought, either work great.
- Shop for the ingredients. Go to the (ideally Asian) grocery store and buy ALL THE THINGS.
- Prep: wash the vegetables, lay out the meats, seafood, dumplings, balls, vegetables, and noodles out on plates or trays. Keep the meats together, the seafoods together, the vegetables together, the dumplings together, and on and on so that everything is contained and separate.
- Set the table. Set the table with everything you need, more on that below!
- Hot pot! Bring the soup up to a boil, cook your ingredients at the table, dip in sauce, eat, drink, laugh, enjoy.
What equipment do I need for hot pot?
Essentially you need two pieces of equipment for hot pot: a burner and a pot. The burner needs to be portable enough to sit at the center of your table. It can be anything you like, but make sure it's not charcoal because it'll fill your home with carbon monoxide. For the burner, there are several ways to go: induction, gas, or a two-in-one pot connected to electric source. I say you go with whichever one you might already have, or if you are going to be buying something, I’d choose induction. Induction is easy to clean – just wipe it down. Plus you don’t need to buy extra gas canisters. We’ve used the two-in-one before too, but it’s easier to use a pot you already have. As for pots, you want one that’s shallow so your food isn’t drowning. You want to be able to see it floating in there so a deep stockpot isn’t going to cut it. Growing up, we always had a split pot so the adults could have spicy soup while the kids had a mild soup. Split pots are great for people who want two kinds of soup or if you want to keep one side for meat and the other side for vegetables.Our personal hot pot set up
Mike and I use a portable induction cooker with our favorite cast iron shallow brasier, it retains heat amazingly and after we’re done, we just wipe down the induction cooker and pop the brasier in the dishwasher. There are three main components of Chinese hot pot: broth, ingredients, and sauce.Hot Pot Broth
There are a bunch of different variations of hot pot in China, depending on the region, it goes from fiery red and spicy (Sichuan and Chongqing) to milky and herbal. Soup is the backbone of your hot pot, but really, you don’t need to worry about it too much. If you want to go all out and make a homemade stock, go for it. Sometimes if I’m feeling particularly extra, I’ll do just that, but more often than not, I’ll just use a store bought stock or seasoning packet. Our favorite base happens to be Japanese dashi with soy, sake, mirin, and a touch of sugar. It isn’t Chinese at all, but, you know, since hot pot is all about customization, we are here for it, especially since it reminds us of oden. The light yet deep umami richness is the perfect flavor for all the ingredients to soak up.Store bought broth
Lee Kum Kee makes a large variety of seasoning packets – you can find those and all of the ingredients for Chinese hot pot at your local Asian grocery store. If you’re looking for spicy, Hai Di Lao is a famous Chinese hot pot restaurant that sells their hot pot seasoning packets. There’s also an extremely popular hot pot restaurant (Little Sheep Hot Pot) that sells its soup base as well. Be careful of store bought packages, because some of them can be extra extra spicy. If the ingredients list mentions mala or sichuan pepper, you might be in for a spice-fest. When in doubt, use a half- or a quarter-package and taste test beforehand.Homemade hot pot broth
Most days, we just use a simple no sodium chicken stock dressed up with some soy sauce, shaoxing wine, toasted sesame oil, ginger, and scallions. For a Japanese dashi flavor, use instant dashi seasoned with soy, sake, mirin, and a touch of sugar.How much broth do I need?
You’ll need enough broth to fill your pot. Most seasoning packages have enough to make 6-8 cups. All you do is mix the packet with water. As you’re cooking your hot pot, the soup base will inevitably go down, just top it up with water, there’s no need to add extra flavoring because the soup intensifies and concentrates as it boils down.Hot Pot Ingredients
This is the MOST fun part of hot pot. If you love variety and eating a bunch of different things in one meal, this is the meal for you! The best kind of hot pot contains a little thinly sliced meat, a little seafood, some veg, tofu, dumplings, and noodles of course! Everything tastes amazing when cooked in a hot pot. And the best part is, all you’re really doing is buying fresh, raw ingredients. If you’re wondering where to buy hot pot ingredients, the answer is an Asian grocery store! All grocery stores will (obviously) carry different things, but my main recommendation is to hit up any Asian grocery store because they will have a huge selection to choose from. I’ll break down the different categories of ingredients; it’s best to try to get a couple of each category.Thinly sliced meats
Meat, it’s what hot pot is for. Essentially you can cook any kind of meat in hot pot, as long as it’s sliced thinly. You pop it into the boiling water, swish it around a bit and let the pot come back up to a boil, pull it out and eat it. Typically thinly sliced beef, pork, and chicken are very popular. There are a variety of cuts that you can get thinly sliced in trays at your Asian grocery store – go wild and buy a bunch. Some of our favorites are: rib eye, pork belly, pork jowl, lamb shoulder, and pork shoulder. Or, if you like, you can DIY it! Pick pieces of meat that are heavily marbled and pop them in the freezer for about 30 minutes – it should feel slightly solid, but still yield, and then slice it as thinly as possible.Seafood
Seafood is a very common addition to hot pot but it's something we often skip. When we do it, we actually love those frozen seafood medley packs that contain shrimp, squid, scallops, and sometimes even mussels and clams. Fresh fish is a good bet too when we're splurging (or feeling healthy)Vegetables
Traditionally chinese hot pot is a bit light on the veg but vegetables are Mike’s favorite part of hot pot (sometimes I think he could eat hot pot with just a head of lettuce) and I've come over to the healthy side. I like a bit more variety, so I usually include some sort of Asian vegetable (gai lan, as pictured) and mushrooms. Anything goes, just make sure you’re not over cooking your vegetables! Pop them in, let them cook, then pull them out immediately, unless they’re the starchy variety of vegetable like daikon, potatoes, sweet potatoes, and taro. Tomatoes are amazing in hot pot, but be careful because they get really hot!Tofu
Tofu hot pots are a thing all by themselves. There is a huge variety of tofu at Asian grocery stores and they are all amazing. Tofu is some of the best stuff to put in hot pot because they soak up all the flavors. Mike’s partial to mini tofu puffs and I like medium firm tofu. I also love egg tofu, the kind that comes in a tube. When you’re popping the tofu into the hot pot, it doesn’t need long because you can essentially eat tofu “raw” but if you let it simmer for a while it’ll be one of the best bites: juicy and full of all the delicious hot pot soup.Fish balls and meatballs
When you get to the Asian grocery store, head to the frozen section. Sometimes there will also be a case beside the fish where fresh fish balls are. Fish balls, if you haven’t had them, are the bomb. They have the best texture and are not very fishy. They’re kind of hard to explain, but trust me, you’ll love them. I call them fish balls, but they come in all kinds of flavors: shrimp, squid, cuttlefish, lobster – if it swims, it comes in fishball form. I particularly like the “golden” ones because they’re deep fried. Oh, and grab some meatballs too, they usually have these in the deli section – in our local store we have a selection of Vietnamese meatballs and I always grab some to throw in.Dumplings
Speaking of dumplings, grab some frozen dumplings to put in your hot pot. I like to get the ones that are already fully cooked since you can’t really see inside them. Those packages will feature a large “fully cooked” text on the front. Getting fully cooked dumplings ensures that you don’t accidentally pull out a dumpling and bite into a raw filling. Get the classic pork and vegetable combo and if you see it, go for pork and corn, it’s my fave.Noodles
Noodles are the carb of choice for hot pot, they go right into the soup and soak up all the flavors. Sometimes people have bowls of rice too, so if that’s what floats your hot pot boat, go for it! I love noodles, so they’re essential. I usually go for udon because they’re thick and chewy and delicious, but mung bean noodles are excellent at soaking up flavor too. Shirataki is also amazing if you’re going low carb or keto.How to prep ingredients for hot pot
If you have a bunch of ready to go items like sliced meats, seafoods, and various balls, just open up the packages and put everything out on plates. I like to put everything on separate plates, but if you don't have enough plates, it's best to keep the meats, vegetables, and frozen stuff separated. Depending on how much you bought, you won’t need to put everything out - but if you have a big table, it never hurts and is always impressive!- Meats: If you have whole cuts of meat, place them in the freezer for 20-30 minutes until slightly firm (this helps a LOT!) and thinly slice.
- Seafood: Cut into bite sized pieces for quick and even cooking.
- Vegetables: Wash and dry all the vegetables. For large leaf and root vegetables, cut them into small pieces.
- Tofu: Drain and cut into bite size pieces.
- Noodles: Remove from the package. For most noodles, it's best to soak in hot water for 30 seconds and drain first.
- Balls and dumplings: Remove from the packages. If you like you can slice the balls in half. Make sure you don’t put the dumplings out too early because they’ll melt.
Hot pot sauces
Here’s where the fun starts: the dipping. Everything that comes out of the hot pot is dipped in sauce. Well, maybe not the noodles, but you know, you can pour sauce on to those. Every family has their own version of hot pot dipping sauce ingredients and within that everyone has their own personal sauce recipe. Provide a bunch of sauces and let people mix and match. Growing up, I just dipped in a simple sweet soy sauce with green onion and cilantro mix, but now I prefer a mix of Chinese sesame paste, hoisin sauce, sweet soy sauce, and shacha (Chinese barbecue sauce).Shacha sauce
If there’s a sauce that I think is always offered with hot pot, aside from soy sauce, it’s shacha. Shacha is made from soybean oil, garlic, shallots, chilis, brill fish, and dried shrimp. It’s an umami bomb and so so delicious. Shacha is from Taiwan and the best brand is Bullhead and it comes in a little silver can (although it actually comes in a big can too and that’s what we have in our fridge) with a resealable top. Confusingly, it’s labeled as Chinese barbecue sauce. Give it a good mix before you scoop some out, the good stuff usually settles at the bottom. People typically mix it up with a bit of soy sauce, sesame oil, green onions, and cilantro. Some people also mix in a raw egg yolk for an extra bit of oomph. They sell it at the Asian grocery store and online.Sesame sauce
Sesame paste or sesame sauce is the other big gun at the sauce table. Essentially it’s Chinese sesame paste - which is similar to tahini but made with toasted sesame seeds and it’s nuttier, deeper, and more toasty tasting .You can have sesame sauce on it’s own diluted with a bit of water, soy sauce, and toasted sesame oil, sprinkled with cilantro and scallions, or you can mix it up with other sauces. It’s super thick, so give it a good stir (just like natural almond butter!) before using. They sell it at the Asian grocery store and online. Whangzhihe is probably the most common sesame paste sauce you’ll see.How to set the table for hot pot
Now that all the shopping and prep is done, it’s time to set the table.- Place the burner and the pot in the middle of the table.
- Arrange the ingredients around the table.
- Have a sauce station - usually it’s a little nicer to have the station away from the table since it frees up space. We put all the sauces on the counter and head there when we need refills. Have little dipping bowls to mix up sauce in, sometimes you might even want 2 sauce dishes per person!
- Place a bowl, plate, chopsticks, and napkin at each setting.
- Have a couple of plates with tongs and hot pot strainers (the little individual scoop-y thing you see in the photo), and a ladle. It’s nice if you have one hot pot strainer per person but if you’re good at sharing, you can get away with one between two people.
- Don’t forget the drinks! You can go with beer or if you want those authentic feels, try wine! Wine is crazy popular in China. If you’re doing non alcoholic, iced green or jasmine teas or suan mei tang aka cold sour plum tea are good choices.
How to hot pot
Once the table is set, the soup is bubbling in the middle, and you have your own custom sauce made, this is how you do it:- Decide on a couple of pieces of what you want to eat. Most people start with meat, but if you’re feeling dumplings, tofu, or vegetables, you do you!
- Use a pair of tongs to gently place your pieces of choice into the pot – go for 3-5 pieces per person.
- Once everything is in the pot, the bubbling will subside a bit. Let everything come back up to a simmer. If you’re cooking thinly sliced beef, you can just give it a gently swish in the bubbling soup until it is cooked to your liking then pull it out immediately.
- Use a scoop to scoop out the pieces you put in and place them in your bowl.
- Dip the pieces in your sauce, enjoy, and repeat as needed!
Hot pot FAQ
How do you get the food out of the hot pot?
Don’t dip your chopsticks in the pot! Use a hot pot strainer to scoop your food out. It’s easier, cleaner, and you’ll be able to find your food more quickly.When is it cooked?
This is probably what confuses most people about hot pot. Generally, letting everything come to a boil before you start scooping food out is a good rule, but here are some *hot pot cooking times:*- Meats - since they’re thinly sliced or cut, it shouldn’t take more than 30 seconds for beef and up to 1-2 minutes for pork, chicken, and lamb.
- Seafood - seafood cooks quickly in general, 1-2 minutes should do it.
- Vegetables - leafy greens can take a quick dip, things like potatoes will take until they’re tender, up to 15 minutes.
- Dumplings - cook these according to package directions.
- Balls - these usually come fully cooked, but give them up to 5 minutes at a boil to make sure they’re heated through.
- Noodles - cook these according to package directions.
- Tofu - this can go in as long as little as you like.
Do you add everything at once to hot pot?
It’s easier if you don’t add everything at once, just add in a few pieces at a time, the ones you want to eat. This keeps the soup bubbling and the food fresh so you don’t find a random piece of leathery beef that’s been in the pot for hours.Help! I don’t live near an Asian supermarket and still want to hot pot
You can make do with a regular grocery store! Use chicken broth with some ginger, garlic, soy, and toasted sesame oil. Pick out some meats, freeze them slightly, and thinly slice. Get some leafy greens and check out what they have in the frozen section. There will usually be some frozen dumplings at the very least. Grab a package of tofu and some noodles you can have a scaled-down version of hot pot. Order some dipping sauces online for maximum enjoyment.Go forth and Hot Pot
Alright my friends! You’re ready to go forth and hot pot. Cook, dip, and eat away. I hope you give this a chance. It’s so cozy and comforting and warm. Happy hot-potting! xoxo stephHot Pot at Home
For maximum authenticity, get as much variety as you can. Use the scale button to change for number of guests. See post for more ingredient suggestions.
- induction burner
- wide shallow pot
- 1 package hot pot soup mix (see notes for substitution)
- 1 lb meat (at least 2 kinds, thinly sliced ribeye and pork jowl preferred)
- 1 lb seafood (at least 2 kinds, shrimp and salmon preferred)
- 1.5 lb vegetables (oyster mushrooms, broccoli, and cherry tomatoes preferred)
- 1 lb tofu (1/2 firm and 1/2 tofu puffs preferred)
- 8 dumplings (such as gyoza or potstickers)
- 8 fish balls
- 8 meatballs (vietnamese preferred, ikea if needed)
- 1 lb noodles (frozen sanuki udon preferred)
Hot Pot Sauce
- 1/4 cup soy sauce (sweet soy sauce preferred)
- 2 tbsp green onions (thinly sliced)
- 1 tsp toasted sesame seeds
- 1 Thai bird’s eye chili (sliced, optional)
Mike's Hot Pot Sauce
- 2 tbsp ketchup
- 2 tbsp sugar
- 2 tbsp sriracha
- 2 tbsp shacha (optional)
Arrange all ingredients on separate platters, keeping the meats together, seafood together, and dumplings and meatballs together, so as not to cross contaminate. Or just arrange each ingredient on its own plate.
Combine your soup mix with enough water to fill the pot 1” from the top. Bring your soup to a boil at the table. See notes for soup mix alternatives.
Make the sauces: combine sauce ingredients and let sit for 1 minute in two separate bowls. Taste and adjust as needed. See post for sauce alternatives.
Set place settings, divvy up sauces, and pour drinks. Prepare and set aside a carafe or pitcher of water to refill the soup when it gets low. Enjoy!
If you can’t get your hands on a hot pot soup packet, combine 1 quart chicken stock, 1 tbsp soy sauce, 1 tbsp toasted sesame oil, 1 tbsp sliced ginger, and 1 tbsp chopped green onions, and enough water to fill up your pot.
You can also use instant dashi powder.
Estimated nutrition doesn’t include sauce or soup.

I Am... Pumpkin Basque Cheesecake
Pumpkin Basque cheesecake forever! I’ve been making this on repeat all season long. Creamy basque cheesecake is my all time favorite dessert. I love the soft ooze of a runny Basque cheesecake. If you haven’t had one before, you must! I implore you, it is the ultimate manifestation of cheesecake: creamy, sweet, and pure cheesecake flavor with none of the distracting graham cracker crust. Come fall, all my cheesecakes take on an autumnal feel thanks to pumpkin. Love it or hate it, pumpkin and pumpkin spice is here to stay and to me, nothing is more fall then the warm and cozy smells of pumpkin mixed together with cinnamon and sugar. If you love pumpkin pie and you love cheesecake, this is the pinnacle of fall desserts. It has the earthy sweetness of pumpkin without being too overwhelming and the tangy decadence of cheesecake.
What is Basque cheesecake?
Basque cheesecake was in San Sebastian in the 70s by a restaurant called La Vina. They did a bunch of experiments and the one cheesecake they kept coming back to was a crustless, burnished cake that was light yet dense and full of cream cheese flavor and a signature brown-black top. The classic San Sebastián basque cheesecake is delicious, but I prefer the Japanese take: slightly oozy and loose in the middle, lightly sweet, with a good amount of cheesiness and just the right amount of dense. Basque cheesecake is the best combination of taste and texture. The edges of the cheesecake are slightly firmer with a lingering tongue coating smoothness that gives way to a supple molten cream center that barely holds together. The contrast is what gets me every time – a soft and cake tender shell surrounding a velvety smoothness that barely holds its shape, like the most decadent slice of triple cream brie. This particular recipe is a riff off my favorite basque cheesecake recipe with roasted, puréed kabocha folded in.How to make pumpkin Basque cheesecake
- Cream. Cream together the cream cheese and sugar. It’s best if your cream cheese is ultra soft. I like to leave it out at room temp for as long as possible before creaming so it blends up completely lump free. If you have a stand mixer, use the paddle attachment and remember to scrape down the sides.
- Mix. Add the eggs, one at a time, mixing in completely without adding too much air. If you’re using a stand mixer, add the eggs and beat with the paddle on low.
- Stir. Stir in the pumpkin/kabocha and spices, then slowly pour in the cream and mix until just combined.
- Bake. Pour the batter into a parchment paper lined pan and bake in a super hot oven so the top gets nice and burnt while the inside stays creamy.
Pumpkin Basque cheesecake ingredients
- Cream cheese. My favorite cream cheese is Philly cream cheese, of course. Make sure you temper it at room temp so it it silky smooth and creamy without any lumps
- Sugar. Not too much sugar, just enough so it’s lightly sweet and delicious. I’ve only ever used granulated sugar, but I think brown sugar would add a hint of depth and caramel flavor.
- Eggs. You’ll need 4 large eggs to stabilize and hold the cake together. Make sure you get some nice, high quality eggs.
- Heavy Cream. Heavy cream is what makes this cake SO smooth and rich. You might also know heavy cream as whipping cream. Either will work as long as it has over 36% milk fat.
- Pumpkin. You can use canned puréed pumpkin (I love Libby’s!) but since this is a super simple recipe, I decided to cube and roast kabocha (aka Japanese pumpkin) for an extra bit of a special touch.
- Spices. A simple mix of cinnamon, ground ginger, cloves, and nutmeg adds just the right amount of warm spice.
What is kabocha?
Kabocha is a winter squash that is often referred to as a Japanese pumpkin. They have a deep green, thick skin, and bright orange flesh. Just like pumpkins, they are found in both sweet and savory dishes. They have a distinctively sweeter flavor profile compared to pumpkin and cook up more dry and fluffy making them more intensely flavored. Roasted kabocha is smooth and fluffy, sweet and nutty. They taste like a mix of pumpkin and butternut/honeynut squash and sweet potatoes. They’re amazing!How to cook kabocha for pie
- Prep the kabocha: wash and dry the outside then place on a heavy cutting board and use a large knife to cut in half. Kabocha are notoriously hard, so be careful. Scoop out the seeds then cut into wedges/chunks.
- Wrap the wedges/chunks in foil and place on a baking sheet and roast in a 400°F oven until tender and cooked through, about 30-40 minutes. You should be able to easily pierce the flesh with a fork.
- Remove, let cool, and scoop the flesh from the skin.
- Blend or purée until smooth. If desired, push through a metal sieve then use as directed in your recipe.
Do I need a springform pan for cheesecake?
The best pan is one that has tall sides so your cheesecake can burnish and brown on the top with just the slightest bit of jiggle in the middle. I like to use 6 inch rounds that are at least 3 inches in height. I’ve also baked Basque cheesecake in loaf pans and they come out really nice when you slice it up. The best part about Basque cheesecake is that you don’t need to use a springform pan and you don’t need a finicky water bath. Take advantage of that and use any pan you have. The deeper and smaller the pan, the more likely you will have a jiggly ooze-y cheesecake. The larger and more shallow your pan, the more likely you’ll have a firm cheesecake.How to line a pan for cheesecake
Measure out a piece of parchment paper larger than the cake pan, scrunch it up into a ball, then flatten it out. That will make it easier to line and push the parchment into the edges of the pan. Place the scrunched up and unfolded parchment paper into the pan, shaping, pushing, and pressing the paper into the edges and up the sides. If you’re worried, you can double line the pan.How long to bake Basque cheesecake
This depends on how creamy and jiggly you want the middle of your cheesecake to be. For a runny, creamy, just set center bake for 20 minutes. For just a bit creamy, go for 25 minutes, and for set, 30 minutes. Burnt top: To the the burnished top while still have a runny center, turn on the broiler and keep a close eye on it while it browns. It only takes a couple of seconds.Do I need to chill cheesecake?
You don’t have to chill it until it’s fridge-cold, but it’s best to let it cool completely. The cheesecake will continue to set and bake after you take it out of the oven, so leave it in the pan and let it cool completely before removing and serving. If you like a cold cheesecake you can pop it into the fridge and serve it once it’s completely cold. For a still runny center, after it’s completely cool, remove from the pan and slice without placing in the fridge. Happy pumpkin cheesecake making! xoxo steph PS - if you’re a pumpkin lover, please check out these other pumpkin recipes:Pumpkin Basque Cheesecake
Creamy, sweet, and pure cheesecake with a touch of seasonal pumpkin.
- 16 oz cream cheese (room temp (two 8oz bricks))
- 3/4 cup sugar
- 4 large eggs
- 1 cup canned pure pumpkin puree (or puréed kabocha)
- 2 tsp cinnamon
- 1 tsp ground ginger
- 1/2 tsp ground nutmeg
- 1/4 tsp ground cloves
- 3/4 cup heavy cream
Heat the oven to 430°F. (If you have convection mode, set the oven to convection.)
Line a 6 inch round 3 inch tall cake pan with parchment paper with an overhang of 2 inches. I like to double line it just to make sure it pops out of the pan easily.
In a stand mixer, or by hand, beat the cream cheese with the sugar until smooth, making sure the sugar is completely incorporated, and the mixture is light, fluffy, and lump free. Be sure to scrape the bowl down.
Add the eggs, one at a time, making sure the batter is smooth and incorporated before adding another egg. Scrape down the sides of the bowl, as needed.
Gently mix in the pumpkin and spices.
Slowly pour in the cream, mixing until just combined.
Pour the batter into the prepared tin and bake for 25-30 minutes. The top should be a dark amber and the middle should still wobble and jiggle. If you want the top to be more caramelized, leave it a bit longer, but know that the center will not be as gooey.
Remove from the oven and let cool in the pan on a wire rack at room temp until completely cool.
Remove the cake from the tin and slice at room temperature for a gooey, lava-like cheesecake. If desired, place in the fridge to cool which will result in a soft and creamy cheesecake without the ooze. Enjoy!

I Am... Garlic Lobster Pasta
I made this garlicky lobster pasta for Mike and it was amazing, if I do say so myself. The other day, Mike randomly came home with two cooked lobsters. “Surprise!” he said. We love lobster but hardly ever buy it or eat it at home. I have made lobster before (lobster risotto, creamy lobster pasta, and a steak and lobster sandwich) but it’s just not one of the things that comes to mind when we’re thinking of dinner. I don’t know why because it’s actually easy to cook and is super impressive and delicious. This lobster pasta is essentially an aglio e olio with a secret ingredient. It's loaded with pieces of lobster and finished with crunchy bread crumbs. The lobster is tossed in at the last minute, just to heat it through and get all those garlicky umami flavors on it without overwhelming the sweet flavor of the lobster meat. It comes together super quickly, like most pasta dishes. Grab some cooked lobster tails, and you have a quick, easy, impressive date night dish.
How to make garlic lobster pasta
- Prep the ingredients: toast the breadcrumbs, chop the parsley, shell and chop the lobster into bite size pieces.
- Cook your pasta in salted boiling water, timing it so it cooks one minute less than what the box considers al dente.
- While the pasta is cooking, warm extra virgin olive oil in a skillet over medium heat.
- Add sliced garlic and let it infuse the oil, softening but not browning.
- After the garlic is super aromatic and soft, stir in the crushed red pepper, parsley and oyster sauce, making sure everything is mixed together.
- Use a 1/3 measuring cup and scoop some of the starchy pasta water and add it to the pan with the garlic. Bring it up to a simmer, stirring and emulsifying the sauce.
- When the pasta is ready, use a pair of tongs to transfer it over to the pan with the sauce.
- Add in the lobster and toss everything until it is glossy with sauce, adding extra pasta water if needed.
- Finish with the breadcrumbs and extra parsley and enjoy immediately!
How to plate lobster pasta
Everyone always says you eat with your eyes first and it is true, especially with this pasta. You put in the effort to make it, so make it extra pretty on the plate! Grab two shallow, large-ish bowls (these are commonly called pasta bowls). For extra bonus points, warm them in the oven. When the pasta is ready, use a pair of tongs to divide the pasta, along with chunks for lobster, evenly into the two bowls. Make sure to scoop up any extra bits of sauce or slices of garlic and add them to the tops of the noodles. Reserve some of the pieces of lobster for the top. Finish with fresh parsley and breadcrumbs then enjoy immediately!Ingredients
- Extra virgin olive oil - use the good stuff because you deserve it. First cold press is best and as a rule of thumb, go for a dark or opaque bottle because olive oil doesn’t like being in the light.
- Breadcrumbs - toasted breadcrumbs add crunch and texture. I like grabbing the ends of sourdough and blitzing them in a food processor and cooking the coarse crumbs in olive oil until they’re almost deep fried and completely caramelized and golden.
- Flat leaf parsley - an underrated ingredient! I feel like a lot of people think flat leaf parsley is there just for garnish. But it adds a huge hit of freshness and when you cook it in oil it deepens the flavor. I love this sauce because it has parsley cooked in olive oil and it finishes the pasta for a hit of freshness.
- Spaghetti or other long pasta - I like the simplicity of spaghetti with this dish but of course there is a huge variety of long pastas out there. If you’re going to make your own, this is the perfect recipe to pair with fresh pasta https://weightloss-update.fit/how-to-make-fresh-pasta-the-easy-way-our-almost-no-knead-pasta-recipe/. If you’re buying it, go for a bronze extruded pasta with a rough surface that will help the sauce catch and cling.
- Crushed red pepper flakes - a little (or big, depending on your spice tolerance) of crushed red peppers that will bloom in the oil and impart a bit of warmth and spice.
- Oyster sauce - this is the secret ingredient that adds a huge amount of umami and seafood flavor to the sauce. It’s sweet and thick and full of complexity. More on oyster sauce below.
- Lobster - you can go with whole cooked lobster or cooked lobster tails or even cook your own whole lobster or tails if you’re comfortable with that!
Oyster Sauce
Oyster sauce can be found in the Asian aisle of any grocery store or online. If you see the Lee Kum Kee bottle with the two people in boats, go for that one. It’s the premium oyster sauce which lists oysters as its first ingredient. It doesn’t taste super seafood-y but it definitely adds an extra oomph to this sauce that you won’t be able to put your finger on.Where can you buy lobster?
Mike got these PEI lobsters from a local vendor who cooked them after he picked them out of the case. Most places that sell live seafood can and will cook your lobster for you - if you’re ever on the East coast, all the grocery stores do it for a small fee. If you’re somewhere like Whole Foods they often sell already cooked lobster tails just waiting in the case for you to purchase. If they have fresh lobster tails, it’s just a quick poach in simmering water for 6-8 minutes. The tails will turn bright red and curl up when they’re cooked.How to easily remove lobster meat
The easiest way to remove lobster tail meat is to think of it like a large shrimp or prawn. Use a pair of scissors to cut through the the bottom then pull the shell off and release the tail meat. If you happened to get a whole lobster, you can remove the meat from the claws and the knuckles as well. Youtube is your friend - there are so many videos on how to break down a whole lobster. Pro tip: don’t throw away the shells. Keep them and make a lobster stock and use it as the base stock for any soup you want to add a deep seafood flavor too. Just cover the shells with water and simmer, covered, on low for 2 hours or place in a crock pot, cover with water and a lid and turn the pot onto high.What to serve with lobster pasta
- start with a charcuterie board for 2
- serve kale salad alongside
- and finish with a creamy, gooey Basque cheesecake for the ultimate date night!
Garlic Lobster Pasta
The best aglio e olio base lobster pasta loaded with pieces of lobster and finished with crunchy bread crumbs and a secret ingredient.
- 4 tbsp olive oil (divided)
- 1/4 cup bread crumbs (coarse, see note)
- 2 tbsp fresh flat leaf parsley (chopped)
- 6 ounces spaghetti
- 1 head garlic (sliced)
- 1 tsp red pepper flakes
- 1.5 tbsp oyster sauce
- 1 lobster (cooked, shelled and roughly chopped, about 1-1.5lbs)
Add 1 tbsp olive oil to a pan and toast the breadcrumbs until golden and crunchy. Remove from the heat and stir in a pinch of parsley. Set aside.
In a pot of salted water, cook the spaghetti one minute shy of al dente.
While the pasta is cooking, heat up the remaining oil in a skillet over medium heat. Add the garlic and cook, stirring, until fragrant and slightly soft, but not brown, 20 seconds to 1 minute. Stir in the red pepper flakes, flat leaf parsley, and oyster sauce. Add 1/3 cup pasta water to the pan and bring to a simmer to emulsify into a sauce, stirring occasionally.
When the pasta is ready, use a pair of tongs to move the cooked pasta over to the pan with the sauce. Leave the heat on medium, add the lobster and toss to combine, until the sauce is glossy and clings to the noodles. Add extra pasta water if the pasta gets too dry.
Finish with toasted bread crumbs and enjoy!
Note: I like to blitz up old sourdough bread in the food processor for fresh, coarse crumbs.

I Am... Miso Tuna Salad
Tuna salad is a vibe. Those who love it love it and those who hate it just haven’t tasted the right tuna salad. I love it and I pretty much always have. Give me a tuna melt and I’m in HEAVEN. This miso tuna salad has been my go to forever because: miso! Miso makes everything better, it adds depth, umami and healthy probiotics.
The best tuna salad
This tuna salad is a simple mix because it’s one of my go-tos when I’m hungry but don’t have any groceries. It’s a little umami bomb and absolutely the perfect moreish no-carb snack. To a can of drained tuna, I stirred in a little bit of kewpie mayo, white miso instead of salt, celery for crunch, and green onions for bite. Crisp seaweed snacks are the best for scooping it up! It’s also amazing on super soft Japanese fluffy bread, toasted sourdough, or sourdough crackers.How to make miso tuna salad
- Super simple: mix together the miso and Kewpie until smooth and then add tuna, diced celery, and sliced green onions. Season with freshly cracked black pepper and enjoy!
Miso tuna salad ingredients
- miso - a traditional Japanese seasoning that is pretty much found everywhere now, miso adds depth and salty umami to this tuna salad. It adds a rich savoriness and as a bonus you don’t need to season with salt.
- kewpie mayo - this is a no brainer, kewpie mayo is so delicious, more on that below!
- tuna - you can use any tuna you like, we’re going to drain it so it doesn’t matter too much. I usually go with a chunk tuna as opposed to flaked. I like tuna packed in water, usually light tuna because it’s supposed to have less mercury. If you want your tuna a bit more rich, you can always add more kewpie but you can’t control the flavor of oil packed tuna.
- celery - tuna salad isn’t tuna salad without celery to add crunch.
- green onions - sliced them up and add them for freshness and a bit of oniony bite
- pepper - freshly cracked of course!
White or red miso
For tuna salad I like to reach for a white miso, which is mellow and sweet. It’s called shiro miso or sweet miso and you can find it near the tofu at places like Whole Foods or at Asian grocery stores.Which mayo to use
Kewpie mayo, forever and always! If you’re not a mayo fan, you have to try Kewpie mayo: the ubiquitous clear, red-topped squeeze bottle of mayo found in practically every Japanese household. It’s tangy from rice vinegar, slightly sweet, and extra creamy. It is absolutely delicious and will take this salad to the next level! Read more about kewpie here.What else can I make with kewpie mayo?
You can use kewpie mayo anywhere you would use regular, but here are some recipes to get you started:- Mayo ramen – for an extra rich luxe restaurant style ramen
- Ebi chili mayo – Deep fried tempura prawns with sweet and spicy Kewpie
- Japanese Egg Sando (or this one) – Japanese egg salads aren’t Japanese unless you use Kewpie. This is gonna be the best egg salad you’ll ever taste
- Japanese potato salad – It just hits different. It’s the Kewpie!
- Takoyaki – the classic takoyaki topped with Kewpie
- Deviled eggs – eggs get an upgrade with Kewpie mayonnaise
- Sushi bake – because it’s the creamiest, warmest, most satisfying casserole
Miso Tuna Salad
Miso makes everything better, it adds depth, umami and healthy probiotics.
- 1 tbsp white miso
- 2 tbsp kewpie mayo
- 1 can tuna (drained)
- 2 tbsp celery (diced)
- 2 tbsp green onions (sliced)
- freshly ground pepper (to taste)
Mix together the miso and kewpie until smooth. Add the drained tuna, celery and green onions.
Mix throughly and season to taste. Enjoy on its own or on top of crackers, toast, or seaweed.
Adjust the miso content to taste, miso pastes vary greatly in terms of saltiness. Also, feel free to add more kewpie mayo if needed.

I Am... Pumpkin Butter
There’s nothing quite like a fresh cup of coffee and a thick slice of toast slathered with pumpkin butter on a crispy, sunny, fall day. It’s pumpkin season! The coziest, most snuggly -dare I say- tastiest time of the year? It makes me smile just thinking about sinking my teeth into a plush piece of crisp and soft toast with pumpkin-spiced butter melting into all the little nooks and crannies.
What is pumpkin butter?
Pumpkin butter is a spread made with pumpkin, pumpkin spices, sugar, and of course, butter. It’s sweet, rich, and absolutely delicious. Think how life would be if you could take pumpkin pie and just spread it on toast. It’s kind of like that but a bit lighter, less dense, and more spreadable.Is there butter in pumpkin butter?
Yes! There is butter in this version of pumpkin butter because without butter is it even technically pumpkin butter? That being said, there are versions out there that don’t have butter in them (I’m looking at you Trader Joe’s, more on that below). I suspect that they didn’t put butter in theirs so they could have a shelf-stable, more jam-like product. Without butter, it’s more of a fruit spread. Both are delicious, but pumpkin butter with actual butter in it is amazing on warm baked goods or toast. The butter melts down into all the nooks and crannies and infuses spiced pumpkin flavor into whatever you spread it on.Pumpkin butter ingredients
All you need is pumpkin, pumpkin spice, vanilla, and butter:- puréed pumpkin - get the small 15-ounce can of pure pumpkin. I love Libby’s, which is straight-up pure pumpkin - Dickinson squash pumpkin to be exact.
- pumpkin spice - if you have pumpkin spice in your pantry, perfect! If you don’t, it’s super easy to whip some up. Pumpkin spice is going to add warmth and spiciness to our butter.
- vanilla - just a touch of vanilla is going to bring out the warmth of all the spices and add that baked goods feel.
- butter - it just isn’t pumpkin butter without butter! Use a high-quality butter that you love the taste of. It’s up to you if you use salted or unsalted, but I feel like salted helps emphasize the other flavors. Make sure your butter is at room temp so it’s easy to mix and incorporate with the brown sugar.
- brown sugar - brown sugar is going to give us a caramel sweetness that you don’t get with granulated sugar. But, if you only have granulated sugar at home, that will work too!
How to make pumpkin butter
- Reduce - add pumpkin, pumpkin spice, and a bit of vanilla to a pot or pan. Turn the heat up to medium and stir and cook the pumpkin until it reduces into a thick, and smooth paste. The key is to cook all of the water content out of the pumpkin so you’re left with pure pumpkin flavor. I like to use non-stick and I prefer using a pan because the increased surface area makes it easier to reduce the pumpkin. But using a larger pan means more splattering as the pumpkin is cooking down. The pumpkin will bubble and splatter, so keep that in mind!
- Cool - once the pumpkin is smooth and thick, spread the spiced pumpkin on a plate to help it cool down.
- Whip - Once the pumpkin is completely cool, whip together the brown sugar and butter. You don’t need to make sure it’s creamed, if you see granules of brown sugar in the butter, that’s perfect! Once the butter and sugar are one, mix in the cooled, spiced pumpkin and mix thoroughly.
- Enjoy - Once it’s ready, you can spread it on anything and everything! If you don’t use all of it right away, just spoon it into an airtight jar or container and keep it in the fridge for up to two weeks. Before you use it, you can whip it up to make it super smooth, or you can use it cold from the fridge. For me, there’s something about cold butter on hot toast or hot pancakes. I live for that contrast!
How to use
Spread a thick layer on fresh bread, toast, bagels, french toast, waffles, pancakes, slices of loaf cakes, buns, basically anything you would use butter on. For extra deliciousness, finish with a shower of cinnamon spice.Homemade pumpkin spice mix
It’s super simple to make homemade pumpkin spice mix and if you do it yourself, you won’t have a whole bottle sitting in your pantry just waiting for fall. For 1 tablespoon of pumpkin spice, mix up: 2 tsp ground cinnamon, 1/2 tsp ground ginger, 1/2 tsp ground nutmeg, 1/4 tsp ground cloves, and 1/4 tsp allspice.Trader Joe’s Pumpkin Butter
Trader Joe’s is dairy-free and doesn’t have butter in it at all. Instead, it’s kind of a pumpkin spread that’s a tiny bit thick, seasoned with pumpkin spice and sweetened with sugar and honey. Think of it like pumpkin jam. If you’re dairy-free, you can make the butter recipe below by adding the sugar to the pumpkin when you’re cooking it and skipping out on mixing in the butter. Personally, I prefer it when it actually has butter in it because it adds that decadence and luxuriousness that is absolutely necessary for a spread.If you love pumpkin and pumpkin spice, please check out these other recipes
- homemade pumpkin cream cold foam
- the plushiest, softest, pumpkin loaf
- irresistible pumpkin cheesecake bars
- mini, fluffy pumpkin chocolate chip pancakes
- super moist and delicious pumpkin cupcakes with brown butter frosting
Pumpkin Butter
Sink into a plush piece of toast with pumpkin-spiced butter melting into all the little nooks and crannies.
- 15 oz puréed pumpkin (~1 can)
- 1 tbsp pumpkin spice
- 1 tsp vanilla extract
- 1 cup butter (room temperature (2 sticks))
- 1/2 cup brown sugar (light preferred)
Add the pumpkin puree, pumpkin spice and vanilla to a non-stick pan and cook, stirring frequently, over medium heat for 15-20 minutes, or until smooth, thick, and reduced. The pumpkin will spatter and bubble as the water cooks out, so be sure to stir and keep an eye on it.
When reduced, remove from the heat, and spread the pumpkin out onto a plate to cool.
When the pumpkin is completely cool, cream together the butter and brown sugar in a large bowl, or the bowl of a stand mixer until combined. Add the cooled pumpkin puree and mix until completely incorporated.
Enjoy immediately or spoon into a jar or air-tight container and keep in the fridge to use on anything and everything. The pumpkin butter will keep well in the fridge for up to 2 weeks.

