
I Am... Trippa alla Romana: Roman Style Tripe in Tomato Sauce
Mike and I love Italian food. So much so that we were recently talking about taking a dream trip to drive up and down Italy just to eat. It’s probably a noodle-y fever dream, but it does tell you we are serious about Italian food. We pretty much try to hit up an Italian restaurant in every city we go to. We have a couple here at home too, but we just demoted one of them, partially because their food hasn’t been that good and partially because they don’t have tripe anymore. They were the only Italian joint in the city that served trippa alla Romana, or Roman style tripe: super tender, rich tripe slow braised in a savory tomato sauce. Trippa alla Romana is usually served showered with parm, with a large amount of toasted bread alongside. The soft and chewy tripe, along with toasty crunchy bread and savory tomato sauce is one of my all time go-to comfort food winter dishes.
Why tripe?
Tripe is one of those foods that isn’t really common and I think it’s so sad. If we’re going to be eating animals, we should really be eating nose to tail. I know nose to tail is kind of trendy (well, maybe not so much anymore) and it’s not trendy to like trendy, but the off cuts are often the most delicious and most rewarding. Not to mention cheap!Trippa alla Romana at home
Anyway, since we haven’t been able to have tripe out, Mike came up with the brilliant idea of making trippa alla Romana at home. I don’t know why I never thought of doing it before, but it was really easy and so good. We picked up some honeycomb tripe from our local Asian grocery store and from there it was just a question of slow cooking it and making a delicious tomato sauce to braise it in. We served it up with a bunch of toasty bread (there was way more bread than in the photos) and went to town, no expensive restaurant needed!Tips and tricks
- You can buy tripe at the butcher, or if you head to a local Asian grocery store, they’re pretty much guaranteed to have it. The kind of tripe you want is honeycomb tripe, which is pretty distinctive looking, with a honeycomb pattern.
- If you want a really tender tripe, you’ll need to simmer it for 1-2 hours. Some people like to add a tiny bit of vinegar to the water to get rid of the “tripe” smell, but I didn’t find that necessary.
- We used some guanciale (cured pork cheek) in the base of our tomato sauce, but it was totally over the top and not necessary.
- If you happen to have leftover tomato sauce in your fridge (or even a meat sauce), you can add the tripe to it and just use that. It’ll probably even more delicious!
Side dishes
Trippa alla Romana is great all on its own but what is life (or a great meal) without side dishes:- One Day No-Knead Focaccia
- Super Creamy Cacio e Pepe Pasta
- Bolognese
- Risotto with mushrooms and eggs and parm
- Kale Salad
Trippa alla Romana: Roman Style Tripe in Tomato Sauce
Super tender and rich honeycomb tripe slow cooked in a savory Roman style tomato sauce.
- 1 lb honeycomb tripe
- 1-2 ounces chopped guanciale (optional)
- 1/2 onion (chopped)
- 3 cloves garlic (minced)
- pinch of crushed red peppers (to taste)
- 1 tbsp tomato paste (optional)
- 14 oz canned tomatoes
- salt and freshly ground pepper
- freshly ground parmesan (to finish)
Place the tripe in a pot and cover with water. Season with salt and bring to a boil over medium high heat. Turn the heat down to a very low simmer and simmer for 1 to 2 hours, covered, until very tender. Add water as needed. Remove the tripe from the cooking liquid, reserving the cooking liquid. Let the tripe cool slightly before cutting into 1 x 2 inch strips.
Meanwhile, while the tripe is cooking, make your tomato sauce: In a pot, crisp up the guanciale or pancetta until brown and crispy and the fat renders out. If not using, heat up 1-2 tablespoons of oil over medium heat. Add the onion and garlic and cook, until soft but not brown. Stir in the crushed red peppers and tomato paste. Add the tomatoes, the cut up tripe, and 1/2 cup of the tripe cooking liquid. Bring to a simmer for for 30 mins to 1 hour, partially covered. Taste, season, and finish generously with parm. Enjoy with toasted bread, if desired.

I Am... Easy Better Than Takeout Kung Pao Chicken Recipe
Kung pao chicken is so quick and easy to make at home it'll be a weeknight dinner favorite in no time at all.
What is kung pao chicken?
Kung pao chicken is a classic Chinese stir fry dish with diced chicken, dried chilis, and peanuts. It comes from the land of fire-y spicy hot Chinese food, Sichuan. It’s also a really popular Americanized Chinese take out order. Everyone loves kung pao chicken with its tender bits of chicken and complex sauce of salty, sweet, tangy, and spicy flavors. This particular kung pao isn’t quite the way it’s made in Sichuan. In Sichuan, they classically dry fry it with just a touch of sauce. This kung pao is a saucy riff, more in the style of takeout American Chinese kung pao. The sauce makes it perfect for eating with rice.How to make kung pao chicken
This stir fry comes together super quick and easy after you prep all of the ingredients. If you want do this faster than takeout will arrive at your door, prep everything before you start cooking.- First off, make some rice. Unless you’ve smart and have rice meal-prepped in your fridge. Then in that case, skip this step because you’re already winning at life.
- Cut up your chicken into bite sized pieces. Place them in a bowl with the marinade and set aside while your prep the sauce ingredients.
- Prep the ginger and garlic. Whisk up all the sauce ingredients in a small bowl or liquid measuring cup. Use a garlic press for the garlic and a ginger grater for the ginger. Both are huge time savers.
- Time to cook! It’ll take just a few minutes: cook the chicken, add the sauce, let it reduce a bit, and you’re ready to eat.
Kung pao sauce
Kung pao sauce is a magic sauce that makes everything taste good! It’s so delicious that they sell bottles of it at the store (there’s even Panda Express kung pao sauce) but it’s really easy to make at home and store in the fridge. From there you can add it to random clean out the fridge stir fries and boom, instant kung pao. To make kung pao sauce, mix together 1 tbsp + 1 tsp cornstarch, 1/4 cup hoisin sauce, 1/4 cup sambal oelek, 2 tbsp rice vinegar, 2 tbsp sugar, 4 cloves minced garlic, and 1 tbsp grated ginger. Cook in a non stick sauce pan over medium heat, stirring until the sauce becomes thick and glossy. Let cool completely then pour into a clean container and keep in the fridge for up to 2 weeks, tightly covered. Add to stir fries during the last step, after everything has been cooked.Kung pao chicken ingredients
Most of the ingredients in this kung pao chicken can be found at your usual grocery store. You need chicken thighs, soy sauce, rice vinegar, cornstarch, sugar, garlic, ginger, scallions, and peanuts (or your nut of choice). The other handful of ingredients can be found at your friendly Asian grocery store, online, or in places like Whole Foods.The hard to find stuff
- Shaoxing wine: This is the secret ingredient that will make your Chinese food taste like restaurant style Chinese food. Shaoxing wine is a sweet, nutty, earthy Chinese rice wine. Read more about it via our ultimate guide to Shaoxing wine.
- Hoisin sauce: Hoisin is pretty much sold everywhere now, from Target to your basic grocery store. It’s a thick, sweet brown sauce that’s used in marinades and as a dipping sauce. It’s super flavorful: sweet and savory, tangy, and full of umami. Hoisin can taste different based on brand, and for us, the best brand of hoisin is Lee Kum Kee. Bonus, it comes in a squeeze bottle!
- Sambal oelek: This is not an authentic ingredient in kung pao chicken in Sichuan, but it packs a fresh chili-garlicky punch.
- Whole dried chilis: These are completely optional, but if you want your kung pao to look authentic, you’ve got to have dried chilis! They sell whole Chinese dried chilis online and in Asian grocery stores. We use dried heaven facing chilis but you can sub the chile de árbol you see in the Mexican aisle too. Most people don’t eat the dried peppers, but some do, especially if the peppers are high quality, toasty, and good.
Nuts or nut free?
Peanuts are the classic nut in kung pao. The key is to fry them a bit to enhance their nuttiness. I went for a peanut-free kung pao with cashews. If you like, you can sub in any nut or leave them out entirely. To fry your nuts: heat a bit of oil in a non-stick pan or wok. Stir fry, moving constantly for 2-3 minutes until they start to smell roasty and delicious. Remove from the pan and set aside. If you’re not going to fry your nuts, make sure you’re using toasted/roasted nuts.Chicken breast or chicken thighs?
Chicken thighs are superior in this stir fry because they are super flavorful and have more fat content than breasts. You can use breasts too, just make sure you cook them for less time.Does this taste like Panda Express kung pao chicken?
This isn’t an ingredient-for-ingredient copycat recipe for Panda Express but it is pretty darn close!Tips and tricks
- Cut your chicken into even pieces. Take the time to chop up the chicken into small even pieces. It’ll cook faster and more evenly.
- Velvet your meat. Marinating the chicken in Shaoxing wine, soy sauce, and cornstarch is called velveting. It gives the chicken flavor and the cornstarch protects the chicken from too much heat which makes it juicer when it cooks. It’s what gives stir fried meats their silky texture.
- Toast the nuts. Toasting the nuts draws out the flavors making them more nutty and crunchy.
- Use a non stick pan. I like to use a non-stick pan because cornstarch has the tendency to stick to regular pans and with a non-stick you have the option of not using as much oil. Some people think that non-stick pans are not professional, because they don’t give you the maillard reaction (or wok hei, if you’re going that deep) you’d get with a regular pan, but when you’re making stir fry, not steak, it’s not an issue. Plus, the name of the game is ease and if you have an annoyingly difficult to wash pan after dinner is done, that’s not easy. These pans are my favorite.
What to serve with kung pao chicken
Kung Pao Chicken Recipe
Highly addictive and super easy to make at home.
Chicken
- 1 lb chicken thighs (cut into bite size pieces)
- 1 tbsp soy sauce
- 1 tbsp Shaoxing wine
- 1 tsp cornstarch
Kung Pao Sauce
- 2 tsp cornstarch
- 2 tbsp hoisin
- 2 tbsp sambal oelek
- 1 tbsp rice vinegar
- 1 tbsp sugar
- 2 cloves garlic (crushed)
- 2 tsp ginger (grated)
Stir Fry
- 1 tbsp oil
- 8-10 dried red chiles (if desired)
- 1/4 cup roasted cashews (or peanuts)
- 2-3 green onions (cut into 2" lengths)
Marinate the chicken thighs in the soy sauce, shaoxing wine, and 1 teaspoon of cornstarch. Set aside while prepping your sauce.
In a small bowl or liquid measuring cup, whisk together the remaining 2 teaspoons of cornstarch with 1/4 cup water, hoisin, sambal oelek, rice vinegar, sugar, garlic, and ginger.
Heat up the oil in a large non-stick frying or sauté pan over medium high heat. Add the chicken and cook, stirring occasionally until golden and cooked through.
Turn the heat to medium, add the peppers and the sauce and stir to coat. Cook, until the sauce starts to thicken and turn glossy.
Add in the green onions and cashews.
Enjoy hot!
I Am... Tokyo Food Guide: In Search of the Best Tokyo Gyoza
Are you here for the love of gyoza? It's not hard to fall in love with those little packages of crispy bottoms, tender tops, and juicy meaty insides. I can't remember when I had my first gyoza, but I can tell you that my love for gyoza runs deep. I legitimately love all the food in Tokyo, but when I'm there, there is a special gyoza-sized hole in my heart that just needs to be filled. When you love gyoza as much as I (and Mike!) do, the only logical thing to do when in Tokyo is: GYOZA HUNT.
Here are a few things we learned from our intensive study in Tokyo gyoza houses
- Gyoza houses have a relatively limited menu: gyoza, rice, some small sides, and beer.
- Most people order meat gyoza. Some places also offer vegetable/yasai gyoza, but I would say that meat are standard.
- Generally, gyozas come with garlic or without. The staff will ask you, "niniku?" and the answer should always be hai/yes. If, for some reason, you're a vampire and don't like garlic, you can say: niniku janai. Side note: lots of the newer, hip gyoza places don't have garlic in their gyozas – the lack of garlic is supposed to be so buisness peeps can enjoy gyoza without worrying about garlic breath.
- Gyoza generally come yaki (pan-fried) or sui (boiled). I say go for an order of each – usually everyone goes for yaki because hello crispy bottoms, but sui really let the gyoza flavor shine and their soft and silky texture will leave you wanting more.
- The sauces are as important as the gyoza. There will always be shoyu (soy sauce), su (vinegar), and some sort of rayu (chili oil) or chili sauce. Mix them up as you please in the tiny dishes that are set at every table and dip to your heart's content.
- The standard order is about 2 plates of gyoza – 6 gyoza per plate, per person – but gyoza houses are pretty relaxed, so if you only want to order one per person, it's no big deal.
Gyoza no Fukuho
Gyoza no Fukuho is our absolute favorite gyoza place. No frills, no nonsense, and the best tasting gyoza around. There are several locations – it's a chain – but the one we go to most is right next to Shinjuku Gyoen. There's a lunch special for 590 yen that gets you 2 orders of gyoza, a fluffy bowl of rice, and a bowl of seaweed soup. It's the BOMB. With thin skins and just the right amount of filling, the yaki-gyoza are crisp but not overly oily, extremely flavorful with an a good hit of garlic. The sui gyoza are tender, silky and juicy. If you're looking for a cheap and delicious lunch in Tokyo look no further because who doesn't love rice and gyoza? Bonus, along with the standard soy, vinegar, and hot sauce, they also have a little pot of red miso and packets of karashi, hot Japanese mustard. Gyoza no Fukuho Rating: 5/5Kanda Gyoza
Kanda Gyoza is an old school gyoza house with many branches in Tokyo. They serve a bunch of other Chinese food too (gyozas are known as Chinese food in Japan), but they're most well known for their gyoza. They have giant kurobuta gyoza that are delicious, but even more than the pork gyoza, we love their veggie gyozas. They're juicy, thicker-skinned, and kind of on the bigger side. Kanda Gyoza Rating: 4/5Harajuku Gyoza Rou
This is the place that shows up most when you do a search on "must eat gyoza in Tokyo." Cheap, friendly, and delicious, this little hole in the wall in the back streets of Aoyama, just off of Cat Street, is definitely serviceable and pretty good if you're just beginning your gyoza journey. But, I will say, give it a pass if they have a line. For some reason, there almost always is, unless you're there at 3 in the morning. The gyoza at Gyoza Rou are thin-skinned (a sign of a good Japanese gyoza), juicy and if you choose it, full of garlic-y flavor. I have to say that it's a true hole-in-wall, or as much of a hole-in-the-wall as you'll find in Tokyo. I feel like the place hasn't been cleaned since the 80s, but, you know, most Tokyoites and toursits have pretty fond memories of hitting this place up during late nights. Harajuku Gyoza Rou Rating: 2/5Gyoza Bar Comme a Paris
If you're looking for more of a night time bar feel, Comme a Paris is the place to be. While most gyoza houses have beer as the drink of choice, this cozy Aoyama bar pairs their gyoza with wine or champagne by the glass. Their gyoza is proudly garlic-free and comes with three different dipping sauces: tomato, white miso, and black chili oil. The skins are thin and tender, the bottoms crunchy, and the varieties creative. We loved the onion gratin gyoza, a take on French onion soup with a cheesy gyoza standing in for the traditional crouton. I also especially loved it because they have fries on the menu and gyoza and fries go together almost as well as gyoza and rice. Update: This one is permanently closed, friends :( Gyoza Bar Comme a Paris Rating: 3/5Kitchen Tachikichi Gyoza
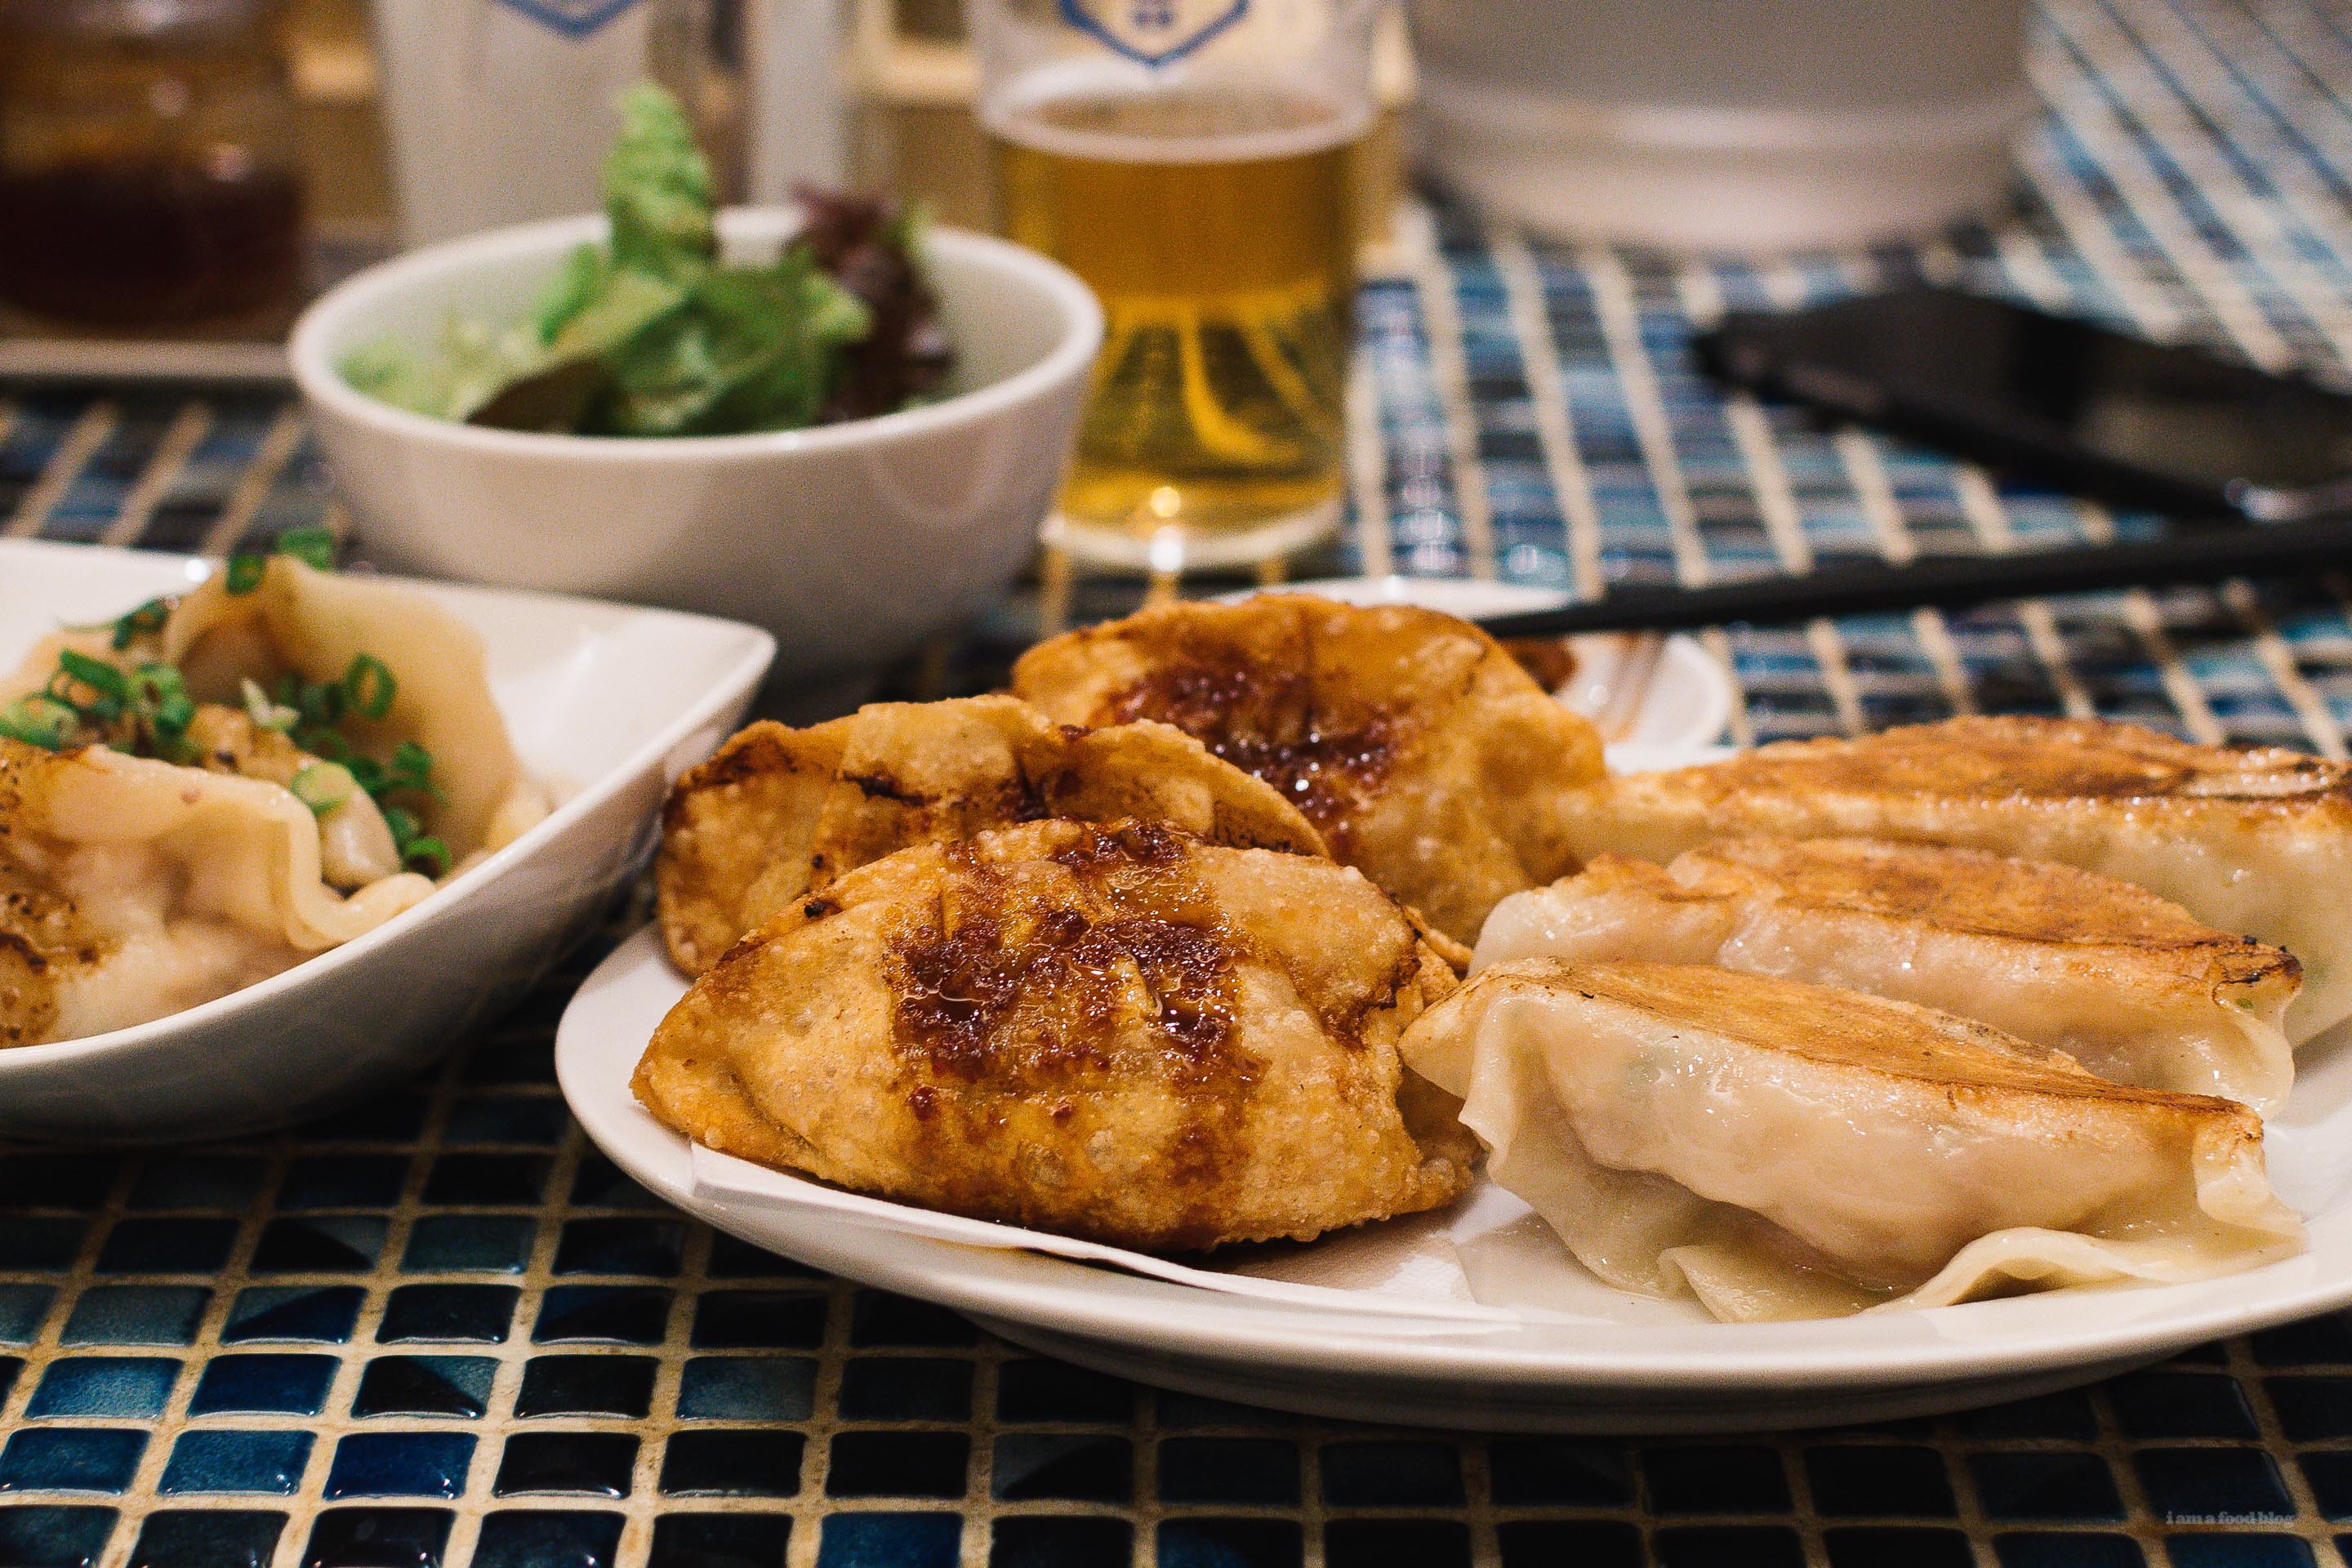
This Omotesando gyoza joint is kind of all about aesthetics with their cute blue tiled counters and custom glasses and plates. But don't worry, they're not just about looking good – the gyozas at Tachikichi happen to be delicious. They much larger then what you normally see in Tokyo so if you want to cut down on your normal order, you'll still be full. They have slightly thicker skins and the pork used is sourced from Yamagata. As always, the lunch set is your best option. I went with the 2 set option: 2 each of yaki, sui, and age/deep fried. The sets come with salad, kimchi, and unlimited serve yourself rice and miso soup! Update: the Omotesando store seems to be closed but the tachikichi gyoza lives on at their (original) Shibuya main branch. Kitchen Tachikichi Gyoza Rating: 3/5Anda Gyoza
Anda has a charming, quaint room and a Michelin bib gourmand recommendation. Their gyoza are Taiwanese style with thicker skins flavored with roasted brown oats. They're more jiaozi than gyoza, with a tortellini shape. All of the gyoza here are served sui/boiled and have interesting flavor combinations like pork and daikon, carrot and curry, chicken and ginger. The lunch set rice looks like a plain bowl with pickles, but there is a little bonus pork hidden at the bottom, so mix it all up before devouring. Anda Gyoza Rating: 2/5Awaya Gyoza
Another one of those hipster places that serves gyoza and booze in a cheery, modern hipster space. Awaya is located in Kichijoji so when you're tired of shopping, pop on in. We liked the cheesy gyoza: crispy pan-fried pork gyoza topped off with a slice of American style cheese. Sounds like it it'd be bad, but it was so good. Update: This one is permanently closed too. Awaya Gyoza Rating: 2/5And there you have it, all the knowledge you need to go forth on your own gyoza journey in Tokyo. To be honest, there are TONNES of gyoza places in Tokyo so let me know which place is your favorite. We're always on the looking for gyoza! Note: The gyoza rating is based purely on taste alone, not atmosphere. Read More →

I Am... One Pan Sesame Chicken
This one pan sesame chicken is the answer to all your quick and easy weeknight dinner dreams. Sesame chicken is a sweet and saucy dish of crispy bits of chicken coated in a sticky savory sauce, sprinkled with toasted sesame seeds. It’s a classic Chinese take-out favorite and one of my must order dishes. It’s extremely versatile – go with whatever pieces of chicken you have in the fridge or picked up at the store on sale, either breasts or thighs will work. I prefer skin off, but skin on works too. The name of the game is ease. From there, your chicken gets a little coat of cornstarch for both tenderizing and to add a bit of crisp.
What is sesame chicken?
Sesame chicken is a super popular American Chinese chicken dish that is most likely inspired by real Chinese dishes like sweet and sour pork or lemon chicken. It’s almost just like General Tso’s chicken but instead of on the spicy side, it’s sweet. Like General Tso’s chicken, no one is quite sure of the origins of sesame chicken. Sesame chicken is uniquely Chinese-American and incredibly delicious.How to make sesame chicken
- Season and cornstarch your chicken. Cut the chicken into bite sized pieces then mix it up with some cornstarch.
- Fry the chicken. Heat up a bit of oil and pan-fry the chicken until golden and crisp.
- Make the sauce. Push the chicken to the side and fry the garlic for a minute, then add all the sauce ingredients. Cook until it starts to bubble and thicken, stirring occasionally.
- Make it rain. Sprinkle on the sesame seeds and enjoy hot with fluffy white rice!
Ingredient notes
- Chicken - I used boneless skinless thighs but you can use whatever boneless chicken you happen to have, skin on or skin off doesn’t really matter. Both breasts and thighs will work in this recipe. Versatility is the name of the game.
- Cornstarch - this is what we’re using to dry coat the chicken with before it gets pan fried. Cornstarch doesn’t have any gluten in it which will help make the chicken a little bit crispy and golden. Garlic - just a bit of garlic for those mellow warm garlicky flavors we all know and love.
- Honey - this is what is going to add the sweetness and also cook down nicely into a sticky, thick sauce.
- Soy sauce - There are so, so many soy sauces out there, but in this case, the best one is the one in your pantry. That being said, if you’re running out or want to expand your soy sauce collection, make sure you go for a naturally brewed soy sauce for its complex deep aroma and flavor. We like both Amoy and Lee Kum Kee.
- Rice vinegar - rice vinegar adds that signature little bit of tang that sesame chicken has. The tanginess highlights the sweetness and that contrast is what makes sesame chicken irresistible. We like to use Marukan or Kikkoman unseasoned rice vinegar. If you don’t have any on hand, you can substitute white vinegar.
- Toasted sesame oil - Toasted sesame oil will add a huge hit of sesame flavor! It’s intensely nutty, toasty, and so so good. It’s not the same as regular sesame oil. Toasted sesame oil is made from toasted sesame seeds and is a finishing oil, much like a really good olive oil. Our favorite brand is the Japanese one, Kadoya, with its signature bottle shape and yellow cap. You can find it in the Asian aisle at most grocery stores, in your local Asian grocery store, or online.
- Toasted sesame seeds - These guys are the finishing touch. Look for toasted sesame seeds at the store, they have a nuttier, toastier flavor.
What’s in sesame chicken sauce?
Sesame chicken sauce is made of garlic, honey, soy sauce, rice vinegar, and toasted sesame oil, which gives it that sesame-ness.Crispy sesame chicken
Personally I love the ease of this one pan sesame chicken but if you NEED crispy sesame chicken, I’ve got you. The recipe is exactly the same, the only difference is: you’re going to shallow fry the chicken in more oil. You can also choose to bake or air fry for a crispier coat.How to fry
In a cast iron skillet, or heavy bottomed pan, heat up 1/2-1 inch of oil over medium heat. When it’s hot and shimmery, add in the cornstarch coated chicken, making sure to shake off any excess cornstarch. Fry the chicken, flipping as needed, until the chicken is golden brown and crisp. Remove and drain on a rack so it crisps up more while you use another pan to make the sesame sauce. When the sesame sauce is thick, add the crispy chicken to the sauce and toss to coat.How to bake
Baking will give you a slightly crisper chicken than simply pan frying but it takes a lot longer in the oven. To bake: heat the oven to 420°F and lightly oil a rack. Place the coated chicken on the rack and bake for 15-20 minutes until the internal temperature reaches 165°F and the juices run clear, flipping once, halfway. When the chicken is almost done, use a nonstick pan to make the sesame sauce. When the sesame sauce is thick, add the crispy chicken to the sauce and toss to coat.How to air fry
Air frying will give you a similar crunch to shallow frying but is a bit more hands off. To air fry: oil the air fryer basket and lay in the cornstarch coated chicken in a single layer. Air fry at 400°F for 12-15 minutes or until the internal temperature reaches 165°F and the juices run clear, flipping halfway. When the chicken is almost done, use a nonstick pan to make the sesame sauce. When the sesame sauce is thick, add the crispy chicken to the sauce and toss to coat.Why this is the best sesame chicken recipe out there
Most sesame chicken recipes are deep fried chicken but I love this one-pan version because it’s the easiest way to make homemade sesame chicken from scratch. Instead of coating each piece of chicken in a batter and deep-frying, we’re going to toss our chicken cornstarch to give it a slightly crispy coat. Not quite the same as deep fried, but 1000 times easier and quicker, which is what everyone needs on a weeknight. This sesame chicken is definitely faster (and healthier) than ordering take out!Pro tip
If you want your sesame chicken to have a deeper, nuttier, sesame flavor, and you don’t have toasted sesame seeds on hand, you can toast untoasted sesame seeds yourself. Toasting them right before you add them to the chicken will unlock the ultimate nutty sesame aroma. To toast sesame seeds, add a table spoon of sesame seeds to a dry pan and heat over low, shaking the pan constantly until the seeds start to smell nutty and turn slightly golden. Remove the seeds from the pan immediately as they have a tendency to burn.What to serve alongside
More Chinese takeout dishes you should try
Sesame Chicken Recipe
This one pan sesame chicken is the answer to all your quick and easy weeknight dinner dreams.
- 1 lb boneless skinless chicken thighs (~4 thighs, or sub 2 breasts, cut into 1 inch pieces)
- salt and freshly ground pepper
- 1 tbsp cornstarch
- 1 tbsp oil
- 2 cloves garlic (crushed)
- 2 tbsp honey
- 1 tbsp soy sauce
- 1 tbsp rice vinegar
- 1 tsp toasted sesame oil
- 2 tsp toasted sesame seeds
Season the chicken with salt and freshly ground pepper, then toss with 1 tablespoon cornstarch.
Heat up oil in a large skillet over medium high heat. Cook the chicken in a single layer, until cooked through, golden brown, and crispy, flipping once. Cook in batches, if needed.
Push the chicken to one side, then add the garlic to the pan and cook until soft, but not brown.
Add soy sauce, honey, rice vinegar, and sesame oil. Cook over medium heat, stirring until the sauce turns slightly thick and glossy and coats the chicken. Finish with toasted sesame seeds and enjoy hot!

I Am... Chinese Pork Dumplings Recipe
Potstickers, Chinese pork dumplings, jiaozi, guotie, whatever you want to call them, they’re delicious, and homemade dumplings are the most delicious of all. Dumplings are definitely a staple in our home. We always keep a bag of frozen homemade dumplings for those emergency hungry times. Pan-fried dumplings are incredibly satisfying: crispy on the outside, juicy on the inside, filled with so much flavor. You could just buy a bag of frozen dumplings at the grocery store and call it a day or you could make your own at home and impress yourself with your amazing dumpling making abilities. Golden brown and crispy on the bottoms with a juicy pork filling inside, these Chinese pork dumplings will make you feel like you’re at your favorite dumpling spot.
But what even are dumplings though?
Dumplings are juicy, crispy little bundles of deliciousness. In this particular case, we’re talking about Chinese dumplings, or jiaozi. Jiaozi are a ground meat filling (sometimes vegetable) wrapped up in a piece of thinly rolled out dough. Chinese dumplings can be deep-fried, boiled, steamed, and pan-fried. They’re served in soup and on their own with a dipping sauce. Dumplings are super versatile, you can eat them for breakfast, lunch, dinner, a late night snack, you name it, and dumplings can be there for you.The best dumplings are the ones you make at home.
There is something gratifying about making something from nothing. It’s why sourdough is so popular - making food from scratch will give you a deep satisfaction. It’s why generations of families sit together at the kitchen table at dumpling making parties. But also, let’s face it, those dumpling making parties are just an excuse to wrangle kids in to doing free labor. Still, take an afternoon to make some homemade dumplings – heck make a triple batch and freeze the extras – and you’ll be eating like dumpling royalty for days. Also, if you make your dumplings at home you can customize them infinitely. Dreaming of shrimp and chives? Maybe a green chile cheeseburger dumpling? You can have it all, wrapped up in one beautiful bite.The perfect homemade dumpling dough
The key to any good dumpling is the dough. You want it to be plush and chewy and pliable. There is a space in the world for thin skinned dumplings (like xiao long bao) but for homemade potstickers you want a rustic al dente wrapper that you can really sink your teeth into. There are different kinds of doughs for different kinds of dumplings - how much flour and water you add yields different textures. For our potsticker dumpling dough we’re going to be using a hot/warm water dough which makes a very pliable, easy to work with dough. It has a 55% hydration, which is perfect for crispy, yet chewy dumpling skins. All you need to make homemade Chinese dumpling wrappers is water and flour. Because it’s a warm/hot water dough, this basic dumpling wrapper recipe is perfect for potstickers or steamed dumplings. Incidentally, boiled dumpling dough usually uses cold water so the dough can hold up to the rigors of boiling. Boiled dumplings, or shui jiao, are actually considered more difficult to make than dumplings for pan-frying or steaming.How to make homemade dumpling dough
Put some flour into a bowl. Add hot/warm water. Mix. That’s it, you have dumpling dough! It really is that simple, but let’s break it down a bit.- Add flour to a large bowl. I like to use a kitchen scale because it means less washing up and more accuracy. It’s really win-win. After you add the flour to the bowl, make a well in the middle, just like when you make pasta.
- Add warm water to the dough. Pour warm water in to the well. Warm water helps the starch form gluten which means our dough will be soft, stretchy, and easy to work with. Use a pair of chopsticks to mix the water into the dough so that it forms a shaggy ball.
- Knead. From here you can knead the dough by hand until it becomes a smooth ball or you can do what I do and use a stand mixer. I almost always prefer using a stand mixer when I can, it makes kneading hands off.
- Rest. This is just where the dough takes a little nap so it’s easier to roll out the wrappers. You can optionally re-knead and let it rest again so that it’s even easier to roll out.
- Roll and shape. The classic way to portion out dumpling dough is by poking a hole in your dough and then stretching it out into a big thin doughnut/bagel. From there you cut it and you have a thin rope of dough that you can cut small pieces off of. The pieces are then rolled out using a small rolling pin and you’re ready to make dumplings!
What are Chinese dumplings filled with?
You can pretty much fill dumplings with anything. Most of the time they’re filled with ground meat (pork, beef, chicken, lamb), vegetables, aromatics, and sesasoning. The vegetables are what makes the inside of your dumplings extra juicy and the aromatics add flavor.How to make homemade dumpling filling
- Prep: The first step to making a good dumpling filling is prepping the vegetables. You could go with an all meat dumpling but I find that all meat dumplings tend to be missing something – vegetables add an extra bit of moisture, flavor, and texture that just compliments the meat. We’re going to be using cabbage but you can use chives, spinach, carrots, kale, hearty greens, mushrooms, anything you want. The key is not having too much moisture. In the case of cabbage, we’re going to salt it a bit then squeeze it to remove some moisture so our dumplings don’t get too soggy.
- Mix: Once you vegetables are being salted, it’s time to mix up the meat. Mix together a bit of cornstarch with water then stir it into the ground pork. Stirring in a bit of cornstarch and water will make the insides of your dumplings super tender. It’s the secret to juicy, tender dumplings! When you stir in the water-cornstarch mix everything will come together into a homogenous paste, which is exactly what you want. When the pork is nice a smooth, mix in the vegetables.
- Season: It’s all about the aromatics and seasoning! Ginger, garlic, shaoxing wine, soy sauce, toasted sesame oil, and salt are you friends. Stir them all in and your dumpling filling is ready to go.
How to wrap dumplings
There are infinite ways of wrapping dumplings. My tip to you is: don’t worry about it! If your first batch of dumplings is just folded over and pressed together it’s totally fine! You can even just pinch up the sides, it’s a style. The goal is to make homemade dumplings, not to stress out about different dumpling folds.How to freeze homemade dumplings
You might be wondering, can I eat 40 dumplings in one sitting? The answer is yes, but if you are more regular person this recipe will probably give you some extra dumplings. Or, if you’re smart you’ll double or even triple this recipe so you can have extra dumplings in the future. Dumplings are one of those things that do extremely well frozen. They take almost no extra time to cook from frozen and it’s basically an instant home cooked meal. To freeze your dumplings, space out uncooked, formed potstickers in a single layer on a baking sheet and freeze until solid. Transfer to freezer bags.How to cook dumplings
All hail crispy bottom dumplings! Crispy bottom dumplings are the best dumplings, am I right? That textural contrast between super crispy burnished bottoms and the tender steamed tops is the best. To get crispy bottoms on your dumplings, pan fry them in a bit of oil over medium heat for 2-3 minutes, the add a bit of water and cover to steam to 4-5 minutes. Lift the lid off and continue to cook off the water and the bottoms of your dumplings will be golden and crisp and the insides will be tender and cooked through.How to make a crispy dumpling skirt
- Heat up a bit of oil in a non-stick pan over medium to medium high heat.
- Add your dumplings, leaving a bit of space between them.
- Crisp up the bottoms of the dumplings, 2-3 minutes.
- Whisk 2 teaspoons of flour with 1/3 cup of water and add to the pan. Cover the pan with a lid and steam for 3-4 minutes.
- Remove the lid and continue to cook until the flour slurry starts to evaporate and crisps up golden brown.
- Flip the dumplings over on to a plate and admire your extra crispy dumpling skirt.
You should make homemade dumplings if you:
- want to learn a new cooking skill
- want to impress your dumpling loving friends
- don’t live anywhere near an Asian grocery store and can’t get your hands on frozen dumplings let alone dumpling wrappers
- want to customize your dumpling fillings
- love dumplings
How to Make Homemade Dumplings
Homemade crispy bottomed dumplings are 100x worth it.
Homemade Dumpling Wrappers
- 300 g all purpose flour (about 2 cups)
- 165 g very warm water (about 2/3 cups, 110ºF-120ºF)
Dumplings
- 1.5 cups cabbage (finely chopped)
- 1 tsp cornstarch
- 1 lb ground pork
- 2 tbsp ginger (minced)
- 2 tbsp garlic (minced)
- 1/4 cup green onions (thinly sliced)
- 2 tbsp soy sauce
- 1 tbsp Shaoxing wine
- 1.5 tsp toasted sesame oil
- 1/2 tsp salt
- 1/2 tsp white pepper
Make the dumpling wrappers
Add the flour to a large bowl and create a well in the middle. Pour the very warm water into the well and use a pair of chopsticks to whisk, incorporating the flour little by little until everything comes together into a very shaggy dough.
Tip the dough out onto a work surface and knead until smooth. Shape into a ball, cover with plastic wrap and let rest for at least 30 minutes. After 30 minutes, knead the dough again so that it is smooth and elastic. You can use it right away but it will roll out even better if you let it rest for another 30 minutes. Shape it into a ball. (See notes for stand mixer instructions).
Make the dumpling filling while you wait for the wrappers to rest
Toss the cabbage with a pinch of salt in a large bowl and mix well. Let rest for 10 to 15 minutes, the squeeze out and drain as much of the extra water as possible.
Mix together 2 tbsp water with the teaspoon of cornstarch and stir into the pork until it forms a paste.
Mix in the ginger, garlic, green onions, soy, shaoxing wine, sesame oil, salt, white pepper, and squeezed out cabbage until incorporated.
Make the dumplings
After the dough has rested, poke the center of the dough with your finger and stretch it out to create a bagel shape. Keep stretching and rotating it out into a large, thin ring.
Cut the ring and you should have a rope of dough. Roll it out until it is about 1.5 inches in diameter. Cut off 6 pieces and weigh the pieces of dough, about 10-12 grams each, which looks like about 1 tablespoon of dough. Cover the rope of dough so it doesn’t dry out.
Take each piece of dough and roll it into a ball then flatten it with your palm until it is about 1.5 inches, lightly dusting with flour as needed. On a lightly floured work surface, use a small rolling pin and roll out the edges of the flattened disk, rotating and rolling so that the edges of the wrapper are slightly thinner that the middle. Aim for the wrapper to be 3.25 to 3.5 inches in diameter. Lightly flour and cover with plastic wrap while you roll out the other 5 portions of dumpling dough. Once you’ve rolled out 6 wrappers, shape your dumplings. (See notes on how many dumplings you should make at a time).
Place 1 tablespoon of filling in the middle of the wrapper. Fold over into a half moon shape and pinch the edges to seal. You can also pleat/fold the dumplings: start by folding the dumpling skin in half and pinching. From the middle, fold over/ pleat one side of the dumpling skin and push against the back skin to secure. Repeat until you reach the edge the pleat the other side. If you're using store bought wrappers, lightly moisten the edges of the wrapper with water before folding.
After you’re done making the 6 dumplings, continue to roll out and make your dumplings with the rest of your dough, 6 at a time.
Cook your dumplings
In a nonstick pan, over medium heat, heat up a touch of oil. When hot, lay the potstickers in the pan, in one layer. Cook, until slightly browned, then add 2-4 tablespoons of water and cover and cook for 3-4 minutes. When the water has cooked off, lift off the lid and continue cooking until the bottoms are brown and crisp. Enjoy hot, with soy sauce and chili oil!
Stand mixer dumpling wrappers
Add the flour and water to the bowl and whisk together with chopsticks. Use the dough hook and knead on low until all the water has been absorbed. Mix on medium-low until a dough starts to form, about 2-3 minutes, scraping down the bowl as needed. When the dough comes together, shape it in a ball, and let rest, covered for 30 minutes before kneading it again.
How many dumplings to make at once
If you’re working with a partner, one of you can roll out dumpling dough while the other makes dumplings, otherwise if you’re by yourself, 6 is probably the right amount. Freshly made dumpling wrappers need to be used almost immediately otherwise they become dry and difficult to shape and the pleats won’t hold together.
Storage
It’s best to use the dumpling wrappers fresh but if you absolutely need to store them for later, make sure you brush them well with tapioca or potato starch in between each wrapper before stacking them together.
Once they are generally dusted and stacked, wrap them tightly with plastic wrap and then place in a air-tight container, refrigerate, and use within the next 2 days.
To freeze dumplings once you've made them: space out uncooked potstickers in a single layer on a baking sheet and freeze until solid. Transfer to freezer bags. Cook from frozen adding a couple of minutes to the covered cooking time.
Estimated nutrition is based on one serving = 6 dumplings.

I Am... Chinese Sticky Rice (糯米雞 / Lo Mai Gai)
This Chinese sticky rice, aka lo mai gai, is the perfect stick-to-your ribs kind of meal. It’s been getting chilly. All of a sudden it got really cold. So cold that we can see our breath in the air and had to pull our puffer jackets and mittens out. We’ve been going on long sunset walks and I’m just about frozen when we get home. All I want after being out in the cold is something warm, hearty, and filling. Chinese sticky rice is the perfect thing, and best of all, it's getting close to lunar new year too.
What is Chinese sticky rice/lo mai gai?
Lo mai gai is a classic Cantonese dim sum dish. If you’ve been to dim sum, you’ve probably ordered a steaming basket of little leaf wrapped parcels filled with sticky rice, chicken, chinese sausage, and a shiitake mushroom or two. They’re a crowd favorite and it’s easy to understand why: a tasty little package with everything you need right inside. I’ve made lo mai gai with lotus leaves (this is the standard Cantonese way) and I’ve made them with parchment paper (a convenient hack) but my favorite way to make lo mai gai is the way I’m most familiar with: the Singapore-style overturned bowl. All the ingredients are packed into a bowl, steamed, flipped over onto a plate, and served hot. The sauce melts down into the sticky rice, the toppings glisten prettily, and your lo mai gai is there for you, a perfect plate of sweet and savory umami flavors.Why is lo mai gai so tasty?
It’s that combination of sweet and savory that gets most people: the slightly sweet umami-rich sauce and savoriness of the meats combines together to form a balanced bite. It’s a marvel in textures too: the Chinese sausage is bouncy and firm against the sticky soft rice and silky mushrooms. It’ll keep you coming back for bite after bite. Serve it up with your favorite chili hot sauce and a simple side of blanched vegetables and you’ve got the ultimate comfort meal.How to pronounce lo mai gai?
It’s low-my-guy, with a rising intonation on the “guy.” Fun fact, lo mai gai (糯米雞) is Cantonese for sticky rice chicken.Lo mai gai ingredients
The list of ingredients is kind of long, but most of them are sauces and if you have the sticky rice and sauces at home, you can make lo mai gai easily whenever you crave it. The usual suspects that you probably have in your fridge/pantry: chicken thighs, cornstarch, soy sauce, shallots, garlic, and oil.And this is what else you’ll need
Shaoxing wine
The secret ingredient to all good Chinese food. It adds that extra oomph that you probably thought was MSG. It wasn’t, it was shaoxing wine. Read more about it here.Dark soy sauce
You might be tempted to skip dark soy sauce, but if you have a chance to buy a bottle, do it because it’ll last you a long time and bring a lot of joy into your life. Dark soy sauce adds a beautiful glossy brown to Chinese dishes and also adds caramel sweetness and depth.White pepper
White pepper is more delicate and floral than black, as well as being a bit brighter and sharper. It pairs exceptionally well with Chinese food.Toasted sesame oil
Pure nutty, toasty aromatic umami in the form of a oil. Get the toasted stuff, it’s completely different from regular sesame oil. Our favorite is Kadoya, which comes in that iconic yellow topped bottle.Dried shiitake mushrooms
These are a foundation in Chinese cooking. They’re intensely flavored and full of umami. You can buy them online or at an Asian grocery store and keep them in your pantry (or the fridge) for whenever you need a mushroom hit. To use them, you just rehydrate in hot water until they plump up and become tender, chewy, and delicious. They go so nice with sticky rice.Oyster sauce
Oyster sauce is a thick and flavorful brown sauce that can be found in the Asian aisle of any grocery store. If you see the Lee Kum Kee bottle with the two people in boats, go for that one. It’s the premium oyster sauce which lists oysters as its first ingredient, unlike the one with the red panda label which has oysters listed further down the list. Oyster sauce is going to boost the umami in the lo mai gai even more.Five spice
A mix of star anise, cloves, cinnamon, Sichuan peppercorns, and fennel. These spices add warmth and flavor.Chinese sausage
I love Chinese sausage. Also known as lap cheong, Chinese sausage is firm, sweet, smoky, and fatty. It keeps just about forever (because it’s air cured) in the fridge and can be used in almost everything: fried rice, noodles, or alone as a snack. It is a classic ingredient in lo mai gai.And last but not least: sticky rice
The star of lo mai gai. Also known as glutinous rice or sweet rice, sticky rice is a rice with a very low amylose (specific starch) content which makes it sticky when cooked - it’s what they use to make mochi. When you’re buying sticky rice, just look for a bag that says sticky rice, glutinous rice, or sweet rice.How to make Chinese sticky rice
You need to do a little bit of planning to make lo mai gai, but the actually making and assembly is really easy.- Prep your ingredients. The night before (or 6 hours before you’re going to cook) soak the sticky rice, marinate the chicken, and rehydrate the shiitake mushrooms.
- Cook the mushrooms and chicken. We’re going to cook the mushrooms and chicken using the soaking liquid from the mushrooms to create a rich and flavorful sauce.
- Cook the rice. Drain the soaked rice and fry it up with some shallots, garlic, soy sauce, and spices until the grains turn glossy. Frying the uncooked grains of rice gives this lo mai gai an extra layer of flavor. After the rice is glossy, we’re going to add water to the pan and cook, stirring, until the rice absorbs the water, just like how you cook risotto, but not as saucy. When the rice is tender, it’s time to assemble.
- Assemble. Grab 4 heat proof bowls (these can be ceramic or stainless steel) and lightly rub with oil. Arrange the toppings at the bottom of the bowl and then top with the rice and any leftover sauce. Wrap with tin foil and steam for 15 minutes.
- Serve. Carefully remove the foil and flip over onto a plate. Garish with some cilantro or scallions and serve with chili sauce. Enjoy!
A couple of last things:
- Lo mai gai is a dim sum dish, which is usually eaten in the morning or at lunch, but you can eat lo mai gai whenever you want. It’s not really a main dish per say, but I like it so much that we’ve taken to eating at all times of the day, as a meal with veggies.
- I added an extra jammy egg to the mix because I love the bright pop of color it gives an otherwise brown dish and mixing the jammy yolk into the rice is so good. It’s also a nod to the fact that there’s usually a salted duck egg yolk in lo mai gai.
- Serving lo mai gai with scallions and cilantro is also more of a Singaporean thing, most Cantonese restaurants don’t do that (because it’s served in lotus leaves) but I love the fresh contrast it provides. Also, don’t skip out on the chili sauce - we like either sriracha or sambal oelek.
Pro tip
You can freeze this! After steaming and cooling down, you can tightly wrap the whole thing up and freeze for it future you. If you don’t want to freeze the bowls, tip them out onto plastic wrap and wrap tightly. When you want to steam, unwrap and place in the same bowl you made it it. Steam from frozen until hot and cooked through, 15-20 minutes.Chinese Sticky Rice
糯米雞 - Lo Mai Gai
Chicken
- 1/2 lb boneless skinless chicken thighs (cut into 2" pieces)
- 1 tbsp cornstarch
- 1 tbsp Shaoxing wine
- 1/2 tsp dark soy sauce
- 1/4 tsp white pepper
Mushrooms
- 8 medium shiitake mushrooms (dried)
- 1 tbsp oyster sauce
- 1 tbsp soy sauce
- 1 tsp dark soy sauce
- 1 tsp toasted sesame oil
- 1 tbsp cornstarch
Rice
- 1.5 cups sticky rice (300g)
- 2 tbsp neutral oil
- 1 shallot (diced)
- 3 cloves garlic (minced)
- 2 tbsp soy sauce
- 2 tsp dark soy sauce
- 1 tsp toasted sesame oil
- 1/4 tsp five spice
Assembly
- 4 Chinese sausages (sliced)
- 4 eggs (jammy soft boiled, halved)
- fresh cilantro (optional)
- green onions (sliced, optional)
Six hours before cooking (or the night before), marinate the chicken. In a container or bowl, soak the rice in water. In a separate container or bowl, rinse, then soak the mushrooms in 1.5 cups of water. Put everything into the fridge.
After everything is soaked and marinated, add the mushrooms, with their soaking liquid, the oyster sauce, soy sauce, dark soy sauce, and sesame oil to a saucepan and bring to a boil over medium high heat. Add the marinated chicken and simmer until the chicken is cooked through, 5-7 minutes. While the chicken is cooking, whisk 1 tablespoon cornstarch with 2 tablespoons water. Slowly add the cornstarch slurry to the pot. Stir and let the sauce thicken, 1-2 minutes. Remove from the heat and set aside.
Drain the rice very well and set aside. Add 2 tablespoons of oil to a wok or a large non-stick frying pan over medium high heat. When shimmery, add the shallot and cook, stirring, until soft. Stir in the garlic, and when fragrant, add the drained rice, tossing to coat in the oil. Stir in the soy sauces, toasted sesame oil, and five spice. Slowly add in 1.5 cups water, 1/2 a cup at a time, stirring occasionally and cooking until the water is absorbed before adding more, kind of like making risotto. The rice should be almost, but not quite tender at the end.
Assemble the lo mai gai in a bowl: lightly oil 4 heat safe bowls. Divide the sausage, mushrooms, and chicken evenly between the bowls. Add the rice to the top, pressing down with with a wet spoon or silicone spatula. Evenly spoon on 1-2 tablespoons of the mushroom and chicken sauce on top of the rice. Cover with foil then steam over high heat for 15 minutes (do this in batches if needed). Let cool slightly, carefully remove from the steamer, remove the foil, and flip onto plates. Serve with scallions, cilantro, and your favorite hot sauce.
If you don’t have a steamer, you can do this in the oven: place the foil covered bowls in a water bath with boiling water and bake at 350° for 15-20 minutes.

I Am... Easy One Pot Chicken Spaghetti
Chicken spaghetti is one of those casseroles that needs a little Tiktok glow up because it is good and more people need to make it. The 80s are back and I’m all for it! Give me hair scrunchies, neon, and ALL the casseroles. I don’t know why casseroles have such a bad reputation. They’re one dish, they’re creamy, they taste good, and there’s almost always leftovers. There's even a tiktok spaghetti and it's not this one. If you haven’t had it, chicken spaghetti is pure comfort food goodness. Tender pieces chicken mixed with spaghetti, tomatoes, and peppers in a creamy cheesy sauce. Back in the day it was made with canned soup but we can do better than that! And what’s more, you can make it all in one pan so there’s minimal clean up.
What is chicken spaghetti
Chicken spaghetti is an American baked spaghetti dish made with a cream sauce, topped with cheese and baked until bubbly. The spaghetti is broken up in small pieces before being cooked.How to make chicken spaghetti
- Sauté the aromatics. In a dutch oven, melt some butter and sauté onions, diced red bell pepper, and garlic until soft and fragrant.
- Cook the chicken. Add sliced chicken and cook until golden.
- Stir in the liquids. Stir in diced tomatoes, chicken stock and milk to the pan.
- Add the pasta. Add the spaghetti and bring everything to a boil. Turn the heat down to a simmer and cook, tossing occasionally, until the spaghetti is tender and cooked through. If it gets too thick, stir in a bit more chicken stock.
- Cheese! Season with salt and pepper and stir in some shredded cheese until melted. Top the casserole with more cheese.
- Bake. Bake until bubbly and golden and enjoy!
What is one pot pasta?
One pot pasta is a pasta cooking method that was popularized by Martha Stewart back in the early 2000s. It’s a way of cooking pasta where you don’t need to drain the pasta water. Everything, including all of the ingredients for the sauce are put in a large, wide pan along with extra liquid that boils up and cooks the pasta. After the pasta is cooked, it’s tossed until it’s glossy and coated. I love one pot pasta because you can really get a lot of flavor into the noodles because you’re cooking it in sauce instead of water.Do I need to break the spaghetti?
You don’t have to, but if you want that classic American style, break that pasta! I opted to keep my spaghetti long because I love slurping noodles, but either way tastes amazing. If your pot isn’t wide enough to put all the pasta into the pan, laying flat, I would break the spaghetti so it fits.What about other pasta shapes?
Feel free to use other kinds of short pasta. I’m pretty sure people used broken short spaghetti back in the day because there wasn’t as much pasta variety available.Ingredients
- Aromatics - to add maximum flavor we’re going to use onions, garlic, and a bell red pepper. The onions and pepper add a bit of sweetness and four cloves of garlic add a huge garlicky hit.
- Chicken - sliced boneless skinless chicken breast is what I prefer but you can use chicken thighs too. You’ll want to cut the chicken into bite size pieces.
- Spaghetti- just regular spaghetti, not the fancy stuff. But if you do want to get the fancy stuff, you’re looking for bronze extruded pasta with a rough surface so that the sauce can cling to it.
- Tomatoes - a can of diced tomatoes is going to add some umami.
- Milk - this is what’s going to make our sauce nice and creamy without the cream.
- Chicken broth - instead of using water, a little bit of chicken broth is going to help our spaghetti cook up with extra chicken flavor.
- Cheese - shredded white cheddar (or mozzarella) is stirred into the sauce and layered on top to be baked into a golden brown cheesy crust.
What to serve with chicken spaghetti
This is a rich and filling casserole that doesn’t need much support from side dishes. If you’re going all out, serve it with these:FAQ
Can I use precooked chicken?
Absolutely. If you want to use rotisserie or leftover chicken, just shred it or chop it. You’ll need about 4 cups.Do I have to use peppers?
If you’re not a fan of bell peppers, you can leave them out. You can even substitute any kind of hearty vegetables you like.Can I use another kind of pasta?
Any sort of dry pasta will work with this recipe, except perhaps lasagna noodles.What kind of baking dish should I use?
If you have a large dutch oven or brasier it’s perfect for making the one pot pasta and baking it. The wide bottom means you don’t need to break the spaghetti. Of course, any oven safe pot will work and if you need to break the spaghetti, it just means it’s more authentic.Do I need to bake it?
Nope! In fact sometimes I just make this in the pan and eat it as is like an extra creamy chicken spaghetti. It tastes amazing unbaked but baked is also super cozy, it’s up to you.Why this chicken spaghetti
There are, admittedly, lots of chicken spaghetti recipes out there. What makes this one different is that it’s a one pot chicken spaghetti that can go straight from the stove to the oven to the dinner table. Most pasta dishes, as I’m sure you know have you cook pasta in a large pot of salted water, drain it, then add it to the sauce. We’re going to use the one pot pasta method where pasta is cooked right into the sauce. When you do this the pasta becomes extra flavorful because it’s being cooked in sauce instead of water. The result is a chicken spaghetti that is extremely delicious, creamy, and perfectly cooked.Make ahead chicken spaghetti
Make the casserole and top it with the cheese but don’t bake it. Cool completely and cover tightly and refrigerate up to 2 days. Bake in a 375°F oven, covered with foil for 30 minutes, then remove the foil and bake until bubbly and golden.How to reheat
To reheat you can either portion it out and microwave it or you can bake the entire casserole, covered in foil, in a 375°F oven for 30 minutes, then remove the foil and bake until bubbly.Chicken Spaghetti
Tender pieces chicken mixed with spaghetti, tomatoes, and peppers in a creamy cheesy sauce.
- 1/4 cups olive oil (or butter)
- 1 medium onion (diced)
- 1 bell pepper (diced)
- 4 cloves garlic (minced)
- 2 boneless skinless chicken breasts (sliced)
- 14 oz canned tomatoes (roasted diced preferred (1 can))
- 2 cups chicken broth (no sodium preferred)
- 1.5 cups milk
- 1 lb spaghetti (or pasta of choice)
- 2 cups Parmigiano Reggiano cheese (shredded, or mozzarella/white cheddar)
Heat the oven to 375°F. In a large dutch oven or other oven proof dish, melt the butter or heat the oil over medium heat. Add the onion and cook until soft, 3-4 minutes. Add the red pepper and garlic and cook until fragrant, about 1 minute.
Add the chicken to the pan and cook flipping, until lightly golden brown, about 3-4 minutes. They will continue to cook in the sauce.
Stir in the diced tomatoes, chicken broth, milk, and spaghetti (break it to fit into the pan if needed) to the pan and bring to a boil.
Reduce the heat and simmer, stirring occasionally so the pasta doesn’t stick to the bottom of the pan, until the pasta is cooked through and tender, about 8-10 minutes. If too thick, slowly add 1/4 cup chicken stock until desired consistency is reached. Season with salt and pepper.
Stir in half of the shredded cheese, then top with the remaining cheese and bake in the oven until bubbly and melted, about 20 minutes. Let cool slightly and enjoy! Optionally, you can enjoy the spaghetti as is and not bake it.

I Am... How to Make Oden at Home
When the weather turns cold, oden is the answer to what’s for dinner. If you’ve ever been in Japan in the winter and hop into one of the many ubiquitous combini aka convenience stores like 7-11 or Lawson, chances are you’ll have seen oden: a steaming vat of soup featuring featuring things like fish cakes and tofu. A huge pot of oden is a great way to gather around and enjoy winter. Mike and I love oden with a passion. We’ve eaten oden on the streets of Japan, at izakaya, in various kombini, and at dedicated oden restaurants. Dare I say we’re oden connoisseurs? Fancy oden restaurants aside, I’m here to tell you that you’ve been sleeping on oden at home though. It’s just as amazing and so easy to make.
What is oden?
A classic warming winter snack or meal, oden is a one pot dish featuring fish cakes, tofu, and other hearty ingredients simmered in a flavorful soy-dashi broth. It’s a simmered dish that is continually kept warm. The ingredients in oden are meant to be simmered for a long time so you don’t have to worry about anything being overcooked. In fact, the oden ingredients, are meant to soak up the flavor of the dashi.How to make oden
Prep ingredients - peel the daikon and cut into 1 inch thick rounds. If desired, you can trim the edges of the daikon to round it out. Add the daikon rounds to a pot with cold water and bring to a boil and cook for 20 minutes. While the daikon is cooking, rinse off the konnyaku and lightly score the block with diagonal cuts, then cut into triangles. Add to a pot of boiling water for 3 minutes then drain and set aside. Prep the rest of the ingredients: cut the atsuage tofu into triangles and any of the larger pieces of satsuma age into smaller pieces. Cut the hanpen in quarters and the chikuwa in half on a diagonal. Make the oden stock - In a large, heavy bottomed low pot, add dashi, soy sauce, sake, and mirin. Bring to a simmer. Simmer - Add the prepared daikon, and konnyaku, then simmer over medium to medium low until the daikon starts to turn tender. Add the chikuwa, atsuage, and any other oden ingredients you’ve chosen. Simmer for another 10-15 minutes or until everything warms through and the daikon is tender. Enjoy - Bring the pot to the table, where you can opt to keep it warm on a very low simmer on a burner. Pluck out your chosen pieces of oden as desired and enjoy!Types of oden and oden ingredients
The beauty of oden is that it’s incredibly simple to make and prepare. Most of the ingredients that go in oden are things that you pick up at the store, like fish cakes, fish balls, and tofu. If you’re feeling like getting a bit fancy and offering up some other oden goodies, I’ll talk more about preparing those later in this post. Here is a list of the most comment types of oden ingredients.Daikon
A classic! Daikon is a giant white radish that is cut into rounds and then simmered until soft and yielding, yet still a bit firm. Daikon oden is juicy and light, with plenty of the oden dashi flavor. Super tasty and a must.Tamago/egg
Boiled eggs are extremely popular even though I don’t prefer them because they tend to be too over-cooked for me. If you want to do tamago, do a soft boiled egg, peel it, then very gently dip them in the oden stock to heat them up, making sure to not over cook.Chikuwa
Fish cake that’s shaped into a tube then grilled. It’s a classic favorite, chewy, hearty, and good.Hanpen
A delightfully soft and squishy fluffy steamed fish cake. When it’s simmered it becomes super big and fluffy, full of dashi.Satsuma-age
A catch all for all the deep-fried fish cakes. They come in flat rounds, flat ovals, balls, and plenty of other shapes. You can tell they’re satsuma age from their deep orange golden color.Konnyaku
Chewy and jelly-like, konnyaku is a love it or hate it ingredient. I love it and if you’ve ever had house made konnyaku at a specialty oden shop, you’ll forever be chasing that flavor and texture.Shirataki
They look like a bundle of white noodles, but really they’re a bundle of konnyaku that’s shaped like noodles. Chewy, filling, and delicious.Atsuage
Deep-fried tofu. A large, thick slab of tofu that’s deep fried and holds up perfectly in oden.Kinchaku
A deep-fried tofu pocket with a secret mochi surprise inside! Careful, because they’re hot and the mochi is molten and melty. I love kinchaku.Ganmo
I love ganmo! It’s a piece of tofu made with vegetables inside and then deep-fried. They’re usually round and have little bits of burdock or wood ear mushrooms studded through the tofu. They soak up the dashi and are incredibly delicious.Other ingredients
These are some other things you can pop into your oden, but you’ll have to make them because they don’t come ready-made at the store. Usually you’ll find these kind of oden offerings at oden specialty restaurants or at izakaya. Tsukune - soft and juicy chicken meatballs on a stick. tebasaki - chicken wings, usually on a stick, simmered until tender and juicy. Gyusuji - served on a stick, beef tendon is simmers until soft and chewy. Rorukyabetsu - literally rolled cabbage, this is similar to a cabbage roll where a cabbage leaf is rolled around a gyoza-like filling.Where to buy oden ingredients
The best place to buy oden ingredients is at a local Asian grocery store. If you have a Japanese grocery store in town, that’s where you’re want to go. You’ll find all of the fish cakes in the frozen section, usually all together. Sometimes they’ll even have oden packs where they have a variety of fish cakes all conveniently together. You’ll find daikon in the vegetable department, and konnyaku and tofu next to each other in one of the fridge cases. For the dashi, you’ll find that in one of the aisles, usually near the soup stock section.What kind of soup should I use
The classic soup base for oden is awase dashi flavored with sake, mirin, and soy. Awase dashi is combination dashi, made from both dried kelp (kombu) and katsuobushi (dried skipjack tuna).How to make dashi
There are three ways most people make dashi. 1. kombu and katsuobushi: simmer kombu in water for about 10 minutes, remove the kombu, then steep the katsuobushi before straining. 2. dashi granules: simply add dashi granules to water. 3. dashi packs: this is my favorite way of making dashi - bring a pot of water to a boil, lower it to a simmer and add the dashi pack. Dashi packs contain both kombu and katsuobushi in a handy packet that you can fish out so you don’t have to strain your dashi. Dashi packs are readily available online: this is our favorite brand, Kayanoya, straight from Japan.Where is oden from?
Oden is a classic Japanese stew, a type of nabemono, or one pot dish. Nabe means cooking pot and mono means “things” so nabemono is things in pot. In oden’s case, the things in a pot are a variety of fish cakes, proteins, and vegetables. If you’re more familiar with Korean culture, maybe you know about odeng, which is essentially a Korean take. The Korean version usually features long flat fish cakes on skewers and is sometimes seared with a spicy soup.How to serve
Typically, the way oden is served in Japan is piece by piece. You order your favorite pieces of oden from the chef, and they scoop it out and plate it individually or with a couple of pieces on a plate or in a small bowl. They place it in front of you and you enjoy. Repeat as needed trying new pieces or getting more of your favorites until you’re full. At home, what we tend to do is have a pot of oden in the middle of the table, either gently simmering on a burner or keeping warm in our oden pot. We use tongs to fish out the pieces we like, eat them, and repeat. It’s a super simple serve yourself kind of meal. We’ll have side plates and chopsticks, and tiny dishes for condiments. Sometimes if we’re extra hungry, we’ll have a bowl of rice along side or maybe some udon. Usually though, we just enjoy the pieces of oden. If we’re feeling like we really want to go all out, I’ll grill some yaki onigiri for us to enjoy.What kind of sauce for oden
Typically they don’t serve a dipping sauce because the simmered pieces are really flavorful. That being said, when you go to a restaurant they often have sweet soy sauce, karashi (Japanese mustard), or yuzu kosho (a spicy paste made with yuzu and chili), and a miso sauce for dipping if you prefer. That’s it! I hope you give it a try. It really is the most comforting winter meal and I can think of nothing I enjoy more when it’s snowing out side and we’re all cozy inside with a big pot of oden in the middle of the table. Happy oden-ing! xoxo stephOden recipe
Warm and filling, oden is the perfect hands off, one-pot dish to warm you up
Soup
- 8 cup dashi
- 1/4 cup light soy sauce
- 2 tbsp sake
- 2 tbsp mirin
Items
- 1/4 medium daikon radish
- 1 block konnyaku
- 1 large piece atsuage/deep fried tofu
- 3 pieces chikuwa
- 1 piece hanpen
- 1 package satsuma age (assorted)
- 4 kinchaku
- 4 soft boiled eggs
- In a heavy bottomed pot, like cast iron, bring the dashi, soy sauce, sake, and mirin up to a gentle simmer. Turn the heat off or down to low while you prepare the oden ingredients.
- Peel the daikon and cut it into 1 inch rounds. If desired, trim so the daikon has no sharp edges. Add the daikon to a pot and top with cold water. Bring the daikon to a boil over medium heat and cook for 20 minutes. When done, remove from the water and set aside.
While the daikon is cooking, prep the rest of the ingredients: cut the atsuage tofu into triangles and any of the larger pieces of satsuma age into smaller pieces. Cut the hanpen in quarters and the chikuwa in half on a diagonal. If any of the pieces of satsuma age are extra large, cut them in half or in quarters.
If using konnyaku: Rinse off the block and lightly score the surface on a diagonal then score on the opposite diagonal, creating a diamond crisscross pattern. Cut the block of konnyaku into 3 even pieces then cut the 3 pieces in half into triangles. Bring a small pot of water to a boil and when boiling, add the konnyaku pieces and boil for 3 minutes. Drain, rinse, and set aside the konnyaku pieces.
When the daikon cooking time is up, add the daikon and konnyaku to the oden broth and bring to a simmer over medium low to low. Cook the daikon and konnyaku for 20 minutes, then add the remaining ingredients, aside from the boiled eggs. Simmer all of the ingredients for 10-15 minutes or until all of the ingredients soak up some of the dashi and are throughly hot.
Bring the pot to the table and enjoy, picking out pieces of oden to enjoy as desired. For the eggs, add them as desired, until just heated through, being sure to not overcook.
Estimated nutrition is highly dependent on what you buy and how much you eat.

I Am... Soft and Chewy Gingerbread Cookies
These soft and chewy gingerbread cookies have taken the spot as my top holiday cookie! I love gingerbread so much so I eat it all year round. I order gingersnaps and ginger cookies and all the ginger things even when it’s not the holiday season. The warm and soothing mix of ginger and cinnamon gets me every time, every season, but especially during the holidays. The smell of gingerbread when it’s cold outside and warm inside is so incredibly cozy. It’s an instant serotonin boost, right when you need it the most. What I love most about gingerbread is that it’s an umbrella term for ALL the delicious things flavored with ginger and cinnamon. It can be soft and cakey like this gingerbread loaf to crisp and waiting for icing like these cut outs to soft and chewy like these gingerbread cookies.
Gingerbread cookies
This gingerbread cookie recipe comes to us via NY Times and Sohla El-Waylly. When I saw the picture of them, it was a must bake. NY Times does a Christmas cookie round up every year and every year I tell myself I’m going to make something and this is the year I actually did it! These cookies did not disappoint. Packed with ginger and a hint of black pepper, these cookies pack a punch with the spice and have a fudgy chewy center and crisp edges. If you love gingerbread that tastes like ginger, thick and chewy cookies with crisp edges and soft middles, these are the ginger cookies for you!How to make soft and chewy gingerbread cookies
- Brown the butter: add the butter to a saucepan and brown over medium heat, stirring until brown and toasty.
- Remove the pan from the heat and stir in freshly grated ginger, ground ginger, ground cinnamon, freshly grated black pepper, and freshly grated nutmeg. Let cool in the fridge for 20 minutes, until slightly solid but still creamy.
- Add icing sugar, molasses, vanilla, salt, and baking soda to the cooled butter and mix until creamy and combined.
- Whip in the egg until pale and fluffy.
- Mix in the flour until evenly combined, then chill for at least 2 hours.
- In a small bowl, stir together sugar and ground ginger. Heat the oven to 375°F and arrange the racks in the upper and lower thirds of the oven. Line baking sheets with parchment paper.
- Scoop the dough into balls (about 2 tbsp each) and roll them in the ginger sugar then bake for 10 minutes. Let cool and enjoy!
Ingredients
- butter - in this recipe, you brown the butter until nutty and fragrant, then cool it so it you can cream it with the sugar. Browning butter adds so much flavor to baked goods for just a tiny bit of extra effort.
- freshly grated ginger - there are 3 whole tablespoons of freshly grated ginger in these cookies! They are definitely for ginger heads. The fresh ginger, along with the ground, adds a warm, pleasing, spicy punch.
- spices - here we have the usual suspects: ground ginger, ground cinnamon, nutmeg (freshly ground is best but if you only have ground, that works too!), and freshly ground black pepper.
- sugar - I’ve never used icing/confectioners’ sugar in ginger cookies before and I was pleasantly surprised and how it creamed and how chewy and fudgy the cookies came out. There’s also a bit of regular granulated sugar in the ingredients used for coating to give the cookies a bit of sparkle.
- unsulphured molasses - also known as fancy molasses or light molasses, this is the sweetest and lightest of all the molasses used for cooking and baking. It’s what most people use for gingersnaps, gingerbread, ginger cookies, and ginger cakes.
- vanilla - a tablespoon of vanilla to highlight all those warming spices and add a hint of creaminess.
- egg - don’t forget to let your egg come to room temp, you’ll get much better cookie and the egg will mix more evenly into the batter.
- flour - regular all purpose flour, nothing much to say here!
Recipe Notes
- There’s a whole teaspoon of black pepper so if you’re not a huge fan of it, dial it back to 1/2 teaspoon. Some of the reviews online said it was too much pepper for their palate.
- There’s also a fair bit of salt in this recipe, 1 and a quarter teaspoons of Diamond Crystal kosher salt. I dialed it back a bit because as much as I love sweet and salty, that just felt like a bit much. I used a slightly heaping 1/2 tsp of sea salt, not kosher.
- This is a baking soda cookie, meaning that it will give you a thick, chewy cookie.
Other cookies to bake for the holidays
- Brown Butter Chocolate Chip Cookies
- Mochi Cookies
- Neapolitan Cookies
- The Best Snickerdoodles
- White Rabbit Snickerdoodle Cookies
Chewy Gingerbread Cookies
These soft and chewy gingerbread cookies are the best holiday cookie ever.
- 14 tbsp unsalted butter (cut into pieces (200g))
- 2 cups confectioners' sugar ((240g))
- 3 tbsp molasses (unsulphured/fancy/light (60g))
- 1 tbsp vanilla extract
- 1 1/4 tsp kosher salt (Diamond Crystal preferred)
- 1 tsp baking soda
- 1 large egg (room temperature)
- 2 cups all purpose flour ((250g))
Spices
- 3 tbsp fresh ginger (finely grated (50g))
- 1 tbsp ground ginger
- 2 tsp ground cinnamon
- 1 tsp black pepper (freshly ground)
- 1/2 tsp nutmeg (freshly grated)
Coating
- 1/4 cup sugar (50g)
- 2 tsp ground ginger
In a medium saucepan over medium, melt butter until foamy, about 3 minutes. Continue cooking butter, stirring and scraping frequently with a stiff silicone spatula, until the sputtering has subsided and the butter solids look deeply browned, 3 to 5 minutes.
Remove from heat, then whisk in the fresh ginger and spices. Scrape the butter and any brown bits at the bottom into the bowl of a stand mixer (or into a large bowl if using a hand mixer). Set aside until cool, slightly solid, but still creamy, about 20 minutes in the refrigerator or 2 hours at room temperature. Add confectioners’ sugar, molasses, vanilla, salt and baking soda to the cooled butter. Mix on low with the paddle attachment, stopping once to scrape the bowl and paddle, until creamy and combined, about 1 minute.
Add the egg and mix on medium until pale and fluffy, stopping once to scrape the bowl and paddle, about 2 minutes. Add flour and mix until evenly combined, about 30 seconds. Cover and chill for at least 2 hours and up to 3 days before baking.
Prepare the sugar coating: In a small bowl, stir together the sugar and ground ginger.
Line two sheet pans with parchment paper, arrange the racks in the upper and lower thirds of the oven, and heat oven to 375 degrees.
Using a #40 cookie scoop or two spoons, scoop the cookie dough into 2-tablespoon portions (30 grams). Roll the portioned cookie dough into balls and coat in the ginger sugar.
Arrange on the sheet tray at least 1 inch apart and bake until set and lightly browned around the edges, about 10 minutes. Transfer to a wire rack to cool.
Cookies are best eaten the day they are baked. Cookie dough portions can be frozen, then coated in sugar and baked from frozen as needed. No need to thaw; bake frozen portions for 11 to 13 minutes.

I Am... Tini’s Hot Chocolate Recipe
It’s hot chocolate season! I love Tini’s mac and cheese, so when I saw Tini's hot chocolate recipe recently, I had to try it. Come winter, I love getting cozy on the couch, with a heated blanket over my lap and decadent mug of homemade hot chocolate in my hands. If you’ve only ever had instant packet hot chocolate, trust me, it’s not as good as homemade. The only real way to make hot chocolate is from scratch. It’s thick, it’s creamy, it’s full of chocolate-y goodness and after you top it with a dollop of softly whipped cream, all your worries will melt away.
Who is Tini and what is Tini’s hot chocolate?
Tini, aka from Tini’s mac and cheese fame, is Tineke Yonger, the presiding TikTok viral recipe creator that is an absolute beast at creating comfort food. Her mac and cheese is the ultimate comfort food and her hot chocolate follows suit. Her hot chocolate recipe is at 16 plus million views and countless people have been making it and singing its praises.How to make Tini’s Hot Chocolate
- Prep - start by gathering all your ingredients and measuring them out. Chop the chocolate and have a mug on hand. If you’re going to make the peppermint whipped cream, I recommend you do that first so your hot chocolate doesn’t cool down while you’re making it.
- Warm - Add milk and heavy cream to a pot and warm it up gently over low heat. You want it warm but not hot, so just be patient. When it starts to warm a little bit of steam will start rising. Giving the milk and cream a stir every so often will help you make sure you don’t burn it.
- Stir - Once the milk and cream are warm, stir in the cocoa powder and sugar until they dissolve. You can use a whisk or a spoon, your choice.
- Melt - When the cocoa powder and sugar have dissolved, slowly add the chopped chocolate in batches, stirring or whisking so that it melts before you add more.
- Thicken - Once all the chopped chocolate melts, you want the hot chocolate to thicken slightly. Let it continue to warm on low heat, stirring occasionally, for about two minutes.
- Enjoy - When the hot chocolate is thick and velvety is time to enjoy! Pour it into your favorite mug, top with your homemade peppermint whipped cream (if you’re having that) and enjoy!
Tini’s hot chocolate ingredients
The beauty of Tini’s hot chocolate is that it has simple ingredients that you probably already have in your kitchen - if it’s well stocked. There’s nothing too fussy, all you need is:Whole milk
Tini prefers whole milk, and I do too because if you’re making homemade hot chocolate, you might as well go all the way. You can substitute in your preferred milk fat type here, it won’t affect the taste, just the consistency. That being said, if you substitute for a milk alternative, the taste will definitely be different.Heavy cream
Heavy cream also known as heavy whipping cream, whipping cream, full fat cream, or double cream, has the most milk fat of all the creams. It’s what you use to make whipping cream and you’ll find it in cartons, next to the milk. It will give your hot chocolate a thick and creamy velvety texture.Cocoa powder
Cocoa powder plus chocolate is what makes this hot chocolate extra decadent. Make sure you’re using unsweetened cocoa powder, not sweetened cocoa powder or instant hot chocolate mix. The only ingredient your cocoa powder should have is cocoa powder. You’ll find it in the baking aisle and if you’re fond of baking brownies, you probably already have some in the pantry.Sugar
Since we’re using unsweetened cocoa powder and a high percent cacao chocolate, you need sugar to sweeten everything and bring all the flavors together. Regular granulated sugar is what Tini uses, but if you have brown sugar at home, that will do too, it will just add a hint of molasses.Chopped chocolate
You need a nice dark chocolate, at least 70% cacao. The easiest thing to do is buy a bar of dark chocolate - the bars of chocolate in the candy section at the supermarket are perfect for this. One you have the bar of chocolate, all you need to do is chop it up.Vanilla
Tini uses vanilla bean paste, but if you only have vanilla extract on hand, that will do too! Vanilla paste is usually found in the baking aisle or online.Homemade peppermint whipped cream
If you’re going to make Tini’s hot chocolate, please make her peppermint whipped cream to go on top. It’s the perfect minty, creamy counterpoint to warm, rich cocoa.Peppermint whipped cream ingredients
heavy cream - good news, you can use the rest of your carton of heavy cream to make whipped cream! powdered sugar - powdered sugar dissolves really easily into cream, but if you don’t have any on had, just use a bit of granulated sugar. You won’t need as much, so start with 1/4 cup, taste and adjust as you go. vanilla extract - again, Tini uses vanilla bean paste but regular vanilla extract will do too. peppermint extract - you need the tiniest amount of peppermint extract because a little goes a long way.How to make peppermint whipped cream
- Add 1 cup of heavy cream to a large bowl and whisk until soft peaks form.
- Sift in 1/2 cup of powdered sugar and whisk until all the powdered sugar dissolves.
- Stir in 1/8 tsp vanilla extract and 1/8 teaspoon peppermint extract.
- Dollop onto your hot chocolate!
Tips and tricks
- If you don’t like thick hot chocolate, don’t use the heavy cream, just use 2 cups of milk.
- Make the whipped cream - soft fluffy peppermint whipped cream is so good with hot chocolate.
- If you don’t like peppermint, leave it out, but make some homemade whipped cream anyway because homemade whipped cream is amazing.
- Add some chocolate shavings, festive sprinkles, or crushed candy canes on top.
Tini’s Hot Chocolate Recipe
Hot chocolate from scratch is the best thing and this recipe won't disappoint
- 1.5 cup whole milk
- 0.5 cup heavy cream
- 3 tbsp cocoa powder
- 3 tbsp sugar
- 2 oz chopped chocolate (70% cocoa preferred)
- 1/8 tsp vanilla
Add the milk and cream to a heavy bottomed pot and heat it gently over low heat, just so you warm up the milk, making sure it doesn’t get too hot. When the milk and cream is warm, whisk in the cocoa powder and sugar until dissolved.
Slowly add in the chopped chocolate in small batches, whisking and making sure it melts before adding more.
Add a dash of vanilla and let gently heat for 2 more minutes while the hot chocolate thickens. Remove from the heat and pour into a mug. Enjoy as is or top with mint whipped cream or marshmallows.

I Am... Best Food in Whistler
The best food and drink options in whistler. Mike and I are here in Whistler 2-3 months every year and we always take advantage of all the dining options just to see what's new and of course, to visit old favorites. The food options here in Whistler (we're here right now as I write this) are pretty world class, so if you're here for more than just the skiing, this is the best food in Whistler list for you. Whistler Blackcomb is one of the top rated ski resorts in North America, if not the world. With over 8000 acres of skiable terrain, the world’s longest gondola, and the cutest village ever, Whistler is a must visit. Whether or not you’re a skier or snowboarder doesn’t even matter - there’s so much to see and do in the town Whistler. The vibes, as the kids say, are immaculate. Even more so, the food scene eats and leaves no crumbs. Most of best food and beverage options lie in the main village of Whistler, which is at the base of both Whistler and Blackcomb mountains. It’s a completely walkable, pedestrian village that has super cute architecture with a combination of smaller chalets and castle-looking luxury hotels. There are so many places to eat and drink and because the options seem endless, don’t waste your time on overpriced, bad food. Here’s what you should be eating while you’re in Whistler!
Do you need reservations in Whistler?
Whistler is busy. It’s the biggest resort in North American and it attracts a lot of people. That means, generally, you can’t just walk into a hot ticket place and expect to be seated. Reservations are a must in peak season, which is, obviously, winter, but summer as well. If you have a must-visit restaurant, make a reservation to avoid disappointment. That being said, some of the best food in Whistler are casual options that don’t need reservations, such as pretty much everything on the list below:BeaverTails
Have you even gone skiing if you don’t end your ski day off with a beavertail? Beavertails are a decidedly Canadian treat: irresistibly warm and fresh from the fryer whole-wheat pastries that are a combination of chewy and crisp. Think of them like a giant flat donut, in the shape of - you got it - a beaver tail! My favorite is the classic cinnamon and sugar, but if you’re a toppings person, they have so many to choose from. Really, there’s nothing quite like standing in the snow while the village fairy lights are twinkling, eating a steamy hot and sweet beavertail after a day on the slopes. BeaverTails 4293 Mountain Square, Whistler, BC V0N 1B4 Open: 2pm - 8:45pmChubby Ducks Donair, Kebab & Poutine
If you’re staying in an airbnb or somewhere where you have kitchen but aren’t really looking to cook, but also don’t want to go out to eat, grab some take away from Chubby Ducks! They have THE best poutine in town, no questions asked. It’s not in the middle of the village, but it’s just a short hop through the main road, off to one side. They’re not an eat in place, so keep that in mind. Also, they make the fries to order, so there’s always a bit of a wait, but it’s worth it! You can also order in advance to make it a little more streamlined. Chubby Ducks Donair, Kebab & Poutine 4122 Village Green Unit 9, Whistler, BC V0N 1B4 Open: 11am - 2:30amProvisions
This is a newer fast-casual cafe slash restaurant brought to Whistler by the Toptable group, who also behind Araxi and Bar Oso. It’s an all-day neighborhood cafe with 30 seats that seems perpetually busy. It’s a pretty cute scene, but with that comes the inevitable fight for table seats. I think they intended it to be more of a takeout store, but Whistler has been dying for a cozy, while away the day cafe and it looks like all of the people who don’t ski like to hang out here to peep the scene. That being said, they do great coffee and pastries, so hop in, grab some, and wander around the Village for the ultimate Whistler experience. Provisions 4222 Village Square Unit 120, Whistler, BC V0N 1B4 Open: M-Th 8 am-5 pm, F-S 7:30 am - 5 pm% Arabica Whistler Village
If you’re looking for an aesthetic coffee shop AND good coffee, a stop at % Arabica is a must. Straight from Kyoto, the Whistler location is the first on this side of Canada, with the other two locations in Toronto. % Arabica is cult classic coffee shop in Japan and they’ve brought that success to the rest of the world. Their custom-made espresso machines combined with proprietary coffee blend that has notes of chocolate, nuts, caramel, and wine. The shop itself is sleek, white, and reminiscent of an ice cave, which is exactly what % Arabica was going for. Try their specialty lattes, each which mixes a different coffee blend or single origin bean, amount of sweetness and condensed milk. % Arabica Whistler Village 4295 Blackcomb Way #123, Whistler, BC V0N 1B4 Open: 8 am - 6 pmPortobello
Located in the Upper Village, inside the gorgeous Fairmont Whistler, Portobello is a hidden gem for daytime dining. They have a large cozy room with plenty of large tables for groups and corners to tuck away in. Breakfast and lunch are the times to hit up Portobello, they have a huge amount of freshly baked pastries and construct your own breakfast bowls or sandwiches. During high season, they also open at night with a Smokehouse dinner where they have juicy brisket and a variety of sides including mac and cheese. Portobello 4599 Chateau Blvd, Whistler, BC V0N 1B4 Open: S-Th 7 am - 3 pm, F-S 7 am - 3 pm; 5 - 8:30 pmSplitz Grill
Splitz is a locals favorite and has been since what seems like forever. It’s near the main Whistler grocery store, Fresh Street Market, and while that seems like a long walk from the slopes, it really isn’t, unless you’re in your ski boots. I love it there. Just a classic, mountain burger joint, no fuss, no muss. They have TVs where you can request to watch your favorite team’s games as well as beer on tap. The burgers are juicy and made to order, with plenty of customization options and their fries are crispy and hot. Mike always gets a burger and I always get chicken strips because chicken strips and skiing just go hand in hand in my mind. Splitz Grill 4369 Main St, Whistler, BC V0N 1B4 Open: S-Th 11 am - 9 pm; F-S 11am - 10pm That's it for now! If you're interested in reading and/or eating more, check out our Five Best Restaurants in Whistler. Read More →
I Am... Burr Baskets
Burr baskets are a cute little winter gift basket with cozy cute things for your loved ones! It’s coming up on December - where did the year go!? - and it’s time for Burr Baskets. I know, I know, the world is a horrible consumerist place and we’re all slaves to corporate. But, it’s the holiday season and a little cheer this year isn’t remiss, so why not make someone you love happy with a Burr Basket?
What is a burr basket?
A burr basket is a cute little winter themed gift basket, kind of like an Easter basket or a boo basket. It’s called a burr basket because, brr, it’s cold out there! To be honest, I don’t know why it’s “burr” and not “brr,” but I’m here for it. If you are on TikTok, you’ve seen them, I’m sure. And if you’re clueless on just what the heck a burr basket is, I’ve got you!What do you put in a burr basket?
Anything and everything with a cozy winter theme! Really, anything goes, but here’s a loose “recipe” just to make life easy:Basket
You’ll need a container/basket for your burr basket. You don’t need the basket to be giant, just keep in mind that everything you get should be able to fit inside. Also, you don’t need to be restricted to a basket either, you can choose a reusable tote bag too. There are a lot of cute winter themed baskets and bags out there but if you get something neutral, the basket can hang out all year round.Cozy item
Moving on to the things in the burr basket, I’d say the number one thing is something warm and cozy that is something that is both functional and cute. Something that will make the recipient of your burr basket think of you every time they use it. A quirky hoodie, a fuzzy blanket, a scarf, mittens, maybe slippers? Just make sure it’s warm and cozy.Mug
A cute holiday mug is perfect for burr baskets. Heck, you can even make a mini burr basket where the mug is the basket! There are so many winter and Christmas-y themed mugs out there. Or you can go classy and get a hand thrown ceramic mug. If your special someone isn’t a hot drinks kind of person, you can get a really like cocktail glass or even a Stanley so they can stay hydrated.Drinks
Seasonal winter tea mixes, hot chocolate mixes, coffee, or matcha all make great items to tuck into your burr basket. Maybe they’ll even share with you!Snackies/Treats
Um, wintertime is the time for ALL the holiday snackies and treats! Peppermint bark, festive holiday oreos, Christmas cereal, popcorn, all the Christmas flavored things! Just hop into the grocery store, there usually have a giant seasonal section where all the fun winter treats will be.Plushie
A cute little snuggle buddy is just the thing to tuck into your burr basket. There are so many super cute Christmas Jellycats out there, you’re sure to find one that is perfect for your loved one.Candle
Winter is the time for candlelight and scented candles. There are a bunch of quirky seasonal candles out there but just be careful because candles are a love it or hate it kind of thing. If you’re going for a candle and want to go all out, there are some candle companies out there that are considered delicious: Diptyque, Le Labo, P.F. Candle Co., Voluspa, and Mala the Brand. Scented candles are on the pricier side, but they really set the vibes.Card
Don’t forget a handwritten note in a card because that’s the true gift. Let your loved one know what you love about them, what your favorite things to do with them are, and what kind of fun things you see the two of you doing during the winter season.Homemade treat
Nothing beats a homemade treat and nothing says love like spending time in the kitchen baking up something sweet. Add in some homemade brown butter chocolate chip cookies, soft and chewy gingerbread cookies, or cinnamon sugary snickerdoodles.How to make your burr basket extra cute
- Get a big enough basket (or bag) so that everything fits inside neatly without too much extra space. Place the biggest item in the bottom of the basket - ie line the basket with the blanket or scarf.
- Remove any extraneous packaging. Take things out of the box if the box isn’t cute, peel off any price tags, take off the plastic wrap if there is any. Don’t cut off any of the tags though, just in case they might want to exchange or return something.
- Arrange. Larger items go in the back slash near the bottom and smaller items go on top and in front. Try to make it so that everything in the basket is visible from first glance.
- Bonus: grab a string of battery operated fairy lights, put the batteries in, turn them on, and arrange them around all items to make the basket look extra magical.
- Tuck the card/note in the top or at the front so it’s the first thing they open!
Amazon burr basket items to buy:
Burr baskets
- These cotton woven baskets are practical and handy, even after burr basket season is over.
- A super cute Christmas deer basket
- A lil woven guy that’s perfect for a mini burr basket
- A multipack of baskets in case you need to make more than one ;)
Cozy winter burr basket items
- Soft and plush blanket perfect for snuggling
- An extra luxurious soft blanket for those girlies who like being pampered
- The cutest santa hat wearing smilie face slippers
- Cat paw slippers for the cat lover in your life
- Fuzzy shearling slippers for those peeps who always have cold feet
- A colorful, thick, warm scarf
Burr basket mugs and cups
- Super #aesthetic ribbed mug in a smoked glass, perfect for homemade lattes in bed
- A classic Stanley camp mug for winter morning walks
- A water tumbler with a top handle in winter white
- A Japanese pottery warm your hands around it mug
- The cutest retro Christmas mug with a big red handle
- Fluffy font forward “Oh what fun” and “Ho Ho Ho” mugs
Burr basket drinks and snacks
- Holiday blend roast coffee in the cutest holiday package
- Cake batter medium roast coffee
- White chocolate peppermint bark beans or Sugar cookie coffee beans
- Spiced holiday black tea in a festive tin
- Creamy white tea with a vanilla and almond white Christmas tea
- Cinnamon spiced creamy horchata hot chocolate mix
Burr basket plushies
There are so many cute Christmas plushies out there from mini to big!- The sweetest lil candy cane
- A stuffed mug of cocoa you can hug forever
- A squishable red and white Christmas ornament!
- Don’t worry, you can cuddle this snowman all you want, it won’t melt
Burr basket cards
A burr basket is nothing without a handwritten note. Pick up a super sweet card and don’t forget to write a personalized message inside :)- The cutest card for your favorite person
- A classy Christmas card that let’s someone know all you want for Christmas is some quality time
- Classic Christmas vibes with a pop-up Charlie Brown Christmas card that has lights and music!

Latest Comment
“Bananas and coffee seem like such a strange combination at first but it really is delicious! Agreed that when the banana...”Jerrica L on Banana CoffeePopular
 2015 Holiday Giveaway
  One-Pot Lemon Scallop Pea Spaghetti
  Beer Battered Onion Rings, Jalapeno Aioli
  2014 Holiday Gift Guide and a Giveaway
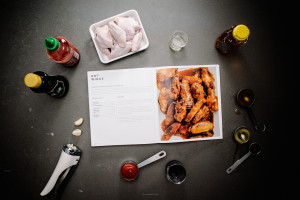 Easy Gourmet Hot Wings and a Giveaway!
 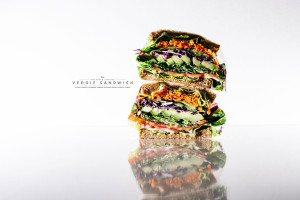 The Ultimate Veggie Sandwich
 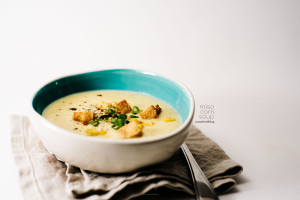 Vegan(!) Creamy Corn Soup Recipe
 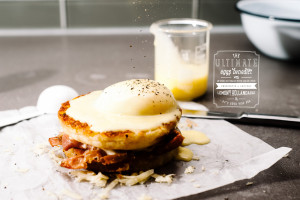 Sunday Brunch: Grilled Cheese Eggs Benny
