
I Am... Rabokki
Sometimes I scroll through the rabokki hashtag on Tiktok to see how other people make their rabokki. Inevitably I get hungry, and ask Mike if he wants to share a bowl so I don’t feel so guilty eating a huge amount of carbs when most people are snug in bed. Always so worth it though!
What is rabokki?
Rabokki is a popular Korean street food that is ramen and tteokbokki in one dish. Ramen and rice cakes is carb on carb action and I am here for it.Ramen + tteokbokki = rabokki
Sometimes it’s called rapokki as well. It’s a sweet and spicy, super savory delicious dish, perfect for warming up with and a quick satisfying meal. The combination of instant noodles, Korean rice cakes, and savory spicy-sweet sauce comes together incredibly quickly so it’s great when you’re craving something spicy, filling, and delicious. It goes awesome with beer and late night rabokki is one of my favorite late night treats, especially with cheese. The slurpy noodles, chewy rice cakes, and spice are a match made in heaven. Rabokki is incredibly popular, both as street food and as an easy meal you can make at home. They even have Costco rabokki!How to make rabokki from scratch
- Make the sauce. In a small bowl, mix together gochujang, sugar, soy sauce, minced garlic, and a bit of gochugaru.
- Simmer the soup with the rice cakes. Add the sauce with the rice cakes to a pot of water and bring to a simmer.
- Cook the ramen. When the rice cakes are soft and chewy, add the ramen and cook it. If you like, add some Korean fish cakes.
- Top and serve! Serve everything up topped with scallions and maybe a boiled egg and some cheese!
How to make instant rabokki
- Make the soup. Open up the instant seasoning packet and add it to a pot with 2 cups water and 1 tbsp brown sugar and bring to a simmer.
- Make the “rice cakes.” Lightly soak a piece of rice paper in warm water and tightly roll up. Cut it into 2-3 inch pieces. Repeat with one more piece of rice paper.
- Cook the noodles. Add the noodles to the soup and cook for 2 minutes. Add your homemade rice cakes and simmer for 1 more minute.
- Enjoy! Top with toasted sesame seeds, scallions, and a slice of cheese and enjoy!
Which one is better?
Truthfully it depends on time of day. For me, after about 10pm the instant version starts looking pretty darn good. The rest of the time, I'd have to go with the traditional-with-real-ingredients version though.Ingredients
- Instant ramen. You need the noodles from an instant ramen pack, but not the seasoning pack. I like using Shin Ramyun noodles because they’re thick and chewy.
- Korean tteokbokki rice cakes. You can find Korean rice cakes freshly made, packaged in the refrigerated section, or frozen in the freezer aisles at a Korean grocery store. If you can’t make it to the Korean grocery store, I have a tteokbokki substitute for you!
- Gochujang. A spicy Korean sauce. It’s savory, sweet, spicy thick fermented paste made from chili powder and sticky rice. It adds sweet and heat and a ton of flavor. Traditionally it comes in tubs, but these days you can find it in convenient squeeze bottles in the Asian aisle of literally any grocery store.
- Gochugaru. Korean chili flakes. Korean chili flakes are fruity, sweet, smoky, sun dried bright red flakes. They’re not too spicy and their heat is gentle and delicious. I always buy coarse gochugaru which looks like flaky sea salt. They usually come labeled with mild, medium, or hot, so you can buy them according to your spice preference. https://amzn.to/3sMzY6e
- Sugar, garlic, soy sauce. A bit of sugar makes the sauce sweet, garlic adds a hit of raw spiciness, and the soy sauce adds umami and salt.
Is rabokki spicy?
It really depends on your spice tolerance. I would say they are a little bit on the spicy side but they’re also a touch sweet. If you add cheese that helps cut the spice too. They’re spicy in an addictive way! If you like spicy, hot food, they won’t be too spicy for you and you can always adjust the sauce to adjust for your spice level.Best instant ramen for rabokki
You’re just going to be using the ramen and not the spice pack (unless you’re making instant rabokki) so the flavor doesn’t matter much, but if you’re going to be making the easy version of rabokki, I recommend either Nong Shim Shin Ramyun Black for regular spice or Samyang Buldak if you’re a spice fiend.Where to buy Korean rice cakes
You can find tteokbokki rice cakes at Korean markets. They’ll usually come freshly made by the store, commercially made fresh and packaged, or frozen. If you can get ones that are fresh, they are the top choice, but packaged and frozen are good too.Korean rice cake substitute
If you can’t make it to the Korean grocery store, I have the perfect rice cake hack for you. All you need is Vietnamese rice paper. They sell rice paper at most grocery stores in the Asian aisle. Just soak the rice paper, roll it up tightly, wait for minute and then slice them into rice cake lengths. Not the same as tteokbokki but a really good sub!- Place some warm water in a shallow bowl.
- Lightly soak the rice paper.
- Place the rice paper on a cutting board and roll it up tightly.
- Slice the rolled rice paper into 2-3 inch lengths.
- Use the rice rolls in your rabokki.
Rabokki toppings
Toppings make the rabokki! You can keep it simple with just ramen and tteokbokki or you can all all the mix-ins and toppings for a super luxe and filling rabokki.- Onions - Add some onions to the mix, they add sweetness and onion vibes.
- Cabbage - if you want a little bit of health, add sliced cabbage when you’re simmering everything together. The crunch and softness are perfect with the spicy sauce.
- Dumplings - Go wild and add some mandu/Korean dumplings for an extra filling rabokki.
- Fish cakes - add sliced Korean fish cakes while you’re simmering the ramen and tteokbokki.
- Scallions - a sprinkle of sliced scallions add freshness.
- Eggs - soft or hard boiled eggs add some protein and are so good in the sauce.
- Cheese - melted cheese is AMAZING on rabokki. Go for a classic American slice or mozzarella, something super melty for cheese pulls.
- Toasted sesame seeds - adds a nice nuttiness
- Seaweed - adds crunch and saltiness
More fun Korean inspired recipes
I hope you enjoy! I know what my next meal is… Rabokki forever, xoxo stephRabokki Recipe
Rabokki is instant noodles, rice cakes, and spicy-sweet sauce that's great when you’re craving something spicy, filling, and delicious.
- 1 tbsp gochujang
- 1 tbsp sugar
- 2 cloves garlic (minced)
- 1 tsp soy sauce
- 1 tsp gochugaru
- 8 pieces tteokbokki tteok
- 1 package instant ramen (Korean brand preferred)
In a small bowl, mix together the gochujang, sugar, garlic, soy sauce, and gochugaru.
Add the sauce to a pot with 2 cups of water and bring it to a simmer. Simmer the tteokbokki until tender, about 5 minutes.
Add the ramen noodles to the pot and cook according to the time on package instructions.
Scoop everything out into a bowl and top with toasted sesame seeds and scallions. Add additional toppings as desired. Enjoy!
EASY VERSION
1 package spicy Korean instant ramen
2 pieces rice paper
In a pot, add the spice packet to 2 cups water. Bring to a simmer over medium high heat.
While the soup is coming to a simmer, make the rice cakes. Place some warm water in a shallow bowl and lightly soak the rice paper. Place the rice paper on a cutting board and roll it up tightly. Slice the rolled rice paper into 2-3 inch lengths.
When the water is boiling, add the rice paper rolls and the noodles. Cook the noodles according to the package directions.
Scoop everything out into a bowl and top with toasted sesame seeds and scallions. Add additional toppings as desired. Enjoy!
Estimated nutrition does not include instant noodles of choice.

I Am... Instant Pot Teriyaki Chicken Recipe
When you're hangry and craving an easy simple meal, this Instant Pot teriyaki chicken recipe is here for you. Just 5 minutes, a handful of ingredients that you (hopefully) have in your pantry, and you're good to go.
Read More →
I Am... Homemade Clotted Cream
I love clotted cream. If you haven't had it, it's kind of like a mix between whipped cream and whipped butter, but with a deeper flavor. It's thick, it's creamy, and it's absolutely dreamy on scones warm from the oven. Clotted cream and scones have always been my favorite part of afternoon tea. I'm obsessed with it.
What is clotted cream?
Clotted cream sounds kind of funny, but really, it’s SO delicious. It’s also called Devonshire cream or Cornish cream, so if you’re not so fond of the word “clotted,” you can think of it like that. Really, clotted is just another word for thick, so just think of it as thick cream! It's thick, spreadable form of heavy cream first invented way back in the day by dairy farmers in Devon as a way to preserve milk.Clotted cream ingredients
- Cream. All you need to make clotted cream is heavy whipping cream. That’s it! You’ll need to make sure the milk fat percentage is 35% or higher and that it’s not ultra pasteurized and you’ll be good to go.
How to make clotted cream
- Bake. Pour your cream into an oven safe dish and bake it in a very low oven for 10 to 12 hours, or overnight.
- Cool. Let it cool down to room temp then place the dish in the fridge to firm and chill up.
- Skim. The slightly golden, thickened layer of cream at the top of the dish is clotted cream! Skim it off then enjoy.
What does it taste like?
Clotted cream tastes rich and, well, creamy. It’s not particularly sweet because it’s made from just cream. It’s fairly neutral like whipped cream and is the perfect compliment to jam. It has a smooth, rich texture that just melts in your mouth. It has a very slight hint of sweetness, kind of similar to how a really good butter tastes a bit sweet.What do you eat it with?
Clotted cream is essential with a batch of scones. Trust me when I say you haven’t lived until you’ve eaten a fresh scone slathered with Devonshire cream and jam. It’s divine. It's standard when you have British tea and scones. You can pretty much also eat it on anything where you would have butter. I love it on toast and I’ve been known to eat it with slices of banana bread too. You can also have a smoosh alongside cake.What kind of cream?
Clotted cream is made from heavy cream or whipping cream. Heavy cream is the high-fat layer that skimmed off of milk before homogenization. It’s kind of like that saying, “the cream always rises.” Because cream has so much fat in it, it rises to the top of milk and is skimmed off. We’re going to take heavy cream and concentrate it even more. Since you only need one ingredient, it’s best to use the highest quality cream you can find: local, organic, grass fed. Essentially, you want the stuff that tastes really good because your end product will taste like the cream you buy.What is heavy cream?
Heavy cream is just another name for whipping cream. It’s also sometimes labeled as heavy whipping cream. As long as the label says 35% fat or higher, you can make clotted cream with it.What is ultra pasteurized heavy cream?
Ultra pasteurized cream is cream that’s been heated to 280°F so that the cream is more shelf stable. Unfortunately you can’t use ultra pasteurized heavy cream to make clotted cream. I’m not too sure on the science of it but ultra pasteurized heavy cream won’t clot as much as regular pasteurized cream.Can I make clotted cream in an Instant Pot?
Yes! Just place the heavy cream in your Instant Pot and choose the yogurt setting until it hits boil. When the Instant Pot beeps to let you know that it’s come to temp, press keep warm. Let the cream cook for 8-10 hours. Turn the Instant Pot off and let cool down completely then place the insert in the fridge for at least 12 hours to chill and firm up. Scoop off the top layer of thickened cream - that’s the clotted cream.Slow cooker clotted cream
Yes, but it depends on your slow cooker settings. You’ll want to add the cream to the slow cooker and keep it on warm – the cream needs to stay between 165-180°F so read your manual to see which setting that is. It should probably just be warm, but it might also be the low setting, so double check. Once your cream is in the slow cooker and the temp is right, cover it with the lid and let cook for 8-10 hours or until a light golden crust starts to form. Turn the slow cooker off and let cool to room temp before chilling in the fridge completely, then just skim off the top thickened layer.Or even a rice cooker?!
Yup, as lot as your rice cooker has a keep warm setting that keeps things warm from 165-180°F. You can test your rice cooker with water and an instant read thermometer. Just pour 4 cups of water, set it on keep warm and after 30 minutes or so, check the temp of the water. If it reaches 165-180°F, you can make clotted cream in it. Simply pour the cream into the bowl and set the keep warm for 8-10 hours. Double check every so often to make sure your rice cooker hasn’t turned off. When it’s done, let it cool to room temp then pop it in the fridge to cool completely before skimming off the clotted cream that has formed on the top.Why is there a crust on my clotted cream?
The crust is the part that you want - it’s the cream that has been clotted. Most people skim off the top most layer that is the thickest. Underneath the thickest layer there may be another layer that is a bit more loose. You can skim this out too and use it to loosen your cream if you like a looser, more flowy clotted cream. Underneath that layer will be liquid, which is the leftover whey (the liquid that is left over after making cheese or butter). You can use the whey in baked goods.What can I do with the left over liquid?
After you skim off the lovely layer of clotted cream, you’ll notice some whey at the bottom of your dish. You can use this in any baked good that calls for milk. You could use it to make scones, muffins, and cakes. xoxo steph PS - This last shot is pink because I used a bit of powdered strawberries and gold flecks!What to spread it on
Clotted Cream Recipe
Homemade clotted cream – thick, rich, and perfect for spreading onto cream scones (or toast!) for afternoon tea.
- casserole dish with glass cover
- 1 qt whipping cream (35% MF or higher, NOT ultra pasteurized)
Heat your oven to 170°F. Pour the cream into a deep casserole dish that has a cover that can go into the oven. You’re aiming for a deep dish so that the cream is about 2 to 2.5 inches deep when poured in. I used a casserole dish with a glass cover, kind of like an old school pyrex type thing. Cover the dish and place in the 170°F oven for 10 to 12 hours, or overnight, which is what I did.
The next day (or 10 to 12 hours later), remove the casserole from the oven and let cool to room temperature before placing in the fridge for a minimum of 8 hours, or overnight.
Skim off the top, slightly golden, thickened layer. This is your clotted cream! There will be another layer under the slightly yellow layer that is creamy and thick like sour cream – this is clotted as well, but with a bit more moisture in it. Skim that off as well. Use as is, both the thickened creams are considered clotted. Some people mix the two and some people just use the top layer. Or, you could use a stand or hand mixer/a spoon and mix up the the two kinds of cream until thick, but this is not traditional at all. Serve chilled and enjoy! I love it on scones, toast (SO GOOD), cake, basically anything or everything!
via Rock Recipes
The clotted cream should keep in the fridge for up to 5 days, covered.
Be sure that your cream isn’t ultra pasteurized – double check while you’re buying the cream. If it is ultra pasteurized, it’ll say on the carton/bottle.
The original recipe just stirred the cream together, which I think would work as well, but I wanted a more smooth, whipped consistency. Whipping the top two layers together is NOT traditional.

I Am... Green Chile Cheeseburger
This spicy, crispy, cheesy smash green chile cheeseburger is probably the best you’ll ever eat. The cheese is melt-y and almost queso-y, the fire roasted hatch green chiles are fire, and the smashed patties are charred and juicy. Seriously amazing. If you’ve had the chance to travel to New Mexico, you’ll know that the state slogan really rings true. New Mexico is the land of enchantment. Enchantment and green chile cheeseburgers. Green chile cheeseburgers, if you haven’t had the pleasure of trying them, are amazing. Fire roasted chopped green chile on top of a perfectly juicy burger with cheese in a buttery toasted bun – ugh, they just hit different. We're turning the last of last year's frozen green chiles into GCCs this week. I'm already getting hyped for next year's release.
What is a green chile cheeseburger?
If you’re eating burgers in New Mexico and you order a burger, you’ll get the question: do you want chile on that? By chile (chile with an “e” by the way, never chili, which is chili con carne), they mean fire roasted and chopped green chiles. They have them year round but come late summer and fall, the hatch chiles start getting harvested and everything smells smoky and delicious from all of the fire roasting going on at all the grocery stores. By the way, if they ask you if you want chile on it, the answer should always be yes. We were at a burger place and someone answered no and I swear I saw the server physically recoil as if it was absolutely the wrong answer.What kind of peppers for green chile cheeseburgers?
Hatch green chile of course! If you don’t have a batch stored in your freezer, you can also substitute in another variety of green chile like Anaheim or jalapeño if needed. You can also go with jarred green chile if you’re no where near New Mexico and you don’t want to roast Anaheims or jalapeños.What are hatch chiles?
Hatch chiles are a green chile pepper grown in the Hatch Valley of New Mexico. They’re sweet, smoky, long green peppers that taste amazing fresh and even more delicious when roasted. Hatch chiles come in both red and green. The red Hatch chiles are chiles that have been left to ripen longer than the younger green chiles. They come in mild, medium, spicy, and x-hot varieties. Hatch chile season is one of the most magical seasons of all. The little green chile that could comes from New Mexico and is the backbone of so many wonderful New Mexican and Southwestern dishes. Hatch season starts at the end of summer and goes into the beginning of fall and if you’ve ever visited the Southwest, you’ve definitely seen the well deserved love for Hatch green chiles.Why are Hatch chiles special?
Hatch chiles are a surprisingly famous pepper considering how small the growing season and region is. They’re just like the Champagne region in France – if the grapes aren’t grown in Champagne, what you make from them isn’t really champagne, it’s just sparkling wine. Similarly, you can grow Hatch chiles elsewhere but if they’re not grown in the Hatch Valley of New Mexico, they’re not real Hatch chiles and they won’t taste quite the same.What do Hatch chiles taste like?
They’re earthy, crisp, spicy, and have a bit of onion when eaten raw. When they’re roasted, they’re smoky, rich, and slightly buttery. Green chiles tend to be spicier and the red ones slightly sweeter. They have the ideal balance between heat and sweet. When they’re roasted they’re smoky, delicious heaven.Are Hatch chiles spicy?
Hatch chiles come in mild, medium, hot, and xtra hot. They go from milder than a jalapeño to pretty darn spicy.Where to buy Hatch chiles
When they’re in season, during August and September, they sell and ship fresh chiles online. There are also whole dried hatch chiles, jarred, or canned that are available at most grocery stores or online. Sometimes they even sell them fresh for a really short window at Whole Foods or other specialty food stores. If you’re lucky enough to live in Southern California, Colorado, or Texas, you’ll probably easily find them in your local grocery store. You can also get Hatch chile powder in both red and green.How to roast green chiles
Wash and dry your chiles then roast them however you like:- In the oven Place the chiles on a foil lined pan and broil, directly under the element for 10-15 minutes, flipping as needed until the skin chars and blisters.
- On the grill Place the chiles over direct high heat, flipping every couple of minutes until the skin chars and blisters.
- In the air fryer Add the chiles to the air fryer and air fry at the highest temp, for 15 minutes, or until the skin chars and blisters, flipping halfway.
- On the stove Char the chiles directly on the flame or element, flipping as needed, until the skin chars and blisters.
How to make a green chile cheeseburger
If you can’t make it to New Mexico, it’s relatively simple to make a green chile cheeseburger at home. Pick up some long green peppers – hatch is preferable but Anaheim works too. Lightly oil and roast them in the oven, then skin, seed, and chop them up. Go about your usual cheeseburger making and just before you put the cheese on to melt, add a generous amount of chopped chilies.What kind of cheese for green chile cheeseburgers?
If you’re going for a classic burger, you can’t beat the melt and creaminess of American cheese. If you want something with more flavor, try pepper jack!Cheese on top or underneath the chiles?
There’s a bit of a debate on whether the green chiles should be on top of the cheese or under a blanket of melted cheese. Both Mike and I agree that underneath melted cheese is better for eating because the cheese blanket holds everything together. That being said, for this post we went with the green chiles on top because we wanted everyone to be able to see the green chiles. It’s up to you what you prefer green chile wise. We’ve seen plenty of both in New Mexico, so go with your gut.Other ways to enjoy Hatch chiles
You can enjoy Hatch chiles raw or once they’re roasted you can use them in stews, chile relleno, enchiladas, salsas, sauces, dips, on tacos, as pizza toppings, on burgers, with eggs, or with noodles. They’re incredibly versatile and add smoke, flavor, and spice. Happy hatch chile burger-ing! xoxo steph PS - If you love hatch green chile cheeseburgers please check out our search for the best one in New Mexico.The Ultimate Double Double Hatch Green Chile Cheeseburger
A deluxe double patty cheeseburger with plenty of smoky and spicy fire roasted green chiles.
- 1 - 2 Hatch green chiles
- neutral oil
- 1 tbsp butter (room temp)
- 1 brioche burger bun
- 1/3 lbs ground beef chuck
- salt and freshly ground pepper
- 2 slices American cheese
- 1 slice tomato
- 1 leaf green leaf lettuce
- 1-2 thin slices onion
- mustard (to taste)
- mayo (to taste)
Lightly coat the chiles with the tiniest bit of oil and roast under the broiler until deeply golden, almost black, about 10-12 minutes, flipping once.
When roasted, place in a paper or plastic bag, close, and let peppers steam for 10 minutes. Skin, seed, and stem the peppers, then chop.
Divide the meat into 2 equal portions and gently form very thin patties larger than your bun. Season both sides with salt and pepper.
Butter and lightly toast the bun in a dry pan over medium heat. Remove from the pan and set aside, keeping warm in a low oven if desired.
Heat up a large pan over medium high-heat and add a bit of oil to the pan. When hot, add the patties and cook, without moving for 2 to 3 minutes, or until caramelized, pressing down. Flip and cook for another minute or so.
When the patties are just about done cooking, immediately with a slice of American cheese and a generous amount of the roasted Hatch green chiles.
Build the burger: the bottom bun gets mayo and mustard to taste, then lettuce, tomato, and onion. Top with the two melty, green chile patties and the top bun. Enjoy immediately.
Notes: If you can’t get your hands on Hatch green chiles, you can roast any other long green chile in the same way. You can also use jarred or canned roasted green chiles, you’ll want about 1/4 cup.

I Am... How to Tteokbokki
Sweet and spicy, saucy, chewy tteokbokki is one of my all time favorite snacks. Tteokbokki is probably THE most famous street food from Korea. They’re chewy rice cakes simmered in a glorious mix of sweet, savory, spicy sauce that is completely addictive. The best thing about tteokbokki is that it’s so easy to make. It’s deliciously simple and completely customizable. What are you waiting for, tteokbokki is in your future!
What is tteokbokki?
They’re spicy Korean rice cakes. Tteokbokki literally means stir fried rice cakes: tteok is the word for rice cake and bokki means fried. It’s an extremely popular dish, both as street food and comfort food at home. Tteokbokki are made with cylindrical rice cakes simmered in a thick and spicy sauce.Where to buy tteokbokki rice cakes
You can find tteokbokki rice cakes at Korean markets. They’ll usually come freshly made by the store, commercially made fresh and packaged, or frozen. If you can get ones that are made fresh, they are the top choice, but packaged and frozen are good too. You can even get them online, although we've never tried these, they seem to be well reviewed.How to make tteokbokki
- Soak the rice cakes. Soak the rice cakes in a bit of warm tap water to loosen and soften them up.
- Make the sauce. While the rice cakes are soaking, mix together the tteokbokki sauce in a small bowl: gochujang, gochugaru, soy sauce, sugar, and garlic.
- Simmer. Stir the sauce into some anchovy stock and bring to a simmer. Add the rice cakes and cook until the sauce reduces and the rice cakes are chewy, soft, and heated through.
- Enjoy! Finish with a drizzle of toasted sesame oil, toasted sesame seeds, and sliced scallions and enjoy warm.
What does tteokbokki taste like?
It tastes like heaven! If you love carbs, you’ll love tteokbokki. It’s chewy and filling, sweet and spicy and savory. If you haven’t had it before, think of it like a savory mochi or maybe like a gnocchi in a spicy sauce. Korean rice cakes are chewy and bouncy. The rice cakes themselves are very mild but when you cook them in sauce, they soak up flavor like a sponge and become incredibly delicious. Many tteokbokki also have fish cakes and boiled eggs added in for extra flavor and protein.Ingredients
- Garae-tteok/tteokbokki rice cakes. You can find Korean rice cakes freshly made, packaged in the refrigerated section, or frozen in the freezer aisles at a Korean grocery store. Most Korean grocery stores make their own, which would be the best choice because they’re soft and chewy, but the packaged and frozen rice cakes work great too.
- Anchovy stock. Anchovy stock, much like dashi in Japanese cooking, is a backbone of Korean food. You can make your own by using small dried anchovies and dried kelp, or you can use these handy anchovy stock packets that work like a little teabag that you steep in hot water. The anchovy stock adds a deep umami and flavor that you don’t get if you’re just using water. If you have dashi at home, you can use that too.
- Tteokbokki sauce. Tteokbokki sauce is made up of gochjang, gochugaru, soy sauce, sugar, and garlic. It’s garlicky, a tiny bit sweet, and spicy. It’s definitely super savory and keeps you wanting to come back for more and more.
- Korean fish cakes. I didn’t include fish cakes in my tteokbokki but I love Korean fish cakes. They’re chewy and savory and have the best texture. They come in ball form, tube form, and sheets. Most tteokbokki uses sheets, cut into triangles, squares, or strips.
- Toasted sesame oil. A drizzle of toasted sesame oil right before you serve adds a golden sheen and fragrant finish.
- Scallions. Thinly sliced scallions add freshness and bite.
- Toasted sesame seeds. A couple of toasty, nutty sesame seeds a bit of textural contrast.
Gochujang vs gochugaru
If you’re not familiar with Korean food, you might not know what gochujang or gochugaru is.- Gochujang is a spicy Korean sauce. It’s savory, sweet, spicy thick fermented paste made from chili powder and sticky rice. It adds sweet and heat and a ton of flavor. Traditionally it comes in tubs, but these days you can find it in convenient squeeze bottles in the Asian aisle of literally any grocery store and online, of course.
- Gochugaru, on the other hand, are Korean chili flakes. Korean chili flakes are fruity, sweet, smoky, sun dried bright red flakes. They’re not too spicy and their heat is gentle and delicious. I always buy coarse gochugaru which looks like flaky sea salt. They usually come labeled with mild, medium, or hot, so you can buy them according to your spice preference.
Do I need to soak tteokbokki rice cakes?
If you have fresh rice cakes you don’t need to soak them. If you are using ones that are packaged or frozen, give them a soak in warm water to loosen them up and rehydrate them a bit.Anchovy stock substitute
You can buy anchovy stock packets online or at a Korean grocery store but if you’re looking for a substitute, you can use Japanese dashi or even chicken stock or water. If you use chicken stock or water, the tteokbokki won’t have the same depth of flavor but it will still be good.Where to buy fish cakes
All Korean stores will sell fresh fish cakes in their deli section and frozen ones in the freezer aisles. You can also find fish cakes at regular Asian grocery stores. If you can’t find Korean fish cakes, Japanese fish cakes or Chinese fish cakes can sub in.Is tteokbokki spicy?
Depending on your spice level tteokbokki is on the spicier side. If you want to make mild tteokbokki, I have an adaptation below.Non-spicy tteokbokki
For non-spicy tteokbokki, make this sauce instead of the sauce listed in the recipe:- 2 tbsp mild gochujang
- 2 tbsp sugar
- 1 tbsp soy sauce
- 3 cloves garlic, minced
How to store tteokbokki
Tteokbokki will keep tightly covered in the fridge for up to 3 days.How to reheat tteokbokki
To reheat, add the tteokbokki to a pot with 1/4 cup water or dashi and simmer over low heat until heated through. You can also warm it in the microwave with a bit of water added to the sauce.What to serve with tteokbokki
- Korean fried chicken of course!
- DIY at home Korean BBQ
- Korean corn dogs
- Spicy tofu stew/sundubu jjigae
Frequently Asked Questions
- Do I need to use anchovy stock? You don’t need too, especially if you’re vegetarian, but the anchovy stock adds a lot of extra flavor and depth that is the secret to a good tteokbokki.
- What can I use instead of fish cakes? If you’re vegetarian but still want some protein in this dish you can use tofu! Tofu puffs taste amazing in this sauce.
- Why do my tteokbokki split apart and crack? If your tteokbokki keep splitting and cracking, it’s because your rice cakes are too dry and freezer burnt. They may have been frozen and defrosted more than once. If you have problems with them splitting, try soaking them in cold water and letting them defrost slowly overnight in the fridge.
- How to pronounce tteokbokki? It’s “duck boak key.” A short and hard “duck,” “boak” like oat with a b in front, and “key” like the key for a door. Thanks Chloe for answering in the comments!
- Why is tteokbokki so famous? Tteokbokki is one of Korea’s top street food and convenience items. It’s a super casual kind of food that friends go out for when they meet up and drink and it’s also been featured in so many Korean dramas that it’s kind of been romanticized. Imagine a rainy night where you see a lone tteokbokki stall with steaming spicy rice cakes. There’s a little counter and an awning covering customers from the rain. The streets are shiny and the city lights are glowing. You order some tteokbokki with extra fish cakes and a good looking stranger next to you orders the exact same thing…K-drama feels!
Trader Joe’s tteokbokki
Recently Trader Joe’s has come out with tteokbokki! It’s in the freezer section and it comes with everything you need in one convenient pack. To be honest you can also get packs of tteokbokki with the sauce and everything you need at a Korean store in the freezer section as well but if you’re nowhere near a Korean grocery store this is a good alternative. We haven’t tried them yet but they have pretty positive reviews so next time we spot them we’ll give them a go. I think they’re a style that is not as spicy or saucy and more of a sweet and sticky style.How to make tteokbokki with cheese
This one is really simple, just add a slice of cheese on top of your hot tteokbokki. You can also add shredded cheese if you don’t have a slice of cheese. Mozzarella is what they usually use because it’s super stretchy and mild.How to make rose tteokbokki
We’ve been eating tteokbokki on the regular and experimenting with different variations and our current favorite is rose or rosé (like the wine or pasta sauce!) tteokbokki. Rosé sauce is simply a red sauce with a bit of cream mixed in and rosé tteokbokki is the same! Rose sauce is super popular in Korea: it’s spicy and creamy and incredibly addictive. To make it, all you do is make the recipe as below. Just before serving, stir in 1/2 cup heavy cream until the sauce turns a beautiful pink. Top it off with plenty of mozzarella cheese, let it melt, then go to town. So good!What other recipes have Korean rice cakes?
- Rabokki - the amazing mix of ramen and rice cakes
- Korean corn dogs - instead of using cheese, add a rice cake!
- Budae Jjigae - you can add rice cakes to army stew, they get soft and chewy and are so good
- Kimchi Stew - is it even kimchi stew without rice cakes?!
Tteokbokki
Tteokbokki is probably THE most famous street food from Korea: chewy rice cakes simmered in an addictive mix of sweet, savory, spicy sauce.
- 1 lb tteokbokki tteok
- 3 tbsp gochujang
- 1 tbsp gochugaru
- 1 tbsp soy sauce
- 1 tbsp sugar
- 3 cloves garlic (minced)
- 3 cups anchovy stock (sub dashi or other stock if needed)
To Finish
- 1 tsp toasted sesame oil
- 1 tbsp green onions (thinly sliced)
- 1 tsp toasted sesame seeds
Soak the tteokbokki tteok in warm tap water while you prepare the sauce.
In a small bowl, mix together the gochujang, gochugaru, soy sauce, sugar, and minced garlic. (See notes for a mild version of the sauce.)
Add the anchovy stock to a pot and stir in the sauce. Bring to a simmer over medium high heat.
Drain the tteokbokki and add to the pot. Stir occasionally and bring to a simmer for 3-4 minutes. Turn the heat down to low and let the sauce bubble and reduce, stirring so they don’t stick to the bottom of the pan, about 10-15 minutes depending on how thick you want the sauce.
Before serving drizzle with toasted sesame oil and finish with toasted sesame seeds and sliced scallions. Enjoy warm!

I Am... Japanese Cheesecake Recipe
Japanese cheesecake is probably my all-time favorite cake of any kind, cheese or not. Recently, I’ve been making Japanese cheesecake after cheesecake, not to perfect a recipe or anything, but because they’re just so fluffy and addictive. Can you ever have too much cheesecake?
What is Japanese Cheesecake?
Japanese cheesecake is a soufflé cheesecake that's quite different than the dense and thick New York style cheesecake we all know and love, but every bit as tasty. They are light and fluffy thanks to loads of whipped egg whites, are a little less sweet, and have a slightly tangy cream cheese flavor. They’re so fluffy that you can probably eat a whole cheesecake by yourself and not feel totally guilty about it. They're like the cheesecake version of Japanese soufflé pancakes. They look pretty darn cute and squishy and taste good too. This recipe bakes up beautifully, doesn't crack and the inside texture is bang on, almost exactly the same as the cheesecakes I get in Tokyo. The key is baking it at different temperatures. It starts off high so it can get a lot of heat to help it rise, then goes low and slow so everything bakes evenly.How to make Japanese Cheesecake
- Make the cream cheese batter: The cream cheese is melted over a double boiler so that it gets extra smooth and creamy. When it’s melty, mix in the butter, milk, egg yolks, and a bit of sugar.
- Sift in the flour and cornstarch: After everything is smooth you sift in the cake flour and cornstarch.
- Whip the egg whites: This is the part that is key. It’s not too difficult, especially if you’ve made meringue before. Just whip up your whites to about soft peaks.
- Mix: Gently fold together the whites and cream cheese batter, being careful not to deflate the whites too much.
- Bake in a water bath: Japanese cheesecake is a bit delicate so you’ll need to bake it in a water bath with a kitchen towel underneath so that it doesn't contact direct heat in any way.
- Cool: If you like, you can remove it from the pan once it’s cool enough to touch and do the jiggly shake that I’m sure you’ve seen on the internet. Otherwise, just let it cool very slowly then you’re ready to eat!
Japanese Cheesecake Ingredients
The ingredients for this Japanese cheesecake recipe are are similar to regular cheesecake, but with a few important changes:- cake flour: if you don't live in America, cake flour is low protein flour, usually about 8%-9% protein
- corn starch: not corn flour. corn starch is used to get the protein content down even further to make the cake as light and fluffy as possible
- cream of tartar: cream of tartar helps stabilize the egg whites, which are whipped into a meringue. Cream of tartar can be hard to find depending on where you live, so if you don't have it but you're pretty good at whipping egg whites to soft peaks, you could skip it. You can also order it online.
The importance of cooling your cheesecake
After the baking, the cheesecake will spend an enormously long time to cool off in the oven. I’m pretty sure this is not how they do it in Japan because they take them out of the oven when they’re still super hot and jiggly, but this works for me so I roll with it. The super slow cooling keeps your cheesecake looking non-wrinkly and crack-free, which was a problem I faced the first few times I made this. The only thing is, when you cool it in the oven, you don’t get to have fun jiggling it while it’s still hot. And really, the cheesecake is most jiggly when it’s warm. After it cools down, it deflates a bit and is more like a regular fluffy sponge cake texture rather than a jiggly puffball. If you don't care about aesthetics, or care more about jiggling, or just want to eat cheesecake ASAP, feel free to shorten the cooling time or even take it out right away.Soft peaks
Japanese cheesecake is made light and fluffy by whipping up egg whites. We’re aiming for a soft peak, which will help the cheesecake be fluffy and jiggly. You want your egg whites to look like almost fully whipped egg whites, but when you pull your whisk up from the whites, the whites will gently fold over like the tip of a nice swirl of soft ice cream, instead of standing straight up.Kitchen scale
The measurements in this recipe are by weight because Japanese cheesecake can be a little finicky when baking by volume. If you don't yet have a kitchen scale, you should totally get one because they are cheap and will change your baking life forever. You'll wonder why it took you so long to start baking by weight before, it's so much easier! This is a recipe that takes time and care but it’s totally worth it! Wishing you a fluffy Japanese cheesecake :)The Best Japanese Cheesecake Recipe
Just the right sweetness and perfectly fluffy and jiggly with a hint of tart cream cheese.
- kitchen scale
Cream Cheese Batter
- 250 grams room temperature cream cheese
- 60 grams unsalted butter
- 100 ml whole milk
- 6 large egg yolks
- 70 grams sugar
- 60 grams cake flour
- 20 grams cornstarch
- 1/4 tsp salt
Meringue
- 6 large egg whites
- 1/4 tsp cream of tartar
- 70 grams sugar
Preheat your oven to 390°F and lightly grease a 8” x 3” round cake pan with butter. Line the bottom with parchment paper.
Pour boiling water into a large bowl or pan, then sit a smaller mixing bowl inside. Add the cream cheese to the smaller bowl and let soften while you separate your eggs. When the cream cheese is soft, whisk until smooth and creamy, then stir in butter and milk until smooth and incorporated. Whisk in the yolks until smooth, then whisk in the sugar. Remove the bowl from the hot water bath and sift in the cake flour and cornstarch. Whisk until smooth.
Whip the egg whites with the cream of tartar until frothy and pale, adding sugar bit at a time until the whites are whipped into a glossy thick meringue that holds a soft peak. Be careful not to over whip.
Take 1/3 of the whipped egg whites and whisk it into the bowl with the yolks until completely incorporated. Add half of the remaining whites and whisk into the yolk batter, being careful not to deflate.
Transfer the egg yolk mixture to the remaining egg whites, whisk and then use a spatula to fold together. Pour the batter into the prepared cake pan – it should come up almost to the top of the pan, about 1/4 inch from the top. Tap the pan against the counter to release any air bubbles.
Place a kitchen towel into a large deep baking dish and place the cake pan on top (this ensures that the cheesecake doesn’t have any contact with direct heat), then put everything into the preheated oven and carefully pour hot water about 1 inch high.
Bake at 390°F for 18 minutes, then drop the heat to 285°F and bake for another 30 minutes. When the 30 minutes is up, turn off the oven and leave the cake inside without opening the door for another 30 minutes. Finally, open the oven door and remove the water bath. Place the cake back into the oven and leave the door slightly open to let cool gently for another 30 minutes. The idea is to let the cake cool very gradually so it doesn’t crack.
The cake will have naturally shrunk from the sides and should be cool enough to touch. Use a cutting board (or your hands) to invert and remove from the pan. Flip back right side up and place on your serving dish. It should be soft, fluffy, and jiggly while it’s still warm.
adapted from craftpassion.com

I Am... How to make the best charcuterie board
I love date-nights in. So cozy and romantic. You get to pick the music, or maybe a movie, light some candles and just chill with your boo. My favorite way to do an easy night in is a charcuterie board. Mike and I first discovered our love for charcuterie together. Way back in the day, years and years ago, a hot new restaurant opened in a literal alley in a very sketchy part of town. It was hipster before being hipster was a thing. They offered flights of meat and cheese for an insane amount of money (to us, back then) and we fell in love.
Charcuterie at home
After our fourth visit there in 2 weeks, we wised up to the fact that we were spending an absurd amount of money on something that we could easily do at home. After all, the restaurant literally told us where they sourced their charcuterie from. This was way before made-in-house was a thing. So, we went right to the source, bought a bunch of our favorites, which we handily already knew, and went to town. Ever since, we’ve always made charcuterie and cheese boards at home. The best part is coming up with fun little accompaniments, because stuff that makes everything prettier makes things tastier too, right? Our boards are heavy on the pate because to me, that's the best part.Where to get charcuterie ingredients
Ideally you have a nice little European inspired artisanal meat and cheese provider in your city. Failing that though, you can get a decent selection of salamis, cured meats, cheeses, and pates from the deli section of most major grocery stores, especially Whole Foods and similar higher end stores.How to make a charcuterie board
First off, don’t feel like you have to go crazy. I love a simple charcuterie board. You can do just one meat and one cheese and have some mustard and good bread and call it a day. Or you could also go crazy and make a huge impressive platter! You do you. You are after all, the star of your meat and cheese bar.- Grab your board. Just in case you’re wondering, do you need a fancy marble and wood charcuterie board? The answer is nope, you can use any old cutting board or plate you have at home! In these photos we used a baking sheet.
- Little bowls. Put down a couple of small bowls for things like olives, rillettes, mustards, jams, dips, nuts, anything that you don’t want spreading all over the board. The bowls add height to your board and also give you more space because you can lean/stack things against them. How many bowls depends on the size of your board or plate.
- Meats and cheeses. After the bowls are on the platter, add the sliced meats, either in neat rows or in a organic pile. Add the cheese. While the exact combination is up to you, a little further below we have suggested amounts, varieties, and mixes.
- Breads and crackers. Stack or lay out the carbs in little piles, keeping the crackers with the crackers and the breads with the breads.
- Spreads. We like to use a couple of different mustards (usually 1 English and 1 stone ground French) as well as whatever jelly we have sitting around.
- Fruit and garnish. Add some seasonal fruit and herbs for color and freshness! In the photos we use a little trick we learned from Cassia in Santa Monica: pairing charcuterie with Vietnamese herbs. It's genius!
How much charcuterie per person?
It’s nice to get a mix of meats and cheeses but the ratio is up to you! We base everything on a minimum order of 2oz.- For an appetizer, get 2 different meats/cheeses per person (4oz total per person)
- As a main, get 4 different meats/cheeses per person (8oz total per person).
What to put on a charcuterie board?
If you want to go all out and make the perfect charcuterie board, this is our formula:- Something machine-sliced: These are your cured meats like prosciutto, sliced thin for a salty, savory hit. Since you probably don't have a meat slicer, if they don't already come sliced, get these from the deli and ask them to slice them as thin as they recommend (different meats require different thicknesses).
- Something hand-sliced: These are the cured meats that you want with a little bit of a heartier/heftier bite, sausages and the like that you can slice yourself at home.
- Something spreadable: These are the squishy spreadable things that add a bit of fat and are smooth and rich on the tongue. We like to go for a couple pâtés or terrines, and always add a small scoop of rillettes too.
- Cheese. Not all charcuterie boards include cheese, but the best ones do, in my opinion! You can just add one as an accent or do a combination that highlight contrasting flavors and textures. We like to go about 70/30 meats vs cheese, usually one brie and one harder cheese like gouda (more on this below).
- Carbs. Carbs are the base upon which your (probably pretty expensive) meats and cheeses are enjoyed. Crusty bread, untoasted and toasted, crisp rye crackers, homemade sourdough crackers, water crackers - the list goes on. While the point of the carbs on a charcuterie board is a blank canvas for the flavors of the meats and cheeses, a really good selection of crusty toasted baguettes and crispy crunchy crackers can turn an ordinary grocery store meat and cheese board into something extraordinary.
- Bright Notes. These are your fruits, olives, mustards, pickles, herbs, and jellies. They shouldn't be an afterthought, actually, they should be the star of the show! These guys are what people really find themselves enjoying after the first couple of bites, because they offset the richness of the meats and cheeses with complex flavors and mix-and-match combinations. We like to go crazy with different mustards and always include some nice cornichons and olives.
Best cured meats
These are our favorites:- Soppressata: a dry Italian salami made from pork that comes in different flavors like black pepper or spicy. Salty, rich, and flavorful. You can get this sliced thin at the deli or cut slightly thicker slices at home.
- Saucisson sec: a thick dry cured French sausage usually made from pork, saucisson sec is similar to salami or summer sausage. It’s meaty, mild, and comes in a variety of flavors like red wine or garlic. You can get this sliced thin at the deli or cut slightly thicker slices at home.
- Calabrese: a spicy cured pork sausage from Calabria, Italy. Bright red, rich, and robust. You can get this sliced thin at the deli or cut slightly thicker slices at home.
- Mortadella: a large Italian pork sausage studded with small cubes of pork fat, whole black pepper, and optionally pistachios or olives. Mortadella is soft and smooth and silky. It might remind you of baloney, but it’s nothing like baloney. Get this sliced thin.
- Prosciutto: By now everyone and their grandma knows prosciutto and it’s no wonder why, it’s salty, rich, and just melts in your mouth. What’s not to love about thinly sliced cured ham?! Get this sliced thin at the deli.
- Jamon (Serrano and Iberico): The Spanish version of dry cured ham. Sweet, nutty, and earthy, this delicate ham is cured longer than prosciutto and has a deeper, stronger flavor. Serrano is the more common jamon and Iberico is the more specialty, made from black Iberian pigs. Get this sliced thin at the deli.
- Bresaloa: Air dry salted lean beef that’s been aged, made famous in the Lombardy region of Italy. It’s kind of like a beefy version of prosciutto, but less fatty and milder in flavor. Get it sliced thin at the deli.
- Finocchiona: a Tuscan salami on the sweeter side flecked with fennel seeds. This is one of my favorites!
Best pâtés, terrines, and rillettes
Head to a charcutier (a place where they make in house charcuterie) for a selection of spreadables to up your charcuterie game. Spreadable things are incredibly addictive, especially on crackers and bread.- Pâté: The most decadent and delicious of the pâté is foie gras but a more accessible pâté is probably chicken liver pâté or chicken liver mousse. It’s light, rich, and silky smooth. We also like a simple peppercorn pâté or a rustic country style pâté de campagne.
- Terrine: Terrine mostly refers to the loaf-shaped pan that they’re cooked in. Sometimes they’re layered or baked in puff pastry. We love duck and pistachio terrine for its simple heartiness and amazing time tested flavors.
- Rillettes: Rillettes are meat or fish that’s been chopped or shredded and confit/cooked own fat to make a thick spread. If you’ve had potted whitefish dip or potted salmon, it was probably a rillette. Rillettes are heartier than pâté and incredibly satisfying. Our favorite is pork rillettes.
Best cheeses
The best cheese is a cheese you like! That being said, if you want to expand your cheese horizons, these are some of our favorites that aren’t the usual cheddar, brie, and mozzarella. Epoisses de Bourgongne or Saint-Andre: These two are creamy, soft cheeses perfect for spreading. The Epoisses has a pretty pungent smell, but when you taste it, it’s creamy, salty, and sweet. At room temp it’s absolutely luscious. If you’re against stinky cheeses, you should go for the Saint Andre, a triple cream which is dense, buttery, and rich. It’s like brie, but better! Kaasaggio Robusto Gouda: It’s our new favorite cheese obsession. Flavor wise, it’s a blend of parmesan and gouda, with the salty nuttiness of Parmesan and the sweet butterscotch-y flavors of an aged gouda. It has a an intense amount of those addictive little crunchy crystals that are only found in really good aged cheese. Castello Double Creme Blue: I’m not a huge fan of blue cheese, but I have a deep respect for their sharp, deep flavors. I’m slowly liking blue cheese more and more and if you want a gateway blue cheese, this is the one to try. Castello is a Danish cheese, tender and mild compared to other blues while still having a delicate bitterness with a creamy finish. Kind of addictive to be honest! Saint Paulin: This is one of those cheeses that everyone will love. It’s a semi-firm pressed cheese that has a pleasing edible yellow-orange rind and a velvety buttery smooth interior. It’s very similar to a harvarti – super subtle with a hint of sweetness and the taste of fresh milk.Bread and crackers
We like having a variety of breads and crunchy things too.- I’m really into these rye crisps
- and these crispy crackers
- Mike loves toasted baguettes that we get sliced at our local bakery, then put on a baking sheet at home and toast all at once at 350ºF for 15 minutes.
- Of course if you want to go all out, homemade sourdough crackers are the way to go!
What are the best garnishes for a charcuterie board?
- Spreads: jams and honey add a touch of sweetness. They’re perfect with cheese!
- Nuts: walnuts, macadamias, marcona almonds, pecans, pistachios, all the nuts!
- Seeds: this sounds funny, but seeds go exceptionally well sprinkled onto cheese, especially soft ones like goat cheese. Have little dishes of poppy seeds, toasted sesame seeds, toasted sunflower seeds, pepitas
- Olives: Pick your favorite olives! We like picholine (small green French olives), Nicoise (small black French olives), and Manzanilla (firm smoky green Spanish olives).
- Fruit: Any seasonal fruit will do, in the summer berries and stone fruits are nice and in the fall and winter things like pears and apples.
- Mustards: whole grain, dijon, spicy brown, honey mustard, English; mustards add heat and acidity.
- Pickles: cornichon (those cute little French pickles), picked onions or shallots, pickled vegetable such as beets, peppers, radishes, beans, etc.
What is charcuterie, anyway?
Charcuterie is the french term for prepared meat products like hams, sausages, terrines, and pâtés. While traditionally that was more or less it, these days a charcuterie board implies a big spread of cured meats, cheeses, fresh fruits, spreads, crackers, and breads. Part of the fun of charcuterie is that everything is prepared and all you have to do is pick out your favorites and make everything look pretty. It’s easy and delicious and can feel fancy or casual, but always luxurious. You can go from grocery store pâtés to local artisanal cheeses and everything in between.Why are charcuterie boards so popular?
I think it’s because people like choice and abundance. Place a charcuterie board down in front of people and they get to pick and choose what they like, making flavor combinations appeal to them – kind of like a food version of choose-your-own-adventure. With one or two items, it’s a low key appetizer or light meal, perfect for pairing with drinks. If you go all out, it’s also super easy for fancy entertaining or for a casual date night in. We've used charcuterie boards as easy-yet-fancy appetizers for dinner parties that can be quickly thrown together more times than I can remember. You don’t have to go fancy though. Sometimes the best thing to do is to stick to one kind of meat, a really good mustard, and some olives. Keep it simple, keep it crazy, keep it you. It's delicious no matter how you slice it (pun intended).How do you say charcuterie?
It’s shar-CUTE-er-ee! Go forth and meat and cheese with abandon! xoxo stephThe Ultimate Charcuterie Board
Our ultimate version of a classic charcuterie board.
- 2 oz prosciutto (thinly sliced at the deli)
- 2 oz soppressata (thinly sliced at the deli)
- 2 oz finocchiona (thinly sliced at the deli)
- 2 oz duck with truffles pâté
- 2 oz pork rillettes
- 2 oz double creme brie (or bleu)
- 2 oz Kaasaggio Robusto Gouda
- 2 oz boursin (high-low baby)
- 1 baguette (1/3" sliced at the bakery)
- 1/2 package crackers (see blog for recommendations)
- 1/4 cup stone ground mustard
- 1/4 cup English mustard
- 1/2 cup olives (see blog for recommendations)
- 1/4 cup cornichons
- 1 fruit (thinly sliced, seasonal)
Toast your baguettes in a 350ºF oven for 15 minutes. Meanwhile, slice your cheeses and salamis, if needed
Arrange your mustards, olives, cornichons, and other spreads in small dishes.
Smear your pâté, rillettes, and soft cheeses along the edges of deep plates.
Remove baguette from oven and arrange in a large bowl or two. In a separate bowl, snap into small pieces (if homemade) and arrange your crackers.
Serve immediately with tongs, forks, or other serving utensils.
As a main, either double the volume or variety of the proteins.
The meats and cheeses are just a base, you should add jams, jellies, herbs, and other fruits or veggies according to your taste.
Estimated nutrition is a good representation but will be highly variable based on your selections.

I Am... Air Fryer Eggs
I’m forever looking for ways to improve my egg game and I think these air fryer eggs just did it. I love eggs. Fried, boiled, jammy, sous voided, scrambled, give me all the eggs, all the time. I recently came across an amazing way to make boiled eggs, no water required. Inspired by people who hard boil bake their eggs, I thought to myself, why not air fry? I haven’t tried hard boiling eggs in the oven, but an air fryer is like a mini oven and you don’t need to preheat it so I figured it was a win. My life is changed. No more waiting for water to boil and the eggs crack perfectly every time. No water, just eggs and an air fryer. We use our air fryer for so many things: fried chicken, tacos, steak, bacon, I guess it was just a matter of time until we used it for eggs too. It couldn’t be simpler, just put your eggs straight from the fridge into the air fryer basket, set it, then forget it. When the air fryer timer goes off, plunge the eggs into an ice bath or cold water, peel and you’re in egg heaven. I’ve done them at all different times and I love them most at medium, which is what I like to use in egg salad and as a snack.
How to make air fryer eggs
- Place cold eggs into the air fryer basket.
- Cook them for 9-15 minutes depending on your yolk preference at 250°F.
- Plunge immediately into cold water or an ice bath.
- Peel and enjoy.
How many eggs can I make in an air fryer?
As many as you want! You can make one, or up to 6. Just give the eggs a little bit of room between them so they have enough heat circulation so they’re evenly cooked.How do you like your eggs?
I like them all! Every doneness has a purpose. I love a softie egg with toast, jammy eggs to eat on their own, and hard boiled for making deviled eggs.How long to air fry eggs
- Soft boiled: For just set whites and a very runny yolk you need 9 minutes at 270°F.
- Medium boiled: For medium boiled eggs medium firm whites and a jammy yolk you need 10 minutes at 270°F.
- Hard boiled: For hard boiled eggs with firm whites and a fully set not chalky yolk you need 13 minutes at 270°F.
Tips
- Make sure you use eggs straight from the fridge so they cook evenly.
- Plunge the eggs in an ice bath to stop them from cooking.
- Crack them on the fat end then roll them around and peel.
Every air fryer is different
Be sure to experiment with cook times because each air fryer is a different size with a different wattage and even how many eggs you place in the basket will affect the cook time. Give one or two eggs a try at first, hone in the timing, then go to town and meal prep ALL THE EGGS.Don't have an air fryer but have an instant pot?
Try this recipe!How to eat boiled eggs
Boiled eggs are the perfect snack. Full of protein, filling, flavorful, quick and easy. I like them with:- salt and freshly ground pepper
- topped with freshly chopped herbs
- drizzled with chili oil
- topped with everything bagel spice
- topped with pesto
- sprinkled with bacon bits
- sprinkled with furikake
Recipes that use boiled eggs
- ultra creamy deviled eggs
- egg and yogurt breakfast bowl
- oven roasted steak with chimichurri eggs
- ramen eggs
- egg salad sandwiches or this style too
Air fryer eggs
Perfect eggs every time in the air fryer, faster than boiling because you don't need to wait for the water.
- air fryer
- eggs (as many as needed)
Place the eggs, straight from the fridge into the air fryer basket, leaving space between the eggs. Air fry at 270°F for 9-13 minutes depending on how you want your yolks done.
Soft - 9 minutes
Jammy - 10 minutes
Medium - 11 minutes
Hard - 13 minutes
When the time is up, plunge into cold water or an ice bath to stop the cooking, then when cool enough to handle, peel and enjoy.
Estimated nutrition based on 1 large egg.

I Am... How to make Ebi Fry
Ebi fry (ebi furai in Japanese) aka panko shrimp is a beloved dish in Japan and in my opinion, is the cutest shrimp dish of them all. Ebi fry is often served in bento or with teishoku meal sets. It’s a favorite of children and adults alike. So much so that there is a character much like Hello Kitty but a deep fried shrimp called Ebi Fry no Shippo. Panko shrimp is delicious and cute! That extra crispy crunchy crust coating plump and juicy shrimp is sure to bring a smile to your face. Ebi fry might be my ultimate fried shrimp. I love the delicate flavor and texture of shrimp tempura but there’s something about that thick and crunchy bread coat that really does it for me. I guess I’m just the kind of person who loves deep fried foods like chicken strips and fries. Whenever I see ebi shrimp on the menu, I have to get it. It’s the perfect textural counter point to fluffy white rice and it’s AMAZING with Japanese curry rice. I love eating it on its own too, with kewpie mayo, Japanese tartar sauce or even Japanese egg salad.
What is Ebi Fry/Panko shrimp
Ebi fry (エビフライ) aka panko shrimp is shrimp that has been coated in flour, egg, then panko, and then deep fried. It’s a crispy breaded shrimp that is a super popular main dish served with rice or bento component. It’s similar to katsu, but shrimp.How to make ebi fry
- Clean. Peel the shells off the shrimp, devein, and clean the tails. More on that below.
- Straighten. Gently cut about a quarter of the way through the belly of the shrimp and push down to flatten it out so it fries up nice and straight.
- Bread. Dip the shrimp into flour, egg, panko, then again into the flour, egg, and panko so you get a double coating.
- Deep fry. Add the coated shrimp to hot oil and cook, flipping as needed until crispy and golden brown.
- Enjoy. Enjoy as is, dipped in sauce, or as part of a rice plate or bento!
How to clean shrimp
- Peel the shell off, leaving the tail attached.
- Devein the shrimp by carefully slicing through with a small sharp knife to the vein and removing.
- Cut the tail of the shrimp on a diagonal.
- Squish out any water left in the tail with the edge of the knife.
How to straighten shrimp
On the bottom side of the shrimp (it’s belly) lightly score three to four times, at even intervals. Turn the shrimp so it’s belly down and press the shrimp onto your cutting board, flattening it out into a long, straight line.Panko shrimp ingredients
- shrimp - I like to use large shrimp, at lease 16-20 size. The larger size shrimp stay juicer and are more impressive when you serve them.
- flour - a little bit of flour helps the egg stick to the shrimp so you can get a nice even coat.
- egg - it’s what allows the panko to stick to the shrimp and gives you an extra crispy coat.
- panko - Japanese breadcrumbs that deep fry up to a delicious crispy coat. More on them below.
- oil - choose a neutral high heat oil like rice bran, canola, or grapeseed.
What is panko?
Panko are Japanese breadcrumbs. They’re vastly different from regular breadcrumbs – fluffier, larger, and made from crustless white bread. The irregular flakes of panko are what make katsu so crunchy. They’re dryer, flakier, and absorb less oil. Panko is actually super interesting and a big deal in Japan. Dedicated panko factories bake bread to different panko specifications. You can get fresh panko, dried panko, and different sized flakes. They even have different ways of baking the bread, either oven baked or electrically baked using currents. A lot of restaurants get fresh panko delivered to them daily.Where to buy panko
Panko is sold in most grocery stores in the Asian aisle but it’s cheaper to buy it at an Asian grocery store. You can also get it online. I prefer Japanese brands of panko, sometimes you’ll see something labeled panko but it looks like regular breadcrumbs. Take a look at the package and buy panko with large, irregular, shards that are flat. You can even make your own!How to set up a panko breading station:
Just like how you bread chicken you need flour, egg, and panko.- Set up three shallow dishes that are able to fit the shrimp.
- Put flour in one dish, lightly beaten egg in the next dish, and panko in the last dish.
- Dip the shrimp in the flour, coating all sides. Shake off the excess flour and place it in the egg.
- Use your other hand to turn the shrimp in the egg, making sure it’s coated all over.
- Shake off any excess egg and place the shrimp in the panko. Repeat the steps to double coat the shrimp, being sure to gently adhere the panko all over. Shake off the excess panko and you’re ready to cook!
How to deep fry panko shrimp
Heat up at least 2 inches of high heat oil in a deep, heavy bottomed pan over medium high heat until it reaches 350°F or a pair of unchoated wooden chopsticks bubbles gently when you put them in the hot oil. Carefully add the panko shrimp to the hot oil and cook, flipping occasionally until golden brown and cooked through, about 2-3 minutes. Drain on a wire rack.How to air fry panko shrimp
Before coating the shrimp in the panko, be sure to toast it to give it some color. Add the panko to a dry pan and toast over medium heat, stirring often. Drizzle on 1 tbsp neutral oil and stir until golden and toasty then remove from the pan immediately. Coat the shrimp as per below then air fry in an oiled air fryer basket at 360°F until golden brown and cooked through, about 10 minutes, flipping half way.How to bake panko shrimp
Before coating the shrimp in the panko, be sure to toast it to give it some color. Add the panko to a dry pan and toast over medium heat, stirring often. Drizzle on 1 tbsp neutral oil and stir until golden and toasty then remove from the pan immediately. Coat the shrimp as per below then bake on a parchment paper lined baking sheet in a 425°F oven for 12 minutes.Japanese tartar sauce
Japanese tartar sauce is a little different from the regular tartar sauce you’ve had because it has eggs in it! It has all the same tartar sauce ingredients you love like mayonnaise, pickles, and herbs, but it is extra rich because of the diced egg. To make Japanese tartar sauce, mix together 1/4 cup kewpie mayo, 2 finely diced hard boiled eggs, 2 tbsp finely diced pickle, 2 tbsp finely diced onion, finely chopped parsley, and the juice of 1/2 a lemon. Taste and season with salt and pepper.How to make an ebi fry bento
Ebi fry teishoku or set meals are a super popular choice in Japan. You usually get 2 to giant plump shrimp, tartar sauce, rice, soup, salad, pickles, and some small side dishes. Think of it like a panko shrimp bento. They make me SO happy. I just love the crunchy of the shrimp and the creaminess of the tartare sauce and the rice and cabbage go so well with everything. Seriously so good. Do yourself a favor and make a panko shrimp bento! You’ll need:- rice: a bowl of fluffy Japanese rice is the perfect accompaniment for crunchy, juicy shrimp.
- cabbage: thinly sliced cabbage is a must for panko fried things like panko shrimp, chicken katsu, or tonkatsu.
- cucumbers: some slices of cucumber to add some crunch and greenness.
- tomatoes: just a couple of cherry tomatoes for cuteness and a bit of sweet freshness.
- tartar sauce: see above for a Japanese take on tartar sauce. Sometimes I like to serve panko shrimp with Japanese egg salad as a condiment too.
- optional: Japanese pickles or small side dishes like miso soup, tamagoyaki, a couple of gyoza, or edamame.
Panko Shrimp
This extra crispy plump and juicy shrimp is sure to bring a smile to your face.
- 12 prawns (extra large preferred, see notes)
- 1/2 cup all purpose flour
- 2 eggs (lightly beaten)
- 2 cups panko
- 3 cups neutral oil (high heat for deep frying, see notes)
To Serve
- 1 cabbage (shredded)
- 1 cucumber (sliced)
- 1 cup cherry tomatoes (halved)
- 1 cup tartar sauce (Japanese preferred, see notes)
Peel the shell off the prawns, leaving the tail on. Devein and make three shallow cuts on the bottom of the prawn to straighten it out. Pat dry with paper towels then season generously with salt and pepper.
Dredge the prawns in flour, then egg, then back into flour, egg, and finally panko, pressing to adhere. Repeat the breading process so the shrimp are double coated.
Heat the oil to 350°F and when hot, add the prawns, 2-3 at a time and deep fry, 2-3 minutes, or until golden brown, flipping as needed. Drain on a wire rack.
Enjoy with cabbage, cucumbers, tomatoes, and Japanese tartar sauce.
Buy the largest prawns you can find, look for a number like "16-20" or lower on the package.
High heat oils include refined peanut oil, canola oil, grapeseed oil, and sunflower/safflower oils.
To make Japanese tartar sauce: combine 1/4 cup kewpie mayo, 2 finely diced hard boiled eggs, 2 tbsp finely diced pickle, 2 tbsp finely diced onion, finely chopped parsley, and the juice of 1/2 a lemon. Taste and season with salt and pepper.

I Am... Hot Cross Buns
Making homemade hot cross buns is an accomplishment, one that you can do, easier than you think! These deliciously cinnamon spiced yeasted buns are buttery and plush, full of dried cherries and melty white chocolate. The perfect twist on an Easter treat.
Quick and Easy
Hot cross buns, hot cross buns, one a penny two a penny hot cross buns! I’m sure you know the song - it always always gets stuck in my head around Easter. There’s a local bakery chain in town that specializes in hot cross buns and back in the day when samples were a thing, I would always choose the hot cross bun sample when we were buying bread. Their buns are so popular that they sell them year round and I love them so much. Of course it’s super simple to head to the bakery to buy hot cross buns (or even order them online) but this year I thought I’d bake my own, based off of my favorite soft and fluffy dinner roll recipe. There’s something so satisfying about the smell of bread filling up the kitchen. The sweet sent of yeasted dough and cinnamon makes me feel super homey.What are hot cross buns?
Hot cross buns are an Easter classic. Little yeasted sweet buns with crosses on top date back to the 12th century and they were considered a treat marking the end of Lent, eaten on Good Friday. Nowadays, they are available year round, but are especially enjoyed around Easter.How to make hot cross buns
If you’ve made dinner rolls, you’re just one step away from making hot cross buns. Here’s how you do it:- Sprinkle yeast on to warm water and let foam.
- Mix together flour, sugar, cinnamon and salt in a bowl.
- Stir the yeast, along with egg, into the flour mix until everything comes together into a ball of dough.
- Add the butter to the dough and knead the dough until smooth.
- Add the dried cherries and chocolate then pop the dough into a lightly oiled bowl so it can proof for an hour.
- After the dough is puffy and proofed, tip it out onto a floured surface and divide into 9 balls, place in a pan, and let proof until doubled.
- Bake until golden then pipe on some chocolate crosses. Enjoy!
Hot cross buns ingredients
These buns have pretty standard pantry ingredients: yeast, bread flour, sugar, cinnamon, salt, egg, butter, dried cherries, and white chocolate chips.Bread flour
Bread flour is the key to fluffy, soft, and chewy buns. You might be tempted to just use all purpose, and well, you can do that, but if you use bread flour your rolls will be soft and fluffy with just the right amount of chew. Bread flour has a higher protein content than regular all purpose – the resulting dough has more gluten in it which helps the rolls stay soft and chewy.Yeast
This recipe uses active dry yeast which needs to be dissolved in a bit of liquid before using – in this case we’ll sprinkle it on to some warm water. If you have instant yeast, you can use it too, there won’t be much of a difference; your rolls might rise a bit faster, depending how warm your kitchen is.Dried cherries and white chocolate
Dried cherries add some sweet tartness that pairs exceptionally well with white chocolate and cinnamon. You can sub in your favorite dried fruits, more ideas below!How do hot cross buns taste?
Classically, hot cross buns are a soft, sweet, spiced yeasted bun usually made with dried fruit like raisins, sultanas, or currents. They’re soft, squishy, and not too sweet. Think of a slightly sweeter dinner roll studded with dried fruit. This particular bun is super soft and fluffy, scented with cinnamon and dotted with melty white chocolate and sweet dried cherries. The plush cinnamon buns remind me of cinnamon rolls, but not as sweet. They’re glazed with a bit of apricot jam for shine and finished with a melted white chocolate cross. If you like sweet dried cherries, caramelized white chocolate, soft and fluffy buttery buns, and cinnamon, you’ll love these hot cross buns!Variations
You can easily customize these buns with your favorite add-ins.- Classic: sultanas, raisins or currents
- Orange cranberry: dried cranberries and orange zest
- Blueberry dark chocolate: dried blueberries and dark chocolate
- Triple chocolate: a mix of white, dark, and milk chocolate
- Apple cinnamon: dried apples and extra cinnamon
- Strawberry matcha: dried strawberries, switch out the cinnamon for matcha
If you love soft and fluffy bread, try these recipes:
- the fluffiest cinnamon rolls, full of sweet brown sugar and cinnamon
- extra cheesy earthquake bread with a hidden cheesy center
- pull apart monkey bread with a sweet glaze
- cheesy garlic knots
- the best bread you could ever make
Hot Cross Buns
These hot cross buns studded with plump dried cherries and luscious melty chunks of white chocolate are incredibly soft, fluffy, and delicious.
- 8x8 inch pan
- 120 g water (warm, ~1/2 cup)
- 1 tsp active dry yeast
- 250 g bread flour (~1 3/4 cups)
- 30 g sugar (~2 tbsp)
- 5 g cinnamon (~2 tsp)
- 1/4 tsp salt
- 1/2 large egg (lightly beaten, see notes)
- 25 g butter (room temp, ~2tbsp)
- 1/2 cup dried cherries
- 1/2 cup white chocolate (chopped, plus extra for crosses)
- 1 tbsp apricot jam
Sprinkle the yeast onto the warm water and let proof. Meanwhile, in the bowl of your mixer, stir together the flour, sugar, cinnamon, and salt.
Whisk the egg into the foamy yeast mixture, then add the mix to the dry ingredients. Use a wooden spoon to stir together until everything comes into a ball. Switch to a dough hook and knead on low until the dough pulls away cleanly from the sides.
Add the room temperature butter and continue to knead on medium-low, for about 10 minutes, until the dough reaches the windowpane stage – take a piece of dough about the size of a golf ball and stretch it out between your fingers and thumbs. If you can stretch it without the dough breaking and you can see through the stretched dough, you’re good to go. If the dough doesn’t windowpane, knead a bit longer. Knead in the cherries and white chocolate.
Transfer the dough to a clean bowl and cover with plastic wrap. Place in a warm spot and let rise until doubled, 1-2 hours; dough that has mix-ins takes longer to rise.
Take the dough and tip it out onto a lightly floured surface. Punch down lightly then divide into 9 equal portions. If you want to be precise, use your kitchen scale to see how much your dough weighs, then divide by 9. Shape the portions of dough by bring the edges towards the center and tucking into balls. Lightly grease a 8×8 baking pan and evenly space the buns. Cover and let rise in a warm spot for 1 hour.
Heat the oven to 350°F. Bake for 15 minutes, or until golden brown. Let cool slightly. Stir the apricot jam with 2 teaspoons of hot water and gently brush on top of the buns. Pipe on crosses with melted white chocolate and enjoy!
For 1/2 large egg, whisk a whole egg in a small bowl, then measure out half of the weight or just use 1 1/2 tablespoons of the whisked egg.

I Am... Corn Cheese
Corn cheese is the ultimate snack or side for your late summer BBQ. Here’s why you need to make corn cheese today:
A piping hot skillet served at the table with steam still wafting up is the best thing. I love how it can be a snack, side, or even a main dish.
If you’ve been to Korean BBQ or out for Korean food and drinks, I’m sure you’ve come across Korean corn cheese. That gloriously golden, cheesy, stringy, hot, and delicious mess of sweet corn and cheese served in a skillet or a little special dish around the grill. It’s sweet, salty, creamy, gooey, and SO delicious. And the best part is that it is the easiest side dish to put together.What is corn cheese 콘치즈?
Corn cheese is the best KBBQ side dish. I love melty cheese and I love corn and the combination is just out of this world. Essentially it’s a combination of canned corn, butter, mayo, sugar, and cheese baked up until golden and warm. It’s a classic Korean anju or drinking food. You just scoop it out with a spoon and pop the deliciousness into your mouth. It’s like fondue but with bits of sweet corn in it: sweet, savory, and cheesy.Why does Korean corn cheese taste so good?
The combination of sweet kernels of corn, the creaminess of mayo, and the meltiness of the cheese combines together into a sweet and savory dish that is out of this world. It has a balance of flavors, textural contrast, and it’s fun to make and eat. Don’t sleep on corn cheese, it’s amazing!
How to make corn cheese
- Gather your ingredients. Drain your corn, melt the butter, measure out the mayo and sugar.
- Stir everything together. In a bowl, mix everything together then taste and season with salt and pepper.
- Bake. Top with some extra cheese and bake until bubbly and golden.
- Enjoy!
Corn cheese ingredients
- Corn - I like to use canned corn. It’s super sweet and it’s what they use in restaurants. You can also use fresh or frozen corn, more on that below.
- Butter - Butter and corn just go together.
- Mayo - The best mayo to use is Kewpie mayo, it has so much flavor and deliciousness.
- Sugar - A little bit of sugar highlights the sweet and savory combination of corn and cheese.
- Cheese - Melty mozzarella is the best cheese to use but you can use any melty cheese, it’ll just change the flavor. Mozzarella is good because it’s super mild and highlights the flavor of the corn.
How to eat
This is usually served as a side dish or appetizer or alongside alcohol. If you’re doing a whole Korean BBQ party, you can serve it along with all the other banchan. Or, serve it on its own with some ice cold beer or soju as the best drinking snack.What kind of corn
Usually they use canned corn in Korea, but you can use fresh corn too. If you’re using fresh in season corn, simply cut it off the cob and sauté it for a bit longer in the butter. You can also use frozen corn as well.What kind of cheese
Mozzarella is the meltiest, stretchiest cheese and is what is usually used but you can go for any melty cheese: colby, harvarti, swiss, fontina, monterey jack, provolone, American. Imagine corn cheese with melty cheese hot from the oven and then burrata torn on top?! The creaminess!Variations
This is usually a pretty simple dish, but the beauty of it is that you can add in so many things! Try:- diced onions
- diced chilis
- crispy bacon
- bulgogi
- tteokbokki
- Korean fried chicken
Frequently Asked Questions
What kind of corn?
I like to use canned corn because it’s easy and it tastes good. Canned corn has all the nutrients of fresh, it’s picked at the height of ripeness, and it’s actually cheaper than fresh corn. Frozen corn works too, just be sure to defrost it and drain it well. After canned and frozen comes fresh, but you have to peel the husks and cut it off the cob. I feel like fresh corn is best enjoyed grilled or on the cob.
Do I need a skillet?
Nope, you can just any oven safe dish as long as it can withstand the heat. I like to use a skillet because it retains the heat longer and keeps the cheese hot and melty, but any casserole dish will work great.
Where do they serve corn cheese?
They serve corn cheese at most Korean BBQ places and also at drinking places and bars. It’s considered anju, which means food you eat with alcohol. Anju foods are usually delicious addictive foods that pair well with soju and beer.
I hope you have some soon. It’s truly comforting and will make you feel cozy and good inside! xoxo stephCorn Cheese
a gloriously golden, cheesy, hot, and delicious mess of sweet corn and cheese.
- 15 oz corn (drained well, 1 can )
- 1/4 cup mayo (Kewpie preferred)
- 1 tbsp butter (melted)
- 1 tsp sugar
- 1/2 cup mozzarella cheese (shredded)
Preheat the oven to 400°F. In a bowl, mix together the drained corn, mayo, melted butter, sugar, and half of the cheese. If desired, stir in 1/4 cup sliced green onions. Taste and season with salt and pepper.
Scoop the corn mix into an ovenproof dish or skillet and top with the remaining cheese.
Bake in the oven for 10 minutes or until the cheese is melty. Broil on high for 1-2 minutes until the top is toasty and brown. Remove and enjoy!

I Am... Taco Chili
Super warming, filling, and cozy: taco chili is one of the easiest, coziest dinner you can make. If you love the flavors of tacos and the cozy spoonability of chili, you are going to fall in love with taco chili. This taco chili recipe is incredibly easy to make and the flavor pay off is huge. Taco chili is perfect for a quick weeknight dinner, a weekend lunch, and is always a winner during game day party season (it's the playoffs soon!). Taco chili is what would happen if tortilla soup and chili had a baby. All the flavors of taco soup with the heartiness of chili. It’s truly one of our go-to meals.
How to make taco chili
- Sauté - Start off by cooking ground beef until it’s crumbled and browned. Add the onions, peppers, and garlic, then cook until aromatic. When everything smells amazing, stir in the taco and ranch seasoning.
- Simmer - Simmer everything together develop the flavors and thicken. You can simmer on the stovetop, in a slow cooker, or pressure cook in an Instant Pot.
- Top - Once everything comes together into a thick and hearty chili, it’s time to serve by finishing off with a dollop of sour cream, shredded cheese, and cilantro. Bonus points if you add some Fritos!
Taco chili ingredients
- ground beef - go for lean ground beef, ground chicken, or ground turkey. It’s up to you! We almost always use lean ground beef.
- aromatics - a diced onion, green bell pepper, and plenty of garlic add aroma and flavor.
- seasoning - taco chili gets its seasonings from taco and ranch seasoning. You can buy the packets at the store (if you do, go for low sodium so you can adjust the salt to taste) or you can go homemade. If you’re doing homemade, you’ll need 2 tbsp of each seasoning mix.
- beans - there are two cans of beans in this chili to bulk it up, add protein, and nutrients. A can of refried beans adds creamy thickness and rinsed and drained pinto beans add texture.
- diced green chilis - this little can of chilis adds a mild and smoky flavor to your chili. You can choose between mild and hot, so pick according to your spice preference.
- tomatoes - we’re going to use a mix of fire roasted tomatoes and crushed tomatoes to make up the bulk of this chili. The fire roasted tomatoes add a huge amount of smoky flavor and the crushed tomatoes cook down into a thick, hearty base. If you have tomato sauce or regular chopped tomatoes on hand, you can use those instead.
Why this taco chili
The reason I love (love love) this version because of the ranch seasoning (either homemade or store bought) and a can of refried beans. The ranch seasoning adds a tangy you-can’t-quite-figure-it-out-but-can’t-stop-eating-it flavor. The hint of tanginess from the buttermilk powder in ranch really makes this chili addictive. The refried beans, while not traditional in chili, adds a creamy thickness that is spoonable and comforting.Stovetop taco chili instructions
For stove top chili, sauté the beef, onions, bell pepper, and garlic in a large, heavy bottomed pot. Stir in the taco and ranch seasoning, beans, green chilis, and both cans of tomatoes. Partially cover, bring to a boil, then lower to a simmer. Simmer for 1-2 hours, stirring occasionally, until thickened to your liking. Stir in extra water or chicken stock if it gets too dry. Taste, season, and serve.Slow cooker taco chili instructions
Use a skillet to brown the beef, onions, bell pepper, and garlic, then add to the crock pot insert. Stir in the taco and ranch seasoning, beans, green chilis, and both cans of tomatoes. Cook for 6-8 hours on low or 3-4 hours on high, stirring in extra water or chicken stock if it gets too dry. Taste, season, and serve.Instant Pot taco chili instructions
Sauté the beef, onions, bell pepper, and garlic in the Instant Pot insert over high then stir in the taco and ranch seasoning. Add the beans, green chilis, and both cans of tomatoes. Stir well, put the lid on and set the pressure to high and cook time to 30 minutes. Quick release when the cooking time is complete. Stir, taste, and season.Chili toppings
This chili is delicious on its own, but when you add toppings it’s magical. Customize to your heart’s content with a topping bar. Try:- shredded cheese
- sour cream
- chopped cilantro
- thinly sliced green onions
- avocados
- diced onions
- tortilla chips or Fritos
If you love taco chili, you will also love
Happy cozy bowl food season! xoxo stephTaco Chili
If tortilla soup and chili had a baby
- 1 tbsp neutral oil
- 1 lb ground beef (lean preferred)
- 1 medium onion (diced)
- 1 bell pepper (green preferred, seeded and diced)
- 4 cloves garlic (minced)
- 1 package taco seasoning (or 2 tbsp homemade, see notes)
- 1 package ranch seasoning (or 2 tbsp homemade, see notes)
- 15 oz pinto beans (rinsed and drained, optional)
- 16 oz refried beans
- 4 oz chopped green chiles
- 14.5 oz fire roasted tomatoes
- 15 oz crushed tomatoes (or tomato sauce)
In a large, heavy bottomed pot, heat up the oil over medium high heat. Add the ground beef and cook, breaking up, until no longer pink. Season with salt and pepper to taste. Drain off any excess fat, if needed.
Stir in the onion, bell pepper, and garlic. Cook for 2-3 minutes, stirring. When the vegetables are aromatic and slightly soft, stir in the taco and ranch seasoning.
Add the drained and rinsed beans,green chilis (with the juice), both cans of tomatoes, and 1 cup water. Stir everything to mix evenly, and bring to a boil over medium high.
Turn the heat down to low and simmer, with the occasional bubble popping up, partially covered. Simmer for 1-2 hours, stirring occasionally, until thickened to your liking. Finally, stir in the refried beans. Taste, season with salt and freshly ground pepper and enjoy!
If you’re using home made ranch seasoning and homemade taco seasoning, you’ll need 2 tablespoons of each.

Latest Comment
“Bananas and coffee seem like such a strange combination at first but it really is delicious! Agreed that when the banana...”Jerrica L on Banana CoffeePopular
 2015 Holiday Giveaway
  One-Pot Lemon Scallop Pea Spaghetti
  Beer Battered Onion Rings, Jalapeno Aioli
  2014 Holiday Gift Guide and a Giveaway
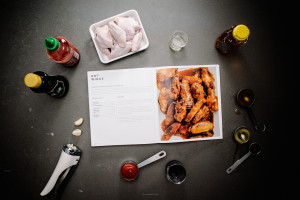 Easy Gourmet Hot Wings and a Giveaway!
  The Ultimate Veggie Sandwich
  Vegan(!) Creamy Corn Soup Recipe
 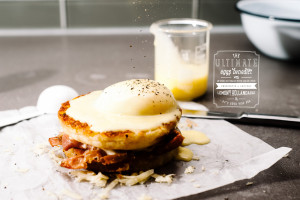 Sunday Brunch: Grilled Cheese Eggs Benny
