
Crispy, soft, pillowy, and bursting with butter, these Korean salt bread rolls are the best rolls you’ll ever make.
Do you ever just want a small amount of bread and are too lazy to go to the bakery to get it? Do you want to try making bread for the first time? If so, salt bread is for you.
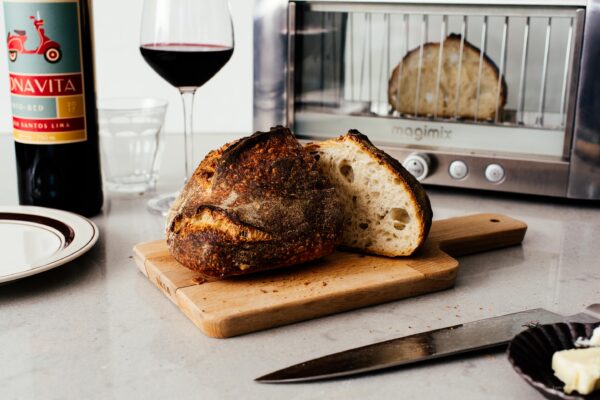
I’m obsessed with salt bread. When I see it, I want it. Salt bread that’s just out of the oven is amazing and if you’ve ever wandered past a salt bread bakery and seen a line up of eager bread lovers, I hope you joined it. You’ll never forget your first salt bread. The crispy crust, the soft and tender insides, the little melted pool of butter waiting for you like a secret. I know it sounds like hyperbole, but it really is just that good.

The trend is real
Salt bread is one of those things where once you’ve had one roll, you immediately want another. Coming out of Korea, via Japan, salt bread, or sogeum-ppang, is a super popular bakery bread roll that showcases the simple flavors of butter and salt.
What is salt bread?
The name is deceptively simple and descriptive. Salt bread is literally bread. With salt. Don’t discount its deliciousness though. The addictiveness of salt bread lies in the textural contrast: crunchy, crispy butter-fried bottoms with soft, light, pillowy tops. The centers tend to be hollow with a surprise pool of butter waiting for you. Essentially, salt bread is a crescent roll, if crescent rolls were actually good. The basic recipe for salt bread is a milk bread dough, cut into individual portions, rolled up around a frozen baton of butter. When the bread bakes, the butter melts and pools, creating a pool of butter for the bottom of bun.

Where is salt bread from?
The consensus on the origin of salt bread is that it’s a Korean take on the underrated Japanese shio-pan: a salty, buttery bun. Most people now tend to think of salt bread as an “Asian” bread, one that you can find at Asian bakeries like 85°C or dedicated salt bread bakeries. Thanks to the internet, even a humble bun can be viral and that’s where we are now, with people lining up in timed intervals for freshly baked salt bread in Seoul.
How to make salt bread
Now that you’re convinced, let’s make salt bread! If you’ve made bread before, you’ll find this relatively easy. You start out with a regular milk bread dough, then divide it and shape each piece into an extra-long tapered triangle. The essential step is adding a small rectangle of butter on the wide end of the dough and roll it up like a croissant. As the bread bakes, the butter melts slowly while the crust firms up, becoming thin and crisp.

Salt bread ingredients
- flour – bread flour is your friend and if you’re going to endeavor to make salt bread, do yourself a favor and get the bread flour. The difference between all-purpose and bread flour lies in the protein percentage. Bread flour has higher protein which allows it to develop more gluten, leading to a better network of elasticity. More gluten equals more chew and rise, which is what we want in bread.
- water and milk – all bread needs liquid and here we’re going for a mix of water and milk. You can go with all water if you don’t have milk, but the milk adds a nice delicate milky fragrance. If you love shokupan or other Asian breads, it’s probably because it’s milk bread.
- egg – the egg in the dough makes this an enriched dough, giving the salt bread more flavor as well as helping it bake up golden brown.
- yeast – all bread needs yeast! No special yeast needed here, just go for instant. If you have active dry, that’s okay too, it just might take longer for your bread to rise. We’re using instant yeast because its smaller granules means we don’t need to activate it in liquid and can just add it directly to the flour mix.
- sugar – a bit of sugar adds sweetness and helps with browning.
- butter – it wouldn’t be salt bread without butter. We’re doing two additions of butter, once in the dough so it stays soft and rich, and once when we shape the salt bread so we get that hollow centre. You’ll need softened butter and a straight from the fridge butter block. For the encased butter in the salt bread, you need to cut the butter into little rectangular batons about 3 inches by 1/2 inch and freeze them.
- salt – duh! Regular fine sea salt in the dough and a sprinkle of flaky salt on top to finish.

Step by step salt bread
Most bread recipes have you mix together all the dry ingredients, then mix in the wet ones, but after a bunch of experimenting, I’ve found that adding all the liquid ingredients to the bottom of your bowl, then putting the dry ingredients on top makes for a more even mix, especially when you’re using a stand mixer. By layering the dry ingredients on the wet, you don’t have to scrape the bowl down as much and you don’t end up with any dry bits at the bottom of the bowl. It’s my all time favorite trick for bread making! Here is the step by step:
1. Add
To the bowl of your stand mixer, add in this order: water, milk, egg, yeast, sugar, butter, flour, and salt.
2. Knead
Mix on low for 5 minutes with the dough hook, then turn up to medium and knead for 15 minutes minimum. You want to knead until you reach the windowpane stage: take a bit of dough in your hand and stretch it out, if you can stretch it out thin without it breaking, you’re good to go.
3. Proof
Gather all the dough into a ball and let it take a nap and puff up.
4. Cut
While the dough is sleeping, take a block of cold butter and cut it into little rectangles about 3 inches in length by 1/2 inch in height and width. Place the rectangles on a parchment paper lined baking sheet and pop them into the freezer to firm up.
5. Shape and proof again
When the dough has tripled, punch it down and divide it into 9 equal portions. Shape each portion into a 6 inch long teardrop/tadpole shape then cover and let rise for another 30 minutes. Once the 30 minutes is up, take a portion of dough and on a lightly floured surface, use a rolling pin to roll it out: you want a super long triangle that’s about 3 inches at the base and 1.5 feet in length. Take a rectangle of frozen butter and place it at the base. Tuck in the sides and then roll the butter up from the base to the tip. Place the shaped salt bread on a lined baking sheet, cover and shape the rest of the buns. Cover the salt breads and let them rise again until doubled, about 90 minutes.
6. Bake
When the buns are puffy and tall, use a spray bottle to spray them with water then sprinkle on some salt. Bake until golden and delicious then remove from the oven. Once you take them out, use a pastry brush and some of the butter that’s pooled on the tray to brush the tops to make them nice and shiny. Cool slightly on a wire rack and enjoy!

Other breads you can make if you loved this

That’s it!
Whew, I admit, this was a journey, what with three proofs and all, but it’s really worth it, I promise! Just take a day or afternoon to yourself, turn on some binge worthy show in the background and make some bread. It’s so wholesome and homey. I hope salt bread makes it to your table this holiday season. It truly is the BEST bread roll you can make and would be such an elite move as your bread course at any dinner. Happy baking!
-xoxo steph

Salt Bread
Ingredients
- 80 g water warm
- 40 g milk warm
- 57 g egg lightly whisked (1 egg is about 57g)
- 6 g instant yeast
- 24 g sugar
- 20 g butter room temp
- 270 g bread flour see notes
- 5 g salt
- 1/2 cup butter to fill
- flaky sea salt as desired, to finish
Instructions
- In the bowl of a stand mixer, add in the following order: water, milk, egg, yeast, sugar, butter, flour, and salt. Mix on low speed with the dough hook for 5 minutes until the dough comes together in a shaggy mass, scraping down the bowl as needed.

- Continue to knead on medium for 15 more minutes. Do the windowpane test: take a piece of dough about the size of a golf ball and stretch it out between your fingers and thumbs. If you can stretch it without the dough breaking, you’re good to go. The dough will be very soft and tacky - try to resist adding flour.
- With floured hands, shape into a ball and transfer to a clean lightly floured bowl, cover and let proof until about tripled in size, about 1 hour.
- While the dough is rising, cut the butter into batons, about 1.5 inches long and 1/2 inch tall and wide. Place the butter batons on parchment and place in the freezer until ready to use.
- When the dough is ready, punch down the dough and divide evenly into 9 portions. Working with one portion at a time, shape each piece into a 6 inch log. Taper one side of the log by using the palm of your hand and slight pressure to make a tadpole shape. After shaping, cover the pieces with a clean kitchen cloth and let rest for 30 minutes.
- Use a rolling pin to roll out each portion of dough into a long acute isosceles triangle, about 2 inches in width at the base and about 16 inches in length. Place the frozen butter on the wider end and roll it up, pinching the sides of the dough and encasing the butter entirely. Continue to roll up to the tip of the dough. Place the shaped salt breads on a parchment paper lined baking sheet, with the sharp point of the bun seam side down. Leave at least 3 inches between each bun. Cover and proof until doubled in size, about 90 minutes.
- Heat the oven to 375°F, on convection mode. When ready, use a kitchen spray bottle to evenly spray the surfaces of the buns. Sprinkle on a generous amount of flaky sea salt and bake for 15 minutes, or until baked through and golden brown — the bread should come to an internal temp of 189°F if you have an instant read thermometer.
- When the buns are ready, remove from the oven and immediately use the butter pooled on the tray to brush the tops of the rolls. Transfer to a wire rack to let cool slightly, then enjoy!


Lovely recipe! Thank you for sharing, easy steps to create this style bread at home!
thank you for sharing your recipe! i always thought that salt bread was a Korean “invention”.