
I Am... Boy Kibble, but Better
What is boy kibble and why is it everywhere? Boy kibble is all over the socials, though not mine because I’m not a boy. The algorithm genders you for real. Warning: this post is going to be pretty gendered too. That's just the nature of the topic. Mike recently asked me if I ever had boy kibble. I was like, “What the heck is boy kibble?” He told me that it was both trending right now and also was what he ate all through his university days. He went on to tell me that every man he knows has had boy kibble at some point in their lives. Google must have heard us, because after that conversation, I am seeing boy kibble everywhere. It’s viral on my algorithm now, so I had to make it. And of course, I had to bump it up a little with lao ga ma chili crisp and fried onions. Guys, doing it this way is actually so good.
What is boy kibble?
If you’re anything like me and have never heard of boy kibble, the internet says it's ground beef and rice, sometimes with a sauce, sometimes not, and sometimes with a ornamental bit of fat from, say, an avocado or eggs. It's a quick/fast meal-preppable high protein dish that checks a lot of boxes for boys, and maybe girls too. It's also a great dish to make if you ever felt the urge to cook for a boy in your life.How to make boy kibble
- Make some rice - cook your rice the way you like. We strictly cook rice on the stove in our household, but we also own this and it's amazing for low effort days.
- Fry up the ground beef - Add the ground beef to a non-stick skillet and season it generously with salt and pepper. There’s no need to add any extra fat. Break it up into pieces while cooking. When browned, stir in any spices or sauces you want to season with (see below) then remove from the stove.
- Serve - Scoop out some rice, top with beef, add garnishes (if any) and enjoy!
Boy kibble ingredients
- ground beef - this is the key for the protein, 1 pound of lean/regular ground beef. Don't get the extra lean stuff for this, the fat goes a long way to making this dish work.
- rice - Your fave rice. I think brown rice is the answer here, Mike disagrees. He's also the kind of person to buy only one kind of rice specifically from Hokkaido, so take that how you will. It’s basically a carb to go along with the ground beef.
- spices/seasonings - spice makes everything nice! Seasoning the ground beef is what’s going to make your boy kibble taste good. I had to ask Mike what the heck kind of seasonings boys like and he said “hot.” In his uni days, he used a packet from Nong Shim Shin Ramyun, which worked because he would make two packs of noodles at once and only need one packet, leaving many to spare.
- toppings - you can get a little creative here with various herbs, vegetables, cheese, nuts, etc. The purest boy kibbles don’t have toppings though, so don’t been too concerned with this.
How to season boy kibble
Plain ground beef gets boring fast. Man (or boy) cannot live on plain ground beef for long. Just like boy kibble is a low-effort high-reward kind of dish, here are some low-effort high-reward seasoning ideas to try:- chicken salt - Australians have invented a super umami forward spice mix made up of chicken bouillon powder, garlic powder, onion powder, white pepper, paprika, and salt. It’s really good when mixed in with ground meats.
- Taiwanese spice mix - Mike is obsessed with Taiwanese popcorn chicken and the seasoning they use on it: equal parts five spice, white pepper, black pepper, garlic powder, and salt.
- Vietnamese spice mix - if you’ve ever had Vietnamese fried chicken, you’ve probably tasted the addictive dusting that they use to season it. It’s a mix of white pepper, onion powder, garlic powder, salt, and a lil bit of sugar. It’s pure magic.
- soy sauce - there’s a world of soy sauce out there, make sure you’re using one that’s naturally brewed.
- sriracha - squeeze it on to taste for spice
- sambal oelek - for even more of a punchier, fresher spice
- chili crisp - the ultimate in crispy, crunchy, flavor
- fried onions/shallots - the kind you buy from the grocery store
- green onions - they feel healthy
- the seasoning packet from instant noodles - especially if you used the noodles to make Tiktok ramen, homemade buldak, mayo ramen, or army stew, you'll have a lot of these packets leftover and they're perfect for seasoning your kibble
The obsession with high protein
I feel like everyone (granted, including me) is obsessed with high protein these days. It’s kind of like hydration: remember when we were kids and no one carried water around? I’m aging myself here, but we were lucky if we all got to line up to drink from a questionably hygienic water fountain. Now, everyone is super-hydrated and soon, everyone will be super protein-ed. Protein is great. It keeps you full, it builds muscle, repairs tissues, bones, skin, and hair. Plus, it’s highly satisfying.Is boy kibble healthy?
Boy kibble is a high protein meal. In its white rice and ground beef iteration, it’s not particularly balanced nutritionally as white rice is probably one of the lowest nutrient carbs out there. As a girl, I'd love to get more nutrients to go along with the protein, although the boy in my life says that guys don't really consider this much. The best way to make boy kibble healthier is to swap out the white rice for brown rice or another grain. I love the nuttiness of brown rice, so for me, that’s a no brainer. If you want boy kibble to be even more balanced, add in a leafy green for some extra vitamins, nutrients, and fiber.Why is boy kibble trending?
It’s cheap, easy to make, and has an interesting name. Personally, I see the appeal. It's low effort for a lot of reward. If you’re eating for fuel and you don’t have a lot of time to prep ingredients or just aren’t interested, boy kibble is a really good meal prep recipe to have in your back pocket.Why is it called boy kibble?
Much like “girl dinner,” boy kibble is something old that’s been rebranded for the viral hit. Ground beef rice bowls aren't anything new, but you have to admit the name kinda hits. Happy kibble-ing, xoxo stephBoy Kibble
More than just rice and ground beef, but also, maybe just rice and ground beef
- 2 cups cooked rice (from 1 cup uncooked)
- 1 lb ground beef (regular or lean)
- 1 tbsp soy sauce (sweet soy sauce preferred)
- 1 tbsp sriracha
- 1 tbsp chili crisp (optional)
- 1 tbsp green onion (optional)
- 1 tbsp fried onions (optional)
Season the ground beef with salt and pepper, then lightly brown over medium high heat.
Add soy sauce and sriracha and continue to brown until cooked (or alternately use one of the other seasonings suggested in the post, or your fave seasoning).
Serve over rice.
Add garnishes if desired and enjoy hot!

I Am... Instant Pot Butter Chicken
Instant Pot butter chicken is savory and saucy and perfect with rice and naan for soaking up that delicious tomato-y buttery sauce. Butter chicken is one of those dishes that holds a special spot in my heart. It was one of Mike and I’s go-to dishes to make and eat when we first moved in together. I wasn’t much of a cook back then but we both had a love of Indian food and when we wanted to stay in and play house, we would buy jarred butter chicken sauce and heat up some chicken and naan and have a cute night in of “cooking” even though it was more like heating up. I’m much more adept at cooking now and Indian food is still one of those things we love to make and eat. Sometimes I’ll go all out and make a 24 hour dal and homemade naan but sometimes we’ll want something quick, easy, and flavorful without much fuss. For those days, it’s always Instant Pot butter chicken.
How to make Instant Pot butter chicken
- Add. To the insert of the Instant Pot, add a can of diced tomatoes along with the garlic, ginger, and spices. Stir everything together, then nestle in the chicken pieces, whole.
- Pressure cook. Pop the lid on and pressure cook on high for 10 minutes, then let the pressure naturally release for 10 minutes. Use a pair of tongs to take the chicken out and set it aside on a plate.
- Blend. Use an immersion blender and blend the sauce until smooth. Or, carefully transfer to a blender and blend. When the sauce is smooth, let it cool slightly, 3-5 minutes.
- Stir. Stir in the butter, cream, then an extra bit of garam masala. The sauce should be lovely and thick, able to coat the back of a spoon.
- Simmer. Chop up the chicken into bite size pieces and add it back to the sauce in the Instant Pot. Set the pot to sauté on low and heat the chicken through and let the sauce bubble.
- Serve. Enjoy with freshly chopped cilantro!
Ingredients
- Diced tomatoes. Tomatoes are the base of butter chicken. Please use diced tomatoes and not tomato paste or sauce - diced tomatoes tend to have a lot more liquid in them which is key for the Instant Pot. You’ll want to add in the ENTIRE can of diced tomatoes, juice and all.
- Garlic. Fresh garlic adds so much flavor. Use a garlic press for extra ease.
- Ginger. Fresh ginger adds heat and a bit of warming spice.
- Spices. Turmeric, cayenne pepper, ground paprika, cumin. These are spices that you’ll probably have hanging out in the pantry. Make sure they’re fresh!
- Garam masala. This is a mix of spices that varies greatly from spice mix to spice mix but usually contains: fennel, bay leaves, peppercorns, cloves, cinnamon, nutmeg, cardamom, cumin, coriander, and red chili powder. You can make your own, but you can also buy a mix at the store.
- Chicken. Chicken thighs are best because they cook up juicy and tender.
- Butter. It wouldn’t be butter chicken without butter. Go for unsalted so you can control the saltiness of your butter chicken.
- Heavy cream. Full fat whipping cream adds luxurious creaminess and mixes with the redness of the tomatoes to butter chicken its iconic golden color.
What if I don't have an instant pot anymore
It's 2026 and the instant pot craze is definitely over. If you still want to make this dish but don't have an instant pot, you can. All you need to do is simmer the chicken uncovered for 25-30 minutes rather than bringing it up to pressure, adding water as necessary to keep the liquid level consistent (about 1/2 cup for me). Follow the recipe as-is otherwise.What is butter chicken?
Butter chicken, known as murgh makhani, is a chicken curry made with tomatoes, spices, butter, and cream. It’s mild and creamy and so incredibly delicious. It’s a fairly new curry, developed by a restaurant group called Moti Mahal in India.Is this authentic butter chicken?
Yup, I would say so! This recipe is based off of Urvashi Pitre’s butter chicken and she has had a whole lifetime of making and eating it. Butter chicken is an Indian dish, very popular in North India and also widely eaten in South India.Urvashi Pitre’s Instant Pot butter chicken is perfection:
- it’s quick and easy, you basically put everything in the Instant Pot and turn it on
- it’s full of SO much flavor, creamy, just a touch of heat, and so delicious
- it’s authentic because Urvashi Pitre is essentially known as “the butter chicken lady”
Why does butter chicken taste so good?
Curry chicken is the ultimate comfort food and butter chicken is the most comforting curry because it’s warm and cozy, full of savory flavors that aren’t too spicy. The cream and tomatoes play off each other perfectly. The tomatoes add umami and acidity and the cream counters the acidity and adds a lovely texture and the added bonus of tempering the the heat of the spices.What is the difference between butter chicken and chicken tikka masala?
Butter chicken and chicken tikka masala are very similar with distinctly different flavors. Butter chicken is creamier and not as spicy. Chicken tikka masala is more tomato-y and doesn’t have as much dairy. They’re both delicious!Tips and tricks
- There no need to add extra water. Lots of water will cook out from the chicken so you don’t need to add extra water to the pot. If you do, your sauce will be thin.
- Let the sauce cool slightly before adding the butter and cream
- Finish with garam masala. Adding garam masala at the end makes all the difference. The garam masala added at the end adds a fresh burst of spice.
- If you’re getting a “burn warning” it’s probably because your diced tomatoes don’t have enough liquid. In this case, adding 1/4 cup chicken stock will help, but making sure you use a 14 ounce can of diced tomatoes, including all the liquid in the can, is best!
What to serve with butter chicken
Instant Pot Butter Chicken
Instant Pot butter chicken is savory and saucy and perfect with rice and naan.
- instant pot
- 14 oz diced tomatoes (1 can, undrained)
- 6 cloves garlic (minced)
- 1 tbsp ginger (minced)
- 1 tsp ground turmeric
- 1 tsp ground cayenne pepper
- 1 tsp smoked paprika
- 2 tsp garam masala
- 1 tsp ground cumin
- 1 tsp salt
- 1 lb chicken breast (boneless skinless, or thighs)
- 1/2 cup butter (cubed)
- 1/2 cup heavy cream
- 1/2 cup fresh cilantro (chopped)
Add the tomatoes, garlic, ginger, turmeric, cayenne, paprika, 1 teaspoon of garam masala, cumin, and salt in the Instant Pot. Stir throughly and nestle the chicken in.
Put the lid on and set the pressure to high for 10 minutes. Let the pressure release naturally for 10 minutes, then depressurize.
Carefully open the lid and remove the chicken. Use an immersion blender and blend the sauce until smooth. Alternately, carefully transfer to a blender and blend until smooth. Let cool slightly for 3-5 minutes then stir in the butter, cream, the last teaspoon of garam masala. The sauce should be thick enough to coat the back of a spoon.
Roughly chop the chicken then add back into the sauce. Set the Instant Pot to sauté on low, letting the chicken heat through. Top with the cilantro and enjoy with basmati and naan!
via The New Yorker

I Am... Easy Taiwanese Popcorn Chicken – air fried or baked
Taiwanese popcorn chicken nuggets are probably my favorite kind of fried chicken. They're a super crunchy, deeply savory, absolutely addictive snack, and probably one of the best things to ever come out of Taiwan. The other best thing being boba tea, of course. I have many, many fond memories of late nights at boba tea places, munching on fried chicken, Taiwanese scallion pancake beef rolls and drinking boba tea. There was even that one summer after college when my friends and I would hangout every night, playing mahjong into the wee hours of the morning. We were fueled by takeout bubble tea, beef rolls, Taiwanese popcorn chicken, and the pure joy of youth. We were all working in-between kind of jobs that we didn’t care about. All that mattered was our obsession with the clink of those green and white MJ tiles and snacks. The best snack of all being Taiwanese popcorn chicken of course!
What is Taiwanese popcorn chicken?
Taiwanese popcorn chicken is an addictive night market snack from Taiwan. Like all good street foods, it has made its way into the cultural fabric of Taiwan and is now served in restaurants in Taiwan and all over the world. Just as with other extra crunchy deep fried chickens (Korean fried chicken, chicken karaage), Taiwanese fried chicken is twice-deep fried: first in a low temperature oil to cook through, then in a high heat oil to add crunch. As it comes out of the fryer, it’s tossed in a salt and pepper seasoning and garnished with deep fried basil leaves. Oh, and of course I have to mention, these little nuggets also come supersized as GIANT Taiwanese crispy fried chicken cutlets. Those giant chicken steaks (sometimes bigger than your head!) are served either whole, in a bag, that you can hold onto and bite, or cut up into pieces that you can eat with skewers or chopsticks.Taiwanese fried chicken ingredients
- Chicken - the main ingredient. Chicken thighs are best for juiciness and flavor. Most Taiwanese fried chicken is made from boneless skinless thighs.
- Light Soy Sauce - We need just a bit of light soy sauce for umami and salt. There are a bunch of recipes on the internet that have you marinating in a bunch of regular soy sauce, but if you do your chicken will end up super dark after frying. We just want a hint of soy, not too much. Our favorite brands of light soy sauce are Amoy, Pearl River, and Lee Kum Kee. You can find them either online or at the Asian grocery store.
- Starch - Here I used a combination of cornstarch and potato starch for a coating that was light and crisp. The kind of starch you use for your coating is pretty important. More on coatings further down.
- Five Spice Powder - This is what gives Taiwanese fried chicken it’s distinctive flavor. Five spice is a Chinese spice mix made up of star anise, cloves, cinnamon, Sichuan peppercorns, and fennel. You can find it at most grocery stores and online of course. All five spice powder mixes are different, so make sure you taste your fives spice and like it before using it.
- White Pepper - White pepper is the other distinct spice in Taiwanese fried chicken. It has a sharper, more floral note than regular pepper. Don’t skip out on it if you want the real deal.
- Thai Basil - Taiwanese chicken is almost always garnished with Thai basil that has been deep-fried. It adds a bit of earthy herb freshness to the whole dish. If you’re adverse to deep-frying herbs, you can just serve it fresh.
How to Make Taiwanese Fried Chicken
- Cut down your chicken: Start of with cutting the chicken into bite size pieces. Make sure you cut all your pieces the same size. You don’t want thin pieces because they tend to be drier, so try to make sure they are kind of chunky and thick.
- Marinate: From there you’ll want to marinate them in soy sauce, garlic, five spice, white pepper, and salt. It’s a pretty dry marinade so be sure to mix everything up evenly so that all the chicken pieces are coated. You want them to marinate for at least 30 minutes, ideally an hour. I like to leave them in a cool spot in the kitchen so the chicken can come up to room temp. This helps it cook more evenly and quickly instead of cooking it straight from the fridge. If you’re marinating overnight, just take the chicken out of the fridge a little bit before you’re going to cook.
- Coat the chicken: After the chicken has marinated, you want to coat it in the cornstarch/potato starch mix. You dont need to drain the marinade, since it’s pretty much a rub so just go ahead and toss the chicken in the starches, being sure to coat evenly.
- Fry: From there you can either deep-fry, air-fry, or oven-bake. The choice is yours!
- Toss: Toss the freshly fried chicken with the spice mix. This is a very important part to making your chicken authentic.
Air-frying/Oven Baking
If you’re air-frying or oven baking, you’ll need to spray the chicken with some oil. We like to use a simple oil mister bottle that we got on amazon so we can just use whatever oil we have on hand. Make sure there’s a good coating of oil on the tops of the chicken so it browns evenly, otherwise you might end up with chicken that’s not as golden.Deep-frying
For deep-frying, we’re going to do a double deep fry: once at a low temperature to cook the chicken through and then again at a higher temperature to get the chicken extra crispy and golden brown. Some tips:- Make sure you use a heavy bottomed deep pot to deep-fry.
- You want a lot of headspace so the oil doesn’t boil and bubble over.
- A kitchen thermometer is best, but if you don't have one, you can check the temperature by putting wooden chopsticks into the oil. There should be a bunch of little bubbles that come out the end. The ones that come with your take out orders are perfect.
- Gently add some pieces of chicken into the pot, being sure not to crowd, and fry until lightly golden. Drain on a wire rack and then turn up the heat and deep fry again until crisp and deeply golden.
Which Taiwanese popcorn chicken is the best: deep-frying vs air-frying vs oven-baking
Here we are! I went ahead and prepared Taiwanese fried chicken three different ways to figure out which method was best. I knew which chicken nugget was which but Mike did a double blind taste test and these are the results - they will shock you! Mike thought that all the chicken tasted kind of the same. He said that when hot, the differences were minimal. Once the chicken got cold - we're talking like hours later - this is what he came up with:- Deep-fried was the tastiest, probably because it had some extra flavor from deep-frying
- Air-fried was the crunchiest and crispiest
- Oven-baked was the juiciest
What is the best type of coating for Taiwanese popcorn chicken?
If you ever look closely at some Taiwanese fried chicken, you’ll notice that their coating looks different from fried chicken coated with flour. This is because they use a mix of cornstarch, potato starch, or sweet potato starch. The crust of Taiwanese fried chicken tends to be a bit powder-y with little balls of crunchiness. It’s not as golden as regular fried chicken because the starches used don’t brown up the same way. Starches tend to give a lighter, yet crisper coating because there’s no gluten in it. Look for coarse potato/sweet potato starch for extra crunchy chicken. Coarse starch has slightly bigger granules that make the chicken even crunchier. For the most authentic Taiwanese chicken you’re going to want to search for sweet potato starch. Other starches will work too, but sweet potato starch is the starch of choice. The best chefs often use a mix of starches (their ratios being trade secrets) for the perfect combination of crispy and crunchy.First off, what is starch?
Starch is a white, tasteless powder made up of two molecules: amylose and amylopectin. When heated, the molecules cross link with each other to form a rigid, brittle network that holds its shape. This translates to a crispy, crunchy feeling when we eat it. Bonus, starch is gluten-free!Sweet potato starch
This is the classic coating you’ll find on fried chicken in Taiwan. Sweet potato starch (红薯粉) is super popular in Chinese food for coating meats, making chewy mochi-like dessert balls, and of course, deep-frying. Sweet potato starch comes in regular and coarse ground. Coarse ground sweet potato starch is what you want for Taiwanese chicken. Its irregularly sized pieces give the coating a raggedy, craggy surface which ends up being crispier when deep fried. Sweet potato starch contains the highest percentage of amylose (30%) which makes it the crunchiest/crispiest of all the starches.Cornstarch
Cornstarch, made from corn kernels, is probably the most common starch for thickening sauces, baking, and coating things for frying. Its fairly high amylose (25-28%) makes it a really good choice for a deep fry coating. I always include it as the default choice for coating Asian fried chicken because it's probably in your pantry already.Potato starch
Potato starch, made from potatoes, has a fairly high amylose content (20-22%). It’s really easy to find at the grocery store so if you can’t get your hands on sweet potato starch a mix of cornstarch and potato starch will give you an acceptable facsimile. Note: potato starch is not the same as potato flour!Coatings to avoid
Stay away from flour, rice flour, tapioca starch, and rice starch if you want a crispy crunchy crust that will stay crunchy.What to eat with Taiwanese fried chicken
You can eat it on it’s own as a snack, serve it up with some fluffy white rice as a Taiwanese fried chicken bowl, enjoy it next to fried noodles or fried rice, or last but not least: serve with some green onion pancake beef rolls for an extra Taiwanese experience.Taiwanese Popcorn Chicken
How to Make The Best Taiwanese Popcorn Chicken Three Ways: Baked, Air Fried, and Deep Fried
- 1 lb boneless skinless chicken thighs (cubed)
- 2 cloves garlic (crushed)
- 1/2 tbsp soy sauce (light)
- 1/2 tbsp chinese five spice powder
- 1/2 tbsp garlic powder
- 1/2 tsp white pepper
- 1/2 tsp salt
- 2 tbsp cornstarch
- 2 tbsp potato starch
- oil/cooking spray
- thai basil (if desired)
Salt and Pepper Mix
- 1/2 tsp salt
- 1/2 tsp white pepper
- 1/2 tsp black pepper
- 1/2 tsp chinese five spice powder
- 1/2 tsp garlic powder
In a bowl, marinate the chicken in the garlic, soy sauce, five spice, garlic powder, white pepper, and salt for 30 minutes. If you are air frying or baking, add a 1/2 tablespoon oil to the marinade.
Lightly pat the chicken dry with paper towels. Place the cornstarch and potato starch in a bowl and, working in batches, toss and coat several pieces of chicken, making sure they are well coated. Alternatively, put the cornstarch and potato starch in a bag or container, add the chicken, and shake to coat. The chicken should be well coated and look fairly dry.
Deep Fry
Prepare a wire cooling rack over a paper towel lined rimmed baking sheet. Heat up 2 - 2.5 inches of oil in a deep heavy bottomed pot until it reaches 325°F. It doesn’t need to be too deep, it depends on the size of your chicken. Use a pair of tongs to gently add a couple of pieces of chicken to the hot oil, being careful not to overcrowd. Fry in batches until lightly golden, about 1 1/2 minutes. Remove from the oil and let rest on your prepared wire rack. Repeat with the remaining chicken until all of it has been fried once.
Turn the heat up to 350°F and fry the chicken a second time around until deeply golden and crispy, another 1-2 minutes. Drain on the wire rack, sprinkle with the extra spice mix if desired, and enjoy immediately!
Air Fry
Lightly oil or use cooking spray on the air fryer basket. Place the coated pieces of chicken in the basket, with at least 1/4” of space in between pieces. Lightly spray the tops of the chicken with cooking spray. Cook at 400°F for 5 minutes, then flip and lightly spray with extra cooking spray. Cook for 5 more minutes at 400°F. If your pieces of chicken are large, you might need an extra minute or two. Let the chicken cool for 5 minutes, then air fry for an extra 5 minutes at 400°F to crisp it up.
Immediately remove from the air fryer basket and let rest on a wire rack. Sprinkle with the extra spice mix if desired and enjoy immediately!
To Bake
Heat the oven to 450°F. Oil or use cooking spray to fully coat a wire rack in a foil lined baking sheet. Place the coated pieces of chicken on the rack, with at least 1/4” of space in between pieces. Lightly spray the tops of the chicken with cooking spray.
Bake for 20 minutes, then flip, lightly coat with extra cooking spray and bake for an extra 5 minutes. The pieces of chicken should be golden brown, crispy, and cooked through. Remove from the oven, sprinkle with the extra spice mix if desired and enjoy immediately!
You probably won’t use all the spice mix – dust and taste to see what level of extra salty peppery-ness you like.

I Am... Viral Pork Dumpling Lasagna Recipe
These viral dumpling lasagna guys are here to stay. I LOVE dumplings. To me, they are the perfect food: juicy meat and a tiny bit of vegetables all wrapped up in a noodle-y dumpling wrapper. Dumplings are an instant hunger fixer. Mike and I always, always have a bag of frozen dumplings in the freezer. One of my all time favorite dumpling types is xiao long bao (aka Shanghai soup dumplings). If you’re into Shanghai food or even remotely into dumplings, you’ve probably heard about them. Soup dumplings are notoriously finicky to make and most people just go out to dedicated XLB restaurants like Din Tai Fung or buy frozen ones to steam at home. Making soup dumplings from scratch is no joke: you need to make a rich gelatin stock, chop a bunch of aromatics, and make thin and pliable dumpling wrappers. All of that is before you even think about shaping the dumplings, which, is an art. I tried it…once. Let’s just leave it at that. Like most delicious things nowadays, there’s always a hack and although this recipe looks nothing like soup dumplings, I can honestly say it’s legit delicious.
What is dumpling lasagna?
Dumpling lasagna is exactly what it sounds like: an extra large dumpling, in lasagna form. Think: layers of thin noodle-y wonton wrappers layered with a savory gingery pork mix and tender cabbage. Instead of baking, this lasagna steams up into a tender, layered, spoonable dumpling. Douse your dumpling lasagna with chili crisp and a big splash of soy sauce and black vinegar and get ready for heaven.Who invented dumpling lasagna?
I first saw it on TikTok via april_eatz. She wanted an easy-to-make dumpling, so instead of folding up individual dumplings, she layered a pork dumpling mixture with cabbage and wonton wrappers. It took off and it looks like dumpling lasagna is here to stay.TikTok soup dumpling ingredients
- ground pork - ground pork is the perfect dumpling filling. It’s flavorful and has just the right amount of fat content. You don’t want a super lean meat for dumpling filling because the fat is what makes everything juicy and tender.
- wonton wrappers - super easy to find wonton wrappers are going to be our noodle layers. If you’ve never bought them before, just head to the area where they keep the tofu. They come in little square refrigerated packages. I LOVE wonton wrappers. They’re incredibly versatile: you can make wonton soup, spicy chili oil wonton, crisp salad topper strips and even classic mini lasagna cups.
- vegetables and aromatics - finely chopped (or sliced, if you prefer) cabbage adds a bit of heft and sweet juiciness and fresh ginger and thinly sliced green onions add a nice aromatic bite.
- seasoning - using a mix of soy sauce, Shaoxing wine, toasted sesame oil, salt, and white pepper are going to give this lasagna dumpling a super authentic, savory, deeply delicious flavor. If you don’t have Shaoxing wine, you can skip it, but if you’re a fan of Chinese food, Shaoxing wine is a great ingredient to keep in your pantry. It’s available online and in all Asian grocery stores. It’s hard to describe its flavor, but it’s nutty, sweet, earthy, and aromatic. When you get take out Chinese food and there’s a flavor that you can’t quite put your finger on, but love, it’s probably Shaoxing wine. You can read more about it here.
- chicken stock - a splash of chicken stock gives the dumpling lasagna some liquid so they can steam up extra juicy.
- toppings - chili crisp, soy sauce, Chinese black vinegar, toasted sesame seeds, sliced green onions, basically anything and everything that you like in your dumpling dipping sauce.
How to make TikTok soup dumplings
- Prep - start off by prepping the dumpling filling mix: thinly slice or chop the cabbage, slice the green onions, and mince the ginger. Set up a steamer over medium high heat by adding 2 inches of water to a large, wide pot. Set a wire rack inside the pot and make sure you have a lid that fits over top.
- Mix - add everything to a large bowl and mix in the ground pork, soy sauce, Shaoxing wine, toasted sesame oil, salt and a bit of pepper.
- Layer - grab 4 ramekins and alternate layers of wonton wrappers and the pork filling. before the last layer of wonton wrappers, add 3 tablespoons of chicken stock to each ramekin. Finish off with a layer of 2 wonton wrappers per ramekin.
- Steam - bring the water to a boil and then turn the heat down to medium-high. Steam the dumping lasagnas for 20 mins or until cooked through.
- Enjoy - carefully remove the ramekins from the steamer and let cool slightly. Enjoy the lasagna dumplings topped with chili crisp and desired toppings.
Big soup dumpling lasagna
Most of the dumpling lasagnas floating around out there are for individual sized dumplings in small ramekins or cocottes, but if you don’t have ramekins, you can make a giant dumpling lasagna. The only thing is, it’s a bit difficult to steam a large pan. If you can steam a large pan, I recommend it, but if you can’t, you can also bake your dumpling lasagna. For a big dumpling lasagna, layer all the ingredients in a casserole dish and top with 1 cup of chicken stock. Cover with foil and bake in a 350°F oven for 30 minutes, then remove the foil and check to see if the pork is cooked through. When cooked through, remove from the oven, top with dumpling sauce, chili crisp, and toasted sesame seeds. Scoop up and enjoy hot. Depending on the size of your casserole you may need to double up the ingredients.Dipping sauce
Although there isn't a way to dip a whole dumpling lasagna, the traditional way to eat XLB is with a little black vinegar and ginger. In these photos (and IRL) I topped our lasagna with a little black vinegar and some green onions. If you don't have black vinegar on hand, try it with 1 part balsamic/1 part rice vinegar, or even all rice vinegar. Try it with a little spoonful at first to see if you like it. That’s it! I hope you enjoy this, I love both lasagna and dumplings so I had fun making and eating these guys. We had a chill, rainy winter lunch over lasagna dumplings and they really warmed me up, inside and out. Mike liked them too! xoxo stephTiktok Soup Dumpling Lasagna Recipe
Dumpling lasagna is an easy to make version of classic xiao long bao, but lasagna.
- 1/2 lb ground pork
- 1 cup cabbage (finely chopped)
- 1/4 cup thinly sliced green onions
- 1 tbsp ginger (minced)
- 1 tbsp soy sauce
- 1 tbsp Shaoxing wine (optional)
- 1 tsp toasted sesame oil
- 1/2 tsp salt
- 1/4 tsp white pepper (or black pepper)
- 1 package fresh wonton wrappers
- 1/2 cup chicken stock
Lay out 3 ramekins or small heat proof bowls about 3.5" wide and 2" deep.
In a large bowl, mix together the ground pork, cabbage, green onions, ginger, soy sauce, Shaoxing wine (if using), toasted sesame oil, salt, and white pepper. If you don’t have white pepper, you can sub in black pepper.
Into the ramekins, add a 1 tbsp layer of the pork dumpling mix, then top with a wonton wrapper. Continue alternating pork and wonton wrappers until you almost reach the top, about 8 layers. Just after the final layer of pork mixture, add about 2.5 tbsp chicken stock to each of the ramekins.
Finish with a layer of 2 wonton wrappers.
Steam for 20 minutes or until the pork is cooked through.
Remove from the steamer, let cool slightly, and enjoy with desired toppings.

I Am... Real Deal One Pot Hainanese Chicken Rice
If you’re looking for your next hands-off, delicious one pot dinner, this is it: Hainanese chicken rice. Have you ever had Hainanese chicken rice before? Are you as obsessed with it as I am? I’m guessing the answer is no because I have a lifelong, deep obsession with chicken rice. It’s my ultimate comfort food, my all-time-favorite go to meal, my version of Anton Ego’s mom’s ratatouille. You know, the scene in in the Pixar movie where Anton is taken back to his mom’s kitchen and she serves him ratatouille and all is right with the world. That's Hainanese chicken rice for me. Jump to the recipe using the button at the top of the page or read on for some extreme Hainanese chicken rice nerdage.
What is Hainanese chicken rice?
Hainanese chicken is deceptively simple but somehow complex. It originated in Hainan in Southern China, but its spiritual home is Singapore, where you’ll find renditions of the ever popular dish everywhere, from hawker stands to high end hotels. I would fight to the death to say that Hainanese chicken rice is the best rendition of chicken and rice out there. It’s so humble, so flavorful, and so pure. At its heart, Hainanese chicken rice is just that: chicken and rice. The chicken is poached in a simple yet flavorful broth scented with ginger, garlic, and scallions and is silky, firm, and tastes like the most perfect chicken you’ll ever have. The rice that comes with it should stand on its own: full of chicken flavor, slicked with fat, savory, and fragrant.What’s so special about the rice?
You’ve got to taste it to believe it, but I think the secret to why Hainanese chicken rice is so good is the rice. And the secret to the rice is chicken fat. Any good cook knows that when you cook rice in broth, the broth infuses the inside of the grain, giving it extra flavor. A lot of cultures do this, like how Mexican rice is cooked in tomatoes and onions. Chicken rice goes one step further by frying uncooked rice in chicken fat with garlic, shallots, and ginger before cooking in chicken broth, giving the rice another layer of toasty, aromatic deliciousness. The rice should be glossy, luscious and full of flavor.The best chicken rice is the one you like making
There are a lot of Hainanese chicken rice recipes that call for 24 hour (or more) cures and other very complicated steps. It doesn't need to be this way, especially if you just want good chicken rice and you're not competing with a dozen other chicken rice hawkers at a market. It's the rice that you need to pay careful attention to, and that's an easy thing that doesn't take much extra time. Personally, I love making chicken rice, I find it therapeutic somehow. But sometimes I just want to eat chicken and rice without cooking a whole chicken. This easy recipe is for those times: skin-on boneless chicken thighs and rice are cooked in one pot for ease and fewer dishes to wash. Win-win!The secret to great Hainanese chicken rice
This is a basic one pot Hainanese chicken rice with all the flavor and none of the fuss. The recipe starts with chicken fat. If you’re like me and love chicken rice and make it on the regular, you’ll want to keep a jar of rendered chicken fat in the fridge. Even if you’re not like me and don’t want to make chicken rice every day of the week, you’ll want to keep a jar of chicken fat in the fridge. Chicken fat is PURE FLAVOR. Chicken fat is what makes the rice part of chicken rice taste so good. But, if you don’t have any chicken fat, don’t worry, toasting your rice in any fat is going to give it a glossy, delicious flavor coat. The key is cooking the ginger, garlic, and shallots in fat so that the aromatics release their deliciousness into the rice.How to render chicken fat
Chicken fat is the key to a good Hainanese chicken rice. The chicken fat adds so much flavor to the rice, you won’t believe it.- Collect. Trim excess skin off the chicken thighs. Every time you have a recipe that calls for boneless skinless chicken thighs, just buy skin-on, bone-in chicken. Debone and save the bones for stock and save the skin for rendering. I like to freeze a sizable amount then make a big batch of chicken fat and crispy chicken skin.
- Chop. Use a sharp knife and chop the chicken skin into small 1/2 inch pieces. You can use a pair of scissors for this too.
- Slowly render. Put all of the chicken skins in a non-stick (or cast iron) skillet, pot, or pan. I like using a pot to keep everything from splattering but it’ll be faster in a pan or skillet. Cover and cook on medium low for 15 minutes. The fat will start to render out and collect.
- Crisp. After you have a pretty pool of glistening fat, uncover the skillet and turn the heat up to medium. Let the skin and fat cook, stirring and breaking up occasionally, until the chicken skins start to crisp and brown.
- Strain. After all the skins are brown, remove the pan from the heat and use a fine mesh strainer over a heat proof liquid measuring cup to strain out the crispy skin. The rendered chicken fat is pure flavor. If desired, return the skin to the pan and crisp up further. The crispy chicken skins are the BEST. They’ll continue to crisp up as they cool, so don’t cook them too long. Store the strained fat in a jar in the fridge for several weeks and use to make chicken rice!
Chicken thigh vs chicken breast
But what about the chicken? Do you need a whole chicken? Should you use dark meat or light if you're just going with individual pieces? Again, this is personal preference, but I think the whole chicken isn't necessary. The only question is, do you go with thigh or breast? When you’re in Singapore, you have to pay extra for dark meat (thighs and drumsticks) because the meat is silkier and more tender. I definitely prefer thighs to chicken breasts when making chicken rice but sometimes I like the texture of breasts too.What kind of chicken for chicken rice?
Chicken thighs are clearly superior but they don’t tend to sell skin-on boneless chicken thighs. What I do is buy bone in skin on thighs and trim the bones out myself.How to debone chicken thighs
There’s only one bone to remove from a chicken thigh, making it super simple.- Place the chicken thigh, skin side down on a cutting board.
- Find the bone that runs along the length of the thigh. Use a sharp boning knife or paring knife along the side of the bone to reveal it.
- Use the knife to scrape along both sides of the bone, being careful not to cut all the way through.
- Angle the tip of knife underneath the bone and run the knife alongside the bone to cut the end of the thigh away. Repeat on the other side.
Chicken and Rice
All cultures have some sort of chicken and rice. The Japanese have oyakodon, Latin Americans have arroz con pollo, and Southeast Asians (and Hainanese people) have Hainanese chicken rice. Like most chicken and rice dishes, it’s simple at heart: poached chicken and seasoned rice served with a variety of sauces. Like lots of immigrant adapted foods, there are actually a bunch of different types of Hainanese chicken rices: Singaporean, Malaysian, Vietnamese, and Thai. Growing up, it was a staple in our house. Chicken rice is the food that can bring me back to my childhood and transport me to some of my favorite memories as an adult. I’m not embarrassed to say that chicken rice is my everything.How do you eat Hainanese chicken rice?
Everyone eats it differently! Some people like to pour all three sauces on top and mix it all up, some people only use certain sauces, really, it’s up to you. Authentically, like with curry rice, it’s usually served on a plate with a spoon and fork – NOT a bowl and chopsticks – to scoop everything up.What to serve with Hainanese chicken rice
Traditionally it’s served with the poaching broth the chicken was cooked in, as well as chili sauce, scallion-ginger sauce (I kept it simple here with a scallion only sauce), and dark soy sauce. If you’re in Singapore, they’ll probably give you a couple pieces of cucumber, and a sprig of cilantro on top.Homemade Hainanese scallion oil
Sometimes I keep it simple with a pure scallion oil, but if you have the time to chop up some more aromatics, a ginger garlic scallion oil is an unforgettable umami bomb you’ll want to put on EVERYTHING. Ingredients- 4 cloves garlic
- 1/2 cup scallions
- 1 tbsp fresh ginger
- 1/4 cup neutral oil
- In a food processor - or by hand, you wizard you - chop up 4 cloves garlic, 2-3 scallions (about 1/2 cup), and 1 tbsp fresh ginger. Place everything in a deep heat proof bowl.
- In the smallest pot you have, heat up 1/4 cup neutral oil (grapeseed, sunflower, safflower, canola) over medium heat until it reaches 275°F. You can also test the heat by placing an uncoated wooden chopstick in the oil. If you see tiny air bubbles escaping from the chopstick in the oil, it should be hot enough.
- Carefully remove the pot from the stove and pour over the scallion mix. It will sizzle and bubble. Stir so everything is coated and season with salt to taste.
Hainanese chili garlic sauce
Ingredients- 2 fresno peppers (or other red pepper)
- 1 Thai chili pepper
- 2 cloves garlic
- 1" ginger
- 2-3 tbsp chicken stock
- 1 tbsp lime juice
- 1/2 tsp sugar
- In a food processor, chop 2 fresno peppers, 1 Thai chili, 2 cloves garlic, and a 1 inch piece of ginger until it comes together in a paste. Stir in 2-3 tablespoons of chicken stock, 1 tablespoon lime juice, and 1/2 teaspoon of sugar. Add salt to taste.
Hainanese ginger sauce
This is different from the scallion oil and I make it when I want a pure ginger taste. It’s not too spicy because cooking the ginger mellows it out. It’s a perfect “clean” tasting sauce for those Hainanese chicken rice purists out there. Ingredients- 1/4 cup fresh ginger, finely chopped
- 1/4 cup neutral oil
- 2 tsp rendered chicken fat
- salt, to taste
- In the smallest pot you have, heat up 1/4 cup neutral oil (grapeseed, sunflower, safflower, canola) over medium heat until it reaches 275°F. You can also test the heat by placing an uncoated wooden chopstick in the oil. If you see tiny air bubbles escaping from the chopstick in the oil, it should be hot enough.
- Remove the pot from the heat and stir in the ginger. It will sizzle and bubble. The ginger should be soft and tender. Stir in the rendered chicken fat and season to taste with salt.
Pro-tips
Here are some of my tips for making chicken rice. I do it so much that it’s pretty much second nature to me!Use a food processor
I like doing prep work but a food processor makes everything easier and more enjoyable. There are a lot of aromatics in Hainanese chicken rice and it’s the aromatics that make everything taste amazing so you don’t want to skip out. A food processor will cut your prep time in half. This is the mini one we use on the regular.Save your chicken fat!
I have a little freezer bag of frozen chicken fat/skin in the freezer. This is probably not that strange to people who know how amazing chicken fat is. I add to it whenever I’m trimming chicken or if I need skinless chicken in a recipe. Skin on chicken is so much cheaper that skin-off so I just de-skin at home and happily add to my stash. When the bag is full, I render the fat, stash it in the fridge in clean jar and scoop it out to use whenever I have a chicken rice craving. The crispy chicken skins get eaten pretty much right away. Having a stash of chicken fat in the fridge means you’re never too far away from chicken rice.Use homemade chicken stock
This is my cheat version of Hainanese chicken rice, which is why it calls for store-bought chicken stock. But the truth is, like my endless supply of chicken fat, I also have an endless supply of Hainanese chicken stock in my freezer. To make homemade Hainanese chicken stock, use trimmed chicken bones:- Place as many trimmed chicken bones as you have in a deep pot and cover with water until it is covers the bones by 2 inches.
- Add 1 inch ginger, sliced; 1 shallot, halved, 2 cloves garlic, crushed; and 1 whole green onion.
- Bring to a simmer over medium heat and when there are lots of tiny little bubbles, cover and turn down the heat.
- Simmer for 1 hour. When the hour is done, strain the stock. Use homemade Hainanese chicken stock as directed in the recipe.
Make it in the rice cooker
If you’re not a fan of cooking rice on the stove you can still make this one pot chicken and rice:- Fry up the rice in chicken fat, along with the ginger, garlic and shallot until glossy.
- Add the fried rice to your rice cooker and add in the chicken stock, chicken, and green onion.
- Set the rice cooker and cook until the rice is finished cooking.
- Let the rice and chicken keep warm (on the keep warm setting) for 10 minutes before opening, fluffing, and enjoying.
Perfectly cooked chicken
I prefer to use boneless chicken for this quick and easy version because boneless thighs finish at the same time as the rice, making this quick and easy. If you want to use bone in chicken, make sure the chicken is tempered (not straight from the fridge) when you’re adding it to the pan. Cook the chicken and rice for 5 more minutes and let it steam with the lid on for an extra 5 minutes as well. The rice will be on the more tender side.Super silky Hainanese chicken skin
Something people really love about Hainanese chicken is the super silky smooth chicken skin. It’s delicate, tender, and delicious. In Singapore, if the chicken is gelatinous and silky, it’s considered perfect. The secret to super silky chicken skin is a combination of salt scrubbing and temperature control. Because we’re making a one pot Hainanese chicken I’m going to talk mostly about salt scrubbing, but I will lightly touch on the importance of an ice bath too.Salt scrub
The first thing you should do, if you’re looking for super smooth skin is to give your chicken a nice salt rub. Sprinkle on a generous amount of coarse salt and exfoliate the heck out of the chicken skin, making sure that the salt gets into every nook and cranny of the skin. After exfoliating, rinse the excess salt off the skin (so the chicken doesn’t end up too salty) and the chicken skin should look tighter, cleaner, and generally very pretty. This works super well on whole chickens but it also works on cut pieces of chicken to. Do it, it will definitely make a difference.Temperature Control
As for the other key aspect of silky skin, it’s temperature control. This recipe is for a super simple Hainanese one pot chicken and rice but when you’re making it traditionally (as I do quite a lot as well) you using a whole chicken and poach it gently. After scrubbing and exfoliating with salt, the chicken is gently submerged in a pot of just simmering water and aromatics (scallions, ginger, garlic, shallots) until it cooks through. Immediately afterwards, the chicken is put into an ice cold water bath. The hot then cold shocks the chicken skin, pulling it tighter against it’s body. The skin will be silky and perfect! When chicken rice is done well, you almost don’t need the chicken! Mike pretty much just eats giant bowls of the rice with no chicken at all, that's how good it is. I hope you give this recipe a try, it’s the perfect comfort food for chilly fall days. Chicken rice forever and always, xoxo stephOne Pot Hainanese Chicken and Rice Recipe
Super simple and satisfying Hainanese chicken and rice: juicy steamed chicken and ginger garlic rice cooked in the same pot. It’s what you want for dinner, right now!
Chicken Rice
- 1/2 tsp kosher salt
- 4 boneless, skin-on chicken thighs
- 1 tbsp rendered chicken fat or neutral oil
- 1 tbsp minced ginger
- 1 clove garlic (minced)
- 1/2 small shallot (finely diced)
- 1 cup white jasmine rice
- 1 cup chicken stock (low sodium)
- 2 green onions (whole)
Green Onion Oil
- 1/2 cup thinly sliced green onions
- 1/4 cup neutral oil
- salt (to taste)
To Serve
- chili sauce
- sliced cucumbers
Rub the chicken skin with the salt and set aside.
In a pan or pot with a lid, heat up the chicken fat or oil. Add the ginger, garlic, and shallot. Cook, stirring, until fragrant. Stir in the rice and fry gently until glossy.
Add chicken stock, then place the chicken, skin side up, in the pan. Add the green onions on top. Bring to boil over medium high heat and when it starts to simmer, cover and turn the heat down to low. Cook for 17 minutes, turn off the heat, and let rest for 10 minutes.
While the rice is cooking, make the green onion oil: place the green onions in a deep heat proof bowl and set aside.
In a small pot, heat 1/4 cup oil over medium heat until it reaches 275°F. Remove the pot from the stove and very carefully pour over the green onions – they will sizzle and bubble up. Stir in salt to taste.
When the 10 minute rest is up, remove and discard the green onions. Remove the chicken and slice. Fluff up the rice and serve with thinly sliced cucumbers and green onion oil. Enjoy immediately!
Estimated nutrition facts don't include the green onion oil.

I Am... Bucket List Experience: Tokyo at Peak Sakura Season
Being in Japan, specifically Tokyo, during sakura or cherry blossom season has always been on my bucket list. Still, it took Mike and I nine years of going to Japan before we actually got to see sakura. Not because we kept missing the season, or because we didn’t want to. To be honest, I’m not sure why it too us so long to get here. I think it was partially because I was scared of the stories about how cherry blossom season was the busiest season in Japan and partially because, well, we have Japan down pat. We know what we like and we know which season we like it in. Even so, 2019 was the year we broke our rut. That year we finally made it to Japan to see the sakura! We almost didn’t because I told Mike that it wasn’t really a top priority of mine, but he insisted, saying that if we were going to go around the season, why not try to plan it for the peak.
When is sakura season in Tokyo?
Cherry blossom season varies from year to year, depending on the weather, but it’s usually somewhere near the beginning of April. There are websites and calendars dedicated to telling you when the trees are blooming and when they will be at full bloom. Full bloom is what you want: a gorgeous, generous canopy of fluffy white pink blossoms that are incredibly delicate and fleeting. This is 2026's prediction map: Their fleeting quality is what makes sakura so popular in Japan. In a culture that celebrates things in season and nature in general, they would of course, celebrate a natural phenomenon a both as a herald of spring and as an excuse to get drunk and eat delicious food.Best places to view Sakura in Tokyo
Somehow Mike and I (okay, it was really all Mike) managed to book our flight into Tokyo right at the start of the peak season. Our plan was: check out the blossoms in Tokyo for just one day before heading on a mini train trip to see some other lesser known parts of Japan. We landed in the afternoon after a very long flight (I managed to watch 4 movies!), quickly dropped off our luggage at the hotel and headed out to one of the top cherry blossom spots in Tokyo: Nakameguro.Nakameguro
Nakameguro, even without sakura, is a very fun neighborhood. There are a ton of cute little eateries, hipster cafes, and shops all around the station. And, of course, there’s the Meguro river, which is lined with a dense population of sakura trees. The trees, next to the river, along with pink lanterns, is probably something you’ve seen on Instagram. It gets super busy, both day and night, with everyone politely (sometimes not so politely in tourist cases) jostling for the best photos. We loved the Nakame sakura (what locals call Nakameguro for short) so much that Mike dubbed it Naka Bae. Since we arrived in the afternoon, before most people got off work, it wasn’t absurdly busy. As the afternoon went on, it did get increasingly busier, but it was nothing like what I was scared it would be. If you don’t like crowds, this probably won’t be the place for you, but it wasn’t as busy as the time we went to see the winter illuminations – now that was intense. The best part of Nakame, after the blossoms, which were absolutely delightful, was the street food. There were a bunch of vendors set up on both sides of the river, selling sakura themed food and drinks. Think: strawberry everything, pink champagne, and all your classic Japanese festival foods. I had a grilled mochi covered in a thick, sweet, garlicky sauce. It was crisp and chewy at the same time and seriously so good. We also had some classic Japanese festival street food: yakisoba. I wanted to eat all the things, especially the long fries and the tornado sausage, but we wanted to visit another sakura site so we didn’t eat as much as we could have. But seriously, I love street food and there was SO MUCH! Some of the more popular things I saw people having were: strawberry drinks, strawberries on a stick, boba drinks, takoyaki, grilled mochi, and miso dango.Chidorigafuchi Park
After Nakame, we headed to Chidorigafuchi park, which is right near the Emperor’s palace. Sadly there was no street food there. We got there right at sunset, when they started to light up all the sakura. It was very, very pretty, but it was also so BUSY. Busier than Nakame, and that was already bustling by the time we left. It seemed like there were more out of town tourists at Chidorigafuchi and more local young peeps at Nakameguro. I liked the way the sakura looked at night, but it wasn’t really what I think of when I think of cherry blossoms, so after a quick stroll and ten thousand pictures, we called it and decided to come again to visit in the morning.Hanami
The next day there still wasn’t any street food, but it was a lot less busier. The canopy of cherry blossoms at Chiodorifuchi is gorgeous. As you walk along the moat, you can see people out on boats, and the color of the moat next to the pink of the blossoms is perfection. I’m so happy we came back during the day. We walked around most of the of moat and got to see all the people who were already staking out their claims for hanami viewing parties.What is hanami?
Hanami is when groups of people picnic under the sakura trees. You get a bunch of friends, food, and alcohol and hang out, drinking and eating and enjoying the cherry blossoms. There were huge blue tarps laid out, with just one lonely guy or girl just hanging in the middle. Unfortunately, we didn’t get a chance to hanami because we were leaving Tokyo. But hopefully we’ll get a chance to in one of the other places we’re visiting. If we do, I’m pretty sure it’s going to be awesome.Tokyo sakura season tips and tricks
If you get a chance to be in Tokyo for sakura, here are our top 5 tips on how to hanami:- Bring a tarp. You’ll see giant blue tarps with one lonely person hanging out in the middle of them. They’re just waiting for their friends. Usually, one person will come early in the morning to secure a good spot and friends or office mates will trade off during the day to ensure that they have the best space to hanami. You can grab a cheap tarp at any 100 yen shop.
- Grab some drinks. Alcohol is a big part of hanami, so if you’re going to do it right, you need to get your drank on! Visit a combini – 7-11 or Lawson’s is always a good choice – and grab some drinks. It’s perfectly acceptable and what everyone means when they say they are going to “see” sakura.
- FOOD! You’ll need some snacks with your alcohol. Depending on where you hanami, they’re may or may not be food stalls. If there are, of course buy the food at the foods stalls. Otherwise, I’ve been seeing a lot of Uber Eats hanami ads where people literally uber their food to their tarps. Of course, convenience store food or food from a food hall works too!
- Don’t be disheartened if you can’t sit down. It’s seriously competitive and well, you can just as easily enjoy food and drink while standing around near the food stalls. It’s just as pretty and the food will taste the same sitting or standing.
- Bring some napkins/wet wipes. Most vendors don’t have them. Sometimes they do, but if you’re a messy eater, like me, just bring your own, you won’t regret it!

I Am... Top 10 Ramen in Tokyo to Try Before You Die Spring 2026
If you’re going to Tokyo, I’m sure ramen is on your radar. A steaming bowl of noodles in savory, umami rich broth, topped with tender chashu, and a golden yolked egg is pretty much a must eat. There are literally thousands of ramen shops in Tokyo, and if you’re anything like me, it leads to choice paralysis. Mike and I have been going to Tokyo to eat ramen since forever. From back in the early 2000s when a bowl of basic ramen was only 500 yen to the more modern era of ultra-refined Michelin-starred 2000 yen bowls. I think we’ve been to over 300 ramen shops in Tokyo, no joke. We love noodles (see: our cookbook) so, we love love ramen. If you’re looking to go on a search for the best ramen in Tokyo, you’ve come to the right place. Click here to jump to the first entry if you want to skip our ramen bonafides.
My long love affair with Tokyo ramen
In the early 2000s ramen wasn’t part of the cultural zeitgeist like it is now. One of the very first pop culture moments of ramen was at David Chang’s Momofuku Bar way back in the mid 2000s. Mike and I had our first bowls there. The next day we went to the newly opened Ippudo NY (peep that early 2000s phone camera quality) and that sealed the deal. We were obsessed. The early 00's were a heady time for ramen lovers. We went to every single instance of ramen that could be found on this side of the Pacific ocean, we did extensive research, we scoured the internet for recipes, we made our own noodles, 12 hour ramen broths and caramelized bone tare. We thought we had it down, but then we went to Tokyo. Our very first bowl blew us away and we were hooked. A few years later, when we were firmly established in Tokyo and had been to anything remotely well known in the English speaking world, we bought our first ever TRY Magazine (Tokyo Ramen of the Year). We faithfully tried (haha) to go to every single winner. TRY comes out with a new magazine every year and Tabelog also has its awards for ramen, so it was a losing battle, but we tried and still try to hit up the new top ramen shops every year.My top 10 Tokyo ramen shops
All that's to say that we love ramen a lot. Even now, I can faithfully recall my favorite bowls and wax poetic about the broth, the toppings, and the noodles. We were in Tokyo recently and still went on hours long treks for ramen. Out of the hundreds of bowls that we've bad, these are the top 10 in Tokyo that stuck with me. These are just mine, not Mike's, whose ramen palate tends more towards the extra: extra niboshi, extra fatty, extra everything. The ones on this list are more accessible, cleaner tasting, and more refined, for lack of a better term. Not all of these are on trendy lists these days (some are) but all are amazing and many have stood the test of time. Not all of these photos are of the current shop. In a lot of cases, we had photos of the original honten before they blew up. I kinda prefer those photos (and places?) so you can see the original charm before they sold out to the corporate machine. Be warned if you are using these photos to find the shop, though. In no particular order, here we go:1. Ginza Hachigo
There are only 6 seats at this ramen restaurant and truly, it’s like no other you’ll ever go to, partially because, yes, it has a Michelin star. Currently, they use a ticketed system where you line up (as early as possible, I’m talking about before 8 am) and they give you a timed ticket which lets you know when you come back to line up at the appropriate time. When we went, there wasn’t a ticketing system and we tried three times before we actually got to eat there. The worst is when you wait forever and then they come out to tell you they’ve ran out. Thankfully that doesn’t happen anymore. And now, you can make reservations! This is an absolutely unheard of thing in Japan for a ramen restaurant. They’re only blocking off a certain time frame for reservations, so if you don’t want to make them, you can still get the lining up experience.How to make reservations at Ginza Hachigou
Reservations can be made through TableCheck. The reservations are on a rolling system, meaning they open for the following week every Saturday at 9am. Reservations costs 500 yen and the fee doesn’t go towards your meal, it’s just to secure the seat. The maximum party size is 6 and there are only 5 lunch seating times: 12:30, 1:00, 1:30, 2:00, and 2:30. You get 30 minutes to enjoy your noodles, then it’s time to leave.- The broth: A clear, consommé made from duck, free range chicken, scallops, dried tomatoes, dried matsutake, kombu, prosciutto, and French sea salt.
- The noodles: Thin, bouncy, and springy, made with durum wheat. A snappy yet chewy texture that contrasts with the overall bowl. Good flavor with a slight hint of nutty oat.
- The toppings: Kujo negi (heirloom Kyoto green onions), bamboo shoots, thick cut chashu, and freshly cracked black pepper. A slick of chiyu (chicken oil) keeps everything glossy and helps the flavors of the broth cling to the noodles. Add a ajitama (ramen egg) for a bit extra; the yolks are luxurious.
- The style: Chuka soba aka Chinese style ramen. Ramen in Japan is inspired by lamian from China and chuka soba, literally translates to Chinese noodles–implying wheat noodles instead of buckwheat noodles. Chuka soba broths tend to be clear (unlike miso or tonkotsu) and seasoned with either shio (salt) or tare (a seasoning sauce consisting of different kinds of soy sauce and other aromatics).
- The vibe: Elegant and gorgeous. A wooden counter, an open kitchen, and beautiful recessed lighting.
2. Motenashi Kuroki
Motenashi Kuroki was one of the first ramen places we ever went to way way back in the day and it's one we always come back to. Every new years when we are in town (which is most years) we get their special new years bowl. One year it was a super creative ramen take on Hainanese chicken rice. It's a bowl I still dream of today.Motenashi Kuroki has moved
Now newly moved to a new space in Asakusa, Motenashi Kuroki is a beloved favorite with both ramen heads and all the ramen award committees. They’re super creative but most known for their bowl of shio ramen, which has won multiple awards.- The broth: The shio (salt broth) contains two types of chicken, duck, pork, niboshi, and kombu. It’s clear and golden, full of flavor, yet clean and light. Five types of salt and combined to create a balance of umami.
- The noodles: There’s a choice between thin, straight noodles or hand-scrunched thick curly noodles. Both have a nice bouncy chewy texture, so go for what kind you prefer.
- The toppings: The tokusei (signature, which really means extra toppings or with everything) has a soft boiled egg, shredded crisp green onions, menma, chicken meatballs, and chicken chashu, and a dried tomato. That being said, the toppings can change based on season!
- The style: Both shio and shoyu aka salt and soy sauce ramen. Their classic bowl and the one they’ve perfected is shio, or salt. The tokusei shio ramen is the one that’s the top left button on the ramen machine (iykyk and if you don’t, the top left button is the bowl that ramen shops are most proud of/known for) and what you should order if it’s your first time.
- The vibe: Their new space is gorgeous, modern, and new. There’s a fancy window display of ramen bowls, a spacious wooden counter with high backed stools, and a spotless, stainless steel and tile kitchen.
3. Konjiki Hototogisu
Hototogisu is a beloved ramen shop (yes, it has a Michelin star) with a delicious bowl that has a signature truffle sauce finish. Due to the popularity, you have to do the ticket system. Tickets for lunch are handed out at 9:30 am and dinner tickets are handed out at 5:30 pm. People line up well beforehand. It's now much fancier than in the photo above.- The broth: A dashi, clam, fish, and chicken broth that’s seasoned with either shio or shoyu. Delicate and full of flavor, with a burst of gentle sweet clam umami at the front. The shoyu tare, which makes the broth a deep golden, is a blend of four different soy sauces. The shio tare has both Mongolian rock salt and Okinawa sea salt.
- The noodles: Straight, medium-thin, chewy, and pleasantly snappy noodles made with a blend of flours including Hokkaido wheat.
- The toppings: Roast pork shoulder chashu, menma, green onions, and their signature black truffle sauce, porcini oil and porcini flakes.
- The style: Shoyu and shio. The shoyu is the most well known bowl. They also do tsukemen (dipping noodles).
- The vibe: Ramen counter with seven seats and a couple of small tables. Lots of warm wood and lighting.
4. Jun Teuchi Men to Mirai
This is the kind of place where you look at a photo of their bowl and ask yourself, is this even ramen? “Mirai” means future and if the future of noodles are these super thick, hand-made mochi mochi monsters, then I’m all for it. It’s one of those shops that’s beloved by locals, but not really highlighted all that often. If you’re in Shimokitazawa doing Shimokitazawa things (iykyk), grab a bowl here and you won’t be disappointed.- The broth: Chicken, specifically chicken wings, bonito, dried niboshi, kombu, and clams come together into a light, clean soup with lots of flavor. There’s a hint of yuzu too.
- The noodles: Super thick ramen noodles. Thicker than you’ve ever seen because they’re handmade. They’re handmade in-house, as the name of the shop implies (teuchi means handmade). Since they’re handmade, the hydration is adjusted daily due to the weather and humidity. Thick, chewy, and doughy the noodles are reminiscent of udon, but with a completely different flavor - more wheaty.
- The toppings: Shrimp wonton, pork belly chasu, thinly sliced negi, cilantro, and thick cut menma.
- The style: Shio and Shoyu, their main focus being shio with a seafood forward broth.
- The vibe: Old school ramen room with a corner counter facing the open kitchen.
5. Kagari
Kagari has long been a local favorite, and now that it has received international acclaim, it’s one of the most well known ramen shops in Tokyo. They specialize in toripaitan, which is a riff off of the standard pork tonkotsu.- The broth: Creamy, thick, and the palest yellow, thanks to all the Japanese chickens they use to make their toripaitan, aka chicken ramen. Chicken is cooked until all the flavor, collagen, and fat is released, then is hard boiled to emulsify everything together into a creamy, rich broth. The tare is shio with a mix of salts.
- The noodles: Thin, straight, firm and chewy noodles that pair well with the creaminess of the chicken broth.
- The toppings: Cuts of tender, sous vide chicken breast that’s juicy and melt in your mouth. There’s also a vegetable garnish that changes with the seasons, but is always a complimentary texture and flavor to the noodles and soup.
- The style: Toripaitan soba aka chicken ramen with a shio focus. They also do a niboshi shoyu soba.
- The vibe:
- It might be tucked away in a hidden Ginza alley, but Kagari is just as elegant as its neighborhood. A u-shaped counter faces the open kitchen with wood accents. Small, intimate, and cozy.
Sometimes great ramen gets poor reviews
I can see that there are a bunch of negative reviews on the Ginza branch, probably because a lot of tourists go there and aren’t used to the ramen queuing culture and expect everything to be just as it is where they live. There’s another branch in Roppongi Hills (in a very nice mall in Roppongi) that is almost an exact recreation of the u-shaped counter in Ginza. Since it’s indoors, the wait is much more bearable and not exposed to the elements. There’s also a location in Otemachi Grand Cube (shown above) but it’s a little more difficult to find if you’re not used to the massive Japanese underground malls. Kagari Ginza Honten Main Branch 6 Chome-4-12 Ginza, Chuo City, Tokyo Hours: 11am-9:30pm6. Yamaguchi
Yes, another chicken ramen, but this time, it’s a 100% chicken stock made with 3 different chicken breeds. Most ramen broths have pork bones for the fat content, but Yamaguchi’s shoyu tori soba is chicken only. The chicken wonton here are an excellent addition to a delicious, unique bowl.- The broth: A 100% chicken based broth that’s subtle and light, while still packing a huge hit of umami. The broth is seasoned with a shoyu tare that’s made with a blend of soy sauces.
- The noodles: Chewy, medium-thin, straight noodles.
- The toppings: For the special, you get super tender slices of salt brined chicken breast, braised pork shoulder chashu, supple chicken wonton, menma, and a jammy egg.
- The style: Tori soba and tsuke soba aka chicken shoyu ramen and dipping ramen. Their main bowl is the tori soba. The Tsuke soba can be either regular or spicy.
- The vibe: Modern ramen counter facing a spotless stainless steel open kitchen.
7. Mensho Gotokuji
The Mensho ramen group is amazing. They have multiple shops with different concepts, but their shining star is Mensho Gotokuji. The exterior is understated and the interior is what you would expect at a high-end sushi bar. The Mensho Gotokuji branch is farm-to-bol and everything is made in house. Many ramen shops outsource their noodle making, focusing on the broth, but here, they focus on EVERYTHING.- The broth: Both shio and shoyu. I’ll talk about the shio, which is their signature. It’s made solely with snapper and scallop, which is pretty rare for a ramen broth. Most are supplemented with pork or chicken bones. It’s supremely clean, clear, and flavorful. The broth is gentle, delicate and tastes like the sea.
- The noodles: Thin, straight, flat noodles with flecks of whole wheat made in house. They also have a wheat grinder so they can blend their own flour blends.
- The toppings: The shio bowl comes with slices of rare chicken, wonton, menma, green onions, a cured scallop, and a sprinkle of dried fish roe.
- The style: Shoyu, shio, and tsukemen with seasonal bowls that change.
- The vibe: Truly beautiful with a view into the kitchen, which is behind glass. You can take a peek at their noodle making and the walls are covered with design-y illustrations and words about their ramen philosophy. There’s a u-shaped counter, modern bar stools, hanging lights, and custom bowls.
8. Yakumo
Wantanmen is one of my favorite types of ramen and when they offer it as a topping, it’s always a must add. Yakumo specializes in wantanmen and their wonton are some of the best! We loved Yakumo so much we followed them when they closed their original shop and reopened in a new space a few blocks away. That photo above is from opening day of their new shop.- The broth: A light, full flavored clear broth made with pork, chicken, dried shrimp, mackerel, and kombu. They season their bowls two ways, with two types of shoyu, which they whimsically refer to as “white” or “black.” The white has a white soy sauce tare and the black has a black soy sauce tare. White is more delicate, mellow, and rich without that classic soy sauce flavor while black has a more standard seasoning profile.
- The noodles: Slippery, thin, straight wheat noodles that pair well with the broth and toppings.
- The toppings: The wonton here are amazing: juicy, tender, and wrapped in a slippery thin wrapper. They have a longer tail than most wonton you see in Japan and the longer wrappers are part of what makes these wontons so charming. You can choose from pork, shrimp, or both pork and shrimp. Their bowls also feature chashu, more in the vein of Chinese char siu, menma, green onions, and a sheet of roasted seaweed.
- The style: Shoyu ramen, specifically, wantanmen aka wonton ramen
- The vibe: Modern, long u-shaped counter in a design forward room with an open kitchen at the far end of the u.
9. Toripota Ramen THANK
THANK makes chicken ramen right. Yes, chicken ramen aka toripaitan. Toripaitan is a creamy, thick, chicken broth that is incredibly flavorful. At THANK they go a step further and use a potage as their broth. It’s extra thick thanks to vegetables adding starch to the broth. Think of the best, creamiest (but made without cream or dairy) chicken soup you’ve ever had and this will blow it out of the water. The crispy grilled tare brushed deboned wings are chef’s kiss and complement the bowl perfectly.- The broth: A new free-style ramen with a potage (thick soup) toripaitan made with chicken, potatoes, onions, carrots, leeks, daikon, cabbage, garlic, and ginger. You can choose between 3 different broth thicknesses, from thin to thick: sarari, torori, poteri.
- The noodles: Thin, straight, and bouncy, chewy noodles made with roasted wheat from Hokkaido.
- The toppings: Daisen tori wings, wings from a specialty premium chicken from Tottori prefecture, are deboned and grilled to smoky, crispy, fatty, perfection. The special (comes with all the toppings) includes menma/bamboo shoots, green onions, and a jammy egg.
- The style: Toripaitan, a creamy chicken based ramen. It’s a newer style based on tonkotsu but made with chicken. Toripaitan is typically seasoned with shio (salt) but can also be seasoned with tare or miso.
- The vibe: Casual, with both counter seats and tables.
10. Ramen Jazzy Beats
Nakameguro is the home of the third shop from the Ramen Break Beats group (yes, the chef, Takuro Yanase did DJ in his youth). The bowls are works of art: ramen elevated. Jazzy Beats is a new wave of ramen, one where customers don’t shy away from a bowl costing upwards of ¥2000 for the premiums. High-end ingredients, innovative cooking methods, and a young chef make for a must visit for ramen heads.- The broth: Creamy, frothy, and chicken flavor with a side of umami from sardines. The broth is made with a specialty heirloom chicken breed from Kumamoto and several kinds of dried niboshi. You can get it in either shio or shoyu.
- The noodles: There are two types of noodles, made by long-time artisanal noodle producer Mikawaya Seimen. They’re straight, and medium-thick, with a nice chew. But, really, you’re not here for the noodles, you’re here for the broth and toppings.
- The toppings: The toppings really shine, with two plump and juicy wonton with long thin tails, a lightly marinated egg with a molten fire-y red yolk, green onion, diced red onions, chopped rock nori, and sous-vide, then smoked chashu, both shoulder and loin.
- The style: The milky tori-nibo is the signature at Jazzy Beats, they also do a clear shio and shoyu bowls.
- The vibe: Under the tracks in Nakameguro, with a grey and black interior, L-shaped counter seating facing the open kitchen in the middle.
Bonus: Ramen Afro Beats
Ramen Afro Beats is DJ Takuro’s 2nd ramen shop. Afro Beats is home to a super creamy tori paitan, aka chicken ramen. Afro Beats won the 2023 TRY (Tokyo Ramen of the Year) New Shop Award and it’s easy to see why. You don’t think of foam or paprika when you think of ramen, but considering this bowl, maybe we all should.- The broth: All three branches of the Beats Ramen group use three breeds of chicken (Amakusa Daio, Shingen, and Oyama) to create a full-bodied, umami-filled broth. The broth at Afro Beats is a creamy, frothy tori-paitan, rich yet light at the same time with a delightful paprika foam that clings to the noodles as you pull them through.
- The noodles: Medium, straight noodles sourced from Mikawaya Seimen, a longtime Tokyo producer of custom artisanal ramen noodles. The soup clings well while you’re pulling the noodles up through the soup and paprika foam.
- The toppings: Green onions, diced red onions, thin slices of sous-vide and smoked pork chashu shoulder and loin, ajitama egg with the most vibrant red-orange yolks, and a seasonal foam, typically paprika.
- The style: All paitan, all the time. Chicken and only chicken ramen here. The signature bowl is called “tokujo.”
- The vibe: Low, hip-hop beats play in the background with spotlights over a long grey counter. Not the most eye catching room, but we’re not here for the vibes, were here for the ramen.
Special Mention: Tokyo Ramen Street
If you’re on a time crunch — most people are when visiting because there are just so many things to eat and do — visit Tokyo Ramen Street. Conveniently located in Tokyo Station, right near the Yaesu Underground Central Exit, Tokyo Ramen Street is the home to 8 of Tokyo’s best known ramen shops. Currently the shops are:- Ramen Gyoku (niboshi broth)
- Soranoiro (new style Tokyo ramen, one of our faves when it was the original shop/honten and we tried to go to every single new concept they opened until he sold the store)
- Rokurinsha (tsukemen, dipping ramen, the lineups here are still pretty cray so feel free to check out the easily accessed SKYTREE location to skip the lines)
- Hirugao (shio aka salt broth)
- Oreshiki-Jun (tonkotsu aka a rich, thick pork broth)
- Hanamichian (miso)
- Kakushinka (iekei romane aka toknotsu shoyu)
- Ikaruga (tonkotsu seafood aka pork and seafood broth)
- Tsugaruniboshi Hirakoya (Aomori specialty shop with sardine broth)

I Am... Real Deal Lamb Shepherd’s Pie Recipe
I love shepherd's pie with a passion. To me, there's nothing more comforting than the combination of meat and vegetables topped off with smooth rich mashed potatoes. Shepherd's pie will always be one of my favorite foods, one that makes me feel all-is-right-with-the-world-kinda-fuzzy. Serve me a shepherd's pie and I am one happy person. Which is what Mike did, in the thick of winter, on a particularly heavy snow day. He told me to cozy out, and watch the snow fall, wrapped up in a blanket, while he made me dinner. Then he one-upped himself and told me that he was going to make me not one, but two(!) shepherd's pies so I could do a little compare and contrast.
The best shepherd's pie
It was pretty exciting, I have to admit. Mike picked out two British recipes: Jamie Oliver's and Gordon Ramsay's. Going into it, we both thought that Ramsay's recipe was going to be the clear winner, but it turned out that we were both blown away by Oliver's. It was so good I had to make it again and again and again. I've since put it up against other pies and this one really is the best.Lamb is the real shepherd's pie
Purists will say that shepherd’s pie is made with lamb and cottage pie is made with beef. In America, most people refer to cottage pie as shepherd’s pie. I love cottage pies because that’s what I grew up with, but honestly, lamb shepherd's pie is so much better. Plus, it makes sense that shepherd’s pies are made with lamb because shepherds herd sheep and cottage pies are called cottage because…?Potatoes seal the deal
As a potato-lover, I love how the potatoes surround the lamb filling, which is incredibly savory due to the fact that it's bone-in roasted lamb instead of the typical mince. I did modify the potato recipe a little bit, pushing the boiled potatoes through a sieve for extra smoothness and stirring in some sour cream for a bit of tang, which went well with the richness of the lamb filling. This recipe is a little bit of a time investment, but it's mostly hands off and I think it's perfect as an Easter dish: just a touch more fancy than your regular shepherd's pie, but just as comforting.How to make lamb shepherd’s pie
One of the reasons why shepherd’s pie is so popular is probably because it’s so easy to make. It’s a great weeknight meal, it’s perfect for meal prep, and you can make it ahead and freeze it as well.- Roast the lamb. Generously rub the lamb chop(s) with a bit of oil and season generously, then roast for 2 hours. Take the meat off the bone and roughly chop, being sure to save the bones, fat, and accumulated juices from roasting.
- Make the lamb stew. Use the fat from the roasting to fry up the veg, then add flour, roasting juices, and water. Bring to a boil and simmer until it turns into a loose, lamb stew.
- Make the mash. Make your mash any way you like it. An extra rich version is in the recipe, but you can even make a quick instant pot mash and it'll work too.
- Build the pie. Spread a thin layer of potato on the bottom and sides. Spoon in the lamb filling and then cover with the remaining mashed potatoes.
- Bake and enjoy! Bake for 1 hour, until the top is crisp and golden. Enjoy!
How to serve
It's almost spring! Serve this with fresh spring peas and fresh picked corn from last summer that you totally had the foresight to freeze. Okay bye! I'm gonna go sneak a bit of leftover pie right now ;) xoxo -stephReal deal lamb shepherd's pie
Shepherd’s pies are made with lamb because shepherds herd sheep
- 1.5 lb lamb (shoulder chop (bone in, see notes))
- 1 medium red onion (diced)
- 1 medium carrot (diced)
- 2 stalks celery (diced)
- 1 sprig fresh rosemary (leaves only, minced)
- 1 tbsp flour
- 3 large potatoes (Yukon gold preferred, peeled and cut into 1-2 inch chunks)
- 2 tbsp butter
- 1/4 cup milk
- 2 tbsp sour cream
- 2 tbsp shredded cheddar
- 1-2 tbsp butter (to top, optional)
Heat the oven to 325°F.
Generously rub the lamb chop with a bit of oil and season generously, on all sides. Place into a snug-fitting high sided oven safe dish and add a bit of water to the bottom. Roast for 2 hours, or until the meat is tender and falling off the bone.
Remove the lamb from the oven and let cool slightly. Take the lamb off the bone and roughly chop, being sure to save the bones, fat, and accumulated juices from roasting. Adjust the oven heat to 400°F.
There should be about 2 tablespoons of fat in the roasting tray. Place into a high sided pan and heat over medium. Add the onion, carrot, celery, and rosemary. Cook, stirring, until lightly caramelized, about 10 minutes.
Sprinkle on the flour and stir well. Add the lamb, bones, and tray juices to the pan, as well as 1.5 cups of water. Bring to a boil and turn the heat down to a gentle simmer, reducing until you get a loose, lamb stew. Season with salt and pepper.
While the lamb is cooking down, prepare your potatoes. Bring a large pot of water to a boil and season with salt. Add the potatoes and cook until very tender, 15-20 minutes. Drain, then mash, then mix in the butter, milk, sour cream, and cheddar. Taste, adjust with extra milk and butter if needed, and season.
In a pie dish, spread a thin layer of potato on the bottom and sides. Spoon in the lamb filling and then cover with the remaining mashed potatoes. Top with dabs of butter, if desired.
Bake for 1 hour, until the top is crisp and golden. Enjoy!
Adapted from Jamie Oliver's version
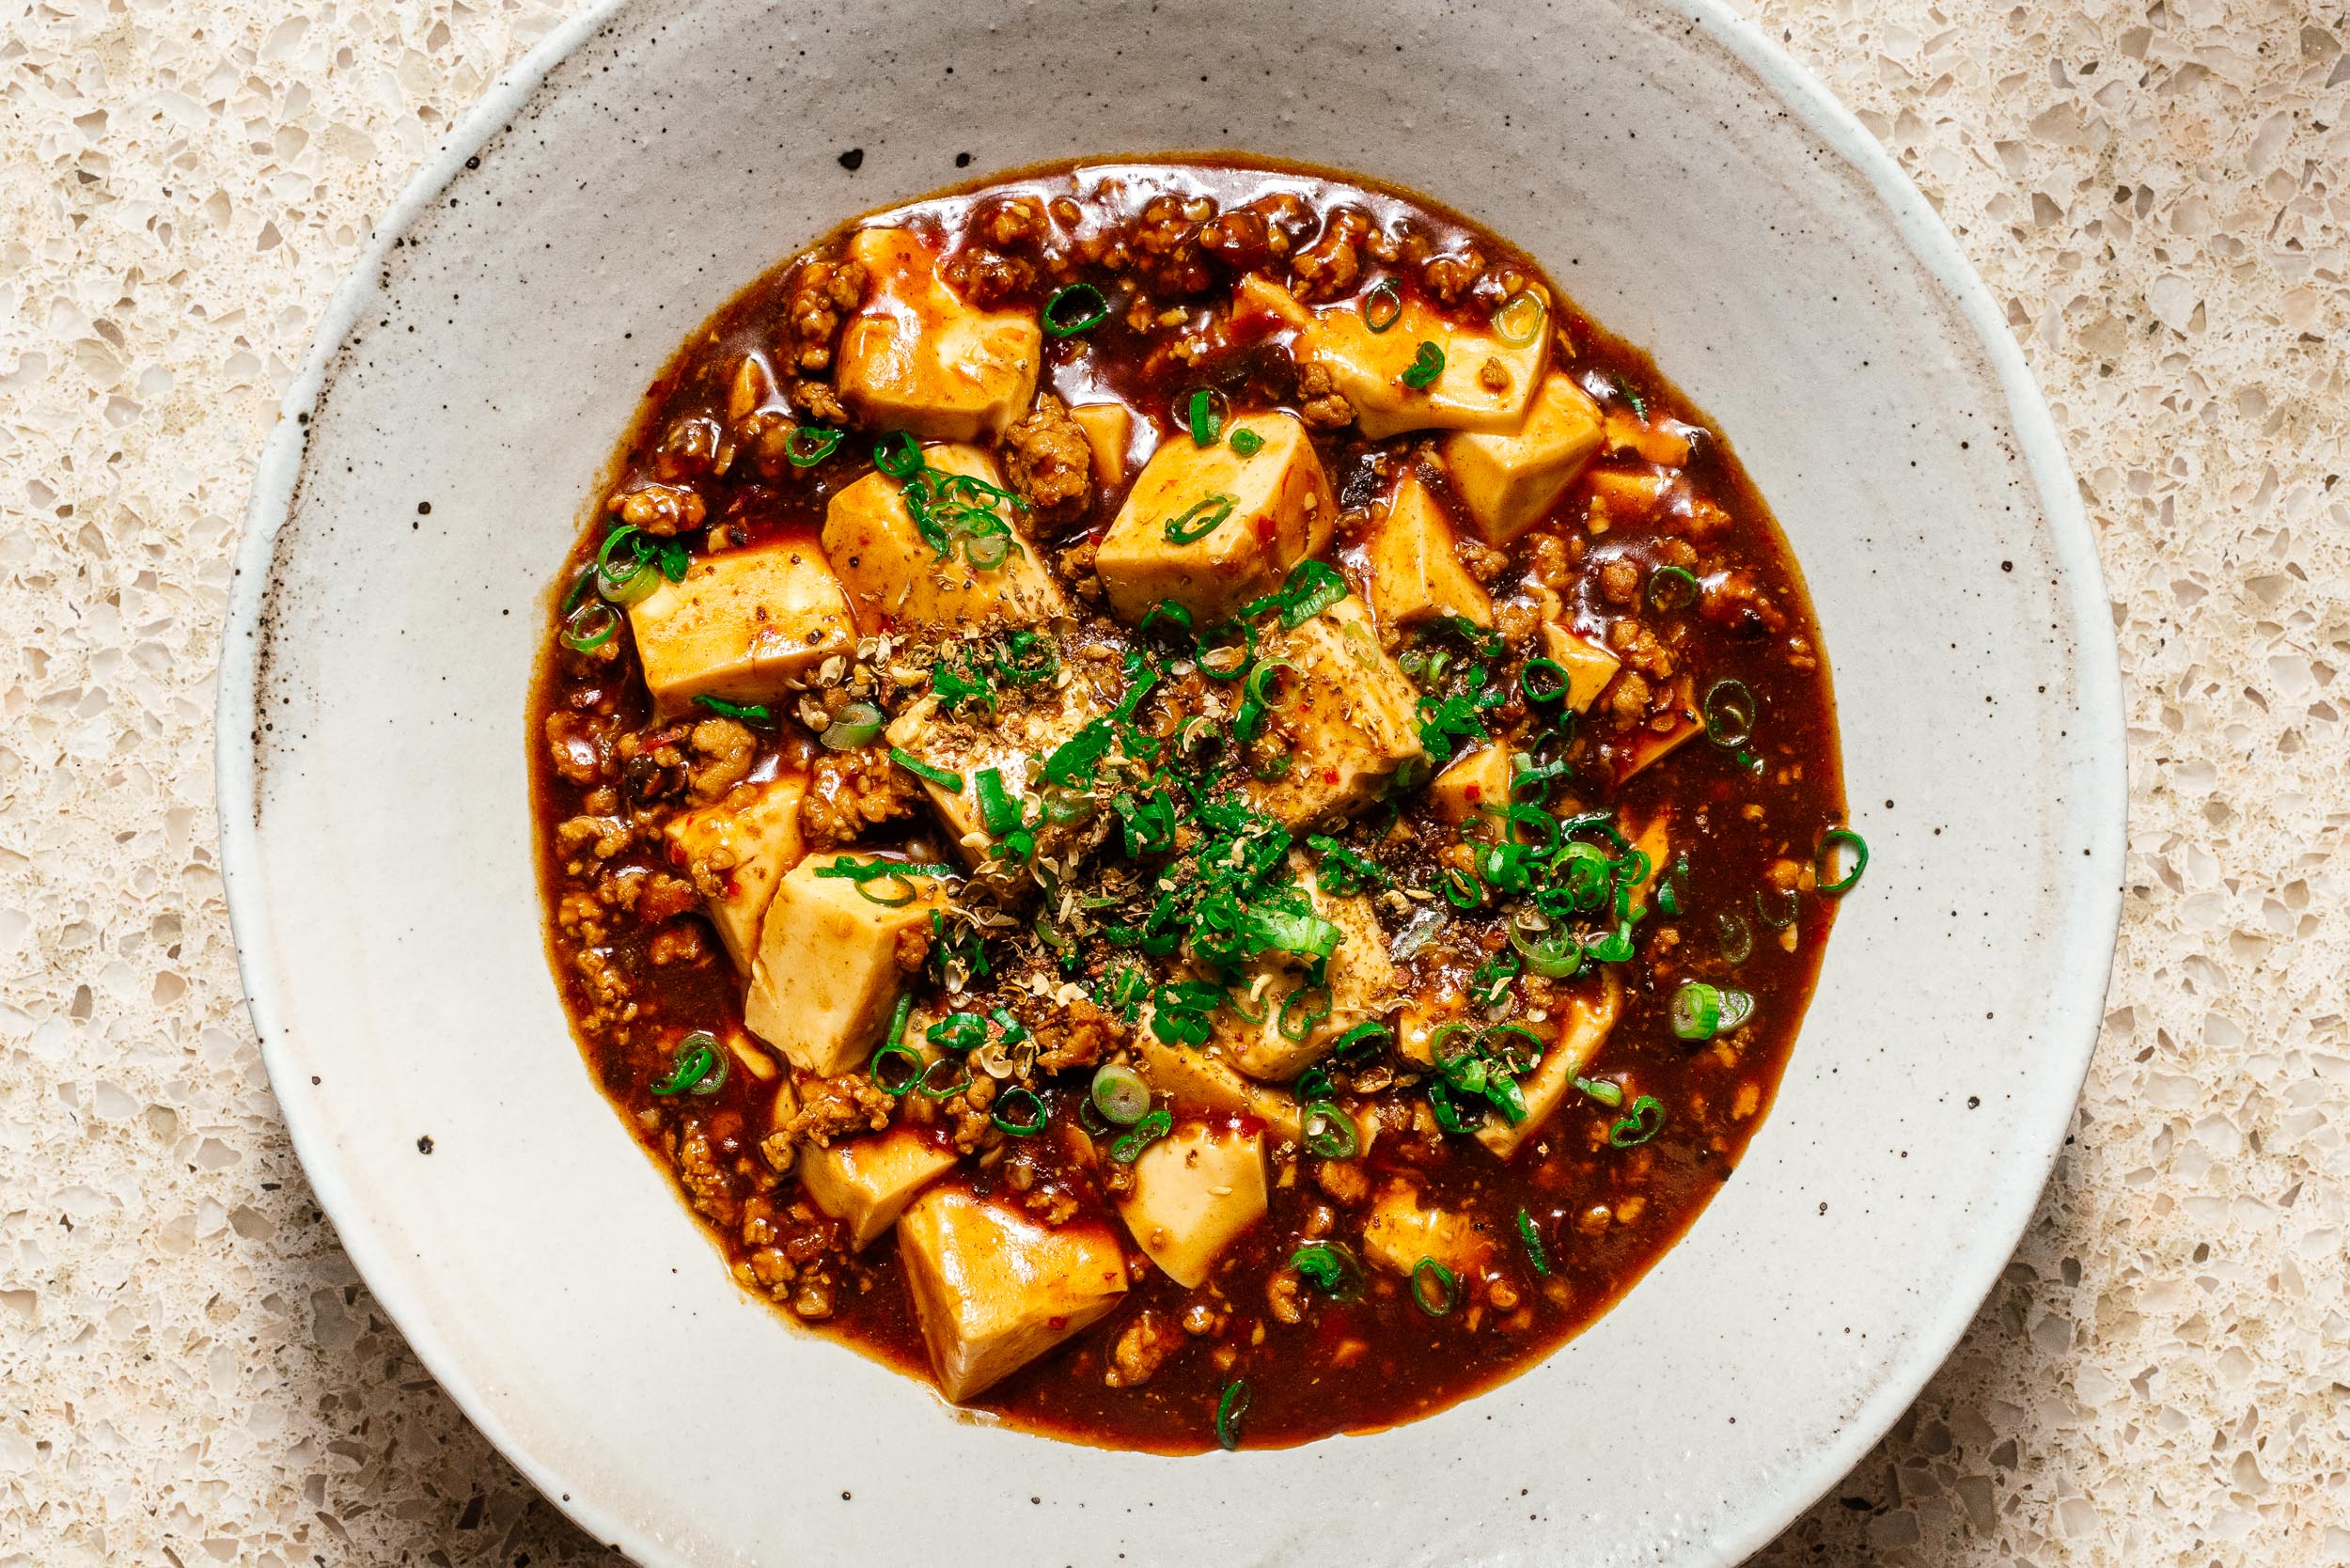
I Am... Authentic (and easy!) Mapo Tofu Recipe
I'm addicted to the magical combination of silky soft tofu and saucy spicy pork. If you're in the know, you know what I'm talking about: mapo tofu.
What is mapo tofu?
Mapo tofu is a famous Sichuan tofu dish that has plenty of mala, the signature numbing spiciness of good Sichuan food. If you haven’t had Sichuan food before, you might be scared of its fire-y red color, but once you get past that heat, you’ll be coming back for more! If you love tofu and you love spicy, you’re going to love mapo tofu too. And, if you’re not so big on spicy, the good thing about this dish is that you can adjust the spiciness level by altering how big of a pinch of Sichuan pepper you finish it with. If you’re not familiar with it, here’s a quick breakdown: mapo tofu is a super popular Chinese dish from the Sichuan province. It has soft tofu in a spicy bright red sauce with a bit of ground pork. The name of the dish roughly translates to “pockmarked grandma’s tofu,” kind of like old grandma’s tofu. There are lots of mapo tofus out there but this is a traditional, authentic mapo tofu recipe.How to make real deal mapo tofu
Once you have your ingredients in hand, it’s a pretty simple recipe. You start off by blanching your tofu in salty water. Then, it’s just a question of frying the pork and doubanjiang, adding some chicken stock and thickening it up. Frying the doubanjiang and releasing the oils is what makes everything super tasty and fragrant. The sauce gets a bit of thickening up with cornstarch and everything is glossy and golden and clings perfectly to your tofu cubes. It’s a match made in heaven for rice.- Blanch the tofu. Gently simmer the tofu over low heat in salted water, then remove the pot from the heat and let it hang out in its salty bath.
- Fry. Brown the pork so it crisps up a bit then add the doubanjiang and fry it so that the heat releases its spicy red oils. Stir in the garlic and ginger.
- Sauce. Add the chicken stock and soy sauce and bring everything up to a bubble. Add the drained tofu cubes and stir in a cornstarch slurry. Simmer until the sauce is thick and gloss then you’re ready!
Key Ingredients
There are two key ingredients to this tofu: chili bean paste (doubanjiang) and Sichuan peppercorns. You can find both of them at your local Asian grocery store. The other ingredients are pretty standard fare.- Doubanjiang. Doubanjiang is the hardest (or second hardest) to find ingredient for real deal authentic mapo tofu, but it's worth it. If your local Asian supermarket doesn't have it, you can find it online. Read more about doubanjiang here or below.
- Sichuan peppercorns. In regards to Sichuan peppercorns, you can buy pre-ground Sichuan peppercorn powder, but if they’re available, go for whole Sichuan peppercorns and toast and grind them yourself. The spice will be much more fresh and apparent if you do.
- Soft tofu. Soft tofu is key to authentic mapo tofu. The tofu should be smooth, creamy, and soft.
- Ground pork. There’s just a bit of ground pork in this dish, just enough to compliment the tofu.
- Ginger and garlic. Ginger and garlic add a punch of aromatics.
- Chicken stock. Chicken stock is what makes up the bulk of the sauce.
- Cornstarch. We’ll use cornstarch as a thickener to make the sauce silky and smooth.
- Soy sauce. Just a touch of soy for some extra umami.
Doubanjiang
Sometimes, with authentic recipes, there’s that one ingredient that you have to search far and wide for. You’ll be searching the aisles wondering, is this worth it? I’m here to tell you that it is! Doubanjiang is a spicy fermented mix of soy and broad beans. It’s been called the soul of Sichuan cooking and it’s what will give your mapo tofu that glorious red hue. When shopping, you want to look for the Pixian (an area in China) variety if you can. It’s kind of like how, if you can, you want to buy champagne from the Champagne region in France. But, like champagne, if you can only find sparkling wine, don’t sweat it, Lee Kum Kee also sells a serviceable easier to find Cantonese style doubanjiang that they call chili bean sauce/toban djan. You can also always find it online. Read more about doubanjiang here.What does mapo tofu taste like?
Mapo tofu tastes spicy: both conventionally spicy with heat on your tongue, and málà, a numbing kind of spicy that is characteristic of Sichuan food. The sauce is pleasingly oily, which ampliflies the spiciness and flavor. It also has a deeply savoriness to it thanks to the umami from the doubanjiang. Also key is the texture play mapo tofu has going on: the silky creaminess from the soft tofu coats your tongue and the crispy-ish bits of pork add a pleasing contrast to the overall softness and sauciness of the dish. Mapo tofu is soul food and maybe the best comfort food out there, especially when paired with perfectly fluffy rice.How spicy is mapo tofu
The pleasant numbing spice of mapo tofu comes from Sichuan peppercorns, which have a pleasant numbing effect which makes it so you can eat more and more spice until you realize that you’re entirely spiced out. It’s called “málà” in Chinese and is prized in Sichuan cooking. Málà literally means numbing (ma 麻) hot/spicy (la 辣). Spicy hot fiends love Sichuan peppercorns because they’re fragrant and have a specific flavor. Warning: Sichuan peppercorns are very spicy. If you have high quality or fresh peppercorns, they're more numbing and powerful. In this recipe, we’re not going to cook the peppercorns because they have a tendency to get over toasted if you’re not careful and can lead to bitterness. Instead, you’ll finish your dish off with a generous sprinkling, which is perfect for adjusting spice levels right at the table.On tofu
I have to say, the most frequently asked questions about mapo tofu are of the following variety: What kind of tofu for mapo tofu? Can you use firm tofu in mapo tofu? It seems like everyone needs to know: which tofu is it? Lots of recipes out there say you can use firm or medium tofu and of course, you can, but if you’re going for an authentic mapo tofu, go for soft tofu. The tofu should be smooth and jiggly and almost break apart the moment your chopsticks touch them. I think a lot of recipes recommend firm or medium firm tofu because soft tofu is notoriously difficult to work with. But I believe in you. Do the soft tofu. It’s worth it! Pro tip: to help your tofu stay together when you toss it into the sauce, blanch it. To blanch tofu: simply place in just simmered salted water for a couple of minutes and let it sit. Blanching tofu in salted water will season it and help firm it up. The tofu will become even more creamy and supple while retaining its shape when you mix it into the mapo sauce. It also has the bonus of making the tofu warm so that you don’t have to heat it up as much in the sauce.Can mapo tofu be vegetarian/vegan?
Yes! You can skip out on the ground pork and it will be vegan. If you have some dried shiitake mushrooms on hand, soak them, drain them, chop them up and give them a fry in place of the pork. Switch the chicken stock out for vegetable stock.What do you eat mapo tofu with?
Traditionally mapo tofu is served with rice. You can also have mapo tofu with noodles (or zoodles), bread, you name it. Essentially it goes with any carb. We’ve even made mapo tofu pizza and mapo tofu poutine. And of course, it goes great with wonton. [caption id="attachment_26331" align="alignnone" width="1450"] Tastes good on zoodles too![/caption]Frequently asked questions
- Can I make this vegan/vegetarian? Easily! Just substitute in finely diced mushrooms for the ground pork. The ground pork isn’t really the star of the show, so using rehydrated shiitakes or even button mushrooms works at adding umami.
- Substitutes for doubanjiang To be honest, if you’re looking to make an authentic mapo tofu you can’t skip out on the doubanjiang. If you don’t want to order doubanjiang online (buy this brand: Pixian broad bean paste)
- Substitutes for Sichuan peppercorns There are no substitutes for the málà of Sichuan peppercorns. If you’re spice adverse, you can definitely leave them out. Between doubanjiang and Sichuan peppercorns, doubanjiang is infinitely more necessary.
- Substitutes for ground pork If you want to use another ground meat, that’s perfectly alright. Ground chicken or turkey or even ground beef (make sure to use a slightly fattier percentage) will all work.
- How do I make mapo tofu not spicy? Reduce the amount of doubanjiang to 1/2 tbsp and leave out the Sichuan peppercorns.
Mapo Tofu
You might be scared of it’s fire-y red color, but once you get past that fear of heat, you’ll be coming back for more, more, more.
- 14 oz soft tofu (1 block)
- 1 tbsp oil
- 1/4 lb ground pork
- 1.5 tbsp doubanjiang (chopped)
- 2 cloves garlic (minced)
- 2 tsp ginger (grated or finely chopped)
- 1 cup chicken stock (sodium free/unsalted preferred)
- 1 tbsp soy sauce
- 1 tbsp cornstarch (whisked into 2 tbsp water)
- 1/2 tsp ground sichuan pepper (or to taste)
- green onions (thinly sliced, to finish)
Cut the tofu into small cubes and set aside. Bring a pot of water to a boil and add a pinch of salt. Turn the heat down to a simmer then add the tofu and cook for 2 minutes. Remove from the heat and let soak in the salted water while you prepare the rest of the dish.
In a wok, heat up the oil over medium heat. Add the pork and cook, breaking up, until the fat renders out and the pork is cooked through. Turn down the heat and add the doubanjiang and cook, stirring, until the oils release from the doubanjiang and everything looks bright red.
Stir in the garlic and ginger and cook for 1 minute. Add the stock and soy sauce and bring the heat up so everything comes up to a simmer.
Drain the tofu and add it to the wok, pushing it around gently so you don’t break it. Stir in the cornstarch slurry and bring up to a gentle simmer, until the sauce is thick and glossy, about 1 minute.
Turn off the heat and scoop the tofu with sauce into a serving dish. Finish with a sprinkle of ground Sichuan peppercorn and sliced green onions.

I Am... Your last chance to ski the OG Revelstoke
If you know snow, you know Revelstoke.
Steph and I have been going to Revelstoke for years and it's always been a highlight, and maybe the highlight, of our ski season. Revelstoke is a skier’s mountain filled with huge terrain and endless snow. But, if you haven’t heard of Revelstoke, this might be your last chance to experience the original feels before it explodes in popularity. We may not be coming back after next year (never say never though). If you've skied long enough, you'll hear old timers reminisce wistfully about the good ol' days when you could just walk up to the lift even on a powder day. And if you wished you could experience the same kind of magic before it's too late, the time is now to hit up Revelstoke.Revelstoke is blowing up
Historically, Revelstoke was kind of a poorly-kept secret, but still a secret. Being many hours away from the nearest major city and with a reputation of extremely difficult terrain meant that most skiers skipped the mountain in favor of other better known resorts like nearby Lake Louise or Banff Sunshine, but this year something changed. For reasons such as Revelstoke recently winning awards for the best powder snow in the world (deservedly, imo) and poor snow at other resorts, as well as geopolitical issues, Revelstoke has been showing up on a lot of radars. This year, during an otherwise normal powder day, there were hours-long lineups that snaked all the way back to the parking lot (below). This was unheard of even a couple of years ago. But the crowd size doesn't change the fact that Revelstoke is seriously one of the best resorts in the world. It's like nothing else on the planet in terms of expert terrain, deep, deep snowfall, (usually) low crowds, and the best tree skiing in the world. Other ski resorts have some of this, but Revelstoke has it all. If you've never been or even if you have, you owe it to yourself to book a trip here asap.Why you should go to Revelstoke
If you like big mountain lines, great powder, and well spaced glades, Revelstoke is the place to be. It's got the most vertical in North America and tons of space per skier. If you want to drop cliffs from 5ft to 50ft, go steep and deep in a giant bowl of pow, or do a 45º tree run, you'll find it here. Outside of Whistler, Revelstoke seems to get the most snow in BC, and some of the most in North America. You can also just come here to watch the talent on display, as some of the best riders around come to Revelstoke, including for the Natural Selection Tour and other freeride events.Skiing at Revelstoke
Like it's spiritual sibling Kicking Horse, Revelstoke is mainly accessed via one gondola. If that gondola goes down, the entire mountain is shut down. Furthermore, the vast majority of Revy's terrain is accessed via one main lift, which can cause huge lineups or if it breaks, can close half the mountain. Revelstoke is majority expert and advanced runs. Officially it's designed as 45% expert, but even the blue runs at Revy are both pitchy and tend to be filled with experts that go way too fast. I would rate a lot of the blue runs at Revy to be equal to black diamond runs elsewhere. However, there's a whole beginner area called Stellar that caters to those newer to skiing. It also happens to be a great area even if you're not a beginner. There's been mini-powder days where Steph and I will lap the stellar chair because it's all fresh untracked lines while the rest of the mountain is waiting in line for the main Stoke chair. If you love tree runs, you owe it to yourself to try the glades of glory (above), especially after a big storm. The powder pillows and tree spacing make it the best designated glade run in North America, at least at any resort we've been to (which is a lot of them). The north bowl (below) is not to be missed, but of course that's where you'll head first, so not much needs to be said about that area.Revelstoke apres and on mountain eats
Like most serious mountains in BC, there isn't much of an apres scene at Revy. The same is true for on mountain dining, with Mackenzie Outpost really being your only option. Luckily, Mackenzie Outpost happens to be a great eatery that sells reasonably priced & fantastic smash burgers, bags of fries, and local beer on tap. They also, strangely, sell $175 bottles of champagne. If you're early you can snag a spot inside, but most of the time the seating will be outside in the cold. On sunny days there are beach chairs set up outside near the french fry sculpture made out of skis and snowboards. We love enjoying a giant bag of crispy, perfectly cooked fries and taking in the stunning views of the Monashee mountains. If you're very lucky, you might get a pine marten begging for a fry or two.Where to stay in Revelstoke
There is one ski-in ski-out hotel at the base of the village but honestly it's expensive and you'll end up going to town as the on mountain dining is pretty limited. If you don't love waking up early to fight for parking, this might be a good choice. Airbnb is a better option for most people. If you are searching on Airbnb, the location to look for is Mackenzie Village. It's a new build masterplan community with underground parking and modern condos, many featuring private hot tubs. Mackenzie Village is only a 5 minute drive from the parking lot at Revelstoke (and has bus/shuttle service as well), so it's an ideal location even if you like to sleep in.Revelstoke village base
Revelstoke only opened 20 years ago and consequently, its village is very underdeveloped. There's not much more than the usual ski rentals and service, guest services, and a basic restaurant or two. Your best bet is to stick to town, where things are more lively.Where to eat in Revelstoke
There are a lot of great restaurants in Revelstoke, these are three of our faves:The Taco Club
For whatever reason, combining skiing and Mexican food has always hit. The taco club has a great vibe, legit food, and a decent drink selection. It's unfortunately a little on the pricier side, but you can't beat tacos after a long day on the hill.La Baguette
La Baguette is a cafe/restaurant/bar that specializes in sourdough, espresso, and pretty much every local beer in Revy on tap. The bakery part does both takeaway and eat in and if you choose to eat in, there’s a warm and cozy inviting space with a fire place, couches, booths, local art on the walls, and huge windows to let in the light. There’s a huge amount of viennoiserie, or what you might think of as croissant pastries, and they are all amazing. They also do breakfast platters, wraps and sandwiches, and really, there is no wrong order here. It’s such a cozy space and we've spent many hours here, working remote and enjoying the vibes.Kawakubo
Like Mexican, there's something about combining a long day of skiing and sushi, or in Steph's case, a whole order of prawn tempura for herself only. Revelstoke has always attracted a lot of Japanese ski bums and many end up opening up shop here. Kawakubo is a very authentic, very old school Japanese restaurant serving sushi and sake. It's the kind of place where the menu looks 1990s basic but the daily specials can include otoro and chutoro.Revelstoke parking
The parking at Revelstoke used to be pretty easy and free. While it's still free (for now) these days it's taken to filling up fast, especially on weekends. Your best bet is to show up before 9am on most days or 8:30am on weekends to get a reasonable spot. There is one paved lot and one semi paved lot and one very unpaved lot. If you have a high tolerance for mud and dirt, the unpaved lot is the best bet. There's very little walking as you can just ski the 100ft down to the gondola. The downside is that you definitely need to ski down to it rather than download, and that can be an issue depending on snow coverage that day.Facts
- Avg 415″ of snowfall per year (Compare to 400″ for Whistler or 550″ for Alta)
- Longest run: 9.5miles (15.2km, it's a green run though)
- 3121 acres of skiiable terrain (Compare to 8171 acres for Whistler or 2614 acres for Alta)
- 13 lifts
- Base elevation: 1680ft
- Summit: 7677ft (you need to do a 15min bootpack to reach this)
- Vertical drop: 5620ft (highest in North America, if you do the bootpack)
- On the Ikon pass
Things to do
If you or someone in your group doesn't love skiing, Revelstoke is a whole town filled with art, gift shops, a distillery, and many cute bakeries. That's it, I hope you make it out before it becomes crazy. -Mike Read More →
I Am... These Cute Miffy Sprinkle Cookies are Perfect for Easter
I am obsessed with sprinkle cookies. I'm also obsessed with Miffy, the cute Dutch bunny with the x mouth. These are my ultimate go to cookie. Soft and chewy middles, slightly crisp edges, layers of colorful sprinkles. Dare I say that sprinkle cookies are my all-time favorite cookie? I think yes. If I had to choose between chocolate chip and sprinkle cookies, I would choose sprinkle cookies each and every time. I love sprinkles and sprinkle cookies so much that Mike buys giant bags of rainbow sprinkles on the regular. It’s a little absurd, but rainbow sprinkles make me so happy.
What are sprinkle cookies?
Call them funfetti, confetti, birthday cake, or sprinkle cookies, essentially they’re all the same: a soft and chewy cookie studded with colorful sprinkles. I like to think of them as chocolate chip cookies, sans chocolate chips, plus sprinkles. This recipe in particular has both brown sugar and white sugar for that classic chocolate chip cookie taste. Most of the sprinkle cookie recipes on the internet have a higher percentage of white sugar to brown sugar resulting in pale sugar cookie looking sprinkle cookies. Those cookies are good too, but I love the round caramel notes that more brown sugar adds. This sprinkle cookie is my magnum opus, my pride and joy, may all-time favorite cookie. Even Mike likes them and he’s kind of a cookie snob. We’ve taken to ending our nights sweetly, with one freshly baked sprinkle cookie each.How to make sprinkle cookies
- Melt. Melt the butter in a pot over low heat just until liquified. Pour the melted butter into a large mixing bowl, scraping down the sides, and set aside to cool.
- Measure. In another mixing bowl, measure out and whisk together the dry ingredients.
- Whisk. Add the brown sugar and granulated sugar to the bowl with the melted butter and stir until smooth. Whisk in the egg and vanilla.
- Stir. Stir the dry ingredients in, until about 80-90 percent mixed.
- Fold. Fold in the sprinkles, making sure not to leave any dry spots, but also not over-mixing.
- Scoop. Use a medium cookie scoop (or a spoon, you’ll want about 1.5-2 tbsp of dough per cookie) to portion out the cookies. If you’re making Miffys, divide 1 cookie dough ball into 8 and shape into short logs for the ears, adhering 2 per each ball of dough.
- Bake. Bake in a 350°F until the edges set and the tops are golden. Remove from the oven and let cool.
- Decorate. If you’re making Miffy cookies, use some melted chocolate to pipe on her eyes and an x for her mouth. Enjoy your bunnies!
Sprinkle cookie ingredients
- butter - butter straight from the fridge because we’re going to melt it, more on that below.
- flour - regular all purpose flour. If you don’t already have a kitchen scale, I recommend it, you’ll wash less dishes, you won’t have to sift or fluff your flour, and your baking will come out so much better.
- baking soda - baking soda is what’s going to give our cookies just a little bit of lift and puffiness.
- salt - just a bit of salt to contrast with the sweetness.
- brown sugar - a higher ratio of brown sugar to granulated means a more caramel tasting cookie as well as a softer, chewier bite.
- granulated sugar - a bit of granulated sugar helps with the crisping up of the cookie edges.
- egg - typically I only ever buy large eggs, but for these cookies, I like to use an extra large egg for the extra liquid. This helps the cookies spread a tiny bit more than if you just went with a large egg. If you only have large eggs on hand, simply break open two eggs, whisk them well, and measure out 64 grams of whisked egg, or 4 tablespoons.
- vanilla - warm and toasty, a splash of vanilla makes these cookies extra cozy.
- rainbow sprinkles - the sprinkles you use matter more than you think, so make sure you get ones that taste good! More on that below.
The sprinkles
The sprinkles you use affect the overall taste of your cookie a lot. For me, I like rainbow jimmies, which are the sprinkles that look like little colorful sticks, instead of nonpareils/hundreds-and-thousands, which are little balls. Nonpareils are super cute, but too crunchy for mixing into cookies. Rainbow jimmies are just soft enough, don’t bleed, and have a specific sprinkle flavor that is hard to describe. It’s important that your sprinkles are fresh and tasty because they are a large portion of your cookie. For me, I like the Canadian brand, Yupik. You can get them on amazon, both in Canada and the US. They’re sweet and just the right amount of crunchy. Make sure you select the “rainbow sprinkles,” not the nonpareils.The secret for the best cookies is melted butter
I think the best part about this recipe is the fact that it uses melted butter. Almost all cookies (aside from brown butter cookies) use room-temp butter that is creamed with sugar until light and fluffy. The goal of creaming butter and sugar is to increase the volume of the baked goods: emulsifying and coating each sugar crystal in fat (aka butter) ensures that tiny air bubbles form when baking, making your cookies and cakes soft, tender, and fluffy. But, when you switch from using room temp butter to melted butter, you get a chewier, fudgier cookie that isn’t puffy or cakey. If you have problems with cookies that are too tall or cookies that don’t spread, melted butter is the way to go. When you use melted butter to make cookies, they tend to deflate and densify after cooling, resulting in a perfectly crisp on the outside, perfectly cooked on the inside cookie.How to melt butter for cookies
Simply put your butter in a small pot and melt over low heat just until it turns liquid. Pour the butter out of the pot into a bowl, to encourage cooling, and you’re ready to make cookies, no more waiting for the butter to come to temp.The perfect bunny for Easter
I love Miffy even more than I love sprinkle cookies. She is the MOST iconic bunny and I just love her blank look with her x nose-mouth combo. Now that Easter is coming up, it’s all bunnies, all the time for me. Bunny cupcakes, bunny tuna onigiri, bunny buns, just give me ALL the Miffy bunnies. Anyway, making Miffy shaped cookies is super easy, even easier than rolling and cutting them out.How to make Miffy cookies
- Shape her head. Her head is simply a ball of cookie dough. My favorite way of portioning out cookie dough is by using a cookie scoop, specifically a size 40, 1.5 inch cookie scoop. I find that this makes the perfect sized cookie after baking, not too big and not too small. Just right for when you want to have one or two cookies.
- Shape her ears. 1 cookie dough ball is perfect for 8 ears. Simply divide evenly into 8 and shape the dough into short logs/ears. Add the ears to the top of a cookie ball, pressing the cookie dough together slightly to adhere. I prefer my Miffy’s to have short ears because they bake and travel better; you don’t have to worry about her ears breaking off.
- Bake and decorate. Bake until the Miffy’s are golden and crispy on the edges but soft in the centers. Let cool completely on the baking sheet then use melted chocolate and a piping bag (or a toothpick) to add here eyes and x mouth.
Sprinkle Cookies
Soft and chewy middles, slightly crisp edges, layers of colorful sprinkles, sprinkle cookies are the perfect cookie.
- 1/2 cup butter
- 1.5 cup all purpose flour ((200g))
- 1/2 tsp baking soda
- 1/2 tsp salt
- 3/4 cup brown sugar ((150g))
- 1/4 cup sugar ((50g))
- 1 egg ((extra large, 64g))
- 1 tsp vanilla extract
- 3/4 cup rainbow sprinkles
Add the butter to a small pot and melt over low heat, stirring, until the butter liquifies. Remove from the heat and pour the butter into a large mixing bowl. Set aside to cool slightly.
In another mixing bowl, whisk together the flour, baking soda, and salt. Set aside.
When the butter is slightly cool to the touch, whisk in the brown sugar and granulated sugar until smooth. Whisk in the egg completely and stir in the vanilla.
Use a silicone spatula to fold the whisked dry ingredients into the butter batter until about 90 percent mixed.
Gently fold in the sprinkles, ensuring no floury dry spots remain.
Use a medium cookie scoop to scoop out the dough onto a parchment paper lined baking sheet. Chill in the fridge for 15 minutes before baking or freeze (see notes)
To bake, heat the oven to 350°F. Arrange the cookies on a parchment paper lined baking sheet, at least 2 inches apart.
Bake for 12 minutes, or until the edges are set and the tops are golden, turning the cookie sheet halfway if needed. Remove from the oven, let cool, and enjoy!
Makes about 16 Miffys
If you aren't baking all of them right away, freeze the cookie dough balls until firm, then transfer to an air-tight container.

I Am... A Breakdown of the Full English Breakfast
Bacon, sausages, eggs, tomatoes, mushrooms, toast, and beans all on one plate: is a Full English breakfast the most ultimate breakfast ever? Confession: I've never had a real full English. At least not in England or anywhere in world in fact, except right here, at home. But a couple of weeks ago, Mike and I were chatting with a dude that moved here from England and the thing he said he missed the most was breakfast, specifically a Full English breakfast. He waxed poetic about the deliciousness for a good five minutes, but I wasn't sold. Mike was nodding along, agreeing with him because he's eaten many a full English in London, but me? Nope. I really wasn't interested until Mike showed me a photo a couple days later. It was a giant plate and it looked AMAZING. I mean, it might have been because I was very hungry, but at the time, nothing looked better to my eyes. Thus started the Full English Obsession. Mike and I took a casual look around town to see what ingredients we could find and here's what we came up with!
What is a full English breakfast?
Sometimes called a fry up, a full English is a hearty, hefty breakfast plate served in the UK and Ireland. Full English breakfasts are so popular that they’re pretty much offered throughout the day as all-day breakfast. Full English breakfasts contain: sausages, back bacon, eggs, tomatoes, mushrooms, fried bread, and beans.According to the internet, full English breakfasts need:
- Sausages - I think everyone just goes with whatever sausages they like, but sometimes there are 2-3 kinds on a plate. We went with regular breakfast sausages and we also got a bit of black pudding, which seems like most people insist on having as well.
- Back Bacon - This isn't your regular bacon, which is made from pork belly, nope, back bacon is bacon that includes a little bit of the loin, kinda like a super thin pork chop but smoked. From what I can see, this kind of bacon isn't really crispy.
- Eggs - Pretty straight forward, all the full English plates I've seen have sunny side up eggs.
- Tomatoes - These guys are cut in half along the equator and then seared in the pan and seasoned with salt and pepper. They aren't really cooked, just given a little bit of color.
- Mushrooms - Seems like a take or leave it item, but we're going all out here so of course mushrooms are needed. They're cooked in the usual way, nicely browned and caramelized
- Toast - Don't call it toast because I've seen some internet fights break out about the bread. You can't just use a toaster and call it a day. The bread has to be FRIED, either with butter or oil.
- Beans - You have to have beans! I mean, I've never really had beans at breakfast, but it's classic. We went for Heinz because that's what they do in England and because their teal cans are too cute.
How to make a full English Breakfast
It takes a bit of juggling and two pans, because making a full English is mostly about multitasking. You can do it!- Warm the beans. Open the can of beans and warm in a small pot over low heat, stirring occasionally.
- Cook the sausages and bacon. While the beans are warming, cook the sausages over medium to medium low, until browned and cooked through, turning as needed. Push the sausages to one side and add the bacon and fry, flipping as needed.
- If you’re having black pudding, add it to the pan and fry, flipping once. Keep everything warm in the pan over a low flame.
- Cook the mushrooms and tomatoes. In another pan, sear the mushrooms until brown and caramelized. Move to one side. Add the tomatoes, cut side down and sear.
- Fry the bread and cook the eggs. Move the meats from the pan and fry the bread in the drippings until golden and crisp. Cook the eggs in the pan that the mushrooms and tomatoes were in.
- Plate and enjoy! Scoop the beans in the middle of the plate then add the bacon at 1-2 o’clock, add the sausages at 3 o’clock, then the eggs at 6. If you have blood pudding, pop that on at 8 o’clock and then fill the rest of the plate with the tomatoes at 11 o’clock and the mushrooms at 12. Fried bread can get tucked in wherever or placed on a side plate. Enjoy!
Ingredients
- Sausages. Chose good sausages, preferably ones that are from your local butcher instead of supermarket sausages. Go for a fresh coarse ground pork sausage that’s seasoned simply. In the UK the sausages of choice are usually coarse ground Cumberland or Lincolnshire sausages.
- Black pudding. Not an absolute necessity but black pudding is super common and for black pudding lovers it’s a hill they will die on. You can get this when you’re buying sausages at your butcher. If they don’t have black pudding, ask for blood sausage.
- English Bacon. The bacon in the UK is not the bacon we know in North America. Back bacon is made from pork loin with a bit of belly. It’s the same cut pork chops, but thinner and smoked. Again, you can usually get this a good butcher.
- Eggs. All the eggs I’ve ever seen in a full English are sunny side up but you can go wild and cook them how you like. I don’t think the English breakfast police will come after you ;)
- Tomatoes. Classic field tomatoes, not romas, not cherry, not anything super fancy.
- Mushrooms. Simple brown (or cremini) mushrooms, halved.
- Fried bread. Thick cut bread fried in a pan with oil or drippings and never toasted. I think a standard supermarket white loaf is what’s needed, not a sourdough or country loaf. Definitely not brown!
- Beans. They’ve got to be Heinz!
Potatoes/hashbrowns
Any sort of potato is frowned upon on a full English. They’re seen as filler. If you even think of putting fries on, someone might get stabbed. You could do bubble and squeak (potatoes and cabbage mixed together and fried) but even then, some people are going to come after you.Do they serve hash browns with Full English breakfasts?
Some people serve hash browns with a full English and some people think it is sacrilegious. Hash browns are more modern addition and that’s why they are so contentious. When you do see hash browns on a full English, they typically tend to be the triangle frozen variety as opposed to home made shredded potatoes. If you want a potato product that isn’t hash browns, bubble and squeak (fried potatoes and cabbage) is probably much more traditional.Which kind of baked beans?
British baked beans are absolutely a key part of a full English. British style beans are made with beans and a tomato sauce seasoned with carrots, celery and Worcestershire. American style Southern baked beans are usually cooked with bacon and brown sugar, with a much more thick sauce. Go for British style Heinz baked beans. A reader suggested Branston Baked Beans. We haven’t tried them but they’re spoken of very highly on the internet!What to serve with a full English breakfast
Coffee or tea! Tea is traditionally English but coffee is perfectly acceptable too. Add milk, sugar, and/or cream based on personal preference. We made this on a snowy morning and it was perfect! Lots of hot tea, big fluffy flakes falling down outside, and ALL the fried bread. But, to be honest, I'm not sure if I'm a huge fan. Call me a savage, but I think I love regular breakfast more. Mike on the other hand, LOVED it! He said it was as good as the full English breakfasts he had while he was in London. Me on the other hand? I didn't eat for the rest of the day and went into a food coma – I was definitely full! Happy breakfasting! -StephHow to Make a Full English Breakfast
Bacon, sausages, eggs, tomatoes, mushrooms, toast, and beans all on one plate: is a Full English breakfast the most ultimate breakfast ever?
- 1 can beans (Heinz preferred)
- 4 links sausages (breakfast sausage preferred)
- 4 slices back bacon (or Irish bacon)
- 4 slices black pudding (optional... some say)
- 1 cup mushrooms (halved or sliced)
- 2 small tomatoes (halved)
- 4 slices bread
- 4 eggs
Heat up the beans over low in a small pot. Keep warm on low.
Cook the sausages over medium to medium low heat, turning occasionally, until brown and cooked through. In the same pan, cook the bacon, flipping as needed. Fry the blood pudding slices over medium heat for 3-4 minutes per side.
In another pan, heat up a bit of oil and cook the mushrooms, without moving, until brown and caramelized. Remove from the pan, then sear the cut side of the tomato briefly. Remove from the pan, season everything with salt and pepper.
Wipe the pan down and heat up a bit of oil or butter over medium heat. Fry the bread until golden, flipping and adding more oil or butter as needed. Remove and set aside. Finally, fry the eggs to your liking. Plate everything up: sausages, bacon, black pudding, mushrooms, tomato, bread, and eggs. Enjoy immediately!
This is really more than enough food for 4 people, but nutritional info is done for the traditional full serving for 2.
