
I Am... Pesto Eggs
Pesto eggs will change your life. If you’re a fan of pesto and eggs, pesto eggs are going to change your life. It’s so simple you’re going to think it’s incredibly silly, but the truth is, sometimes simple things are best! Pesto eggs are the best of both worlds: Italian flavors and breakfast.
Tiktok is super eggcitied (sorry not sorry!) about pesto eggs
Pesto eggs come to us via Amy Wilichowski - it’s her favorite way to make eggs and she shared it on Tiktok where it’s now going viral. All you do is take a couple spoonfuls of pesto, heat it in a hot pan, then add eggs. The eggs fry up in the pine-nutty, basil oil and get infused with all those delicious pesto flavors.What do pesto eggs taste like?
If you love the flavors of pesto, you’ll love these guys. You get a huge fresh hit of basil, loads of garlic, cheesy parmesan, olive oil, and nutty toasted pine nuts. All the pesto flavors combine with the richness and crispiness of a fried egg. Finish it off with a sprinkle of flaky sea salt and chili flakes and you’ll be in breakfast heaven.Pesto egg ingredients
Pesto and eggs: that’s it! If you’re wanting to fancy it up a bit, toast up a piece of sour dough, spread some ricotta on top, add some avocado, top it with the pesto egg, a drizzle of honey, and a sprinkle of chili flakes, and flaky sea salt.Where to buy pesto
You can find pesto at the grocery store in the refrigerated section near the fresh pastas. If your grocery store doesn’t sell it, you can make it at home!How to make fresh pesto:
You need:- 1 large bunch of basil
- 2-3 cloves of garlic
- 1/3 cup toasted pine nuts
- 1/2 cup freshly grated parmesan
- 1/2 cup olive oil
- salt and pepper
How to make pesto eggs
- Add a couple of tablespoons of pesto to a non-stick skillet. Spread it around and let the oil heat up.
- When the oil is hot, crack and egg (or two) into the pesto.
- Let the egg cook slowly until it’s at your desired doneness (don’t turn the heat up too high or the pesto will burn).
- Enjoy sprinkled with chili flakes and flaky sea salt!
How to make perfect sunny side up eggs
Sunny side up eggs are so happy. Who doesn’t love perfectly cooked whites with a runny, gloriously yellow yolk? The trick to making perfect sunny side up eggs is all in controlling the temperature.- Take your eggs out of the fridge and let them come to room temp. They’ll cook faster and more evenly.
- Crack the egg into a small bowl to ensure that the yolk stays unbroken.
- Heat up the pan over medium heat with a bit of oil.
- When the oil is hot and shimmery, slowly pour the egg into the oil. The whites should turn opaque immediately.
- Turn the heat down and let the whites cook until solid, then slide a spatula under the egg, remove, and enjoy!
Tips
- keep the heat on low so the pesto doesn’t burn
- store bought pesto works but if you have the time, homemade pesto is insanely delicious!
- try the eggs scrambled instead of sunny side up
How to serve
- on their own
- on toast
- in breakfast sandwiches
- in breakfast bowls
- on pasta
- on instant noodles
- with rice
- in a tortilla
If you love pesto, try these other pesto forward recipes!
Pesto Eggs
Pesto eggs will change your life.
- 1-2 tbsp pesto
- 1 large egg
Heat the pesto in a non-stick skillet over medium heat.
When the pesto is warmed and shimmery, add in the egg. Cook the egg to your desired doneness.
Enjoy over toast, on a breakfast plate, in a breakfast bowl, or on its own!

I Am... Grated Egg Toast
Have you tried grated egg toast? Grated eggs aren’t anything new. In fact, they’re super retro a la Russian mimosa salad or grated egg salad. They even get super fancy at Dan Barber’s Blue Hill at Stone Barns served a top potato chip crust pizza. But grated eggs on avocado toast? That’s pure 2022. There’s a viral Tiktok going around from @healthyishfoods where she grates hard boiled eggs onto avocado toast. The eggs are fluffy and super pretty with shreds of white and yellow. Grated egg on toast is genius. The beauty of eggs is how many different ways you can make them and I love this new take on eggs on avocado toast!
What are grated eggs?
Light, fluffy, and ethereal, grated eggs are simply hard boiled eggs, grated. It’s the same egg you know and love prepared a little differently to give it a fluffy, light, melt in your mouth texture.How do you grate an egg?
It’s pretty simple: hard boil your egg using your favorite method then grab a grater. Peel your egg then gently grate it. Done! Use your grated egg to top toasts, sprinkle on salads, noodles, pasta, you name it, anything that you want to add a little richness to.How to make grated egg avocado toast
- Make your avocado toast your preferred way. I like toasting a hearty piece of bread, smushing on ripe avocado, drizzling it with extra virgin olive oil and seasoning with flaky salt, freshly ground pepper, and a bit of crushed chili.
- Hard boil and peel your egg.
- Grate your egg on top of your toast. Enjoy the gloriousness of grated egg avocado toast!
What kind of grater?
You can use any kind of grater! I used to love those rotary graters https://amzn.to/3uuKJ06 and that would be a good option for this because you’d be able to grate the whole egg without your fingers getting in the way. A regular box grater or a microplane will work wonders as well. What kind of grater you use will give you different kinds of grated eggs. The coarse side of a box grater will give you larger shreds and a microplane will give you a fine egg dusting.How to make perfect hard boiled eggs
For perfect grated egg toast, you need the BEST hard boiled eggs. I have done my eggs in the air fryer and the instant pot but usually I’ll just go for the straight up stovetop method.- Remove the eggs from the fridge as your bringing your water to a boil. Prepare and ice bath with a large bowl of cold water and ice.
- Bring a pot of water to rolling boil, then turn the heat down and gently add eggs in, with a slotted spoon. Turn the heat back up to medium high and maintain a simmer for 12 minutes - we’re going to go on the harder side so they yolks grate properly - adjusting the heat down, if needed. You don’t want an intense boil, just a happy little simmer.
- When the time is up, immediately plunge the eggs into an ice bath to cool down.
- When cool, peel the eggs: Gently tap the wide end of the egg on the countertop, then flip around and tap the pointed end. Gently roll the egg and peel, under running water, if it helps.
Pro tip
Grating a cold egg is a lot easier than grating warm eggs. Meal prep a bunch of eggs, grab a cold egg from the fridge then grate away! Plus, refrigerated eggs peel more easily.Other things you can top with grated eggs
Happy grating! xoxo stephGrated Egg Toast
Grated egg on toast is genius.
- grater
- 1 slice toast
- 1/2 avocado
- 1 egg (hard boiled, peeled)
Toast your bread and smash the avocado on top. Drizzle with a bit of olive oil and season with salt, pepper, and chili flakes.
Grate the hard boiled egg on top and enjoy!

I Am... Nutritional Yeast
Cheesy, nutty, and full of umami and protein, nutritional yeast is your pantry flavor friend that’s here to stay. Everything you ever wanted to know about the cheesy, delicious seasoning and how to enjoy it. If you’ve been hearing about nutritional yeast and are wonder what the heck it is, you’re in the right place.
What is nutritional yeast?
Nutritional yeast is a flaky, golden powder that’s made from a species of yeast that’s the same as baker’s or brewer’s yeast. Baking and brewing yeast is active, which lets bread rise and beer brew. Nutritional yeast on the other hand is inactive. It’s grown specifically for food, then harvested. When harvested, heat deactivates the yeast, then it’s washed, dried, and crumbled. The result is a cheesy, nutty, savory ingredient that is used to make vegan cheese sauces, vegan dips, in soups, scrambles, stews, and more.Fortified vs unfortified
Yeast is a natural source of protein and B vitamins. There are two kinds of nutritional yeast, fortified and unfortified.- Fortified has vitamins added to boost nutritional content. Most of the ones you find commercially come fortified with B12 and folic acid.
- Unfortified doesn’t have added vitamins or minerals. Unfortified yeast on its own has protein and B vitamins.
Flakes, granules, or powder
Based on what you want to use your yeast for, it comes in flakes, granules, or powder. I like large flakes for sprinkling and granules or powder for sauces. You can also just use your food processor to turn flakes into powder.Is nutritional yeast good for you?
Nutritional yeast is, as its name proclaims, very nutritious. It’s a great source of protein, B vitamins, and minerals. It has all nine essential amino acids and is a great way to add high quality protein to your diet. Fortified yeast is great because it has B12 which helps with maintaining a healthy nervous system, energy, and creation of red blood cells. It also has antioxidants which help protect your cells.How to enjoy
Think of it as a vegan grated cheese. Anywhere you want a cheesy hit, add a sprinkle!Sprinkle it onto:
- popcorn
- pasta
- salads
- eggs
- roasted vegetables
Stir it into:
- soups
- stews
- rice
Add it to:
- cheese sauce
- crackers
- biscuits
- sauces
Where to buy nutritional yeast
They sell it at health food stores and in the health aisle at most grocery stores. You can also buy it online. I like Bob’s Red Mill large flake but there are tons of brands out there.Vegan Kale Salad with Nutritional Yeast
You'll never miss cheese again.
- 1/4 cup olive oil (extra virgin preferred)
- 1 tbsp nutritional yeast (large flake preferred)
- 1 tbsp lemon juice (about 1 medium lemon)
- 1 clove garlic (crushed)
- 1/4 tsp salt
- 1/4 tsp freshly ground pepper
- lemon zest (from the lemon before you juice it)
- 1 bunch kale (lacinato kale preferred, about 4 cups finely chopped)
Combine all the ingredients except the kale and lemon zest, let sit while you prepare the kale.
Prepare the kale: Give the leaves a good wash and shake off any excess water, then slice the stems away with a knife or rip the leaves off by running your fingers along the ribs. Finally, cut into 1/4" thin strips.
Toss the kale with the dressing.
Top with lemon zest and extra nutritional yeast. Enjoy!
Serves 2 as a small main or 4 as a side salad.

I Am... Tiktok Yogurt Custard Toast
New breakfast trend alert! Custard toast (aka, yogurt toast), a delicious, protein forward sweet breakfast toast you might have seen on tiktok, is here to stay. It comes together quickly in a toaster over or air fryer and is full of protein to keep you full. If you’re a person who likes a sweet breakfast, this is the toast for you. Custard toast is all over Tiktok and after seeing literally everyone and their grandma make it, I decided to give it a go. I love custard and I especially love toast of all kinds so it seemed like a match made in heaven.
What is custard toast?
Custard toast (sometimes referred to as yogurt toast) is a breakfast-y take on cheesecake using ingredients most people have at home. I’m not sure who the first person to make it was, but I’ve definitely seen Moody Day’s Tiktok floating around a lot! Essentially, a piece of fluffy bread is is flattened in the middle, then filled with a sweetened yogurt egg mix. Top it with fruit, bake it in the oven until the bread is crisp and toasty and the custard sets and you’re good to go! Almost like dessert for breakfast but a bit more healthy. Creamy, sweet, and a little crunchy, with fruit for freshness it almost tastes like a cross between a danish and french toast.How to make custard toast
- Squish. Use the back of a spoon to make a depression in the middle of a slice of bread so the custard has a little pool to sink into.
- Mix. In a bowl, mix together greek yogurt, an egg, and a bit of sweetener or choice until smooth.
- Fill. Add the custard mix to the little bed you made in the bread.
- Top. Add some sliced fruit on top - anything goes!
- Bake. Bake until the custard is set and the toast is crisp. You can do this in a toaster oven or the air fryer.
Custard toast ingredients
- Bread - a fluffy bread is best. I love fluffy white milk bread or shokupan that you can find at Asian bakeries or grocery stores. Brioche works exceptionally well and challah is lovely. I wouldn’t go for sourdough just because they have a lot of holes and work better as savory toasts.
- Yogurt - I like to use plain Greek yogurt but you can use your favorite yogurt to add a underlying hint of flavor. You don’t need a huge amount of yogurt, just 2 tablespoons or so.
- Egg - The egg is what makes it custard-y, use a good quality egg! Sweetener - you can use sugar, brown sugar, honey, or whatever sweetener you like. I tend to sweeten to taste, with about 2 tsp sugar, but go for more or less depending on your sweet tooth.
- Toppings - This is where your creativity can shine! The most common topping on yogurt toast is fruit. You can do berries, sliced apples, bananas, oranges, peaches, plums, any fruit, really. You can also do chocolate, crushed up cookies, or a bit of granola!
Air fryer
It’s super easy to do custard toast in the air fryer and it gets really crunchy. Just prep your toast and pop it in the toaster oven at 400°F for 10 minutes.Toaster oven
All it takes is 10-12 minutes in the toaster oven at 400°F. Enjoy your custard toasts! My favorite combo so far has been raspberries with a crushed up Biscoff cookie. SO GOOD. xoxo stephCustard Toast Recipe
If you’re a person who likes a sweet breakfast, this is the toast for you.
- Toaster
- 2 slices bread (of choice)
- 2 tbsp greek yogurt
- 1 eggs
- 1 tbsp sugar (or honey)
- toppings (of choice)
Use the back of a spoon to make a depression in both slices of bread.
In a small bowl, mix together the yogurt, egg, and sugar until smooth.
Add the custard to the middle of the bread. Top with fruit of choice.
Bake in a toaster oven at 400°F until the custard is set and the toast is crisp, about 10-12 minutes. Or, air fry at 400°F for 10 minutes.
Let cool slightly, finish with powdered sugar or honey and enjoy!

I Am... Balmuda the Toaster Review
Is it possible to be in love with a toaster? Because I am. Unequivocally, utterly in love. I first lay eyes on Balmuda the Toaster, which I am going to call BTT, the very year it came out in Japan. We were walking in BIC Camera and there was a giant display: a bigger than life poster of picture-perfect toast with a pat of butter lusciously melting in the center. The promo talked about steam technology and crisp-on-the-outside and fluffy-on-the-inside toast. I longed for it, but spending ¥30,000 on a toaster seemed excessive, especially with a lack of luggage space. Fast forward several years and I finally got my hands on one! Mike gifted me Balmuda the Toaster for Christmas and I am SO HAPPY. By the way, this is in no way sponsored, I just wanted to share my love of my new toaster!
The toaster for toast lovers
If you know me, you know that I love toast. Especially Japanese bread that has been toasted. I am a huge fan of shokupan, the super fluffy, soft, and sweet loaves of white bread that toast up perfectly. Mike and I make a point of visiting specialty shokupan bakeries when in Japan and I love it fresh but I especially love it toasted. Most people, when they think of Japanese breakfast, they think of a teishoku breakfast complete with rice, fish, miso soup, and pickles. But the truth is, a lot of Japanese people prefer bread for breakfast. So it’s no surprise that there is a speciality Japanese toaster that is perfect for Japanese bread.Steam technology
Balmuda the Toaster uses steam technology and precise temperatures to give you the perfect toast every time. If you’ve ever tried a steam oven before you know how it locks in moisture. BTT steams the bread to heat it up, then increases the temperature to toast and caramelize the outside so that the insides are fluffy and the outsides are crisp. Honestly, if you haven’t tried toast from BTT I can see how you would be skeptical, but it really is the perfect toaster.Side by side toaster test
We have another fancy toaster, the Magimix Vision toaster, and I did a side by side comparison of toast in Balmuda the Toaster and the Vision and there is no contest. Honestly, I couldn’t believe that the bread was from the same loaf, that’s how different the toast tasted. The toast out of the Magimix was dry and definitely would have benefited from butter. The Balmuda toast was moist and fluffy but at the same time crisp. It was perfect as-is - seriously, it was so good! (left is balmuda).It’s so much fun!
Part of why I love Balmuda so much is the whole ritual of making toast. You slice your bread (or pull it out of your sliced loaf), place it on the rack with the top of the bread closest to the window - as per the instructions - pour in a tiny bit of water into the top, then press the button and turn the dial. The oven starts to steam up then glows a beautiful neon orange while it toasts. There’s something so pleasant about taking the time to enjoy something as humble as a simple piece of toast.What else can it do?
Technically, it’s a little steam toaster oven, not just a toaster, so it can do anything a toaster oven can do. You can reheat essentially anything inside: pizza, fried chicken, french fries, anything you’d put in a toaster oven, you can use your Balmuda the Toaster for. I’ve baked Japanese sweet potatoes and mochi. It works perfectly every time. If you’re looking for something with a moist interior and crispy crunchy exterior, Balmuda the Toaster will do it for you, every time.Where to buy Balmuda the Toaster
We got ours from Huckberry, but Amazon also carries it (in more colors), and you can get it direct from Balmuda. You can also get it direct from Japan when visiting, but with Japanese appliances it's usually better to buy the International version as Japanese electricity is slightly lower voltage, making Japanese domestic versions run hotter sometimes. If nothing else, it's worth getting the American version if only because the instructions and recipes are in English. I can’t wait to make some recipes that use the toaster oven aspect. I don’t love heating up a giant oven just to bake single cookies or baked oats, so this little guy is perfect. Honestly, it brings me so much joy looking at it sitting on our countertop. Aesthetically pleasing, functional, and fun, what more could I want? I love my Balmuda! Read More →
I Am... How to Make a Round Egg
There’s no denying it: a round egg is perfect for breakfast sandwiches (and so much more!). For some reason all the best breakfast sandwich breads are round: English muffins, bagels, soft and fluffy brioche buns, waffles, donuts, wonuts, the list goes on. Sure, you can make sunny side up eggs the regular way with a little bit of the whites hanging out. But if you want a perfect McDonald’s-esque round egg, I’ve got you! One time, when Mike were on a road trip, we stopped in to McDonald’s for breakfast. The person in front of us ordered a sausage and egg mcmuffin with an extra round egg. I was intrigued. “What is an extra round egg?” I whispered to Mike, “is it like a super special super round egg?!” He shrugged, so I worked up my confidence and asked the person at the counter. They said to me, in a very matter of fact tone, “it’s an egg. It’s what we call our eggs.” Turns out an extra round egg isn’t an egg that’s extra round, the person just wanted two eggs on their egg mcmuffin. Ever since then, I love calling round eggs “extra round eggs.”
What is a round egg?
Just like the McDonald’s person said, it’s an egg that’s cooked in a round shape. McDonald’s uses egg rings to cook their eggs in a round circle that’s just the right size for english muffins.How to make a round egg
- Heat up a bit of butter in non-stick frying pan over medium heat.
- Add your egg ring and let it get hot. Make sure you lightly butter the ring so the egg doesn’t get stuck.
- Crack an egg into the egg ring and let it cook. If you want a classic McDonald’s egg, break the yolk.
- Add a bit of water to the pan and cover the egg to steam it a bit.
- When it’s done to your liking, remove from the pan and use a offset spatula or butter knife to release it from the ring.
- Enjoy your round egg!
Add a little bit of steam
When they’re cooking round eggs at McDonald’s they add a little bit of water to the griddle and cover it so the eggs steam to perfection. That’s why they’re soft and tender and not as crispy as regular fried eggs. They also break their yolks so they cook evenly.What is an egg ring?
An egg ring is a ring that will hold your egg yolks in place while they cook. You can buy them online, either in silicone or metal. I have the metal ones and they work great. I’m pretty sure McDonald’s uses special silicone ones that they have custom made for them.What if I don’t want to buy an egg ring?
If you don’t want to buy an egg ring, you can use the lid of a mason jar, just make sure that you butter/oil it really well so the egg doesn’t stick. You can also use a round cookie cutter or biscuit cutter.Baked round eggs
If you have small ramekins at home you can also make baked round eggs. Make sure to generously butter the bottoms and sides and bake the eggs, uncovered, in a 400°F oven for 10-15 minutes, the run a knife around the outside and tip them out. Or, if you have a large muffin top pan or large muffin pan, you can butter and bake in those as well. Happy round egging! xoxo stephHow to Make a Round Egg
The perfect egg for your breakfast sandwich
- egg ring
- 1 large egg
- 1/4 tsp butter
Melt butter in a non stick pan over medium high heat. Lightly butter the egg ring.
Crack the egg into the egg ring and let set.
Add 1 teaspoon of water to the pan and cover and cook for 3 minutes, or until the egg is to your liking.
Remove from the pan and use a butter knife or offset spatula to release the egg from the ring. Enjoy!

I Am... Keto Cheesecake
This keto cheesecake is creamy, sweet, deeply satisfying, and best of all, under 2 grams of carbs per serving! I have been doing keto now for over a year. Well, I mean, I did have some breaks in between because I can never seem to resist carbs, but I always go back on the keto train and this keto cheesecake is what let me keep calm and keto on for so long. It has no crust, no water bath, no xanthan gum. Just cream cheese, sweetener, egg, and heavy cream. It’s the easiest keto cheesecake you’ll ever make. This is the BEST keto cheesecake out there. There’s not crust, no finicky water bath and just four ingredients. The cheesecake comes out soft and creamy, just like a regular Basque cheesecake. This cheesecake has slightly firm edges with a supple molten cream cheese center that barely holds together. It’s like a decadent slice of triple cream brie, but cheesecake! It has a lightly burnished caramelize top and is delicious at room temp or out of the fridge. I love it so, so much.
What?! Keto cheesecake?
Yes! Keto cheesecake is a gluten free, sugar-free, low carb cheesecake that fits easily into your daily macros when on a keto diet. It won’t kick you out of ketosis and will definitely satisfy your cheesecake cravings. It’s creamy and sweet and rich. There’s no finicky crust and bakes up in a flash.This keto cheesecake is based on my all time favorite kind of cheesecake: basque cheesecake.
Maybe you’ve seen pictures of basque cheesecake floating around the internet or instagram when you’re looking longingly at photos of carb heavy food that you can’t eat? Oh wait, is that just me? I don’t know why I torture myself by looking at carb-y desserts, but I do. And basque cheesecake just calls to me. It’s been called the easiest cheesecake to make because it has no water bath and no crust. The top is a lovely dark burnished brown that adds a hint of bitter caramel, kind of like the caramelized part of a creme brûlée.Keto cheesecake ingredients
- Cream cheese. My favorite brand of cream cheese is the original, the one in the silver box, you know what I’m talking about. Make sure your cream cheese is at room temp before you start baking.
- Sweetener. I love using Swerve because it’s natural and a one to one swap. You can use your favorite erythritol sweetener.
- Egg. Gotta love eggs on the keto diet! The egg is what binds the cheesecake together.
- Heavy cream. This will add just an extra touch of richness and thin out the batter just a touch.
Which low carb sweetener should I use?
Sweetener is hotly debated in keto. When I first started I didn’t touch the stuff. But as time went on, I did more and more research and I realized that even though a lot of sweetness have weird names that end in “ol” (like erythritol or xylitol) they’re actually found in natural ingredients like fruits and vegetables. Plus they have zero carbs so, yeah, I got pretty into them. My favorite of the bunch is Swerve (this isn’t sponsored LOL) but you can go ahead and use your favorite, just make sure it’s a one-to-one swap and that it’s granulated, not liquid. I’ve used monk fruit sweetener in this cake successfully too, but Swerve will caramelize better.How to make keto cheesecake
- Fluff. Start with absolutely room temp cream cheese. The softer the better because the Swerve will melt into it better and the cream cheese and resulting cheesecake will be smoother. Use a stand mixer or your arm strength to really mix together the cream cheese and sweetener, making sure the mixture is light, fluffy, and lump free.
- Beat. After the cream cheese sweetener mix is smooth, it’s time to beat in the eggs, one at a time, making sure that the batter is smooth after every egg.
- Stir. Slowly add the cream and stir it in gently.
- Bake. Pour everything into a parchment paper lined pan and bake until the top is deeply caramelized. Let it cool until room temp and enjoy!
Frequently asked questions about keto cheesecake:
Can I freeze cheesecake?
Yes! It is my absolute favorite way to eat cheesecake because I love cheesecake in a half frozen state when it tastes kind of like frozen cheesecake ice cream. It’s so good. Also, I like to freeze the extra slices so I don’t eat the whole cheesecake in one go. Personally I slice this cheesecake into tiny squares (way smaller than the portion size I indicated) and freeze them for little pops of happiness.Can I make a big keto cheesecake?
Absolutely! This is a recipe for a small keto cheesecake because I know if I make a big one I can eat the entire thing over 2 days so it’s my way of portion control.Help, my cheesecake cracked!
Don’t worry about it! One of the blessings of basque cheesecake is that a cracked top is okay. The key point to keto basque cheesecake is the burnished burnt top that contrasts with the creamy sweet cream cheese. Keep calm and keto cheesecake on fellow keto-ers! May all your meals be carb free! xoxo stephKeto Cheesecake
This keto cheesecake is creamy, sweet, deeply satisfying, and best of all, under 2 grams of carbs per serving!
- 16 oz cream cheese (2 bricks, 226 grams, very soft/room temp)
- 3/4 cups Swerve ((monk fruit sweetener))
- 4 large eggs
- 3/4 cups heavy cream
Heat the oven to 430°F. (If you have convection mode, set the oven to convection.) Line a 6 inch round 3 inch tall cake pan with parchment paper with an overhang of 2 inches. I like to double line it just to make sure it pops out of the pan easily.
In a stand mixer, or by hand, beat the cream cheese with the sugar until smooth, making sure the sweetener is completely incorporated, and the mixture is light, fluffy, and lump free. Be sure to scrape the bowl down.
Add the eggs, one at a time, making sure the batter is smooth and incorporated before adding another egg. Scrape down the sides of the bowl, as needed. Slowly pour in the cream, mixing until just combined. Pour the batter into the prepared tin.
Bake for 25-30 minutes. The top should be a dark amber and the middle should still wobble and jiggle. If you want the top to be more caramelized, leave it a bit longer, but know that the center will not be as gooey.
Remove from the oven and let cool in the pan on a wire rack at room temp until completely cool. Remove the cake from the tin and slice at room temperature for a gooey, lava-like cheesecake. If desired, place in the fridge to cool which will result in a soft and creamy cheesecake without the ooze. Enjoy!
Vanilla keto cheesecake: add a 1 teaspoon vanilla extract in when you mix in the eggs.
Chocolate keto cheesecake: sift in 1/4 cup cocoa powder after you whisk in the cream.

I Am... Lao Gan Ma Chili Crisp
If you love spice, you’ll love chili crisp! It’s deeply savory, not too spicy, and has little bits of crispy crunchy bits that are incredibly addictive. Anyone who’s tried chili crisp falls in love with it. It has a cult following, and for good reason. It’s a huge favor bomb, full of umami with just the rice amount of spice to keep you going back for more.
What is chili crisp?
Chili crisp is a Chinese infused oil that’s used as a condiment or sauce. It’s full of crunchy little bits: chili peppers, garlic, and soy beans.Lao Gan Ma
The most well known chili crisp is Lao Gan Ma brand, with its ruby red oil, crunchy large flakes, and serious looking grandma on the jar. Lao Gan Ma (it means old godmother in Chinese) is incredibly popular in China. Lao Gan Ma was started by a woman named Tao Huabi, in 1996 when she created the company from nothing. It’s an inspiring story: Tao started selling rice noodles with chili oil to support her two young children after her husband passed. Soon, people came to her just for the chili oil, not the noodles. With the help of her local government she opened a factory and now she’s a millionaire. Lao Gan Ma is beloved not only in China, but all over the world. It’s my favorite brand and I have a HUGE jar of it in the fridge right now. It has spicy with a hint of sweetness and has loads of caramelized chilies, crunchy soy beans, and garlic. There are several varieties but I always buy the classic spicy, the one without peanuts.What can I substitute chili crisp with?
If you’re looking for that signature crunch, nothing will really be a close fit, but if you’re just looking for a chili flavor, there are plenty of spicy chili oils that you can use too. If you happen to have chili oil at home as well as crispy shallots, crispy garlic, and roasted soy beans, you can make an approximation by mixing them all up. Here’s a recipe for classic chili oil.What is the difference between chili oil and chili crisp?
Chili oil has chilies, oil, and aromatics (that are usually strained out), while chili crisp has crunchy bits left in it adding textural crisp. The crunchy bits are usually things like: fried garlic, fried shallots, roasted soy beans, roasted peanuts, and crispy chili flakes.Is it very spicy?
It depends on your spice tolerance. I don’t find it spicy. I think it’s a 5/10 on the spice scale, but I’ve also had some pretty spicy food in my life. It’s about as spicy as the dried red pepper flakes you can buy in spice aisle.Where to buy chili crisp
You can find it at a local Asian grocery store or online. There are lots of artisanal versions out there too!What does it taste good on?
EVERYTHING! It’s garlicky, spicy, crunchy and makes everything taste better.What to make with chili crisp
- Chili grilled cheese
- Easy chili oil noodles
- Chili oil wonton
- White bean and barley stew with kale and eggs
Chili Crisp Recipe
Add savory spicy crunch to everything you love to eat!
- 1/2 cup chili flakes (Chinese preferred)
- 1 cup neutral oil
- 1 inch ginger (sliced)
- 2 bay leaves
- 2 star anise
- 1 cinnamon stick
- 3 green onions (white part only)
- 1/4 cup fried garlic (see note)
- 1/4 cup fried shallots (see note)
- 1/4 cup dry roasted soybeans (or edamame)
- salt (to taste)
Place the chili flakes in a medium sized heat proof bowl. Set aside. Add the oil, ginger, bay leaf, star anise, cinnamon, and green onions to a saucepan and heat over medium-low until it starts to bubble gently and the green onions start to brown, 5-6 minutes, or until the oil reaches 300°F. When the time is up, carefully use a slotted spoon to remove and discard the aromatics, leaving the oil in the pot.
Heat the oil in the pot until it is hot and shimmery, 350°F. Carefully pour the hot oil into the bowl with the chili flakes – it will sizzle and bubble up. The oil should be bright red. When cool, stir in the fried shallots, fried garlic, and roasted soy beans.
Transfer to a clean jar and store in the fridge. Chili oil keeps pretty much indefinitely but I’m pretty sure you’ll use it up quickly.
You can find fried garlic and fried shallots at any Asian grocery store.
Estimated nutrition based on 1 tbsp serving.
I Am... Our 10 Best Instant Pot Recipes
We love our Instant Pot! It’s the best in class for set it and forget it dinners. Here are our best Instant Pot recipes, the ones we turn to again and again. Instant Pots take time to come up to pressure, but the best thing about them is once everything is inside, you don’t need to baby it. Forget monitoring the temperature or flipping things, just pop everything in, wait, and eat!
Instant Pot pho
This is the best pho recipe on the internet, fight me. I might be biased because it’s Mike’s super secret family recipe but after making it and serving it to multiple people and getting rave reviews, I’m positive it’s everything you’re looking for. Deep, rich, full of spice and big beefy flavors, this is what we make in our Instant Pot the most. We even have a dedicated sealing ring that we use for pho only. Honestly, this pho will change your life. Recipe hereInstant Pot carnitas
The second most made recipe in our Instant Pot (and the other one that has a dedicated sealing ring) is carnitas. There’s something about pressure cooking pork shoulder that makes it incredibly soft and just ready to be crisped up for tacos, carnitas plates, burritos, and on its own. Super simple and delicious. Recipe hereInstant Pot butter chicken
Butter chicken doesn’t need much of an introduction. It’s a creamy chicken curry made with tomatoes, spices, butter and cream. This particular butter chicken is full of flavor, just a touch of heat, and the right amount of cream. It comes together so quickly and it’s the perfect cozy home cooked meal. Recipe hereInstant Pot bolognese
I am obsessed with bolognese and when I need it, I need it. Imagine a rich and full bodied ragu in under an hour. It can be done! Reducing liquids and pressure cooking means you’ll get a thick, luscious sauce that clings to each and every strand of pasta. This is a tomato-rich bolognese with a mix of pork and beef that is the epitome of an Italian American Sunday sauce, but on a weekday. Recipe hereInstant Pot Thai red curry ramen
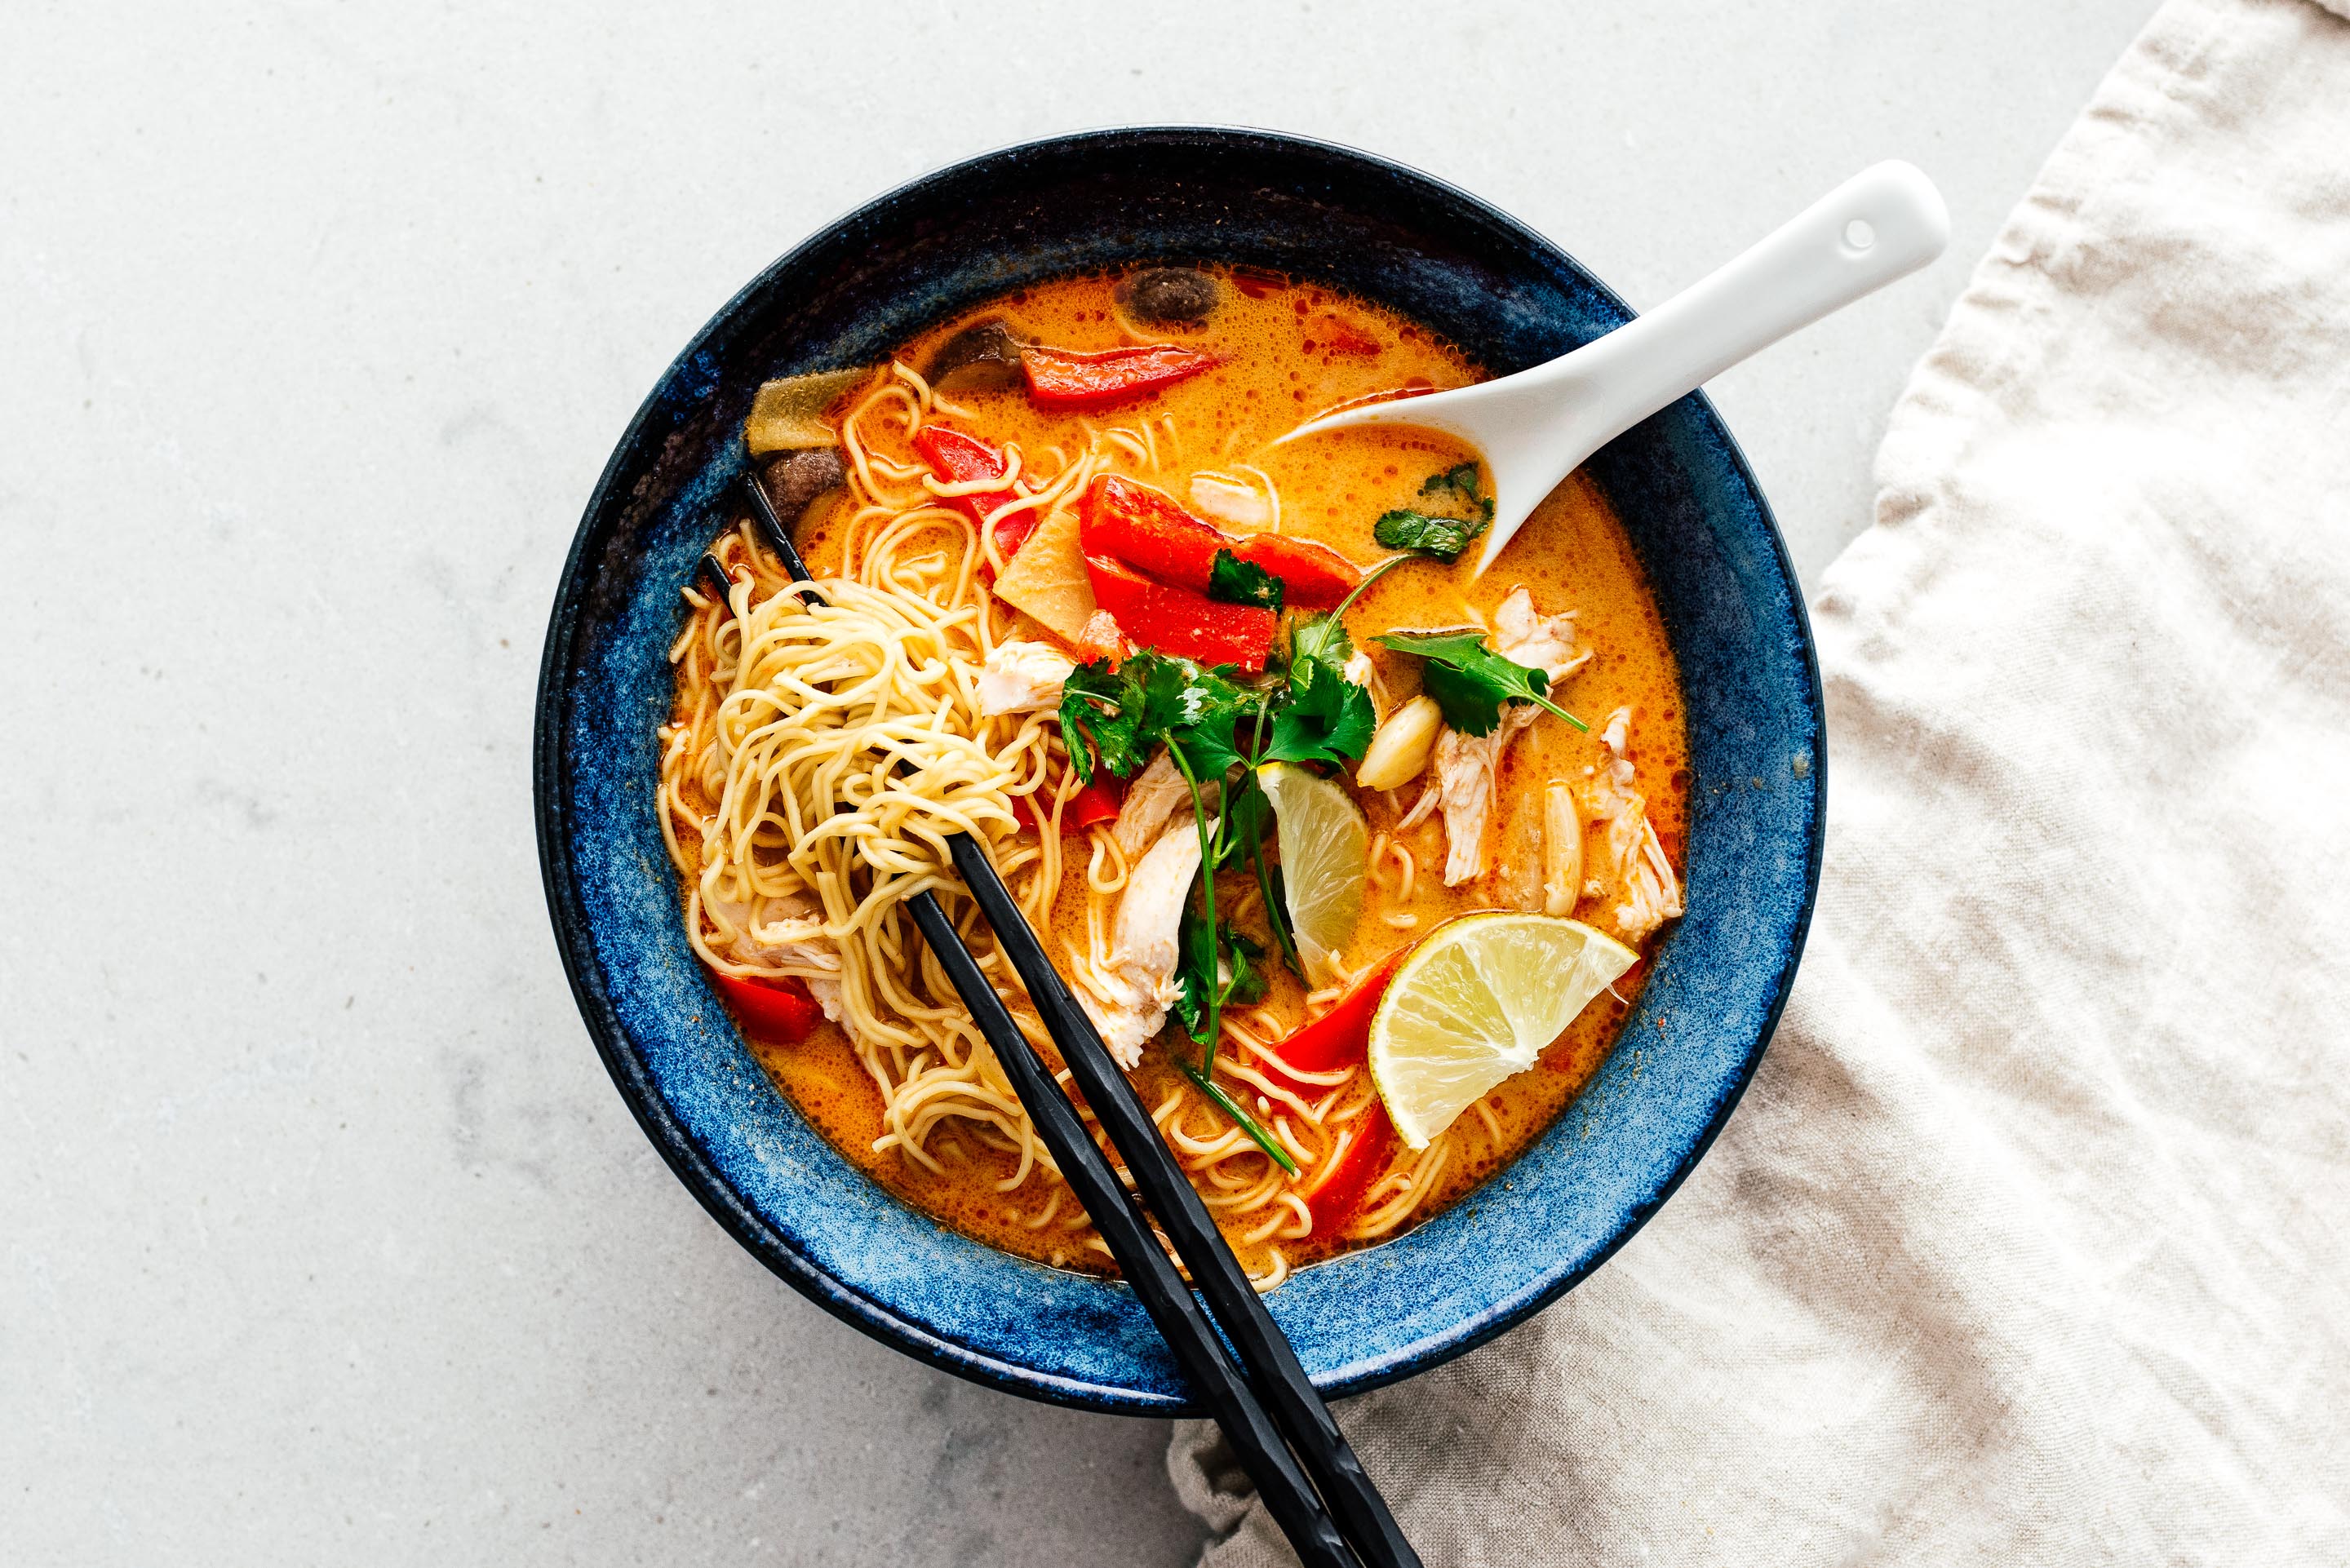
A super simple satisfying weeknight dinner full of flavor, lean protein, vegetables, and noodles. This soup is packed with flavor from the curry and sesame, giving you a creamy, nutty soup that hits all the right flavor notes. I especially love the mushrooms. Don’t worry if the coconut milk “breaks” in the Instant Pot – you want it too, it’s how they make curries in Thailand and Malaysia and it’s a sign of a good curry :) Recipe hereInstant Pot black dal
Inspired by London’s famous Indian restaurant Dishoom – this black dal is based on their signature dish that takes over 24 hours to make. This Instant Pot comes together in a flash and is so GOOD. Tender lentils in a rich and creamy tomato gravy seasoned with cinnamon, coriander, cardamom, fennel, and graham masala. Finish everything off with with butter and heavy cream and serve it up with homemade naan. Recipe hereInstant Pot Meatballs and Pasta
I’ve been obsessed with making Instant Pot pastas ever since discovering that you can cook pasta in sauce without having to drain the pasta. Seriously, what a game changer. The pasta gets infused with the flavors of the sauce and everything cooked up together in the Instant Pot means it’s truly a one pot meal. You might think making meatballs for the Instant Pot would be fussy, but this recipe has ZERO browning, so that means that all you have to do is drop them right into the sauce. The meatballs are tender and juicy and the pasta is perfectly done. Recipe hereInstant Pot Chicken Pot Pie Pasta
This is one of our most made recipes on the blog and it’s a personal favorite of mine as well! Cooking pasta in sauce right in the Instant Pot means no draining and so much flavor. This is a super creamy pasta that tastes just like chicken pot pie. Recipe hereInstant Pot Teriyaki Chicken
Chicken in the Instant Pot is always a pro move - it comes out perfectly cooked, tender and juicy every time. This teriyaki chicken is no exception: sweet and tangy glossy teriyaki sauce and juicy chicken thighs. Serve it up with fluffy rice and some broccoli and forget about delivery. Recipe hereInstant Pot Chicken Tortilla Soup
Tortilla soups are delicious. Tortilla soup that comes together in the Instant Pot is delicious and smart. Full of tender chicken, smokey fire roasted tomatoes, and a bit of spice, this tortilla soup will warm your right up. Extra toppings are a must! Recipe here Read More →
I Am... 22 Best Air Fryer Recipes
These air fryer recipes are just what you need if you want to expand your air fryer horizons. Did you just get a new air fryer? Maybe you want to be a little healthier? Are you looking for new things to make other than frozen french fries? we love our air fryer and these recipes represent the best things we've made with it. One thing: look into getting a rack for your air fryer because you can triple your air fryer abilities. If you’re buying a rack, whether online or offline, don’t forget to check the diameter so you can be sure it fits in your air fryer!
Pok Pok Style Fish Sauce Chicken Wings
No one is really traveling right now but you can get a taste of Vietnam via Portland with these super savory sweet and salty crispy air fryer chicken wings that are finger licking good. Bonus, they’re not battered so less carbs means you can eat more wings! [wprm-recipe-roundup-item id="28693"]Air Fryer Crispy Cacio e Pepe Chickpeas
Do you love those crispy chickpeas you get on salads sometimes? Make a big batch and enjoy snacking at its finest: protein rich air fryer chickpeas with a huge amount of parm and freshly cracked black pepper. [wprm-recipe-roundup-item link="https://weightloss-update.fit/oven-roasted-or-air-fryer-crispy-cacio-e-pepe-chickpeas/" newtab="0" name="" summary=""]Air Fryer Chicken Tacos
These are probably the best air fryer tacos you’ll ever make in your air fryer. Juicy chicken seasoned with garlic, oregano, and cumin, and the crispiest, crunchiest taco shells ever. [wprm-recipe-roundup-item id="33683"]Air Fryer Kale Chips
Like chips, but kale because you’ve been feeling a bit fluffy lately. Let’s face it, they’re not potatoes, but air fryer kale chips are crispy, full of vitamins, and almost just as addictive. [wprm-recipe-roundup-item link="https://weightloss-update.fit/crispy-air-fryer-kale-chips/" newtab="0" name="" summary=""]Air Fryer Chicken Breasts
The perfect air fryer chicken breast recipe: juicy breasts every time! Use them in salads, with pasta, over rice, with noodles, in tacos, even as a snack! Meal prep, here you come! [wprm-recipe-roundup-item id="34718"]Air Fryer Roasted Brussels Sprouts
Everyone knows the best sprouts are the ones that are deeply caramelized. Air fryer brussels sprouts are so good: the outer edges get crisp and charred and insides are tender and savory. The best part? You don’t have to heat up your oven. [wprm-recipe-roundup-item id="34801"]Air Fryer Chicken Thighs
If you’re a thigh lover, these air fryer chicken thighs are tailor made for you. So quick and juicy and perfectly full of chicken-y goodness. These with a side of salad or crispy roast potatoes are the ultimate meal. [wprm-recipe-roundup-item id="34490"]Air Fryer Potatoes
These air fryer potatoes are like giant fries. Or roast potatoes. You choose. no matter what you call they, they’re crispy, golden, crunchy on the outside and fluffy and tender on the inside. I love you air fryer potatoes! [wprm-recipe-roundup-item id="35009"]Air Fryer Chicken Wings
What’s that saying? Teach someone to fish and you feed them for a lifetime? Learn how to make air fryer chicken wings and you’ll never go hungry again! Juicy, fast, crispy, and undeniably delicious. Customize them anyway you want! All the flavors! [wprm-recipe-roundup-item id="34092"]Easy Roasted Air Fryer Asparagus
Spring is coming and if you can’t wait this air fryer asparagus is here to save the day. Tender and crisp and bright green, all happy asparagus things! [wprm-recipe-roundup-item link="https://weightloss-update.fit/easy-roasted-air-fryer-asparagus/" newtab="0" name="" summary=""]Air Fryer Char Siu
Um, did you know that you can make Chinese BBQ pork in the air fryer? Because you can. It has the char, the umami, the meatiness, the sweetness, and all the good things you love about char siu. [wprm-recipe-roundup-item id="31358"]Air Fryer Tofu
This is a super simple air fryer tofu, no batter or breadcrumbs needed. The tofu puffs up and becomes crisp and delicious. Two ingredients, gluten free, low-carb, this tofu is everything. Make several batches and your meal prep is done. [wprm-recipe-roundup-item link="https://weightloss-update.fit/crispy-air-fryer-tofu/" newtab="0" name="" summary=""]Korean Fried Chicken
Looking for some spicy saucy crispy crunchy wings to snack on while you binge K-Dramas? This double fry air fryer technique combined with a sweet and spicy gochujang-honey sauce will satisfy ALL your cravings. [wprm-recipe-roundup-item id="31643"]Air Fryer Vietnamese Chicken Wings
These air fryer chicken wings are coated in legit what I think is the BEST seasoning mix ever. So addictive! Crispy, salty, sweet, these wings are everything. [wprm-recipe-roundup-item link="https://weightloss-update.fit/air-fryer-vietnamese-chicken-wings/" newtab="0" name="" summary=""]Air Fryer Roasted Broccoli
If you're looking for perfectly crispy broccoli with just the right amount of char, it's time to break out the air fryer. [wprm-recipe-roundup-item link="https://weightloss-update.fit/how-to-make-crispy-air-fryer-roasted-broccoli/" newtab="0" name="" summary=""]Crispy Air Fryer Chicken Strips
Air fryer chicken tenders, um yes please, especially with ALL the sauces. The panko outsides are crispy and crunchy and the chicken tenders are so juicy. [wprm-recipe-roundup-item link="https://weightloss-update.fit/crispy-air-fryer-chicken-strips/" newtab="0" name="" summary=""]Air Fryer Pork Chops
Did you know that pork chops are best made in the air fryer? They end up being like no pork chop you’ve ever tasted: tender, juicy, and full of flavor thanks to a Italian green sauce. Best part: they less than 30 minutes. [wprm-recipe-roundup-item id="34877"]The Crunchiest Air Fryer Asian Fried Chicken
These are going to be the crispiest, crunchiest, juiciest wings to ever come out of your air fryer. They’re blank slate for all of your flavor dreams so what are you waiting for?! [wprm-recipe-roundup-item id="31807 "]Air Fryer Parmesan Garlic Knots
Air fryer garlic knots are dangerously delicious: fluffy on the inside, crisp on the outsides, dunked into a super aromatic garlic butter and finished off with a huge shower of parm. I can eat all of these in one sitting. [wprm-recipe-roundup-item id="34896"]One Ingredient Air Fryer Keto Popcorn Cheese Puffs
These are going to be the crispiest, crunchiest, juiciest wings to ever come out of your air fryer. They’re blank slate for all of your flavor dreams so what are you waiting for?! [wprm-recipe-roundup-item id="32075"]Air Fryer Bacon
Seriously the best way to make bacon. For bonus points, twist the bacon into straws and enjoy the texture difference between the soft insides and the crispy edges. [wprm-recipe-roundup-item id="37988"]Air Fryer Eggs
Perfect eggs, every time, just the way you like them! [wprm-recipe-roundup-item id="38933"]
I Am... How to Brown Butter: Tips, Tricks, and Recipes
Just 10 minutes and you can have the best brown butter to add a nutty, deep richness to both sweet and savory recipes. If you ask me what the best thing you can do for your baked or savory goods that only takes an extra 10 minutes, it’s to use browned butter. If you’ve tasted the toasty, nuttiness of browned butter, then you know that it’s a certain kind of magic. This step-by-step tutorial will show you the best way to brown butter and all the best ways to use it!
What is brown butter?
Brown butter, also known as beurre noisette (hazelnut butter in French), is an out-of-this-world delicious concoction originally used in savory French foods but is now used everywhere butter is used. It’s deeply golden, flecked with brown bits, nutty, and incredibly aromatic. Browned butter is perfection. To make it, butter is slowly melted down, separating butter fat and milk solids. The milk solids sink to the bottom of the pan and toast, caramelize, andbrown, making it smell nutty and wonderfully aromatic. Browned butter brings so much flavor to both sweet and savory goods for just a tiny bit of extra effort. It adds a nutty caramel roundness and highlights both sweet and savory flavors making everything it touches taste more deep, rich, and intense. I just LOVE it!Ingredients
All you need for this amazing ingredient is butter. Usually if I’m using brown butter for something sweet I go for unsalted butter. For savory dishes, I use unsalted too, but I have used salted butter. You can use either but because the flavor of the butter concentrates, salted butter is definitely more intensely savory. Aside from the butter you’ll need a skillet or saucepan and something to stir with.How to make brown butter
Melting unsalted butter over very low heat, allows it to separate into butter fat and milk solids. The milk solids fall to the bottom of the pan where they start to brown until they reach the color of hazelnuts. Here’s a step by step!- Warm: start your butter, cut in in small pieces, in a cold pan and warm it slowly so that it melts evenly.
- Sputter: once the butter has melted, it will start to bubble and foam as the water cooks off and the fat left behind begins to sputter. The butter will still be yellow. Stir gently and turn down the heat if it starts to splatter too much.
- Foam: the butter will foam and the foam will change from pale to very yellow as the water cooks off even more and you’re left with the milk solids, which you should see floating near the bottom of the pan.
- Brown: the butter will start to look deeply yellow and start to become golden and brown. The milk solids will become even more visible and your place will smell amazingly toasty, nutty, and caramel-y.
- Remove: Once your butter is to your liking, take it off the heat and pour it out into a heat proof bowl or liquid measuring cup as the milk solids will continue to toast in the residual heat. Be sure to scrape the toasted brown bits at the bottom of the saucepan. They are the toasted milk solids and are what gives brown butter its amazing flavor.
Tips and tricks
- Use a light colored saucepan so you can see the color of the butter change. An enamel milk pan is perfect for this. This is the one we own.
- Stir the butter so that it melts and heats evenly.
- Butter can burn quickly. Once your butter is the right color, transfer it out of the pan so it doesn’t continue to heat up.
Salted or unsalted butter
It’s up to you, I use unsalted mostly, but for savory dishes salted butter works too!How long does it take to brown butter?
It really varies because different brands of butter have different amounts of water. Generally I say it takes between 4-8 minutes.What kind of pan
A light colored saucepan is best so you can see the brown butter bits. If you have a white milk pan that will work, also, regular stainless still saucepans work too.Does browned butter solidify?
Yes! You can make brown butter then pop it into the fridge where it will turn into solid brown butter. You can cream solid brown butter for frosting, cookies, cake, and basically anywhere you use regular butter.How to store browned butter
If you need to keep your browned butter for later, just pour it into an airtight container and keep it in the fridge for up to 1 week. It will solidify in the fridge. If you need it at room temp, you can leave it out, just like regular butter. You can also melt it again for sauces, just be sure to do it over very low heat so it doesn’t brown again.How to use brown butter in any recipe
You can use browned butter in any recipe in a direct 1 to 1 swap. If your recipe calls for sold butter, be sure to pop the brown butter in the fridge so it turns solid. For recipes that call for melted butter, you can gently melt it or use it straight after you brown it. Brown butter adds so much flavor to every dish. Honestly I’ve eaten it just drizzled over vegetables, it’s THAT good. Here are some ideas to get your started:Sweet brown butter recipes
- The best ever chocolate chip cookies
- Snickerdoodles
- Brown butter brownies
- Macadamia dark chocolate cookies
- Pumpkin cupcakes with browned butter frosting
- Blueberry oat bars
Savory brown butter recipes
- Garlicky mushroom risotto
- Garlic parmesan noodles
- Sage and butter spinach pasta
- Steak with a drizzle of browned butter is amazing
- Brown the butter in this garlic lobster pasta for umami overload
How to make brown butter
Just 10 minutes and you can have the best brown butter to add a nutty, deep richness to both sweet and savory recipes.
- 1/2 cup butter (cut into 1 inch pieces)
Add the butter to a small sauce pan (try to use a light colored sauce pan if you can).
Melt the butter over medium heat, stirring. The butter will melt then eventually foam up.
After a couple of minutes, the butter will separate into milk fat and milk solids. The milk solids will start to brown on the bottom of the sauce pan. Keep stirring and use your nose, once it starts to smell nutty and turn amber, it’s time to take the pan off the heat.
Carefully pour the browned butter in a heat proof container, being sure to scrape up the brown bits. Let cool for 10 minutes and use in your recipe as directed. If you need solid brown butter, cool in the fridge until solid.

I Am... 5 Easy Baked Brie Recipes
Baked brie has got to be the most crowd pleasing, easiest appetizer there is. Everyone loves it, it seems fancier than it actually is, and it’s super easy and quick to prepare. Plus there are so many variations you can make! I remember the first time I ever had baked brie. It was the most magical thing ever, no joke. It was at a Christmas party years and years ago and I had no idea my life was about to change. The host brought out a baked brie out with a huge pile of crackers and all of a sudden I was that one person that was next to the cheese all night. Some people are extroverts, some people are introverts, I’m a cheese-o-vert. Melty brie is my idea of a good party.
What is baked brie?
Baked brie is the best melted cheese ever. Period. It’s brie, that’s baked. That simple, yet compelling and seductive. Cutting through the mild and tender rind to have the brie melt out like lava is addictive. With baked brie, everything is right with the world.Why you should make baked brie
It’s the easiest appetizer ever. All you do is pop brie into a warm oven (or even the microwave!), put it on a platter, add some crackers and it’s cheese pull heaven. Add some extra flavors and you too can change someone’s world.How to make baked brie
Bake it in a round, shallow oven proof dish. That’s it! If you don’t have a dish, place it on parchment paper and then use the parchment to transfer it to a serving plate later on.What kind of brie for baked brie
There are so many kinds of brie out there with different price points. I tend to grab 8 ounce rounds of brie that’s locally made or something that’s affordable.Do you take the rind off baked brie?
Nope! The rind of brie is perfectly edible and it helps the brie keep its shape and insulates the insides from drying out. You don’t need to take the rind off when you bake it, just cut straight into it when it comes out of the oven melty and hot. If you don’t prefer to eat the rind, simply remove the top layer before or after baking and dip into the brie like fondue.What to bake brie in?
Use an oven proof baking dish, skillet, or small rimmed shallow bowl that is just a bit larger than your brie. You can use a gratin dish, a mini cast iron skillet, or even just crumpled up parchment paper that you can then move to a plate after baking.How long will baked brie stay melted?
If you bake it in a skillet or dish, the dish will help keep the brie scoopable and gooey for about 15 minutes. You can reheat it gently in the microwave for 30 seconds at a time to make it gooey again.How do you serve baked brie?
I put the dish that it’s been baked on on a platter or a larger dish with crackers or crunchy things around it, kind of like how you would style a charcuterie board. Add a knife so people can optionally use it to scoop up some melty cheese, but most people will just take their crackers, toasts, or whatever and just dip and scoop.Baked brie ideas
If you’re looking for your own take on baked brie, here are some tips! Add something:- nutty - a little bit of crunch and nuttiness is never wrong. I like using toasted or candied nuts as opposed to raw ones. Try toasted walnuts, pecans, macadamia nuts, pistachios, almonds, hazelnuts, pine nuts or even seeds like roasted sesame or sunflower seeds
- sweet - honey, maple syrup, jams, compotes, and fresh fruits highlight the buttery richness of brie.
- savory - most of the time people do sweet things with baked brie but things like crispy bacon, crispy pancetta, roasted tomatoes, sun dried tomatoes, pesto, roasted garlic, caramelized onions, roasted mushrooms, or even chili oil are AMAZING.
- herby - fresh herbs are pretty and aromatic, try thyme, rosemary, mint, sage, basil, oregano
What to serve with baked brie
- sourdough crackers: amazing with baked brie!
- fruit: grapes, sliced pears, sliced apples, sliced peaches, or berries are delicious!
- nuts: toasted almonds, walnuts, pecans, candied nuts taste amazing with brie.
- kettle chips: this is my absolute favorite mix of high-low. You haven’t lived until you’ve dipped a folded over kettle chip into melty brie!
If you love brie, here are some other brie recipes to try!
- Cran-brie grilled cheese: cranberry and brie
- Four cheese pizza with mozza, parm, brie, and ricotta
- Roast beef and brie puffs
- The best charcuterie board featuring brie
Classic Baked Brie
Classics exist for a reason, amirite? This is essentially how you bake brie and warm it to a melty point. Accent the creamy, buttery flavor with a drizzle of honey and some fresh thyme or add your favorite jam or accents for your own take. Baked Brie serves 6 15 minutes 6-8 ounce round brie honey thyme sprigs- Heat the oven to 350°F.
- Unwrap the brie (leave the rind on) and place in a small, round shallow oven proof dish.
- Bake for 15-20 minutes. To see if it’s melty, gently poke the center of the brie, it should feel melty and wobbly under the rind.
- Remove from the oven and place the dish on a larger serving plate.
- Drizzle with a generous amount of honey and top with fresh thyme.
- Serve with crackers and a knife/spoon to help with scooping.
Jammy Pecan Baked Brie
Holiday vibes all around with this gorgeous baked brie. The red and white is super festive and sweet-tart cranberries and pecans are amazing together with melty brie. Jammy Pecan Baked Brie serves 6 5 minutes 15 minutes 6-8 ounce round brie 1/4 cup raspberry jam or jam of choice 1 teaspoon oil 1/4 cup pecans 1 tbsp brown sugar rosemary, to finish- Heat the oven to 350°F.
- Unwrap the brie (leave the rind on) and place in a small, round shallow oven proof dish.
- Top the brie with the cranberry jam.
- Toss the pecans with a bit of oil and brown sugar then place on top of the cranberry jam.
- Bake for 15-20 minutes. To see if it’s melty, gently poke the center of the brie, it should feel melty and wobbly under the rind.
- Remove from the oven and place the dish on a larger serving plate.
- Serve fresh rosemary and crackers and a knife/spoon to help with scooping.
Pistachio and Pear Baked Brie
Crunchy, nutty pistachios with warm, melty brie, a crisp pear, and a cracker are so delicious together. I love how the pistachios look against the brie and green Anjou pears echo the green of the pistachios. A little drizzle of honey and flaky sea salt makes this the perfect combination of sweet and salty. Pistachio and Pear Baked Brie serves 6 5 minutes 15 minutes 6-8 ounce round brie 1/4 cup chopped pistachios honey, to drizzle flaky sea salt 1 pear, thinly sliced- Heat the oven to 350°F.
- Unwrap the brie (leave the rind on) and place in a small, round shallow oven proof dish.
- Bake for 15-20 minutes. To see if it’s melty, gently poke the center of the brie, it should feel melty and wobbly under the rind.
- Remove from the oven and place the dish on a larger serving plate.
- Top with chopped pistachios, drizzle with honey, and finish with flaky sea salt.
- Serve thinly sliced pears, crackers and a knife/spoon to help with scooping.
Apricot and Almond Baked Brie
Apricot jam is velvety, tangy and sweet - and I absolutely love it with brie. When it warms in the oven, it almost turns into a glaze and helps caramelize the almonds a bit. The softness of the brie with the crunch of the almonds is divine. Apricot and Almond Baked Brie serves 6 5 minutes 15 minutes 6-8 ounce round brie 1/4 cup apricot jam 2 tbsp chopped almonds fresh thyme- Heat the oven to 350°F.
- Unwrap the brie (leave the rind on) and place in a small, round shallow oven proof dish.
- Top the brie with the jam and sliced almonds.
- Bake for 15-20 minutes. To see if it’s melty, gently poke the center of the brie, it should feel melty and wobbly under the rind.
- Remove from the oven and place the dish on a larger serving plate.
- Serve fresh thyme, crackers and a knife/spoon to help with scooping.
Mini Baked Brie Bites
Make these when you want to pull out all the stops! Baked brie en croute, the fancy French way of saying brie baked in pastry, is probably going to be one of the best bites you ever put in your mouth. Flaky, buttery puff pastry wrapped around gooey warm brie, and a tiny bit of sweetness from honey or jam. HEAVEN.Mini Baked Brie Bites
Make these when you want to pull out all the stops!
- 1 sheet puff pastry (thawed)
- 6 mini brie
- 3 tbsp jam (jam of choice, or honey)
- 1 large egg
Heat the oven to 400°F. Gently roll out the puff pastry to a 12x12 square, then cut into 9 equal squares. Place a teaspoon of jam or honey onto each square, then top each square with a mini brie bite.
Wrap the dough around the brie bite, pressing to secure. Flip the bites over so the smooth side is on top.
Lightly beat the egg with 1 tbsp water then brush the tops of the pastry with the egg. Score the tops with a sharp knife.
Bake for 20-25 minutes or until golden brown and cooked through. Let cool slightly and enjoy!

Latest Comment
“Sending you love on your journey with chemo!”Beth on Tiktok Hot Honey Cottage Cheese Sweet Potato Beef BowlPopular
 2015 Holiday Giveaway
  One-Pot Lemon Scallop Pea Spaghetti
  Beer Battered Onion Rings, Jalapeno Aioli
  2014 Holiday Gift Guide and a Giveaway
 Easy Gourmet Hot Wings and a Giveaway!
  The Ultimate Veggie Sandwich
  Vegan(!) Creamy Corn Soup Recipe
  Sunday Brunch: Grilled Cheese Eggs Benny
