
I Am... Cabbage Soup
Are you a cabbage soup fan? I love it! It’s hearty, filling, and full of all the good stuff. You can make a giant pot and eat it throughout the week and it’s the best thing to come into after being out in the cold. This cabbage soup is super savory, a little bit spicy, with bits of tender cabbage, meaty sausage, and sweet carrots. This cabbage soup is going to warm you right up! Cabbage is one of those under appreciated vegetables. It’s not trendy like kale or sexy like heirloom tomatoes. Cabbage just is. It hangs out in the fridge section of the grocery store, doing its thing day after day. Cabbage is an unsung hero! It’s cheap, it keeps forever, and is SO versatile. Can you imagine a life without coleslaw, cabbage rolls, or kimchi?! Would we even be living? This soup celebrates cabbage for all that it is: silky and sweet, tender and soft.
This isn’t your classic cabbage soup
It’s based on Korean jjigae and it’s a little bit spicier and a lot more addictive. It gets its flavor from a healthy amount of kimchi: great for adding flavor (and more cabbage) and probiotics. This soup also features farmer’s sausage (or any other smoked sausage), onions, carrots, and cabbage of course! It’s flavorful, healthy, and comes together incredibly quickly. Make a pot and feed yourself for the week.How to make cabbage soup
- Optional: Start off by browning some slices of smoked sausage, they’ll add a huge amount of meaty flavor.
- Sauté some onions, garlic, and ginger to add layers of warming flavors.
- Stir in the cabbage and vegetables along with some stock, kimchi, and seasonings.
- Simmer until everything is tender and cooked through and all the flavors have melded together.
- Enjoy!
Ingredients
The ingredients for this cabbage soup are pretty standard with a couple of extras to make it extra special. You have the usual suspects: green cabbage, onions, garlic, and carrots. Then we’re going to add in some kimchi for a bit of acidity and spice, gochujang, soy sauce, and toasted sesame oil.- Kimchi - they sell kimchi pretty much everywhere now and it’s no wonder why: it’s healthy, sour, addictive, and spicy. When you cook it, the flavors of kimchi mellow out and sweeten making it only slightly spicy and much more sweet.
- Gochujang - a savory, sweet, spicy fermented paste made from chili powder and sticky rice. It adds sweet and heat and a ton of flavor. Traditionally it comes in tubs, but these days you can find it in squeeze bottles in the Asian aisle of literally any grocery store (or online, as always).
- Soy sauce and toasted sesame oil - the soy sauce adds umami and saltiness while the toasted sesame oil adds a hint of round nuttiness that will make you want to eat bowl after bowl of this soup.
Vegetarian cabbage soup
The photos of this soup feature sausages, but you don't need them. It tastes really good as a vegetarian soup too! To make this soup vegetarian, leave out the sausage and switch the stock to vegetable stock, and also make sure you use vegetarian kimchi. Kimchi is traditionally made with tiny shrimp or fish, so by default it's not vegetarian/vegan. Many popular brands, such as Chongga, color code their caps - green is traditional and red is vegan - but it's not always true so be sure to check the ingredients.Instant pot cabbage soup
To make this soup in the instant pot, turn the Instant Pot on Sauté high and brown the sausages, if using. Stir in the onions, ginger, and garlic. Add the remaining ingredients and set the Instant Pot to high pressure for 15 minutes. Quick release when done, taste and season.
Crock pot cabbage soup
To make this soup in a crock pot, just add all of the ingredients to the Crock Pot. If using, brown the sausages in a pan on the stove before hand. Cook for 8 hours on low or 4-5 hours on high. Taste and season before enjoying.
How to prep and cut cabbage
- Wash the whole end and peel the first layer of leaves, which tend to be older and tougher.
- Lay the cabbage down on a cutting board, core side down. Slice through the middle of the cabbage with a large knife, cutting straight through the core.
- Place the cut sides down on the cutting board and cut in half again, vertically so you have a quarter cabbage.
- Cut out the core (that’s the solid looking part in the middle) at a slight angle.
- Cut the cored cabbage into bite size pieces.
What to serve with cabbage soup
- A side of rice for some cabbage roll vibes
- Garlic knots because garlic knots
- Spicy chili crisp grilled cheese would be AMAZING
Storing and freezing
You can keep this soup covered in the fridge for up to five days (hello meal prep!) or you can freeze it in an air tight container for up to three months. Reheat on the stovetop or in the microwave. Happy soup season! xoxo stephCabbage Soup
Super savory little bit spicy cabbage soup with bits of tender cabbage, meaty sausage, and sweet carrots.
- 1 lb sausages (sliced, farmers or kielbasa preferred, optional)
- 1 medium onion (chopped)
- 4 cloves garlic (minced)
- 1 inch ginger (minced)
- 8 cups chicken stock (no sodium preferred, or vegetable stock)
- 2 cups kimchi (including juice)
- 1-2 tbsp gochujang (optional, see notes)
- 1 tbsp soy sauce
- 1 tsp toasted sesame oil
- 1/2 head cabbage (cut into 1 inch pieces)
- 2 carrots (peeled and diced)
- 2 tbsp green onions (sliced, to finish)
In a large pot, heat up a bit of oil over medium high heat. If using sausages, add the sliced sausages and cook until lightly browned on both sides, 3-4 minutes.
Stir in the onion, garlic, and ginger, and cook until the onion is soft, 2-3 minutes.
Stir in the chicken broth, kimchi with juice, gochujang, soy sauce, sesame oil, cabbage, and carrots. Bring to a simmer and cook for 30-40 minutes, or until cabbage is tender and to your taste. Taste and season with salt and pepper and enjoy warm!
Gochujang can be pretty spicy, about half as spicy as sriracha, so use it based on your own spice tolerance.
Estimated nutrition does not include sausages or gochujang.

I Am... Shepherd’s Pie
If you asked 6 year old me what my favorite meal was, the answer was shepherd’s pie. And if you ask me right now what my favorite comfort meal is, the answer would be: shepherd’s pie. There’s just something so cozy and comforting about a big bowl – yes, I have to have it in a bowl – of super savory saucy beef mixed with corn and peas topped off with a huge pile of creamy mashed potatoes. I still eat it the same way I did when I was little: I mix everything together so each bite is essentially mashed potatoes with meat mixed in. I use a spoon so everything goes from the bowl to my mouth in no time flat. For me I can’t imagine anything more cozy than being wrapped up in a blanket, on the couch, with a bowl of shepherd’s pie. But wait! You’re probably thinking to yourself right now, shepherd’s pie isn’t made with beef. And you’re right! Shepherd’s pie is traditionally made with lamb, but beef is just as tasty – if not more! Technically what I love eating is called a cottage pie, but tomato, to-mah-to, am I right? Whatever you want to call it, a super savory meaty ragu topped off with creamy mashed potatoes is a comfort food classic, one that you’ll come back to time and time again.
What is shepherd’s pie?
Shepherd’s pie is an classic English dish: a ground meat pie topped off with mashed potatoes. There are so many variations, but generally, they all have a saucy ground minced meat bottom and a layer of potatoes baked up until bubbling and crisp. Originally, shepherd’s or cottage pie was an ingeniously way use up leftover meat by baking it into a potato topped casserole. Now, most people purposely make it instead of it being a leftovers dish.How to make shepherd’s pie
One of the reasons why shepherd’s pie is so popular is probably because it’s so easy to make. It’s a great weeknight meal, it’s perfect for meal prep, and you can make it ahead and freeze it as well.- Cook the potatoes. Start off by cooking peeled potatoes in salted water. While they’re happily simmering away, you can multitask and make the pie filling.
- Cook the aromatics. Lightly cook some onions, garlic, carrots, celery until soft and tender.
- Cook the beef. Add the beef to the pan and cook, breaking up, until cooked through. Sprinkle on some flour - this helps thicken up the base of the pie - and then add some beef stock, tomato paste, herbs, and a splash of soy sauce for an extra bit of umami. Scoop everything into a casserole dish and set aside.
- Mash the potatoes. By now your potatoes should be tender. Drain them well then mash and season. I like stirring in a bit of sour cream for tang. You can also add in shredded cheese for cheesy potato tops too!
- Make the pie. Finish off the pie by spooning the potatoes onto the meat and evenly spreading them off. Top the potatoes off with a bit of butter and it’s ready to go in the oven.
- Bake. Bake the casserole (place it on a baking sheet to catch any drips) until the tops are golden brown and crispy and enjoy!
Shepherd’s pie vs cottage pie
Purists will say that shepherd’s pie is made with lamb and cottage pie is made with beef, but in America, most people refer to cottage pie (which is made with beef) as shepherd’s pie. This particular iteration is made with beef so it’s technically a cottage pie! Try this recipe for a classic lamb version.Shepherd’s pie ingredients
We’re making a classic shepherd’s/cottage pie with ground beef, onions, garlic, celery, carrots, corn, peas, herbs, potatoes, butter, sour cream, and just a touch of soy sauce and tomato paste to bring everything together and give the pie an extra boost of flavor.To bake or not to bake
When I was making this, Mike asked me, why the heck do you bake it when all the ingredients are cooked? That is a good question! I do it because I like the tops to be browned and crispy, but if you don’t want to wait or don’t care for crispy potato tops, you can serve this up in a bowl with a scoop of the saucy meat with mashed potatoes on top. In fact, I’ve seen lots of shepherd’s pie served like this in pubs and restaurants. Some might argue that they’re baked together to meld the flavors or some such stuff like that but really, with a comfort food like this, I think you can pretty much get away with doing what you like!Make ahead
Assemble the shepherd’s pie completely (don’t bake it) and then cover it tightly and pop it into the fridge. You can make this up to 2 days in advance. When you want to serve, bake it in a 375°F oven until bubbly and crisp.How to freeze
To freeze, make the pie but don’t bake it. Cover tightly and freeze for up to 3 months. Thaw completely before warming in the oven.How to reheat
My preferred way of reheating individual portions is the microwave for about 1 minute but you can also heat this up in a low 300°F oven, covered, for 10-15 minutes or until heated through. If you’re heating it up from frozen, let the pie thaw before heating in the oven.Variations
- Jamie Oliver's Lamb Shepherd's Pie Recipe
- Shepherd's Pie with Roasted Garlic Cream Cheese Mashed Potatoes
- Turkey Shepherd's Pie
Shepherd’s Pie Recipe
Super savory saucy beef mixed with corn and peas topped off with a huge pile of creamy mashed potatoes.
- 1.5 lb potatoes (Yukon gold, peeled and quartered, about 3-4 large potatoes)
- 1 medium onion (diced)
- 2 cloves garlic (crushed)
- 2 small carrots (peeled and diced)
- 2 stalks celery (diced)
- 1 lb ground beef (lean preferred, or lamb)
- 1 tbsp flour
- 1/2 cup beef stock (no sodium preferred)
- 1 tbsp tomato paste
- 2 tsp soy sauce
- 2 sprigs fresh thyme
- 1 sprig fresh rosemary (minced, leaves only)
- 1/2 cup corn
- 1/2 cup frozen peas
- 3 tbsp butter (divided)
- 1/4 cup sour cream
- 1/4-1/2 cup milk
Preheat your oven to 375°F. While the oven’s warming up, make the mashed potatoes: place peeled and cut potatoes in a pot and cover with water. Generously salt the water and bring to a boil over high heat. When boiling, reduce the heat to maintain a simmer and cook for 15-20 minutes or until fork tender.
While the potatoes are cooking, make the pie filling. Heat a bit of oil over medium-high heat in a large skillet. When the oil is hot, add the diced onions and brown slightly, 2 minutes or so. Add the garlic, carrots, and celery. Cook until slightly tender, 2-3 minutes. Add the ground beef and cook, breaking up into pieces. When browned and cooked through, stir in the flour.
Add the broth, tomato paste, soy sauce, thyme, and rosemary. Stir and cook over medium low. Stir in the the corn and peas. Mix well, simmering, until it thickens slightly. Taste and season with salt and pepper, then scoop into the bottom of an oven-safe casserole dish.
When the potatoes are cooked, drain well and return to the pot. Add the roasted garlic. Over very low heat, mash the potatoes. Stir in 2 tablespoons butter and the sour cream. Stir in the milk until desired consistency. Taste and season generously.
Top the meat portion with the mashed potatoes and dot with the remaining 1 tablespoon of butter.
Bake the casserole (place on a baking sheet to catch any drips) until the potatoes are golden brown and crispy, about 30 minutes. If needed, broil for 5-8 minutes for an extra golden potato top. Enjoy warm.

I Am... Pilk
It has an unfortunate name, but guys, pilk is actually really good, especially if you like ice cream floats. Pilk, a portmanteau of Pepsi and milk, is trying hard to be THE DRINK this holiday season. It's creamy and sweet and apparently pairs perfectly with cookies. I’m a huge fan of dirty soda, so it’s no surprise that pilk is right up my alley.
What is pilk?
Pilk is a drink made from two ingredients: Pepsi and milk. It’s the holiday season and it’s time for pilk, at least according to Lindsay Lohan and Pepsi. All over the socials people are trying pilk. Some love it, some hate it, but it’s undeniable, Pepsi has hit viral marketing out of the park. It's a straight up meme now, with people trying it for the first time and either loving it or hating it. Pro tip, I like dirty sodas with heavy cream instead of milk. The thickness and richness of cream is more akin to a melted soda float and is smoother and more delicious. Bonus points if you use vanilla sweet cream instead of milk.Dirty soda
If you’ve been to Utah — where Lindsay Lohan’s comeback Christmas movie, Falling for Christmas takes place — you’re no stranger to dirty soda. Dirty soda, to the uninitiated, is a Utah special: soda and dairy in one drink. It’s creamy, sweet, and delicious. Dairy and soda is a really common combination — think root beer floats (root beer and vanilla ice cream) or egg creams (chocolate syrup, seltzer, milk). And it’s not just America, the dairy and soda combination is popular all over the world. There’s Milkis (Korean milky soda), Calpis (Japanese lactic acid, milk, and fizzy water), and Italian soda with cream (flavored fizzy water and cream). Fizzy soda and dairy are a match made in heaven.How to make pilk
- Pour a can of Pepsi into a chilled glass with ice.
- Top it off with 2 tbsp to 1/4 cup whole milk.
- Enjoy as is, or mix it up then enjoy.
Pilk ingredients
You only need 2 ingredients for pilk: Pepsi and milk.- Pepsi - go for the classic or Cherry or Vanilla Pepsi
- Milk - whole milk is best, for the creamiest flavor.
Variations
Instead of regular Pepsi, try these variations to make your perfect drink!- Vanilla Pepsi - a delicate, creamier flavor thanks to the vanilla.
- Cherry Pepsi - if you love cherry soda, then cherry Pepsi pilk is amazing. I love the tart sweetness of cherry Pepsi.
- Vanilla ice cream - a classic Pepsi float with vanilla ice cream, not pilk at all, but certainly delicious.
- Cream - cream is much better than milk, it dims the bubbles and is thick and luxurious.
- Vanilla sweet cream - this is the elite move, the sweetness and richness of vanilla sweet cream will make your pilk something to sip and enjoy by the fire.
If you’re looking for cookies to serve with pilk, please try out some of my favorite cookie recipes
- brown butter chocolate chip cookies
- soft and chewy gingerbread cookies
- the best snickerdoodles
- four giant cookies in one
How to make Pilk
Pilk is actually really good, especially if you like ice cream floats.
- 12 oz Pepsi (of choice)
- 1/4 cup milk (or to taste)
Pour chilled Pepsi into a large glass filled with ice.
Add 2 tbsp milk, or to taste. Mix, if desired, or drink as is, with swirls. Enjoy!
Estimated nutrition based on diet pepsi and reduced fat milk

I Am... Instant Pot Turkey: Perfectly Cooked Turkey in 20 mins
One of my favorite things is Instant Pot turkey. I love turkey. It happens to be one of my favorite meats, partially because it tastes so good but also because it just gives me those warm and cozy holiday feels. Mike and I actually eat turkey a lot, at all times of the year, because instant. A couple of years ago, we did a whole Instant Pot Thanksgiving, just to see if we could. Spoiler alert: we did it! Turkey, stuffing, mashed potatoes, sprouts, the Instant Pot did it all. The thing I was most impressed with was the turkey. It was juicy and incredibly fast. No basting, no guessing, just super simple juicy turkey.
Instant Pot Turkey?!
Absolutely yes! We made a little skin-on boneless turkey breast roast rubbed with butter, garlic, thyme, rosemary, and sage. All the classic turkey flavors you know and love. And bonus, you’ll even get some drippings to make turkey gravy.How to make turkey in an Instant Pot
- Get your turkey. Decide if you want turkey breast or turkey legs. I went with turkey breast because when breast is done right, breast really is best. There’s way more meat with breast compared to legs. If you’re a dark meat lover, legs are good too, the Instant Pot will make turkey legs super tender and juicy.
- Make herbed garlic butter. Mix together soft butter with chopped herbs and garlic. Classic poultry herbs include sage, rosemary, thyme, marjoram, tarragon, and parsley. Pro tip: they sell little fresh packs of poultry blend herbs in the fridge section at the grocery store.
- Season the turkey. Lightly pat your turkey dry, season generously with salt and pepper, then rub the herbed garlic butter all over.
- Instant Pot time. Pour a bit of chicken stock into your Instant Pot then put in the steam rack that it came with. Arrange the turkey on top and cook on high pressure (see below for times).
- Broil. When the turkey’s done and the pressure has been released, you can give your turkey a quick blast of heat for color, then you’re ready to eat!
How long to cook Instant Pot turkey breast
The magical ratio is: 6 minutes per pound of boneless turkey breast at high pressure. Six minutes per pound will give you supremely juicy turkey without that weird stringy texture you get when you cook poultry for too long. With turkey breast you want to quick release right away and take the turkey out of the Instant Pot so it doesn’t continue to cook and get dry.What about Instant Pot turkey legs?
If you’re a dark meat fan, cooking turkey legs in the Instant Pot makes the meat tender and fall off the bone. Cook the turkey legs for 20 minutes on high pressure, let it natural release for 10 minutes so it can continue to get tender, then release the pressure and take the legs out.Crispy golden brown skin
After you’re done, give your turkey a blast of heat in the oven. Just 2-3 minutes under the broiler will give you the classic golden brown skin that you associate with a good bird. If you don’t have a broiler or don’t even like turkey skin (you monster!), then you can skip that step all together.Instant Pot turkey ingredients
This is the simplest recipe with the smallest ingredient list: turkey, butter, garlic, fresh herbs, salt and pepper, and chicken stock.You get turkey gravy too!
Good news: you can make a super simple gravy with the drippings and stock that are in the Instant Pot. Measure out the drippings. Pour the drippings into a liquid measuring cup and top it off with more chicken stock (or water) so you have 2 cups of liquid. Make a roux. Melt some butter over medium low then stir in some flour to make a roux. Cook the mixture, stirring, until it is light golden and smells toasty. Add the liquid. Slowly stream in the liquid while stirring. Let everything come to a simmer and reduce slightly. Taste and season.What size Instant Pot do I need?
This Instant Pot turkey will work in an 8 quart Instant Pot and a 6 quart Instant Pot. It could work in a 3 quart, but it would be a very tight squeeze, unless you find a very small turkey breast roast. The cooking time remains the same across all Instant Pots, the only difference is that smaller Instant Pots come to pressure faster.
What to serve with this
Since you probably only have one instant pot, here are some ideas for non-instant pot yet quick and easy sides:- The best scratch made green bean casserole
- An easy mushroom shallot stuffing
- Mashed potatoes (non instant pot version) or Mashed potatoes(instant pot version)
- the Velveeta mac and cheese of your childhood, but better
Instant Pot Turkey Breast
Twenty minutes, five ingredients, and one awesome turkey breast.
- instant pot
- 2 tbsp butter (room temp)
- 2 cloves garlic (crushed)
- 2 tbsp herbs (chopped, herbs of choice, see notes)
- 2.5-3 lb boneless skin-on turkey breast roast (see notes)
- salt and freshly ground pepper
- 1/2 cup chicken stock (low sodium preferred)
Turkey Gravy
- 2 tbsp butter (room temp)
- 2 tbsp flour
- 1/2 cup drippings (from above)
- 1.5 cup chicken stock (low sodium preferred)
In a small bowl, mix together the butter, garlic, and herbs.
Season all sides of the turkey breast generously with salt and freshly ground pepper. Rub the turkey with the herb butter. Pour the chicken stock into the Instant Pot insert and set the steam rack that came with the pot inside. Place the turkey on the rack and cook on high pressure for 6 minutes per pound of turkey. Quick release when done. Carefully remove. If desired, broil in the oven on high for crispy skin, about 2-3 minutes.
After you remove your turkey from the Instant Pot, you’ll probably only have a little bit over 1/2 cup of stock. If your instant pot has inner volumetric markings, top it off with chicken stock until you have 2 cups. If not, transfer to a liquid measuring cup and top off. Set aside.
Melt the butter over medium low heat then stir in the flour. Cook, stirring occasionally until lightly golden brown. Slowly stream in the stock/drippings while stirring. Bring to a simmer and let reduce and thicken slightly. Taste and season with salt and pepper, then serve with your turkey.
Our turkey breast was 2.3 pounds and we used a package of poultry herbs that had thyme, rosemary, and sage.
Gravy made with butter instead of roasted fat tends to be on the lighter side – if you want a classically brown gravy, you’re going to need to boost this with a little bit of roasted fat. I simply deglazed the sheet pan that the turkey was broiled on with a bit of hot water and added it to the gravy for a bit of extra color.
Turkey is shown served with instant pot mashed potatoes.
Estimated nutrition is for turkey and gravy.

I Am... Best gifts for men 2022
Do you ever find it hard to shop for the men in your life? Thinking up good gifts for men always seem to be harder, amirite? I always find it super hard to shop for Mike, so this year I’m getting a bit of a head start. These are some of my ideas for perfect gifts for those hard-to-shop-for people in your life, featuring plenty of cozy feels! They’re not just for men, but they definitely appeal to those who like a more masculine aesthetic: leather, whiskey, and the great outdoors. Even though I’m looking for gifts that appeal to men, the theme for this year, according to me anyway, is cozy. I mean, it’s always cozy, but this gift guide feels particularly so. We’re featuring a mix of items that you can use on a crisp, cold day picnic, a bunch of our favorite kitchen things, cozy indoor activities, and some things that are just cute!
Gifts for men who are outdoorsy
Mini Concrete Fire Pit
If you or someone you love is missing campfires because it’s winter, get this amazingly cute tabletop fire pit. We have one and I love it so much. You fill it up with isopropyl alcohol (sold in the pharmacy) and just light it up for instant campfire feels. You can even roast marshmallows on it. We use ours on our deck and have brought it to the park and the beach and it’s such a cheery, warm table topper. Honestly I kind of want another one because I love it so much. Really, it’s the perfect gift for the pyro, s’more lover, or hipster friend in your life. [Amazon]Camp Loveseat
If you ever go tailgating, camping, to the park, or just want to cozy up to something, this is the portable chair for you! It’s a camp loveseat and believe me when I say that it’s super duper comfortable. It’s a great gift for anyone who spends a lot of time at outdoor sports, especially if you pair it with some hot hands (air activated hand warmers). [Amazon]Mini Portable Butane Stove
If someone you know is interested in hosting a Korean barbeque or hot pot party this is the cutest little butane stove. It’s also pretty portable so you can take it camping with you so it’s not just an use it at home kind of gift. I love how it comes in different colors. It’s also perfect for the friend who wants to fim their own cafe at home YouTube videos :) If you want to gift an induction cook top instead, we have and love this one. [Amazon]Gifts for men who like to be in the kitchen
That Noodle Life
This is the BEST gift for noodle lovers and I’m not just saying that because we wrote it. It’s bright and fun and has some of the best photos of noodles out there. I can say that because I love Mike’s photography and I think it’s some of his best. They’re also some of our best noodle recipes. Try it, you won’t regret it. There are quick recipes for weeknights, recipes to flex your cooking skills, and recipes that will introduce you to new flavors that will quickly become your favorites. Noodles are the ultimate comfort food and this is a book that will comfort you and whoever you gift it to. [Amazon]Milk Frother
If you’re looking for a stocking stuffer, a milk frother is perfect! I know what you’re thinking, no one you know even needs to froth milk. But the beauty of a milk frother is that it’s a mini electric whisk - one that that help you emulsify salad dressings, whisk eggs so they’re perfectly smooth, and make individual portions of whipping cream. I use mine all the time, it’s truly one of my underrated workhorses in the kitchen. If you have a matcha lover in your life, someone who takes collagen or protein powder, or enjoys lattes, they will love this small, thoughtful gift. PS - milk and oat milk froths up amazingly with micro foam with this whisk in particular. [Amazon]East Fork Pottery
I’m a huge pottery fan and I LOVE East Fork. Everyone needs beautiful bowls to eat out of and if you want to treat a loved one, I recommend their rainbow set created in partnership with Molly Yeh. It’s fun, poppy, and colorful just like Molly herself. If you want something smaller, I think their small mug is the perfect size and shape.Balmuda the Toaster
Do you have a toast lover in your life? If so, treat them (or yourself) to the BEST toaster out there. Last year Mike surprised me with a Balmuda (I’ve been dreaming of one forever) and I was so surprised and touched. We had Christmas day toast and it was magical. Part of the magic is that Balmuda uses steam technology to make the inside of your toast fluffy and moist while toasting the outside to a golden crisp. If you’ve ever watched Emily of salmon rice bowl fame make toast on Tiktok, this is the toaster she uses. [Amazon]Bagna Cauda Warmer
Have you had bagna cauda? It’s an Italian anchovy garlic dip that’s served in a special warming dish with seasonal raw and cooked vegetables. It’s a cozy, communal appetizer and so much fun to prepare and eat. You don’t technically need a bagna cauda warmer, but it adds to the atmosphere. I think a cute present would be a warmer with a handwritten recipe and a promise to enjoy a night of bagna cauda and wine together. Plus, you can use your warmer for cheese or chocolate fondue as well! [Amazon]Tinned Fish
Conservas (fancy tinned fish and seafood) is so popular right now. There are so many gorgeous delicious tins of seafood out there and they make a cute stocking stuffer or gift basket. Gift one or many tins to the seafood lover in your life and watch their eyes light up. Conservas can go from low-end to high and as with most food items, are a personal choice. A good place to start is: Portuguese sardines in olive oil, roasted garlic mackerel, spicy wild Portuguese calamari, wild Spanish cockles in sea salt brine, or smoked mussels in olive oil and broth. Add a Spanish hot sauce, some chips, and your gift recipient can have a conservas party. Bonus, these little wooden handled sardine forks are perfect for gifting alongside. PS - extra points if you get them these Spanish potato chips.Gifts for men who like cozy feels
Holiday Puzzles
Come winter, we love putting out a puzzle on a table and spending the month of December slowly completing it. Glasses of wine, small nibbles, good music, deep conversations, and puzzling is what growing up is all about. Call it boring if you will, but puzzling is SO relaxing. Gift this to the stressed out person in your life. Oh, but only if they don’t get anxiety about leaving things unfinished. Some of our favorites are vintage bucolic food themed puzzles, especially those by Charles Wysocki like this Vermon Maple Tree one, and this Christmas one. We also like the vintage New Yorker covers like this or this. Lastly, these winter pups and cute cats are absolutely adorable.Tortilla Blanket
Everyone dreams of being a burrito, right?! Make a loved ones’ dreams come true with this extra cozy burrito blanket! It’s double sided, super fuzzy and soft, and really warm. I have one and I LOVE it so much. To be honest, I have two. It’s quirky, cozy, and the burrito lover in your life will love it. [Amazon]Purrble
This lil guy is on my actual holiday wishlist because I’m allergic to cats and I dream of a little furry that can purr in my arms. Apparently this plush companion is great for soothing you and well, it’s just so CUTE! I think it’s a great gift for everyone, even for people whom you don’t think like plushies. We can all use a little more softness in our lives. [Amazon] Alright, that’s it. Hope you found something interesting that you haven’t thought of gifting! Happy holiday season! xoxo steph Read More →
I Am... Delicata Squash
It is squash season! All year I wait for delicata squash season and when I see them popping up at farmers markets and grocery stores my heart does a happy dance. Delicata is the most PERFECT squash in my humble opinion. It is creamy, sweet, easy to cut through, and you don’t even need to peel it. When you roast it, it turns a beautiful golden orangey-brown and gets perfectly caramelized. It’s sweet and savory with a buttery bite. Because they’re so small, they cook up faster than other squash too. They’re so incredibly good.
What is delicata squash
Delicata is a type of winter squash. It’s a cylindrical cream-colored squash with dark green stripes on the outside. Inside, the flesh is orange. As its name suggests, the skin is delicate. It’s supremely versatile and because the skin is thin and edible it is one of the best squashes out there. It’s usually roasted or baked but you can also air fry it, simmer it, sauté/pan roast it, or ever microwave it. The seeds are edible as well.How to prepare delicata squash
- Wash. Because you can eat the skin, you don’t need to peel delicata. Just give a good scrub and dry it throughly.
- Trim. Trim off the tiny stem and discard. If desired, you can trim off the “butt” as well.
- Slice. Slice the delicata in half lengthwise.
- Scoop. Use a spoon to scoop out the seeds and pulp.
- Cut. Cut the seeded squash into 3/4 - 1 inch slices. If desired, cut the slices into cubes.
How does delicata squash taste?
Delicata is mild, creamy, and sweet, similar to butternut squash, but more tender and sweet like a sweet potato or yam. If you’ve had honeynut squash, it’s very close to that. It’s sweet velvety flesh caramelizes wonderfully. The skin is tender and a bit chewy.How to roast delicata squash
Prep the delicata, toss it with a bit of oil and season generously with salt and pepper. Roast it in a hot oven, flipping once halfway and you’re in roasted squash heaven.How long to roast delicata squash
Believe it or not, how long you roast delicata squash for depends on the shape you're using:- cubes - roast cubes for 18-20 minutes in a 400°F oven, stirring halfway.
- half moons - roast half moons for 20-25 minutes in a 425°F oven, flipping halfway.
- rings - roast rings for 10-25 minutes in a 425°F oven, flipping halfway.
- halved - place the cut sides down and roast for 30 minutes in a 400°F oven, flipping halfway.
How to air fry delicata squash
- Toss the prepared delicata squash with a drizzle of oil. Season with salt and freshly ground pepper.
- Add the squash to the air fryer basket and air fry at 400°F for 12-15 minutes or until crisp and golden brown, shaking halfway.
- Let cool slightly and enjoy!
How to pan fry delicata squash
It’s easier to pan fry delicata that is prepared smaller: small cubes or thinner slices work best. Heat up a bit of oil in a skillet over medium high heat and add the squash. Cook, without flipping, for 2-3 minutes, until lightly browned. Flip and continue to cook for another 2-3 minutes or until the squash is tender. Season with salt and pepper and enjoy!How to simmer delicata squash
To keep your delicata moist and juicy, try simmering it. Prep the delicata into large pieces and place in a skillet with 1 cup broth of choice. Bring to a simmer and reduce the heat. Cook, covered, until the squash is fork tender, about 6-8 minutes.When is delicata squash season?
Delicata season is in the fall and early winter. You usually see them popping up at the very tail end of summer.Is delicata squash healthy?
Yes! It’s high in fiber, vitamin A and C, as well as potassium.Do you need to peel it?
Nope! The skin on delicata is thin and completely edible. It’s a tiny bit chewy and sweet.How to pick
Choose solid feeling, firm squash that has blemish free skin. The skin should be creamy and bright with green or orange stripes. Try to pick squashes that are similar in size and shape so they cook evenly.How to store
Because it’s so delicate, delicata squash doesn’t have the same kind of storage life as other winter squashes. Store in a dark, cool place, but use it within 2 weeks to a month. If you cut it, store in the fridge for up to 5 days, wrapped with plastic wrap.How to cut delicata squash into rings
If desired, you can cut delicata into rings/donuts. Trim the ends, then slice the squash crosswise into rounds. Use a spoon to cut out the seeds and pulp from the middle of the rings.How to serve
Golden brown, caramelized roasted delicata squash is delicious on its own or as a simple, hearty side dish. If you have any extra on had, there are tons of ways to use roasted squash. Here are some of my favorites:- as a topping for salad
- stirred into mac and cheese
- scattered on top of chickpea stew
- as a side with turkey
- on a slice of homemade sourdough smothered with homemade hummus
Delicata Squash
Our guide to making the most perfect squash out there.
- 2 medium delicata squash (about 2 lbs)
- 2 tbsp olive oil (or melted butter)
- salt and freshly ground pepper
Heat the oven to 425°F. Wash and dry the delicata then trim off the ends.
Cut through the squash, lengthwise, creating two even halves. Use a spoon to scoop out the seeds and any pulp.
Flip the halved squash upside down and cut crosswise into 1 inch thick slices.
Place the slices in a large bowl and toss with the oil (or butter). Season generously with salt and pepper.
Arrange the squash on a rimmed baking sheet and roast for 20-25 minutes, flipping once, or until golden brown and slightly caramelized. Remove from the oven, plate, and enjoy!

I Am... Baked Salad
Baked salad is salad’s cozier, cardigan-wearing cousin. It’s getting super chilly outside which means all the foods I want to eat are warm and cozy. But what about salads!? I could never give up the crunch and variety of flavors and textures in salad. When it’s cold though, digging into a refreshing salad doesn’t have quite the same feels. Enter: baked salad. Just what is baked salad, you ask? Read on, my friend, and I’ll tell you everything you need to know.
What is baked salad?
Think of baked salad as salad’s cozier, cardigan-wearing cousin. Full of oven-roasted vegetables, oven-wilted kale and brussel sprouts, and an addictive toasted sesame-soy sauce dressing, baked salad is everything you want in a healthy, cozy dish. Really, all baked salad is, is a warm salad full of oven roasted vegetables. This particular salad is inspired by Justine Doiron’s baked salad because as she says, it’s baked salad season! This kale and brussels sprouts baked salad is my all time favorite. I love how you can make it ahead of time, with dressing, and it just gets better and better. It’s the perfect meal prep. The kale and shredded Brussels sprouts stay hearty and hold up to the dressing and nothing wilts or gets limp and sad. The roasted delicata squash is sweet and tender, the apples are crunchy, the cucumbers are cool freshness, the carrots add color, and the sliced almonds are the nutty kiss on top. I almost always add roasted chicken breast for protein, but you can skip it or do tofu if you’re vegan. Honestly, this salad is one of my all time favorite things to make and eat.How to make baked salad
- Prep the salad ingredients. Shred the kale and brussel sprouts, cube the delicata squash, shred the carrot, slice the cucumber, and cut the apple into matchsticks.
- Bake the items that need baking. Toss the kale, sprouts, and squash with oil and season with salt and pepper. Roast the squash in a 400°F oven for 20 minutes. Turn the heat up to 450°F and add the kale and sprouts to the baking sheet and continue to roast for another 10 minutes or until the kale and sprouts are warm and wilted and the squash is fork tender.
- Make the dressing. While everything is roasting, whisk together rice vinegar, soy sauce, mirin, neutral oil, sugar, and toasted sesame oil. Taste and season with salt and pepper and set aside.
- Assemble. Toss together all the ingredients in a large bowl, but save some apples, cucumber, carrots, and almonds for garnish.
- Dress. Dress the salad according to taste – you might not need all the dressing. I tend to dress my salads on the lighter side, I usually make a half portion of dressing. This salad is all about you so dress accordingly!
- Garnish. Finish up by garnishing the top of the salad with the reserved toppings and enjoy!
Baked salad ingredients
- kale and brussels sprouts - these guys are the bulk of the salad and they’re amazing because they’re full of nutrients and taste amazing when roasted. They become a little bit wilted, a little bit crisp, and a lot delicious.
- delicata squash - delicata is my all time favorite fall squash and when you roast it, the flavor and texture can’t be beat. Finding little nuggets of delicata in this salad are like finding little nuggets of gold.
- cucumber, apple, and carrots - these three items add freshness and crunch as a counter point to our warm greens.
- sliced almonds - I love the flavor of slivered/sliced almonds. Somehow they’re flakier, crunchier, and have more flavor than regular almonds.
- dressing - This dressing is a simple but addictive mix of Japanese rice vinegar, soy, mirin, sugar, and toasted sesame oil. It’s light and tangy and full of umami. It lets the salad ingredients shine while still bringing the flavor. If you don’t have mirin (a sweet Japanese rice wine that is readily available in the Asian aisle or online), you can leave it out or add more rice vinegar and a touch more sugar.
How to roast delicata squash
- Wash and dry the delicata then trim the stems.
- Cut the squash in half length-wise and use a spoon to scoop out the seeds and pulp.
- Slice into 3/4 inch half moons then cut into chunks.
- Toss the squash with oil and season with salt and pepper.
- Spread the squash pieces out on a parchment paper lined rimmed baking sheet and bake for 20 minutes at 400°F. Give the squash a stir, then turn the heat up to 450°F and roast for another 5-10 minutes or until tender and slightly caramelized.
How to oven roast kale for salad
- Wash and throughly dry the kale.
- Cut out the center stems with a paring knife or tear the leaves off the stem. The stems are tough – you can discard them.
- Roll the leaves into a tight roll and slice into thin ribbons.
- Toss the kale with a bit of oil and season with salt and pepper.
- Spread out and bake on a parchment paper lined rimmed baking sheet for 10 minutes at 450°F until wilted and warm.
How to roast brussels sprouts for salad
I love brussels sprouts in salad – they’re just like tiny cabbages. To shred sprouts: wash, trim the ends off, cut them in half, place them cut side down on the cutting board and thinly slice cross-wise. Toss them with oil, season with salt and pepper, then roast them on the same pan as the kale for 10 minute at 450°F until slightly wilted and warm.What to serve with baked salad
I like this salad as a meal but it makes an excellent side dish for proteins such as: happy baked salad season! xoxo stephBaked Salad
Baked salad is salad’s cozier, cardigan-wearing cousin.
- 1-2 small delicata squash (seeded and chopped)
- 2 bunches kale (dinosaur/lacinato preferred, thinly shredded, about 8 cups)
- 1 lb Brussels sprouts (shredded, about 6 cups)
- 1/4 cup rice vinegar
- 2 tbsp soy sauce
- 2 tbsp mirin
- 2 tbsp neutral oil
- 1 tbsp sugar
- 1 tbsp toasted sesame oil
- 1 cucumber (sliced)
- 1 apple (fuji preferred, cut into matchsticks)
- 1 carrot (shredded)
- 1/4 cup sliced almonds
Heat your oven (or air fryer) to 400°F. Toss the cubes of delicata with a bit of oil and season with salt and pepper. Spread out on a large parchment paper lined rimmed baking sheet. Bake for 20 minutes then remove from the oven.
Turn the oven (or air fryer) up to 450°F. Toss the kale and sprouts in a bowl with a drizzle of oil. Season with salt and pepper. Push the delicata to one side of the baking sheet and add the kale and sprouts. Bake for 10 minutes or until the kale and sprouts are warm and wilted and the delicata is tender. Remove from the oven and let cool slightly.
While the vegetables are roasting, make the dressing. In a liquid measuring cup or bowl, whisk together the dressing ingredients, taste, and adjust.
In a large bowl, toss together the squash, kale, sprouts, cucumber, fuji apple, and carrots. Dress evenly to taste and top with sliced almonds. Enjoy!
Optional: add chicken breast for extra protein.
I Am... Cinnamon Bites
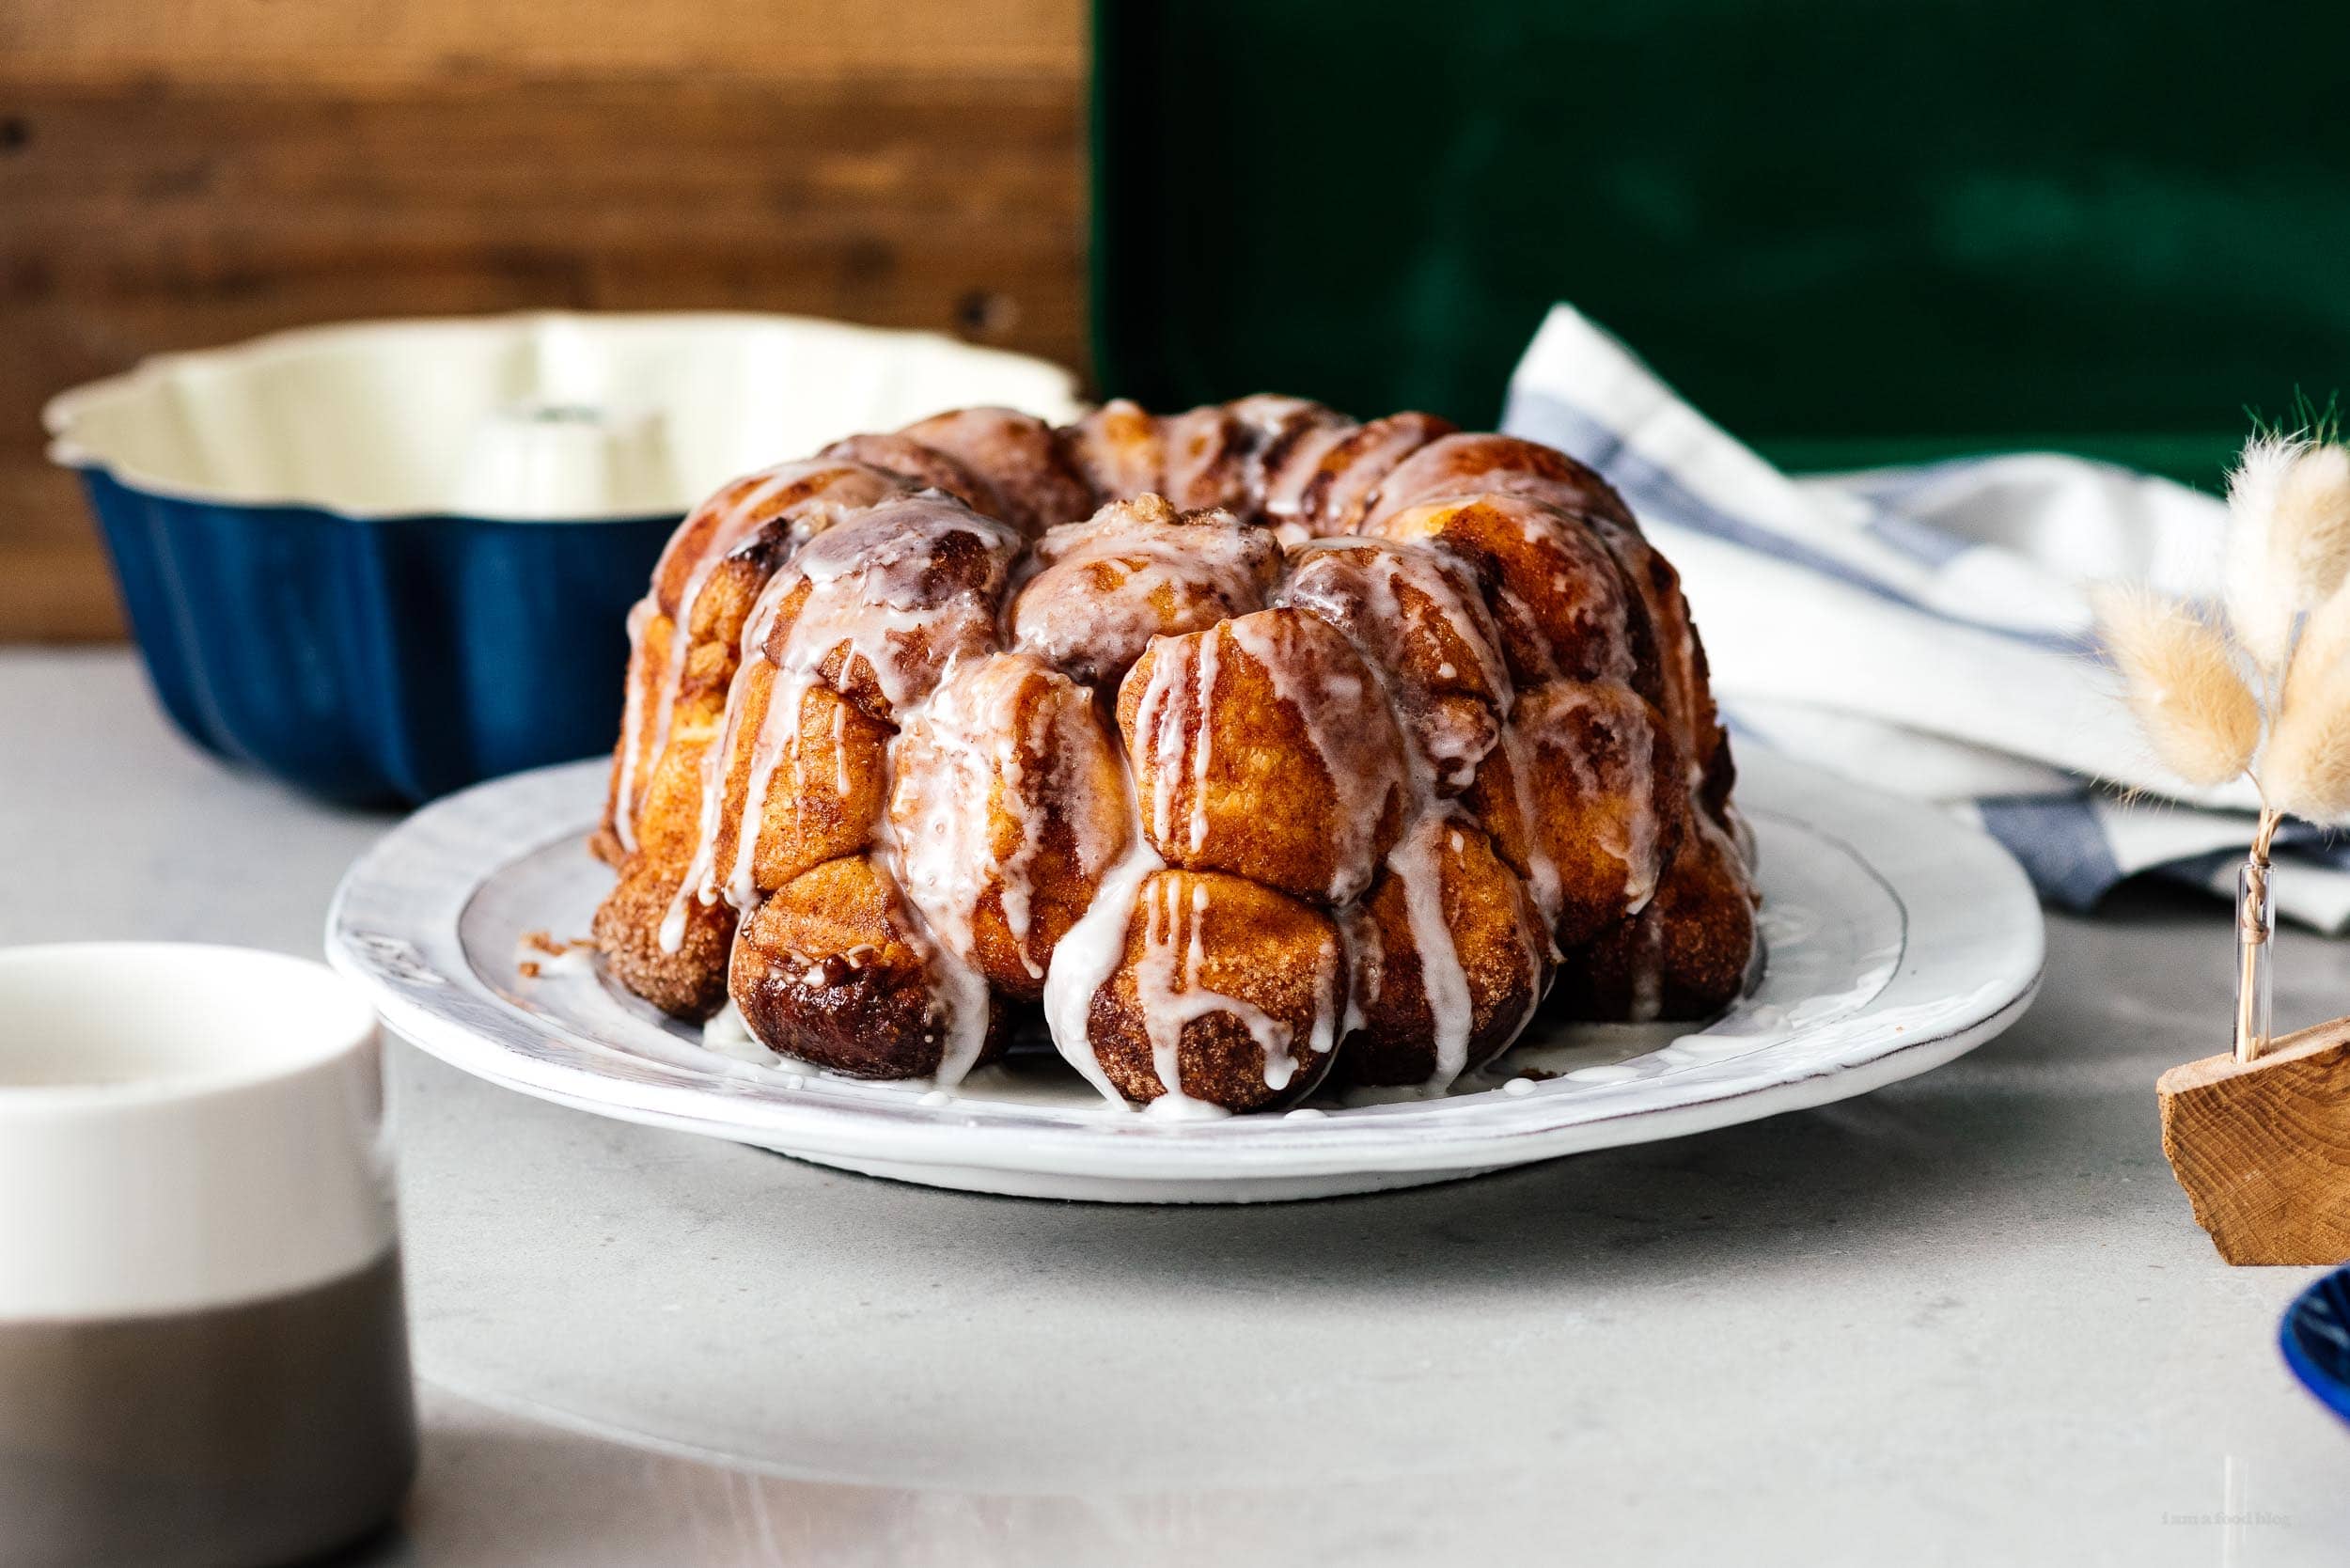
Whether you call them cinnamon bites, cinnamon roll bites, honeycomb bread, cinnamon bread bites, monkey bread, or pull apart cinnamon bread, there’s no denying that cinnamon-sugar dusted, chewy, fluffy, little balls of dough are delicious. I love little pull apart squishy balls of chewy, fluffy cinnamon-sugar goodness. If you haven’t had cinnamon bites before, you’re missing out! Think of them as a cross between a cinnamon bun and pull apart bread. You pull them apart with your hands to get to gooey lil cloud-like pillows of sweetness. Cinnamon bites are a treat best enjoyed warm, with the ones you love.
What are cinnamon bites?
Cinnamon bites are a gooey cinnamon-sugar pull apart bread that’s baked, either in a bundt pan or a round baking dish. It’s made with soft and squishy pieces of sweet dough dipped in cinnamon and sugar. They’re topped off with a gooey cinnamon sugar syrup, baked to perfection, then glazed with a vanilla icing while still warm. You can make these one of two ways: the cozy, relaxing, day of baking where you make homemade dough OR the quick and easy way using biscuit dough. I’m going to explain the cozy all day affair first because fall is the ultimate time to spend an afternoon baking. If you’re looking for shortcut cinnamon bites, scroll down to “Easy cinnamon biscuit bites.”How to make cinnamon bites
- Make the dough. Use a stand mixer to do all the hard work. All it takes is a quick knead with a dough hook and you’re good to go. If you don’t have a stand mixer, you can knead the dough by hand until it is soft and pliable.
- Let it rest. After your dough is ready, it’s time for a rest so it can puff up. Now’s a good time to have a cup of coffee or tea.
- Roll the dough into balls. When the dough has doubled in size, it’s time to punch it down and shape it into little balls.
- Dip the balls. Dip the balls into melted butter, then cinnamon-sugar. Pop everything into a buttered bundt pan or a round oven safe pan then pour on the cinnamon sugar syrup.
- Bake. Bake until golden, gooey, and delicious.
- Drizzle. Finish off with a drizzle of vanilla icing while it’s still hot so it melts into all the nooks and crannies.
- Enjoy! Eat it while it’s still warm, there’s nothing better, trust me!
Cinnamon bite ingredients
- Yeast – this recipe uses either active dry yeast OR instant yeast. If you use active dry, you need to dissolve it in a bit of warm liquid before using – in this case sprinkle it on to warm milk. If you have instant yeast, just mix it right into the dry ingredients.
- Milk – I use 2% milk but any milk will work here, even almond or oat milk. If you’re using active dry yeast, warm the milk up slightly in the microwave (I usually pop it in the microwave in 20 second increments) You want it between 105-115°F, which feels like a warm bath.
- Eggs – this is a extra rich dough with eggs in it. Not all bread recipes have eggs in them, but this one does. I love the extra flavor and plushness the eggs gives this dough.
- Bread flour – this one is important. You can use all purpose, but bread flour makes these bites soft and fluffy with just the right amount of chew. Bread flour has a higher protein content than regular all purpose – the resulting dough has more gluten in it which helps the little bread balls stay soft and chewy.
- Cinnamon – fresh cinnamon is best! We’re going to go with a fairly high cinnamon to sugar ratio so each bite is bursting with cinnamon goodness.
- Butter – Who doesn’t love butter. It’s essential for those warm and cozy bakery feels.
Easy biscuit cinnamon bites
If you don’t have the time to make bread dough and let it rise, you can make cinnamon bites quick and easy using a tub of store bought biscuits. Grab the big tube, take the biscuits out and cut each biscuit into 6 equal pieces. Roll the pieces up into little balls, dip them in the melted butter, then roll them around in the cinnamon sugar. Put the balls in a pan and pour the cinnamon sugar syrup over top. Bake them in a 350°F oven until they are golden and cooked through, about 20-25 minutes. Glaze them with the vanilla glaze while still warm and enjoy!
Which is better?
In my option, homemade cinnamon bites are heads and shoulders above biscuit cinnamon bites. They’re fluffier, chewier, and just so much more delicious. There’s something that is way more satisfying about baking your own bread. That being said, if you’re low on time, there’s no shame in buying a tube of biscuit dough. Or, even better, buying some store made pizza dough and using that.
Make ahead cinnamon bites
If you want to make these the day before then bake them in the morning for a warm treat, it’s absolutely doable. Make the bites up until everything is ready in the pan before baking. Wrap the pan up and put it the fridge right away. The next day, take it out and leave it on the countertop while you heat your oven. Bake as usual and enjoy hot and fresh.How to store
Cinnamon bites are best right out of the oven, but if you have leftovers, store them in an air tight container on the countertop for up to three days. Reheat before enjoying.How to reheat
Pull of the cinnamon bite balls and simply microwave on a plate for 10-15 seconds, or until warmed through.How to tell if my cinnamon bites are ready
Sometimes it can be hard to tell if your cinnamon bites are ready. The easiest way to tell if they’re cooked is to use an instant read thermometer. Just stick it right into the middle. If it reads 190°F, you’re good to go! If you don’t have an instant read thermometer, use a wooden skewer. You’ll know the cinnamon bites are ready when the tops of the balls are puffy and crisp and a wooden skewer comes out clean with no crumbs when you poke it into the thickest part. Happy cinnamon ball rolling! These really are the best fall-winter baking treat, I hope you get a chance to try them. xoxo stephCinnamon Bites Recipe
If you haven’t had cinnamon bites before, you’re missing out!
Dough
- 3/4 cup milk
- 1/4 cup sugar
- 1 egg (room temp)
- 1 egg yolk
- 1/4 cup unsalted butter (melted and cooled)
- 3 cups bread flour
- 2.25 tsp instant yeast (~1 envelope)
- 3/4 tsp salt
Cinnamon sugar syrup
- 1/2 cup unsalted butter
- 3/4 cup sugar
- 1.5 tbsp cinnamon
Vanilla icing
- 1 cup icing sugar
- 2-3 tbsp milk (whole milk preferred)
- 1/2 tsp vanilla extract
In the bowl of an electric mixer, whisk together the milk, sugar, egg, egg yolk, and melted butter. Stir in the flour, instant yeast, and salt with a wooden spoon until everything comes together into a ball of dough.
Knead with the dough hook on medium for 8 minutes. Alternately, knead by hand for 8-10 minutes on a floured surface. Lightly oil and large bowl and place the dough inside.
Cover the dough with plastic wrap and a kitchen towel and let rise for 1 to 1.5 hours or until doubled in size.
Melt the butter and set aside. In a small bowl, mix together the sugar and cinnamon.
Shape the balls. Punch the dough down and divide and roll into small balls, about 1 to 1 1/4 inch in diameter. If you want to be precise about it, each ball should weigh about 15 grams.
Dip the balls into the butter, then roll in the cinnamon sugar mix. Place each coated ball into your pan, repeating until you finish all of the dough. Cover the pan with plastic wrap and let rise for 20 minutes. Meanwhile, preheat the oven to 350°F.
Optional: While the oven is warming up, mix the butter with 2-4 extra tablespoons of melted butter, 1/4 cup brown sugar, and 1/2 tsp vanilla. Just before you put the cinnamon bites into the oven, pour the cinnamon sugar syrup evenly over the balls of dough.
Bake for 35-45 minutes or until golden brown and cooked through. Cover with foil if the top starts browning too quickly. When baked through, pull from the oven and cool in the pan for 5-10 minutes.
Make the icing by whisking all of the icing ingredients together. Drizzle on generously and enjoy the cinnamon bites warm.
I Am... Pumpkin Bread
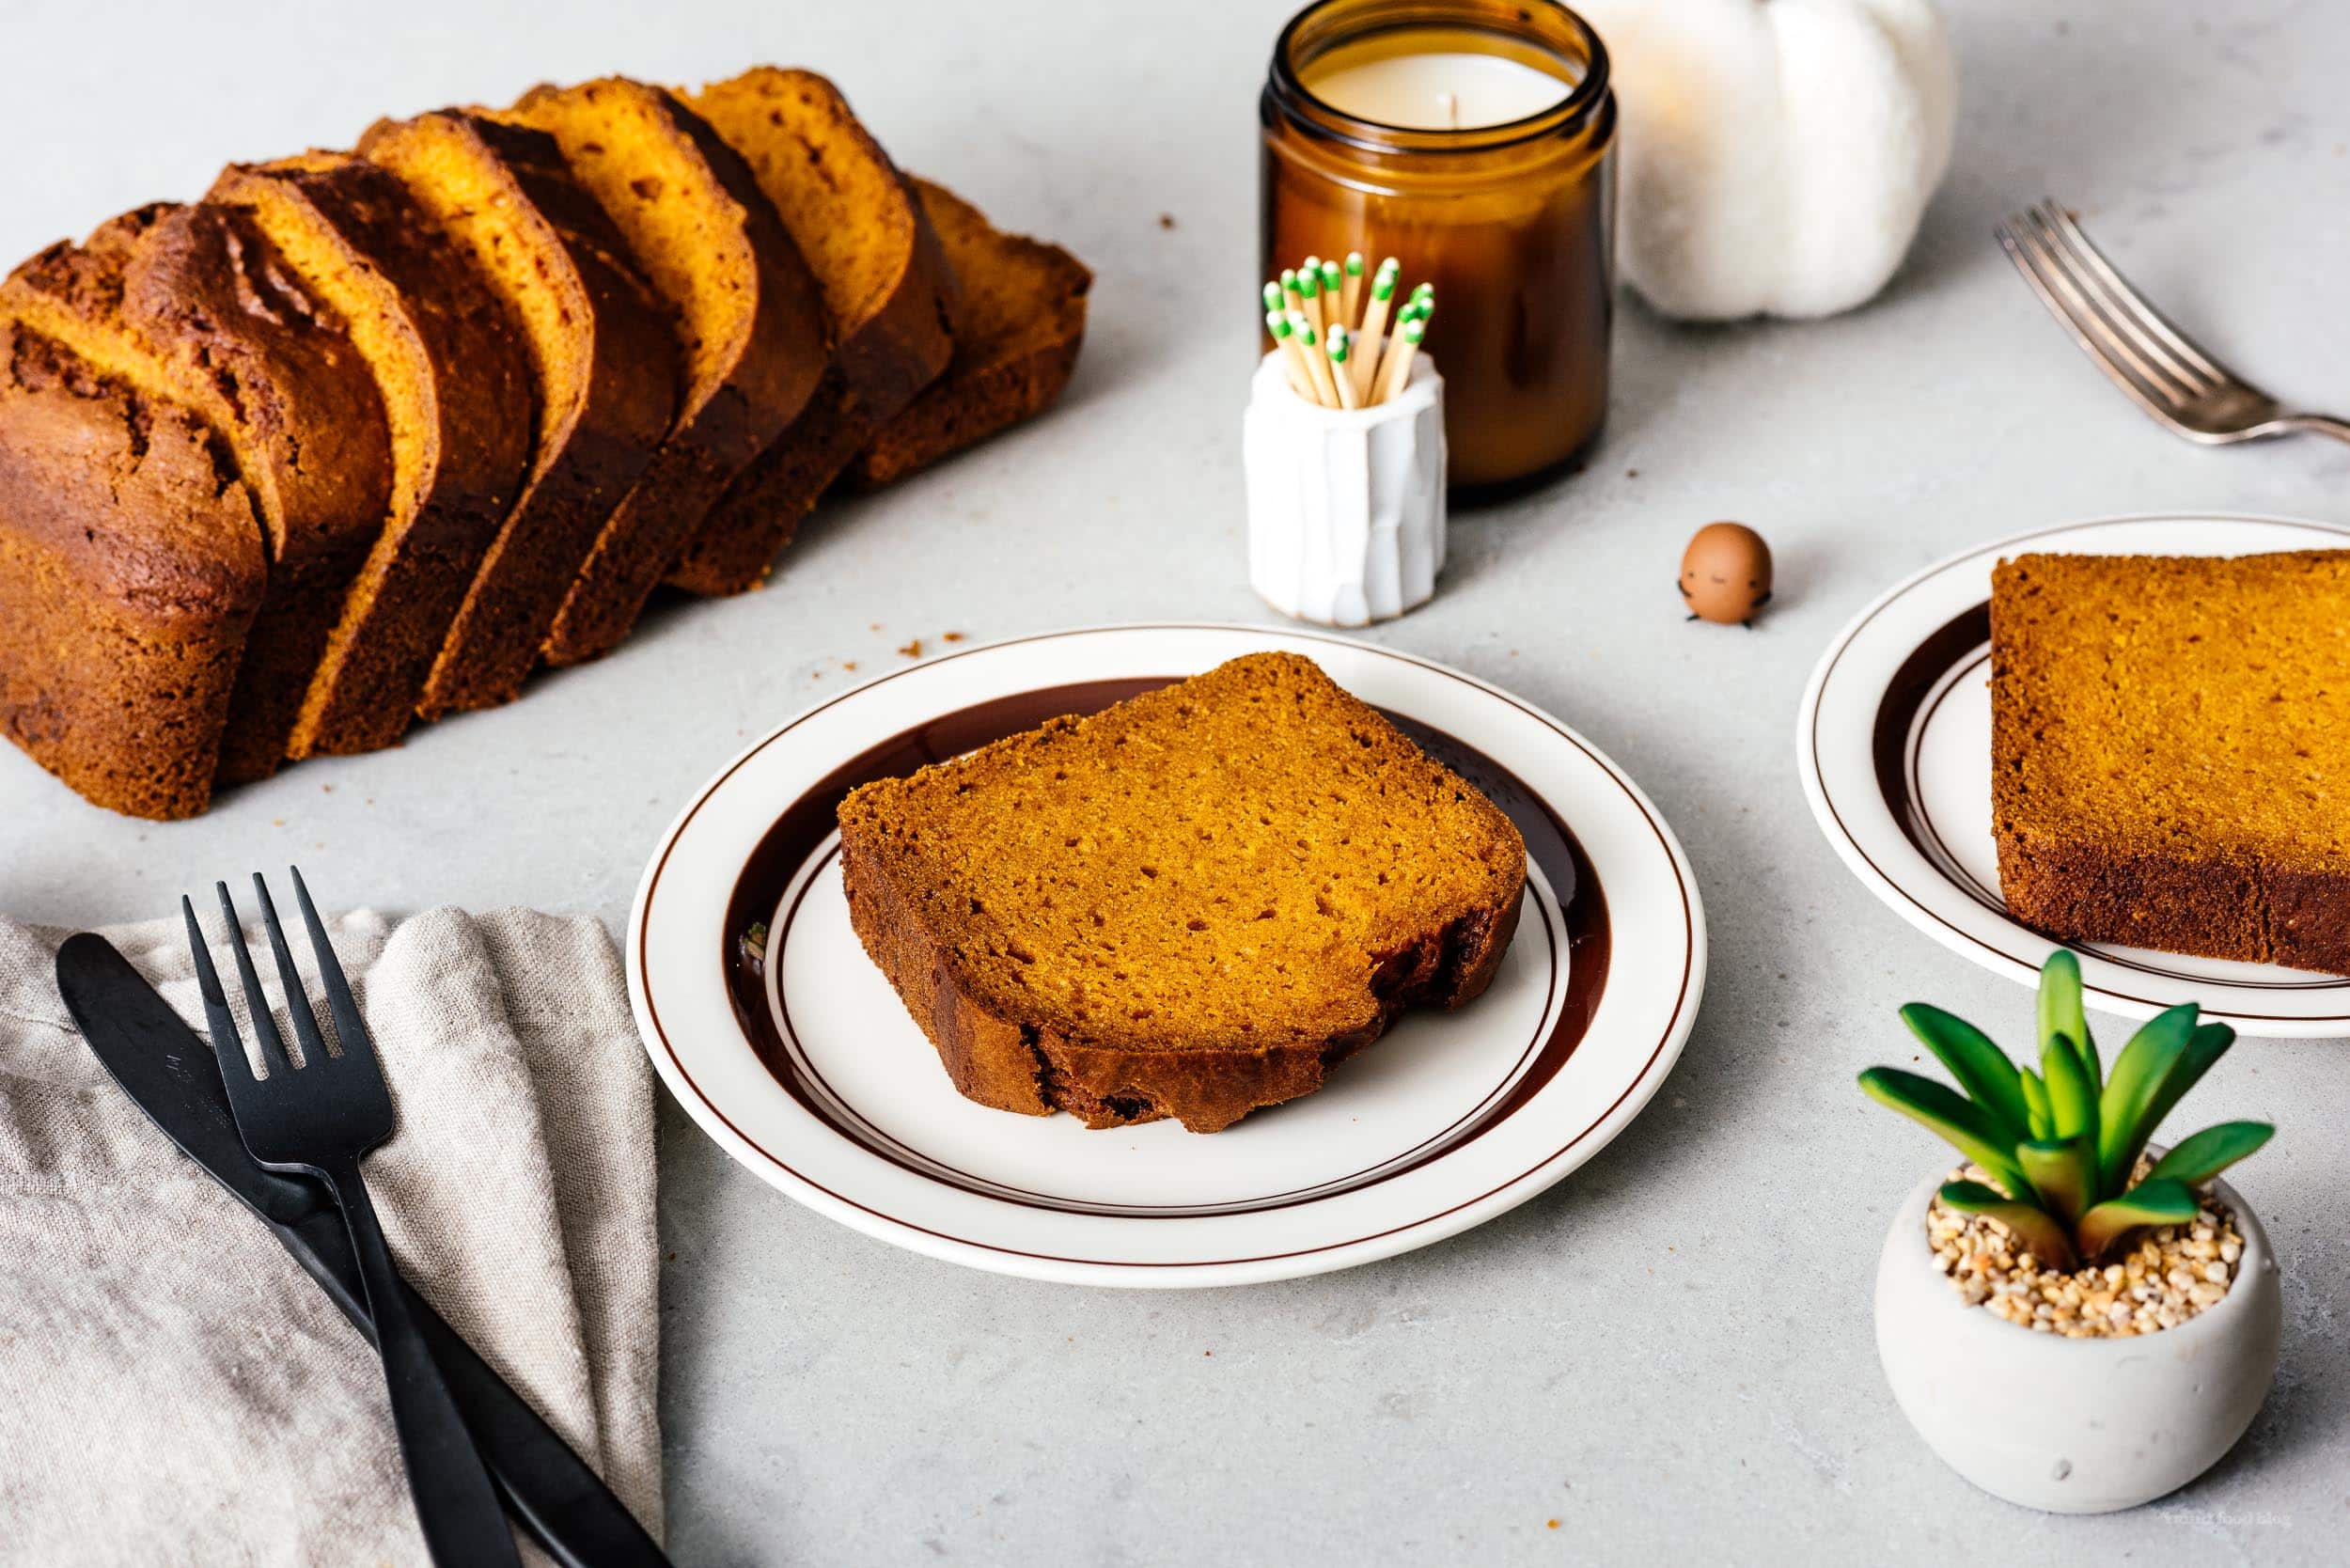
If you love pumpkins and pumpkin spice, this easy pumpkin bread is for you. Full of warm pumpkin spice and packed with pumpkin flavor, it’s the perfect fall treat! This is a copycat Starbucks pumpkin loaf recipe but I didn’t want to call it that in the title because that’s kind of troll-y? This loaf is so good it’s actually kind of bad cause instead of having access to only one slice I now have a whole loaf. Truth is, it’s definitely a good thing because this is my absolute favorite pumpkin bread recipe. Each slice is packed with pumpkin, incredibly moist, and full of warming pumpkin spice. Not a dry crumb - not that there will be any crumbs left. Now that it’s officially Autumn, I’m all about the pumpkins and pumpkin spice. Give me all the pumpkin things, but especially pumpkin bread! This is my go-to pumpkin bread. I love that it comes together so easily and is only one bowl too - less dishes are always a good thing. It’s so good that even Mike, who is not the hugest fan of pumpkin, can’t resist a slice when we have coffee in the morning. Pro tip: grill a slice with butter in a non-stick pan until the outside gets all crispy then slather it with whipped cream cheese. SO GOOD.
What is pumpkin bread
Pumpkin bread is just like banana bread but made with pumpkins. It’s perfect for starting your day during fall and all of those autumn weekends ahead. It tastes amazing when it’s warm and soft, with a little bit of salted butter melting right in. It’s all fall spices, deliciously moist, and tastes like pumpkin in the best way. It will get you right into those seasonal fall feels.Copycat Starbucks recipe
If you are looking for a copycat Starbucks Pumpkin & Pepita loaf recipe, this is it! I didn’t add the pepitas on top of mine because I like the pureness of the pumpkin bread, but all you need to do is sprinkle on 1.5 tablespoons of chopped pepitas and you’ve got yourself the perfect copycat Starbucks recipe. Try it, you won’t be disappointed.Pumpkin bread ingredients
The ingredients for this pumpkin bread are pretty standard: flour, sugar, baking soda, salt, cinnamon, ginger, nutmeg, cloves, oil, eggs, and pumpkin puree.Pumpkin Puree
This bread is packed with pumpkin! Most pumpkin recipes only use 1 cup, but this recipe uses one 15 ounce can for extra pumpkin flavor - no more leftover half cans of pumpkin left sitting in your fridge. You can use homemade pumpkin puree, but if you do, make sure that it’s not too liquid-y. I like to use canned solid pack pumpkin puree just because when you need pumpkin bread, you don’t want to be roasting a pumpkin first – at least I don’t. I like Libby's. Instant gratification pumpkin bread all the way!Would butter be better?
You can switch the oil out for butter, if you love the taste of butter. That being said, I love oil in cake and quick breads. For some reason it makes things so much more moist. I’ve made this with both oil and butter and they’re both delicious, but for me, it’s oil all the way. Choose what you like: butter is a bit more rich, but oil has that more classic loaf flavor, like what you taste when you get pumpkin loaf or banana bread from a coffee shop.How to make super moist and delicious pumpkin bread
- Whisk. In a very large bowl, whisk together all the dry ingredients: flour, sugar, baking soda, salt, and the pumpkin spices. I make my own spice mix of cinnamon, ginger, nutmeg, and cloves. You can use store-bought pumpkin spice if that’s what you have, you’ll need 1 tablespoon.
- Fold. Make a well in the middle of the flour mix, then add the pumpkin, oil, and eggs. Starting wisking the wet ingredients without adding any of the flour, until it is smooth, then slowly incorporate the dry ingredients, folding gently. Don’t over mix. You want everything incorporated with no streaks, but over mixing will make your pumpkin bread tough.
- Bake. Pour the batter into a loaf pan and bake! When it’s done, let it cool slightly. I almost always have a slice warm, but really, it’s best if you let it cool all the way because the contained residual heat will help the bread retain it’s shape and keep it extra moist and fluffy.
Healthy pumpkin bread
If you’re wondering how to make this pumpkin bread just a little bit healthier, here’s what to do:- Use a mix of all purpose and whole wheat flour.
- Instead of sugar, reduce the amount and swap it out for maple syrup or honey.
- Instead of eggs, use ground flax seed: whisk together 6 tablespoons water with 4 tablespoons ground flaxseed and let thicken slightly before using in the place of the eggs.
Pumpkin chocolate chip bread
Simply stir in in 2/3 cups of chocolate chips or chunks.Why this recipe instead of the ten thousand other ones out there
- It uses one whole can of pumpkin puree – no more left over pumpkin that you don’t know what to do with
- Only one bowl needed!
- It’s oil based so you don’t need to wait for your butter to soften
- So incredibly moist and full of pumpkin flavor
- It’s the best pumpkin bread you’ll ever make!
What is pumpkin puree?
Pumpkin puree is my most essential Fall ingredient. Pumpkin puree is simply cooked pumpkin. It’s pumpkin that’s been peeled, cooked, and mashed or blended. When you buy it in a can, it’s usually a strained, bright orange, smooth pulp. It’s used in pumpkin bread, pumpkin pie, pumpkin spice lattes, pumpkin muffins, pumpkin pancakes, you name it, it’s in it. It adds instant Fall feels and is cozy and healthy!Does pumpkin puree really have pumpkin in it?
Yes! Pumpkin puree has pumpkin in it. But, it can also have squash. A pumpkin is a type of Winter squash and lots of times canned pumpkin purées contain a mix of pumpkin and other winter squashes. The other kinds of squashes typically include varieties like butternut, and Hubbard. If you want a pure pumpkin puree, go for Libby’s, which is 100% Dickinson pumpkin, a pumpkin that was created for canning and baked goods. Dickinson pumpkins have extra dense, fine-grained sweet flesh that’s not stringy or watery like the kind of field pumpkins you use for decoration or carving.Is canned pumpkin and pumpkin puree the same thing?
Yes, canned pumpkin and pumpkin puree are the exact same thing. Take a look at the label to ensure that the only thing in the can is 100 percent pure pumpkin and you’re good to go.What is pumpkin puree really made of?
It’s make of pumpkin. And…sometimes squash. Pumpkin is a winter squash and the USDA doesn’t distinguish between the two. All pumpkins are squash but not all squash are pumpkins. Which is confusing, but all you need to know is that in the world of canned pumpkins, pumpkin and squash puree are, for all intents and purposes, the same.What is solid pack pumpkin puree?
Solid pack pumpkin or solid pack pumpkin puree is just another way to say pumpkin puree. Solid pack is how canning companies indicate that the can contains all fruit and no added liquid. When you open the can it’s 100 percent pure pumpkin.What can you use canned pumpkin puree for?
It can go into just about anything:Sweet
- pumpkin scones
- pumpkin cold foam/pumpkin spice lattes
- nutella pumpkin french toast
- pumpkin cheesecake bars
- pumpkin chocolate chip cookies
- brown butter frostingpumpkin cupcakes
- pumpkin whoopie pies
Savory
- pumpkin sage mac and cheese
- pumpkin queso
- one pot creamy pumpkin mac and cheese
- pumpkin and sage lasagna roll ups
What is the difference between canned pumpkin and pumpkin pie filling?
Canned pumpkin is plain pumpkin puree and canned pumpkin pie filling is pumpkin puree combined with pumpkin spices. When you buy canned pumpkin pie filling it’s intended to be mixed with eggs and evaporated milk to be baked as pumpkin pie. Happy pumpkin breading! xoxo stephPumpkin Bread Recipe
This loaf is so good: each slice is packed with pumpkin, incredibly moist, and full of warming pumpkin spice. There won't be any crumbs left!
- 2.5 cups all purpose flour (300g)
- 1.5 cups sugar (300g)
- 2 tsp baking soda (12g)
- 1/2 tsp salt (2g)
- 2 tsp cinnamon (3.5g)
- 1/2 tsp ground ginger (1g)
- 1/2 tsp ground nutmeg (1.2g)
- 1/4 tsp ground cloves (.5g)
- 15 oz solid-pack pumpkin puree (1 can)
- 1/2 cup neutral oil (such as grapeseed)
- 2 large eggs (room temp)
Preheat the oven to 350°F. Lightly oil or spray a 9 x 5 inch loaf pan and set aside. In a large bowl, whisk together the flour, sugar, baking soda, salt, and spices until well mixed.
Make a well in the middle of the flour mix and add the pumpkin, oil, and eggs. Use a fork or small whisk and whisk just the wet ingredients in the middle, trying not to incorporate any of the flour.
Slowly start to fold in the flour mix, using a rubber spatula, mixing gently until all the flour is incorporated with no flour streaks. Be sure to scrape against the sides and bottom of the bowl.
Pour into the prepared loaf pan and smooth out if desired.
Bake for 1 hour and 20 minutes, checking at the hour mark with a wooden skewer – it should come out clean in the center. (Tent with foil if the top starts browning too quickly). Remove from the oven, let cool in the pan on a wire rack before removing and slicing. Bread will keep at room temp, tightly covered for 3-4 days or in the fridge for up to a week.
Sprinkle on some pepitas/pumpkin seeds if you want the ultimate Starbucks copycat pumpkin bread.
Add chocolate chips or chunks (2/3 cup to 1 cup) for pumpkin chocolate loaf.

I Am... Pretzels
It’s Oktoberfest! Which is funny to me because it’s actually September, but I’m not one to argue with soft German pretzels, sausage, and beer. Okay, and truth is, it’s not September anymore. Anyway, I’ve never been to Munich, where Oktoberfest – the world’s largest beer festival – is held, but one day I’d like to because I have a huge soft (pretzel) shaped spot in my heart for Bavarian food. I especially like pretzels and weisswurst, which, in Germany, go together like bacon and eggs. Since we don’t have plans to be in Germany anytime soon (thanks covid ☹) we celebrated Oktoberfest at home this year, with homemade pretzels and weisswurst (not pictured). Making pretzels is no quick endeavor with that overnight rise but it’s totally worth it!
The truth is: making pretzels is dead easy.
Unlike some yeast doughs, this one comes together cleanly and smoothy, and rolls out like a charm. There’s beer in the dough too, which makes it doubly perfect for all of your Oktoberfest needs. The hardest part was not eating all of the pretzels in one go. Mike and I shared one, hot and fresh from the oven, then decided to go on a walk so we would be far away from temptation. But then I kind of sabotaged us by popping an extra one into a paper bag and putting it into my giant cardigan sweater pocket. Let me tell you, the smell of a fresh pretzel in your pocket will drive you crazy, in a good way. Thankfully, we were able to put ourselves out of our pretzel craving torture, by eating the pretzel, of course. There was something especially celebratory and fall-ish, walking around sharing a soft pretzel in that crisp autumn air.What are pretzels?
Pretzels are a traditional German bread shaped into a pretzel knot made from a long loop of dough that’s twisted back onto itself. All pretzels are given a lye/alkaline water bath that gives pretzels their signature shiny chewy crust and undeniable pretzel flavor. Pretzels come in hard (snacking pretzels) and soft, like these ones and the ones you find at the mall at Auntie Anne’s.What makes a pretzel a pretzel?
While there are many pretzel shaped foods out there (I’m looking at you tiny pretzel-shaped Danish butter cookies), what makes a pretzel a pretzel is the alkaline bath the unbaked pretzel takes before it is baked.Soft pretzel ingredients
If you’ve made bread before, you can make pretzels! The dough is made out of the same ingredients, plus a little special addition: beer. For these pretzels, you’ll need: instant yeast, water, brown sugar, bread flour, beer, butter, salt, baking soda, and an egg yolk. Easy peasy. I bet you have everything in your pantry right now. The beer adds an extra malty flavor, but if you don’t want to use it, just substitute water.How to make soft pretzels
This is a two day recipe – like sourdough, the pretzel dough hangs out and proofs in the fridge overnight so it develops some really nice flavors. If you can’t wait overnight, start your dough really, really in the morning, it’ll need to proof for 8 hours.- Activate the yeast: Stir together the yeast and sugar with warm water in your mixing bowl.
- Make your pretzel dough: Add the beer, butter, flour, and salt and knead until everything comes together into a smooth elastic dough.
- Rest. Move the dough to a large, lightly greased bowl, cover and let proof in the fridge for 8-24 hours.
- Shape: Divide the dough into 8 and shape into pretzels (see below).
- Proof. Let the pretzels double in size.
- Baked baking soda bath: In a large sauce pan, very carefully heat up the baked baking soda with water.
- Dip. Carefully dip the pretzels in the baking soda bath shake off the excess and place on a parchment paper lined baking sheet. Brush with an egg yolk wash and sprinkle with salt.
- Bake. Bake until beautifully brown and golden. Brush with butter if you want some extra shine and that delicious buttery flavor.
How to shape soft pretzels
Shaping soft pretzels seems complicated, but if you do it step-by-step it’s easier than pie!- Divide the dough up evenly, making sure to keep the dough you’re not working with covered so it doesn’t dry out
- Roll each piece of dough out into a log
- Roll each log out into a rope about 12-16 inches long, let it rest for a short bit, then roll it out into a rope 24-28 inches long
- Put the dough rope into a U-shape with the ends pointing up. Cross the ends once or twice, then bring them down towards the bottom of the U at 4 and 8 o’clock. Press down lightly. That’s it!
What is baked baking soda?
Traditional pretzels are dipped in a lye solution to help their skin firm up and give them their pretzel flavor, but since lye is almost impossible to get, the next best thing is baking soda that you bake. Baking baking soda in a low oven changes the alkaline levels, will makes it possible to get a much better dark, burnished pretzel-y crust. To bake baking soda: spread out 1/4 cup baking soda on a rimmed baking sheet lined with foil. Bake the baking soda for 1 hour in a 250°F oven. Let it cool completely before using. Use gloves when handling the baked baking soda.Do I have to do the baking soda bath?
If the baking soda bath step makes you nervous, you can skip it and just brush your pretzels with a baking soda wash. The baking soda bath will be even better if you used the baked baking soda mentioned above. The pretzels won’t taste as “pretzel-y” but they will still be good. To make the baking soda wash: mix together 1/4 cup warm water with 1 teaspoon baked baking soda – it will foam up. Stir until dissolved. Throughly brush the pretzels with the soda wash, twice, then let dry slightly. Brush on the egg yolk wash, sprinkle on the salt, and bake.Tips for the best soft pretzels
- use a mixer or knead by hand, it’s up to you
- mini pretzels are cute and you can eat more than one!
- brush/dip the hot pretzels in melted butter for that Auntie Anne’s finish
- always reheat your pretzels before eating for the ultimate pretzel experience: 5 minute in a 350° oven
- you can freeze them, just toast them in 350° oven for 10-15 min or until heated through
- make some beer cheese for dipping (see below for recipe)
- try some other toppings other than salt: everything bagel spice, poppy seeds, sesame seeds, even cinnamon sugar
- melt some cheese on top for a cheesy pretzel
Beer Cheese Recipe
To create the ultimate Oktoberfest snack, make sure to make some beer cheese for dipping: 1/4 cup butter 1/4 cup flour 1/2 tsp onion powder 1/2 tsp garlic powder 1 cup milk 2/3 cups beer, IPA, lager, or pilsner 1 tsp dijon 1 tsp Worcestershire 2 cups shredded cheddar 1 cup shredded gruyere- Melt the butter in a saucepan over medium heat. When warm, stir in the flour, onion powder, and garlic powder. Cook, stirring, for 1-2 minutes.
- Slowly drip in the milk while whisking, to ensure the mix is smooth.
- Slowly whisk in the beer.
- Bring to a simmer, stirring occasionally, until the sauce thickens and bubbles.
- Reduce the heat to low and stir in the dijon, Worcestershire, cheddar, and gruyere, until everything is smooth and melty.
- Enjoy with freshly baked pretzels!
Soft Pretzel Recipe
Traditional soft German pretzels for all your Oktoberfest needs (kneads!)
- 2.25 tsp active dry yeast (7g (1 standard packet))
- 1/2 cup warm water (~100º-115ºF)
- 1 tbsp tightly packed dark brown sugar (12.5g)
- 1/2 cup pilsner beer (or lager/beer of choice)
- 2 tbsp unsalted butter (room temp)
- 3.25 cups bread flour (420g)
- 2 tsp fine sea salt (12g)
- 1/4 cup baked baking soda (see notes)
- 1 egg yolk (beaten with 1 tbsp water)
- coarse salt (to finish)
Activate your yeast: Stir together water, yeast and sugar in the bowl of your stand mixer, then let stand for 5-7 minutes. The mixture should be foamy and bubbly.
Add the beer, butter, flour, and salt then knead using the dough hook on low speed until combined. Continue to knead on medium low until your dough is smooth and elastic, 5-7 minutes. The dough should be slightly tacky but not at all sticky. Place dough in a lightly greased large bowl and cover with plastic wrap. Let rise in the fridge for 8-24 hours.
Line two baking sheets with parchment paper and set aside. Turn the dough out on an unfloured work surface. For the next few steps, always keep the dough covered and work with 1 portion at a time.
Punch down to deflate and cut into 8 equal portions. Roll out each portion one at a time into into 12-16 inch long ropes by rolling with light pressure against the work surface with your palms from the center outwards. Keep the center thicker than the ends.
Go back to the first rope of dough and continue to roll each log out into 24-28 inch ropes.
Form the pretzels: position the rope into a U with the ends pointing away from you. Cross the ends over twice starting about three inches from the tips, then bring the ends down towards yourself and press into the U at 4 and 8 o’clock. Place the pretzels on the baking sheet about 1 inch apart, as you form them.
Let rise in a warm spot, until doubled (about 30 minutes) or in the refrigerator (up to 8 hours). Arrange the racks in your oven: one in the upper third and one in the lower third. Preheat to 500°F.
Add about 3 inches of hot tap water to a large pan or pot, then place over high heat to just below a boil. Add the baking soda and stir until dissolved, being careful not to splash it on yourself. Soak each pretzel one at a time into the baking soda water for 20 seconds, using a spoon to carefully spoon the water over the top.
Once each pretzel has been dipped, brush with an egg wash, top with coarse sea salt, and immediately bake until the pretzels are deep mahogany, 8-12 minutes, rotating the pans half way through, front to back, top to bottom. Cool slightly and enjoy!
Make sure you don’t use an aluminum, copper, or nonstick pan for the baking soda step.
Inspired by Andrea Slonecker.

I Am... 55 Best Fall Recipes
We’ve had two days of rain and all of a sudden I am in FALL MODE. I just said to Mike, it’s time for all the fall recipes! He reminded me that next week’s forecast is for the high 90s but heck, fall food is my favorite so I decided to do a fall recipe round up to get hype for fall. Fall is absolutely my all time favorite season. I love the crisp coldness in the air, I love the colors of leaves and I just love how everything you make and eat gives you a warm and cozy feeling. Here are my favorite fall recipes! These 55 best fall dinners will satisfy your cravings for cozy comfort food. Let’s stay in tonight!
Fall chicken recipes
Chicken is fast and comforting, perfect for those days when you spend a little too long peeping leaves.- Honey garlic chicken. This is the best 5 ingredient back pocket recipe. Sweet and sticky savory chicken in no time flat.
- Coconut chicken curry. This is the most authentic Malaysian curry you’ll get now that travel is a thing of the past. Slightly spicy, coconutty, and so comforting.
- Ruby chicken. If you’re looking to turn up the heat, this spicy, sweet, savory chicken curry is for you. The fresh ginger at the end is just *chef’s kiss* (pictured above)
- Creamy dijon mustard chicken. This is a one pan meal that is comforting, quick, and tasty. Mushrooms and kale for health and cream for that extra bit of warm comfort.
- 3 cup chicken. If you haven’t had 3 cup chicken this is a sign to do it! It’s saucy, savory and and so good, especially with fluffy rice. We use wings because it’s fast and easy.
- Chicken paprikash. This oven baked chicken paprikash is pure comfort food heaven, especially when served over egg noodles. Tomato-y, saucy, and full of so much flavor.
- Butter chicken. Butter chicken might be my ultimate fall meal: so saucy, creamy, and comforting, especially with basmati and homemade naan. Bonus: this guy is an instant pot recipe, super easy!
And pork recipes
There’s something very fall about pork as a protein. I think it’s because pork makes me think of apple sauce which makes me think of fall!- Army stew. I just love making a huge pot of army stew and gathering around the table, eating and drinking the night away with my favorite people. Hearty, comforting, spicy, and just about the easiest meal to make.
- Piri piri meatballs. These meatballs have a spicy piri piri sauce with sour cream for a cooling, creamy contrast. They’re baked which makes them extra juicy and hands off.
- Pork chop adobo. Pork chops are the best dinner food: fast, tasty, and easy. These chops simmer adobo style in soy sauce, garlic, and lemon juice. Sweet and savory, low prep for high reward.
- Bourbon black bean pork belly. Braised pork belly is super a super comforting mix of meatiness and tender bits. Black bean sauce and bourbon add bold flavors making this a winner, winner, fall dinner.
- Pork tenderloin. Super juicy and soft and tender, this tenderloin only takes 30 minutes to whip up. The green sauce it’s served with is zingy and full of parmesan and fennel.
- Oven baked tonkatsu. Sometimes you just want crunch but don’t want to break out the deep fry oil. For those times, this oven baked tonkatsu is for you. Mostly hands off and super crunchy. Serve it with Japanese curry for a fall meal to remember. (pictured above)
- Soboro donburi. If you have had soboro donburi, you’re in for a treat. It’s a quick and comforting rice bowl topped off with sweet and savory pork and tiny fuffy scrambled eggs. Anything out of a bowl is better.
Fall beef recipes
Is there anything more hearty or filling than beef? Super savory, super cozy flavors.- Korean BBQ. The weather is getting chillier and that means more time at home eating. Why not throw a KBBQ feast? Sweet, savory, smoky meats and banchan all in the comfort of your own home. (pictured above)
- Super easy osso buco. This osso buco is beef shank instead of veal and is so incredibly luxurious and easy. Only 6 ingredients to a crave inducing Italian meal.
- Salisbury steak. Old school Salisbury steak for all the fall feels. Tender, juicy beef patties swimming in a rich mushroom gravy is the coziest.
- Crockpot Vietnamese beef stew. This is a little twist on your regular crockpot beef stew. Still tender and full of chunks of beef, carrots, and potatoes but with a ultra warm spice mix. The smell will drive you nuts in a good way.
- Steak Diane. If you love steak but you’re tired of just salt and pepper or steak spice, Steak Dianne is perfect. It’s like mushrooms and peppercorn sauce in one and it’s so good you’ll want to drink it.
- Swedish meatballs. I can’t think of anything cozier than a plate of meatballs smothered in gravy with creamy mashed potatoes. Swedish comfort food at its best.
Fall one pot recipes
One pot recipes because you don’t have time to cook, it’s fall!- Hainanese chicken rice. The ultimate chicken and rice dish. So few ingredients, so much flavor. Everyone who makes this dish raves about it! (pictured above)
- Baked feta pasta. This has got to be the easiest pasta dish in the world. Fall might not be classic tomato season, but this is cheesy, comforting, warm, and SO good. Baked feta pasta is here to stay.
- Chinese sticky rice. Sweet and savory sticky rice studded with juicy pieces of chicken, Chinese sausage, and tender mushrooms. If you’re craving for a stick to your ribs meal that will warm you from the inside out this is the one to make. It’s a bit of a time investment but so worth it - the perfect weekend cooking project!
- Instant pot pasta and meatballs. I love the instant pot because you can pop everything in, set it and forget it. This meatball and pasta dish is perfect for for making when you get home from work. All the ingredients go right in the pot, including raw pasta. The instant pot does its thing and in no time you have saucy, savory pasta and meatballs.
Fall pasta recipes
Why fall is the best: because it means ALL THE CARBS. Fall pasta is the best pasta, am I right?- Pumpkin sage lasagna roll ups. Pumpkin season is upon us and these pumpkin roll ups are always on the menu every fall. I love the sweetness of the pumpkin and the taste of sage together. It’s a great special fall meal.
- Velveeta mac and cheese. Could this be the best mac and cheese ever? Everyone who cooks it thinks so and I do too. It’s so incredibly creamy and flavorful. I feel like I could live on Velveeta mac and cheese forever and ever. (pictured above)
- Chicken spaghetti. This is a one pan meal full of tender chicken, tomatoes, bell peppers, and onions. It’s creamy, comforting and the best part are the leftovers.
- Bolognese. The ultimate pasta sauce for fall (or any time really). Our bolognese is slow simmered for a silky, smooth, deep, full bodied sauce, perfect with dried pasta, or if you’re going all out, freshly made egg pasta.
- Creamy chicken alfredo. Juicy pieces of chicken in a smooth and creamy, extra cheesy alfredo sauce. So incredibly easy to make because it’s an Instant Pot recipe!
- Honeynut garlicky pasta. Honeynut squash are the cutest fall squash around but they aren’t just a cute face, they taste excellent too, especially when paired with a creamy garlicky sauce, pasta, and hearty greens.
- Creamy pumpkin mac and cheese. Pumpkin mac and cheese just screams fall. It’s pumpkin spice and all things nice in a savory mac and cheese format. One pot, extra creamy stove top mac and cheese, no pasta draining needed.
Fall soup recipes
Is it even fall if you don’t soup? Soup is the best, meal prep it and you have instant comfort all week long.- Secret ingredient cabbage soup. Cabbage soup isn’t always thought of as sexy but this cabbage soup sure is hot! It has a secret ingredient and it’s AMAZING. Make a big pot and enjoy it while it lasts.
- Creamy comforting potato soup. Like a baked potato but in a bowl and super creamy and comforting. Potato soup is stick to your ribs filling and this one has all the good stuff plus white miso for extra oomph and umami.
- Chicken tortilla soup. A warm and savory broth-y soup with chunks of chicken, crunchy strips of tortilla, cheese, sour cream, and avocado. It warms you up with a little bit of spice and it comes together in just 15 minutes. (pictured above)
- Chili. This chili has no beans because it’s Texan style, a chili con carne that’s hearty, spicy, and just perfect topped with sour cream, shredded cheese, and scallions. Two dumps of chili spices because that’s what makes it so flavorful!
- Lasagna soup. It’s lasagna, but in soup form! It has all the best parts of lasagna: noodles, cheese, meat, and a tangy tomato based soup. It’s way faster than layering a lasagna but you get all the flavor.
- Chicken congee. Chicken congee is the best base - it’s so creamy and comforting and it goes with anything. Make a huge pot and enjoy it with side dishes or on it’s own, it’s a simple dish that will fill you right up.
- Coconut curry chickpea stew. Super fast, fresh, and easy with a ton of flavor and protein from the chickpeas and kale. Plus, it’s a beautiful golden fall forward bowl of prettiness that tastes good too!
- Spicy kimchi soft tofu stew. Super soft and tender tofu with slices of pork belly in a spicy heart warming stew. The perfect fall food.
Fall Noodle Soups
Fall was made for slurping up steaming hot bowls of noodles. Double these recipes and you’ll be warm all season long.
- Pho. Full of comforting spices, slippery noodles, tender beef, and a rich, yet light broth, pho is perfect for warming up. It’s easier to make than you think, you just need to follow a few key steps! Read all about the most authentic pho you can make at home right here.
- Mayo ramen. This mayo ramen is here to stay: it’s easy, it’s rich, it’s almost just as good as heading out to a tonkotsu ramen shop. Let’s face it, it’s not 100% the same, but when it’s 4 in the morning and you’re craving ramen, mayo ramen is here for you. (pictured above)
- Wonton soup. If you’re looking for a bowl of fall comfort, you’ll find it in this wonton soup. Tender little pork meatballs wrapped in wonton wrappers floating in a light and tasty broth is my idea of heaven. Make big batch of wonton, freeze them, and have wonton soup anytime a craving hits.
- Hot pot at home. The best way to hang out in the fall is to gather your core people around you and have a little hot pot party. Mike and I do this all the time. We set up a little pot in the middle of the table, get all the Chinese hot pot materials and cook and chat the night away. It’s the best!
- Khao soi. A warm coconut curry noodle soup that will fill you up quick. The key to this recipe is using red curry paste - it’s a little cheat that makes your khao soi taste amazing and come together quickly.
- Sesame noodles. A fast and easy noodle dish that is way better than takeout and a little more grown up than peanut butter noodles. You only need 7 ingredients and about 5 minutes for these super slurpable noodles.
Fall vegetarian recipes
These cozy fall vegetarian recipes will fill you up and make you feel good.- Tteokbokki. These spicy korean rice cakes are just what I want to eat when the weather starts getting a little chilly: spicy carb-y, saucy food. The cook up quick and are so snacky. I love them with melted cheese on top too! (pictured above)
- Risotto. The creamiest of all the rices! Risotto is best in fall when you can hang out by the stove, stir, and breathe in all the delicious smells as your cooking. This risotto is so incredibly rich and flavorful, thanks to wild mushrooms and garlic.
- The best baked potatoes. Who says baked potatoes aren’t a meal? If you’ve had an excellent baked potato, you know, it’s even better than steak! Crispy, salty skins, fluffy insides, and piping hot so the butter melts right in to all the nooks and crannies. My favorite topping is broccoli and cheese :)
- Honeynut squash. Is it even fall if you don’t roast some squash? Honeynut squash is better than butternut - it’s just the right size, the skins are edible, and it is super sweet and tasty. Roast some up and serve them with pickled shallots, honey roasted walnuts, and a cooling cucumber yogurt sauce.
- Umami bomb tomato pasta. All you need are four pantry ingredients and a package of noodles for the coziest plate of pasta. This sauce is amazing - it’s crazy how much flavor you get.
- Spicy Korean ramen with tofu. If you love spice, this Korean ramen with tofu is for you. It’s a quick vegetarian kimchi stew recipe with noodles, tofu, and all the veggies so you can clean out your fridge. Super comforting and cozy.

I Am... Green Chile Sauce
Green chile sauce, along with red, are the backbones of New Mexican cuisine. The two flavorful chile sauces are used liberally, smothering and infusing all sorts of New Mexican dishes. If you’ve ever been to New Mexico, you’re familiar with the refrain: red, green or Christmas. They’re asking: red chile, green chile, or both? In the land of enchantment, there’s no wrong answer because red and green are both delicious. And, both sauces together, well, it’s the best of both worlds.
What is green chile?
Green chile is green chile sauce, although sometimes people call green chile peppers “green chile” as well. Note, it’s spelled “chile” as per the state constitution. Green chile can refer to green chile sauce, Hatch green chiles, or New Mexico green chiles.What is green chile sauce?
It’s a sauce created from roasted, unripened, fresh green chile pods. You roast fresh green chiles, peel off the skins, then chop and cook them into a sauce with onion, garlic, and stock (or water). There’s a bit of optional flour added as a thickener as well. It’s smoky, savory, and delicious!How to make green chile sauce
It’s incredibly easy for a huge flavor pay off.- Roast. Start off by roasting your green chiles. Place washed, dry peppers on a baking sheet and roast them in the oven until blistered. Place the hot peppers in a heat proof container with a lid and let them sweat so you can remove their skins. Read more about roasting peppers.
- Peel. Gently rub off the skins, trim off the stems, and deseeded and de-rib the chiles.
- Chop. Chop up the deseeded chiles in either a rough chop or fine dice, depending on what kind of texture you want your final sauce to have. Most green chile sauces have a 1/4 inch dice, but since you’re making your own, you can customize the size of the chopped chile.
- Sauté. Sauce diced onions in butter until soft, then sprinkle on flour and stir to cook and coat the onions. Mix in the chopped chile. Add the stock. Slowly stream in the chicken stock (or vegetable stock or water) while stirring.
- Simmer. Bring the sauce to a gentle simmer, stirring occasionally, until it thickens to your liking. Taste and season with salt and pepper then enjoy!
What are the best green chiles?
Hatch of course! They’re buttery, crisp, smoky, with just a hint of sweetness. Plus they come in mild to very hot so there’s a spice level for everyone. They’re famous for a reason and almost all of the green chile sauce in New Mexico contains Hatch grown green chiles. If you can’t get your hands on Hatch green chiles, try Anaheims.What can you make with green chile sauce?
- green chile chicken enchiladas
- green chile cheeseburgers
- chilaquiles
- green chile wonton
- chile rellenos
- green chile mac and cheese
- green chile chicken stew
- huevos rancheros
- green chile pork stew
- smothered burritos
- green chile cheese fries
- green chile tostadas
Green Chile Sauce
The greatest everything sauce: smoky, savory, and delicious.
- 2 tbsp butter
- 1 medium onion (finely diced)
- 3 cloves garlic (minced)
- 1 tbsp all purpose flour
- 1.5 cups green chile (roasted and chopped)
- 2 cups chicken stock (low sodium recommended)
In a saucepan, melt the butter over medium heat. Add the onion and garlic and cook until soft, but not brown, stirring occasionally, about 5 minutes.
Stir in the flour and cook for another 1-2 minutes, until the flour coats the onions.
Mix in the chile and immediately slowly stream in the chicken stock, stirring as you go.
Bring to a simmer and reduce the sauce for about 15 minutes, until slightly thick. Taste and season with salt and pepper. Use to smother anything and everything or in your favorite recipes with green chile sauce.

Latest Comment
“Bananas and coffee seem like such a strange combination at first but it really is delicious! Agreed that when the banana...”Jerrica L on Banana CoffeePopular
 2015 Holiday Giveaway
  One-Pot Lemon Scallop Pea Spaghetti
  Beer Battered Onion Rings, Jalapeno Aioli
  2014 Holiday Gift Guide and a Giveaway
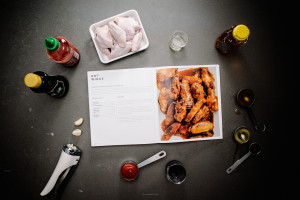 Easy Gourmet Hot Wings and a Giveaway!
 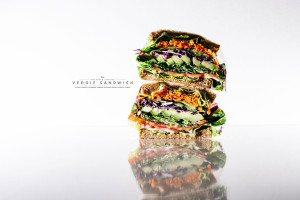 The Ultimate Veggie Sandwich
  Vegan(!) Creamy Corn Soup Recipe
 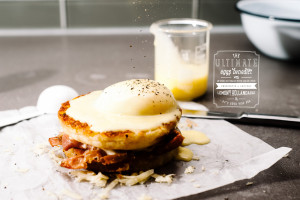 Sunday Brunch: Grilled Cheese Eggs Benny
