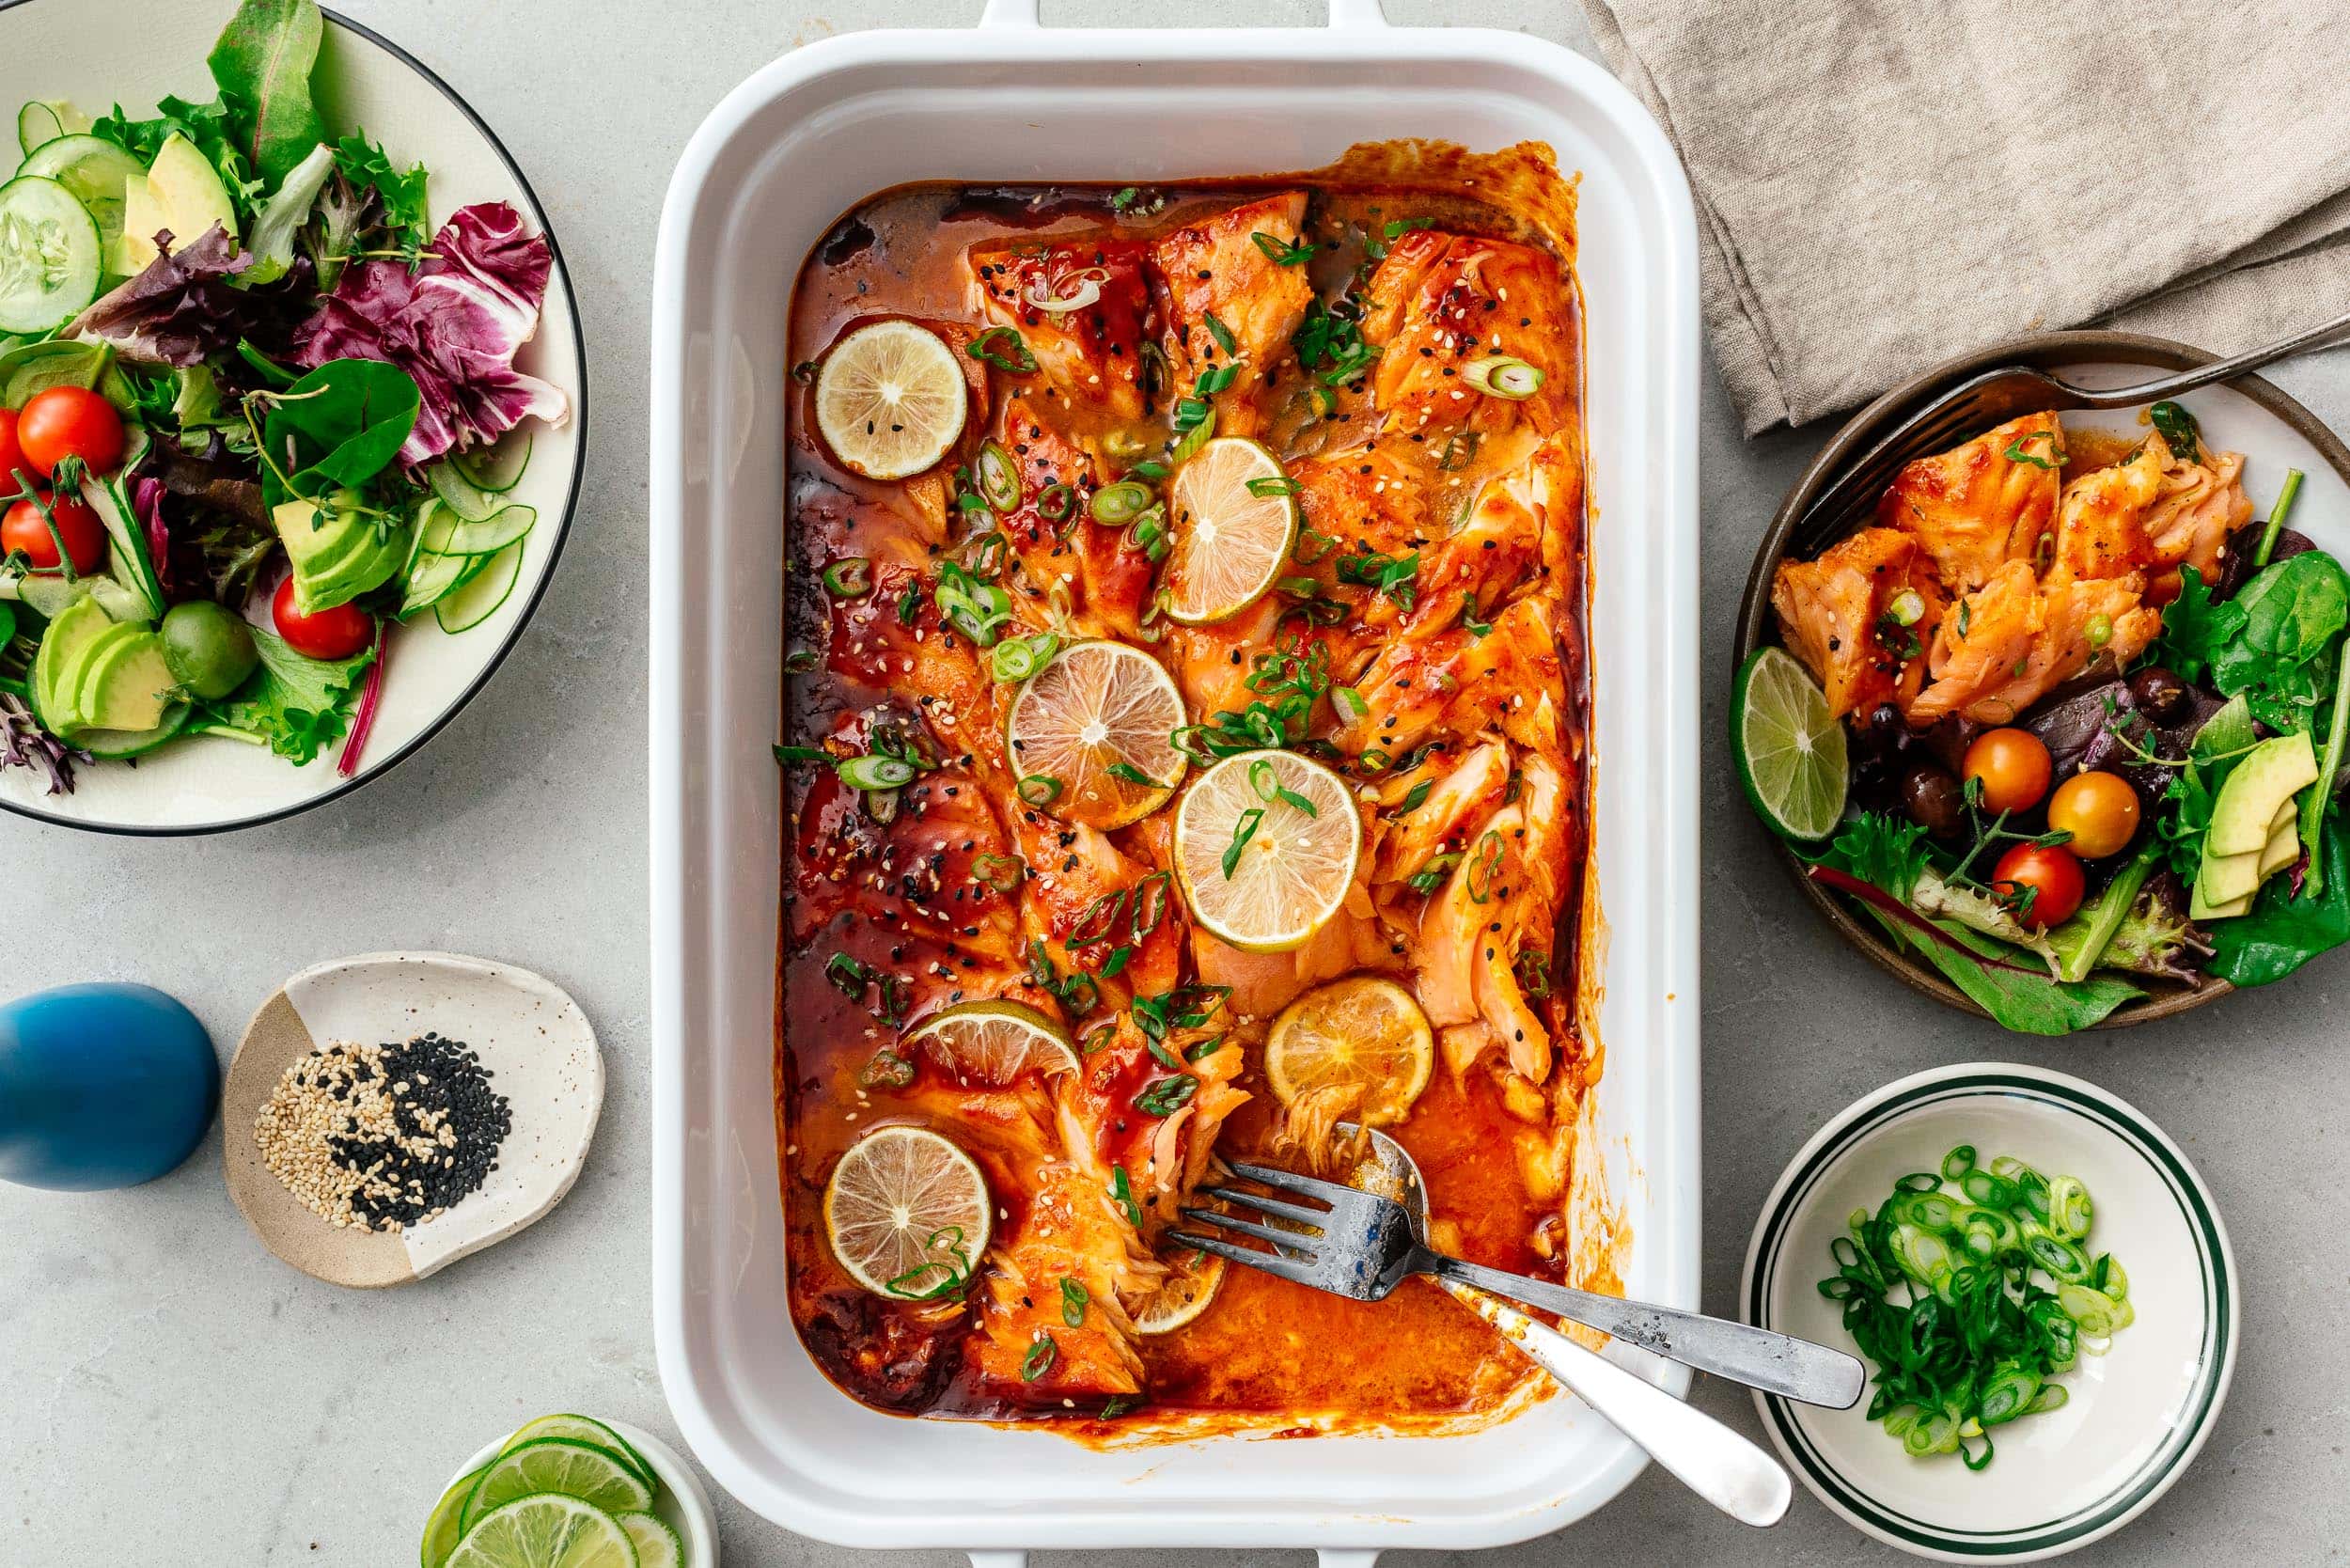
I Am... Baked Salmon
Making baked salmon by slow roasting in a low oven ensures that it never over cooks, flakes apart perfectly and is just the best. If you love juicy, tender, succulent salmon, this is the post for you! Slow roasted salmon in a sweet, savory, slightly spicy sauce, finished with caramelized limes, fresh scallions, and toasty sesame seeds. I feel like everyone loves salmon. When it’s cooked properly, it’s so flavorful and satisfying. The finicky part with salmon is that when it’s over cooked, it’s a dry, crumbly travesty. Salmon is kind of mysterious but it’s really one of the easiest, healthiest, and tastiest proteins you could ever learn to make.
How to bake salmon
- Mix: Mix together a flavorful sweet and spicy gochujang honey sauce.
- Slow roast: Coat the salmon in the sauce and bake in a low oven to ensure tender, juicy, perfectly cooked salmon.
- Flake: Use a spoon to gently flake the salmon into perfectly imperfect pieces to present on a plate or platter.
- Enjoy: Finish with some scallions and toasted sesame seeds and enjoy!
The best baked salmon recipe
This oven baked salmon is spicy, sweet, savory, and so addictive. The gochujang honey glaze is AMAZING. If you’ve ever had Korean fried chicken, the glaze is very similar to that sticky, bright red, deeply delicious sauce you get on the spicy wings.Best salmon for baked salmon
Go for a larger cut of salmon instead of individual fillets: a larger piece of fish means it won’t dry out as much in the oven; a large piece of fish is much more forgiving than smaller fillets. You can either go for skin on or skinless. I went with skin on because the skin provides an extra layer of protection against over baking. Since we’re going to flake the salmon in pieces and present it on another platter, I recommend skin on so the salmon stays a bit juicer. Either way, make sure you remove the pin bones, if there are any. Run your fingers lightly across the surface of the fillet, near the middle. If you feel any pin bones, use a pair of kitchen tweezers to pluck them out.What is gochujang ?
A savory, sweet, spicy fermented paste made from chili powder and sticky rice. It adds sweet and heat and a ton of flavor to your favorite Korean dishes. We use it for Korean fried chicken, oven roasted chicken, and Korean BBQ. Traditionally it comes in tubs, but these days you can find it in squeeze bottles in the Asian aisle of literally any grocery store (or online, as always).How long to bake salmon
Slow roasting salmon at a low temp ensures that your salmon is moist and tender and never dry. Instead of cooking at high heat, which has the tendency to dry out salmon, a low oven will gently surround your salmon and bring it up to temp. Plus it gives the salmon time to absorb the flavors of the marinade!The best baked salmon temp
Slow roasted salmon works best at 275°FHow to tell if salmon is cooked
The best and easiest way to tell if salmon is cooked is to gently press it with the back of a spoon, when it’s cooked properly it will flake. Perfectly done salmon will be tender, barely opaque, and juicy. Over cooked salmon will flake too but it will be dry, lighter in color, and tough.Wild salmon vs farmed salmon
Wild salmon is always going to be less fatty than farmed salmon because they have to work to find their food. Since wild salmon have less fat, it’s best to cook them to a lower finished temp so they remain silky, firm and juicy. If you want to be precise, use an instant read thermometer.What internal temperature should I cook salmon to?
For wild salmon, aim for 120°F internal temperature For farmed salmon, aim for 125°F internal temperature Note: the FDA recommends 145°F.How to serve salmon
Our favorite way of serving salmon is not in individually portioned filets. Instead, a whole side of salmon is oven baked, then gently flaked into large perfectly imperfect pieces onto a platter. We were inspired by a Bon Appétit recipe and the salmon looked so pretty on the platter that we have never gone back. Presenting salmon like this is nice because you (or guests, if we’re ever in a time when you can have guests again) can custom portion out how much salmon you want to eat. Another bonus of cooking a side of salmon and flaking it is that cooking a larger piece of salmon ensures that it doesn’t dry out while cooking because it has more mass. And, when you serve salmon not in the dish you’ve baked it in, you can go ahead and buy skin-on salmon (the skin protects the fish from over cooking) and easily serve it without the skin. Above: Harissa SalmonHere are some of my other favorite oven baked salmon flavors
Garlicky tomato with vine cherry tomatoes: toss 2 pints cherry tomatoes with 1/3 cup extra virgin olive oil and 4-6 cloves minced garlic. Bake as directed below. Harissa: mix together 1/3 cup extra virgin olive oil, 1/4 cup harissa paste, 1 clove minced garlic. Bake as directed below. Miso baked salmon: mix together 2 tbsp neutral oil, 2 tbsp miso paste, 1 tbsp sake, 1 tbsp mirin, and 1 tbsp soy sauce. Bake as directed below.What to serve with salmon:
- this salmon on top of rice for the ultimate salmon bowl!
- these fresh and crisp miso dijon green beans
- you can’t go wrong with noodles and salmon
- creamy mashed potatoes and salmon pair perfectly
- bright and fresh creamy cucumber avocado salad for balance
Baked Salmon Recipe
Perfectly soft and tender slow roasted baked salmon in a sweet, savory, slightly spicy honey gochujang sauce.
- 2 tbsp neutral oil
- 3 tbsp gochujang
- 3 tbsp honey
- 1 tbsp soy sauce
- 2 tsp toasted sesame oil
- 2 cloves garlic (minced)
- 1/2 tbsp ginger (grated)
- 1.5 lb boneless salmon fillet
- 1 lime (thinly sliced)
- 1 tsp toasted sesame seeds (to serve)
- 1 stalk green onion (sliced, to serve)
Temper the salmon. Let the salmon rest at room temp for 20-30 minutes while you heat up the oven and prep the marinade and garnish.
Heat the oven to 275°F. Whisk the oil, gochujang, honey, soy sauce, sesame oil, garlic, and ginger in a bowl.
Spread half of the gochujang mix to the bottom of a large baking dish. Lightly pat the salmon dry and season with salt and pepper on both sides then place in the baking dish (skin side down if your salmon has skin). Spread the remaining gochujang mix on top. Arrange the limes on top and place in the oven for 30 minutes (see notes).
When 30 minutes is up, remove the salmon from the oven and take a spoon and try to flake the salmon to see if it flakes and is cooked through, barely opaque and tender. If needed, return to the oven for another 5 minutes.
Flake the salmon into 2-3” irregular sized pieces. Arrange the salmon and lime on a platter, spoon on any remaining sauce on top. Finish with scallions and toasted sesame seeds and serve immediately.
Depending on the thickness of your salmon and how done you like it, it may take up to 45 mins in the oven. 30 mins should cook a 1" fillet to rare, 45 min should cook a 1.5" fillet to medium.

I Am... Best Ever Stuffing for Crock Pot or Oven
Set-it-and-forget-it crock pot (or oven) stuffing recipe with soft, custardy bread and crispy, toasty edges and a secret ingredient. I LOVE stuffing. I feel like I could make a meal of stuffing and mashed potatoes and be a very happy camper. Give me ALL the carbs. Ever since I discovered making stuffing in the crock pot I have been sneakily meal prepping stuffing at the beginning of every week so I can feed my stuffing addiction. Who says stuffing is only for Thanksgiving? Not me! Stuffing isn’t even hard to make. It’s one of the easiest sides dishes – maybe even the most easy? The most pressing thing you’ll need to think about is: if you should cut up a loaf of bread or use store bought bread cubes. I do both. When I’m in a hurry those store bought bread cubes are a life saver, but for more special stuffing, like Thanksgiving, I’ll get a rustic loaf, tear it up, and dry out the cubes myself.
How to make bread cubes for stuffing
- Decide on a loaf of bread. There are so many kinds of bread out there! I usually use a rustic white, sourdough, or French bread.
- Cube the bread. Use a bread knife to slice the bread into 1/2 - 3/4 inch thick slices, the lay them flat and cut into 1/2 - 3/4 inch strips. Cut the strips into cubes.
- Toast the bread cubes. Spread the bread cubes out into a single layer on a baking pan and bake them in a low oven, until dry and crisp, stirring once or twice. Let cool completely. Boom! Homemade bread cubes.
- Bonus: If you want your stuffing to have a more artisanal, rustic, hipster look, tear your bread. Irregular torn up pieces look more homemade and the extra texture and craggily crevices toast up better!
How to make stuffing
- Toast the bread. Toast the bread in the oven so it’s crisp on the outside but not too dry on the inside. You want it to feel like a crouton.
- Sauté the aromatics. You’ll have to break out a pan for this step, but it’s worth it because searing the mushrooms and shallots brings out so much more flavor.
- Mix up the stuffing. Get a giant bowl so you can mix everything up evenly. Aim to evenly soak all the bread.
- Cook it in the crock pot. Generously butter the insert of the crock pot then add everything in, cover, and cook on low for 3-4 hours. The sides will get gloriously crisp and the insides will be creamy and custardy.
Stuffing Ingredients
You will need: 1 loaf of bread, butter, mushrooms, shallots, celery, garlic, herbs, eggs, chicken stock, and just a touch of the secret ingredient: soy sauce!- Bread - My favorite thing to do is to get a sourdough or rustic loaf from our neighborhood bakery and rip it up into different sized pieces so there’s lots of surface area and craggily bits for all the flavor to cling to.
- Mushrooms - The deep savoriness of mushrooms will add a huge hit of flavor to this stuffing. Try to get a mix of mushrooms (cremini, portobello, button, maitake, shiitake, oyster, trumpet, king) and tear the delicate ones so they get textured surface areas. Most grocery stores sell mixed mushrooms sets, so just grab one of those.
- Shallots - The sweetness of shallots and their pretty purple color is perfect in stuffing to add a note of caramel sweetness to play off all the savory flavors.
- Herbs - I stuck with classic herbs like sage and thyme for that nostalgic stuffing feel but you can mix in any fresh herbs you like.
- Eggs - Eggs are one of those controversial things in stuffing. If you grew up with eggs in your stuffing, you’re probably an egg fan. If you like stuffing that is very loose and falls apart on the plate, you think eggs in stuffing are a travesty. I like how eggs lightly bind your stuffing together and make it custardy. We’re just going to add one egg so the stuffing doesn’t end up too dense. Make sure you whisk the egg very well so it’s fully incorporated with the stock.
- Soy sauce - This is the not-so-secret ingredient. Soy sauce adds an extra layer of saltiness and umami, tying everything together. Butter, mushrooms, and soy sauce are seriously one of the most amazing flavor combinations in the world.
I don’t have a crock pot can I still make this?
Of course! Just pop everything into a lightly buttered casserole dish and bake in a 350°F covered with foil for 30-40 minutes, then remove the foil and crisp up the top for an extra 10.Which crock pot for this stuffing?
Since we are a little family of two, we have the casserole crock, which holds 2.5 quarts. If you’re making this in a bigger crock pot, use the handy “serves” scale and double the number of servings.Make ahead
If you want to prep this ahead of time, toast the bread cubes and sauté the mushrooms, shallots, and garlic the night before. Keep the bread at room temp, uncovered and put the aromatics covered, in the fridge. The next day, combine all the ingredients together and place in the crock pot!How to store
Keep in the fridge in an air tight container for up to one week.To reheat
To heat up, crisp up in an oven safe dish at 350°F for 10 minutes or until warmed through. Or simply microwave if you want it quick, easy, and not-so-crisp.What to serve with stuffing
- Turkey! From easiest to most ambitious: Instant Pot turkey, classic spatchcock turkey, turducken roulade.
- Ham!
- and some sides
Stuffing Recipe
Set-it-and-forget-it crock pot stuffing recipe with soft, custardy bread and crispy, toasty edges and a secret ingredient.
- crockpot/slow cooker
- 1/2 lb bread (rustic white or sourdough loaf, cut or torn into 1-inch cubes (about 5 cups))
- 2 tbsp butter
- 1 lb mushrooms (mixed, sliced or torn)
- 2-3 shallots (quartered)
- 2 stalks celery (diced)
- 2 cloves garlic (crushed)
- 2 tbsp sage (finely chopped)
- 1/2 tbsp fresh thyme (leaves only)
- 1 large egg (lightly beaten)
- 1.5 cup chicken stock (low sodium preferred)
- 1 tbsp soy sauce (low sodium preferred)
Heat the oven to 225°F and arrange the bread cubes in a single layer on a large rimmed baking sheet. Bake, until dry and crisp, stirring occasionally, about 1 to 1 and half hours. Let cool completely.
In a large sauté pan, melt the butter over medium high heat. Add the mushrooms and sear, not moving, until caramelized, flipping as needed. Add the shallots and cook until golden, then add the garlic and cook until just soft. Remove the pan from the heat and stir in the celery, sage, and thyme. Season with salt and pepper.
Add the bread cubes to a large bowl and toss with the cooked vegetables. Whisk the eggs with the chicken stock and soy sauce in a liquid measuring cup or bowl, the pour over the bread cubes and toss until everything is evenly coated. Season generously with salt and pepper.
Generously butter a crock pot and add the stuffing. Cook covered for 3-4 hours on low, until the stuffing starts to crisp around the edges. Enjoy hot!

I Am... Best Baked Potato
Although they often get over looked for mashed or roasted, a perfect baked potato is a thing of beauty. Crisp and salty potato skins with the fluffiest potato-y insides?! Oh my gosh, they are the epitome of pure. Add some toppings on and seriously, they might be the most perfect easy-to-make and even easier-to-eat potato out there. Confession: I was that weird kid that ordered Wendy’s baked potatoes. I mean, I get why no one gets excited about those baked potatoes - they’re often wrinkly and not at all fluffy inside - but a proper baked potato? Those are perfection! In my books, there are three things you need to have to be considered a perfect baked potato: crispy salty skins, fluffy insides, and piping steamy heat. A proper baked potato is so incredibly easy you’ll wonder why you’ve overlooked them your whole life.
How to bake a potato
- Wash and dry your potato. Give it a good scrub and then make sure it’s completely dry.
- Poke. I have never had a potato explode on me but I also don’t want to clean up exploded potatoes, so I always give my potatoes pokes with a fork.
- Rub with oil. No foil jacket here - all you need to do is loving rub your potato with a bit of oil.
- Salt. Chanel your inner salt bae and make it rain salt. The oil will help the salt stick to the skin.
- Bake. Bake your potato, on a rack in a very hot oven. Give it a flip half way through to encourage even baking.
- Make Fluffy. After your potatoes are baked, use clean oven mitts (or a clean kitchen towel) to squeeze and massage your potato a bit.
- Slice and serve. Cut a little opening, use a fork to fluff, and serve! I like them pure with a pat of really good grass-fed butter and flaky sea salt, but I never ever say no to baked potato toppings!
Ideal temp for a baked potato in oven
The ideal temperature for baked potatoes is 425°F. A super hot oven will help the skins crisp up beautifully and bake the insides to fluffy, steamy perfection.How long to bake a potato?
Not gonna lie, baked potatoes take time, but it’s worth it. Bake potatoes for 45 minutes to 1 hour, depending on how big your potatoes are.Baked potato in foil or no foil?
Should baked potatoes be wrapped in foil? The answer is no! Leaving your potatoes naked in the oven means that the skins will be crispy instead of wrinkly. You know skin on french fries? The skins of these potatoes taste like that.Baked potato ingredients
Literally all you need is a potato. The best and original baking potato is a russet. Along side your potato you’ll need some oil and salt.What are the best potatoes for baking?
The absolute best potatoes for baking are russets. Russets are the classic potato for baking. They have a thick skin that crisps up perfectly in a piping hot oven and their starchy insides bake up incredibly fluffy, sweet, and starchy. They’re also suitably large, which is nice because you can make a meal out of one potato. Or even two?!How to pick the best potatoes
Take your time when you’re picking out your potatoes. You’ll want potatoes that are all about the same size so they finish in the oven at the same time. Give them a gentle squeeze. The best potatoes are firm and not squishy. They should be relatively blemish free with no cuts, bruises, or wrinkles.Air fryer baked potatoes
To air fry a baked potato: scrub, dry, and poke your potatoes. Rub them with a bit of oil and season with salt. Place in your air fryer and cook on 400°F until fork tender, about 50 minutes to 1 hour, flipping half way.Crock pot baked potatoes
To make crock pot potatoes: scrub, dry, and poke your potatoes. Rub them with a bit of oil and season with salt. Place in your crock pot and cook on high for 3-4 hours or until fork tender.Instant Pot baked potatoes
To make Instant pot baked potatoes: place 1 cup of water in the bottom of your crock pot and place the insert inside. Scrub, dry, and poke your potatoes. Rub them with a bit of oil and season with salt. Cook on high pressure for 14 minutes, then natural release.Microwave baked potato
Microwave a washed, poked, and salted potato on full power for 5 minutes, then flip and go another 5 minutes. use tongs or oven mitts and be careful, the potato will be hot. Do one at a time.Loaded baked potato
To make a loaded baked potato, bake a potato, fluffy it up, and top with shredded cheddar cheese, crispy bacon, sour cream, and chives or scallions.Carbonara baked potato
The most luxurious baked potato I make is a carbonara baked potato. It is SO good. Think: the creamy, cheesy, egg sauce you love on pasta, but mixed in with fluffy steamy potatoes. Little crispy nuggets of pancetta and freshly cracked black pepper and you’re GOLD. To make carbonara sauce, warm 2 tablespooons heavy cream over medium heat in a small sauce pan. When there are whips of smoke, move the cream off the heat and whisk in two egg yolks until thick and creamy. Whisk in 1/4 cup finely grated parm, returning to very very low heat if needed to melt the cheese. Pour on your baked potato and add some crispy bits of pancetta and lots of black pepper.Other baked potato topping ideas
- Chili: topped with chili, cheddar, sour cream, and scallions
- Broccoli cheddar: roasted broccoli and shredded cheddar
- Mapo: All the spicy meaty deliciousness of mapo minus the tofu topped off with loads cheese. One of my favorite ways to eat baked potatoes!
Best Baked Potato Recipe
Check out the blog post for topping suggestions. Use the scale button in the serves box to change the number of potatoes.
- 4 medium russet potatoes
- 4 tsp oil
- 1 tsp salt
Heat the oven to 425°F. Scrub and dry your potatoes. Use a fork and lightly poke the potato in a couple of spots.
Rub the potato with oil and season generously with salt. Place on a wire rack on a baking sheet.
Bake for 30 minutes, then flip and bake for another 20-30 minutes. Squeeze or use a fork to check the doneness. The potato should be tender and soft.
Use clean oven mitts or a clean kitchen towel to gently squish your potato to mash the insides a bit. Place the potato on a place and slice lengthwise then use a fork to fluff the insides. Enjoy hot with plenty of butter, sour cream and chives.
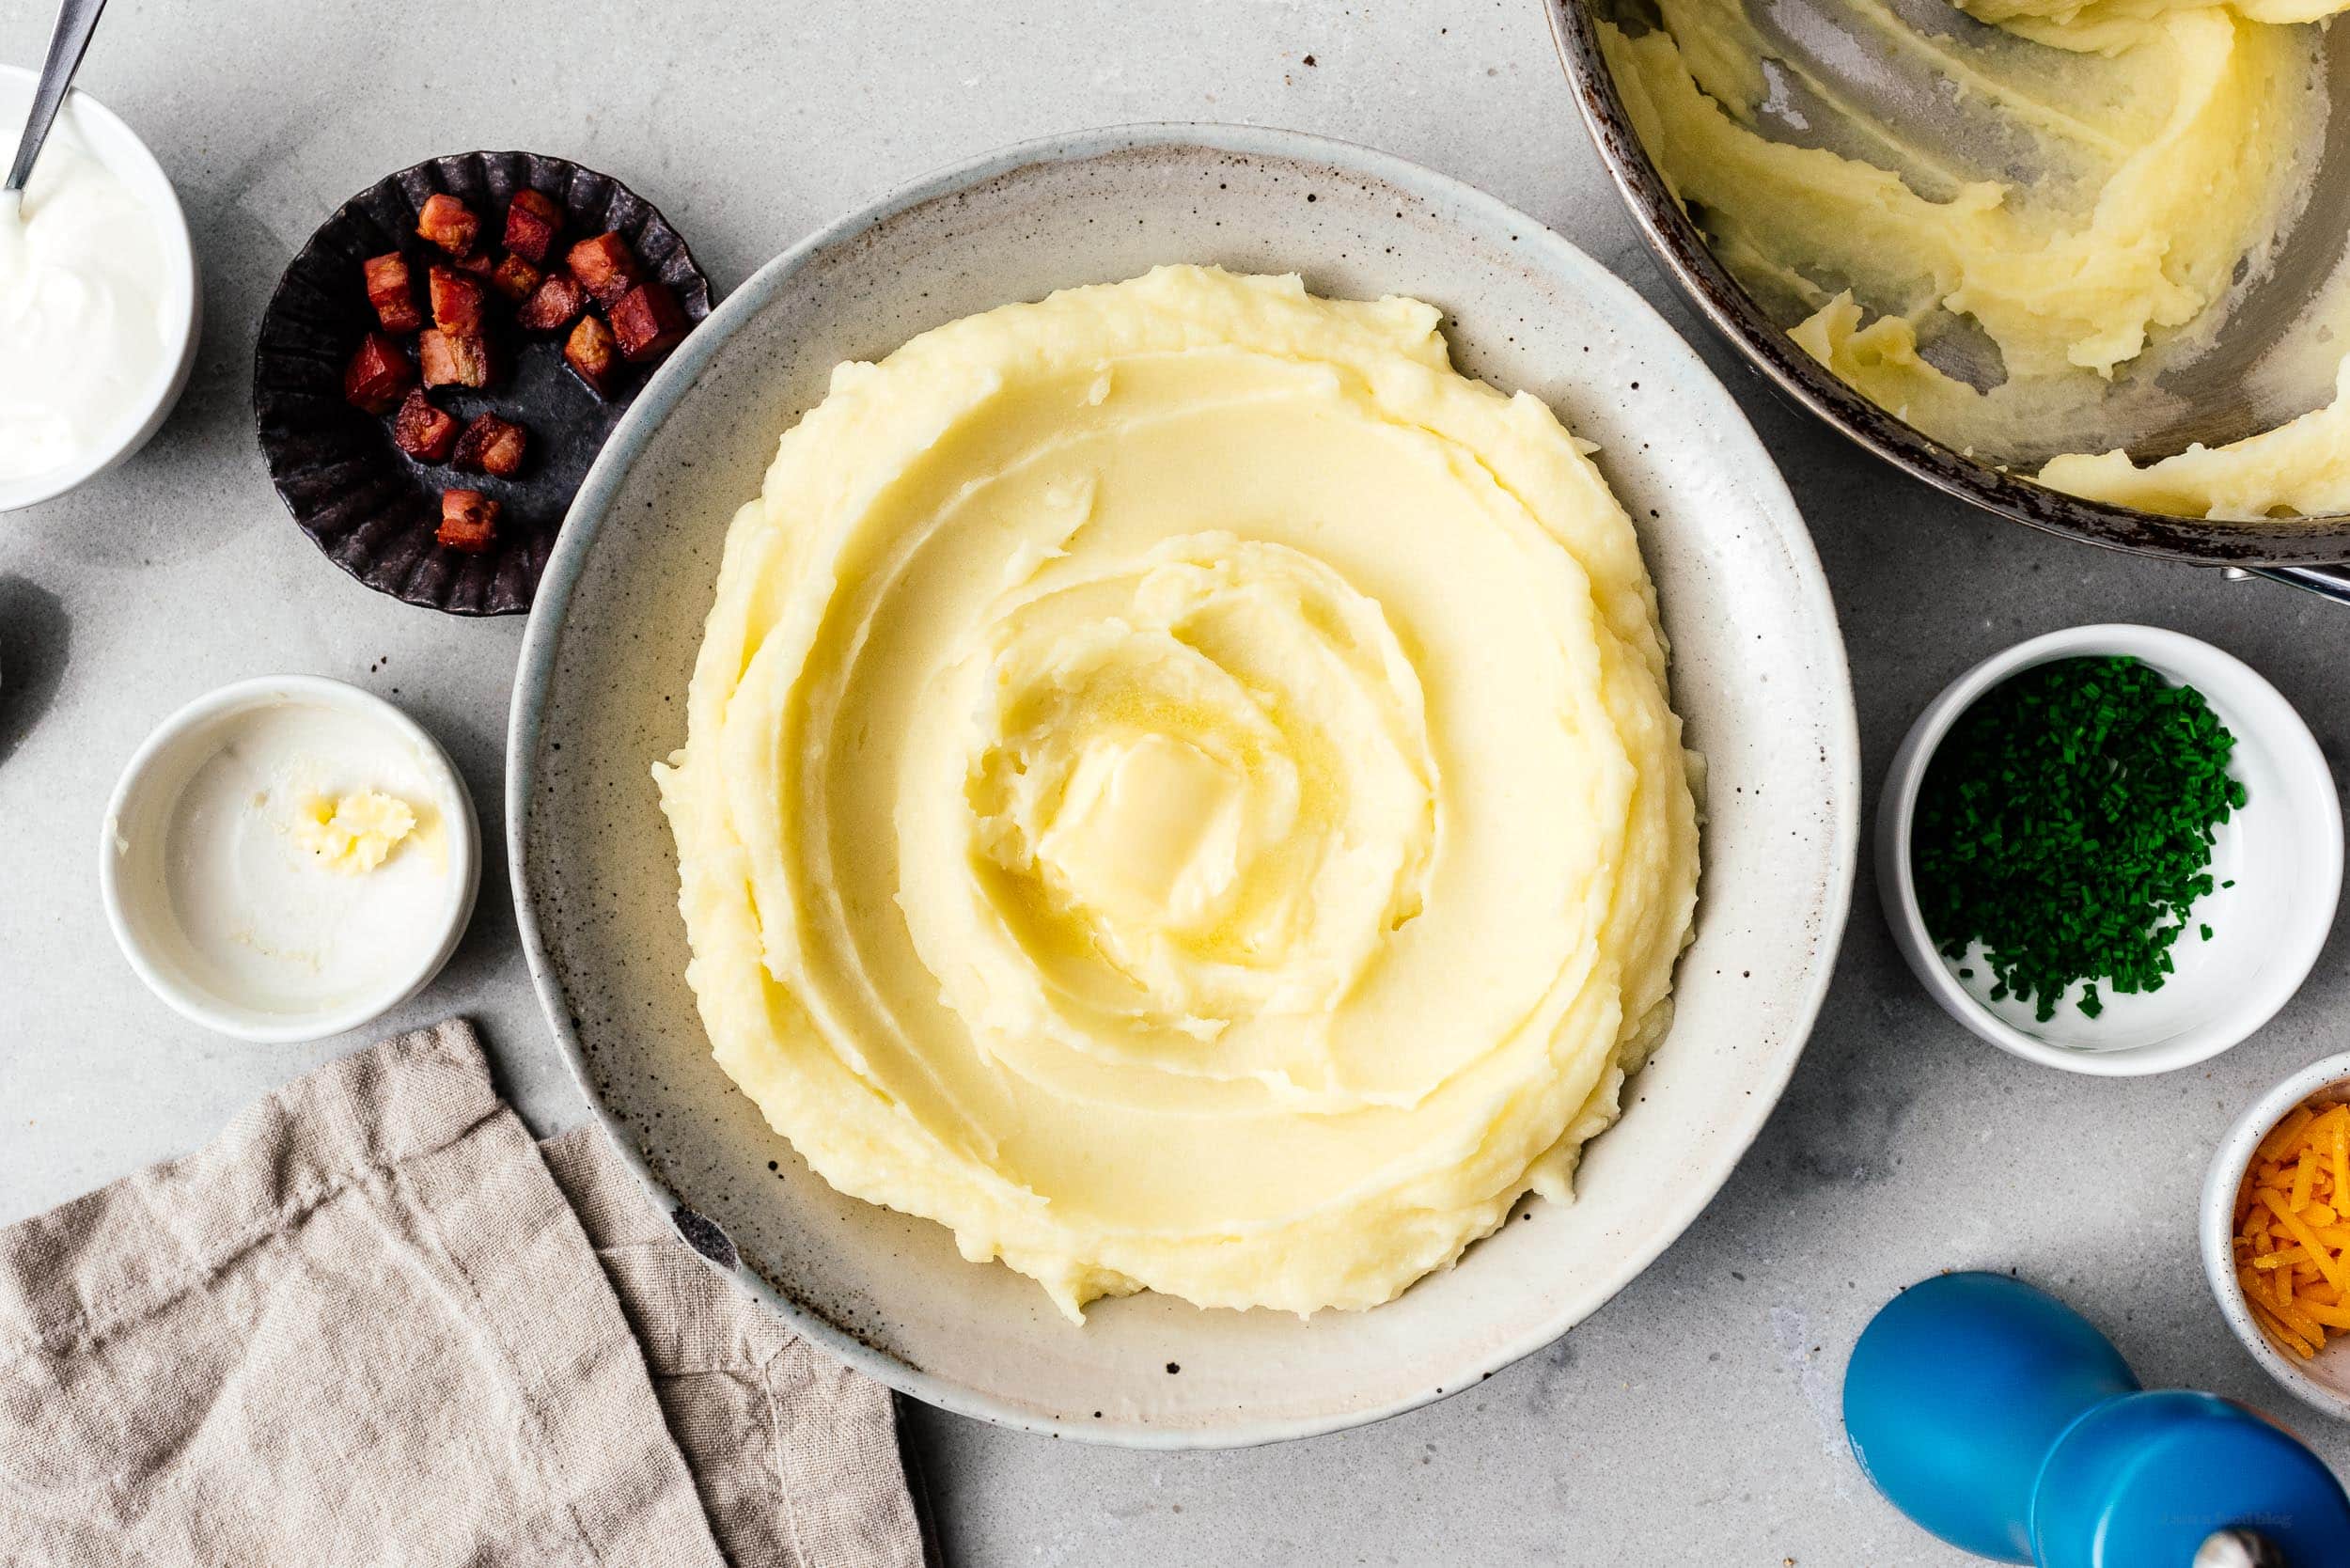
I Am... 5 Best Mashed Potatoes
Mashed potatoes are a classic side. They’re comforting, they’re delicious, and they can be classic OR dressed to the nines. If you’re making steak for date night or maybe even just a simple air fryer chicken breast, mashed potatoes are the answer. Start off by mastering perfect mash, then try these five variations to take your mash over the top. Once you master pure mashed potatoes, it’s time to make the best mashed potatoes. These are my five best potato mix-ins and flavors. These are fancy mashed potatoes. They are over the top goodness, flavor packed, and will elevate any mashed potato to the best mashed potato it can be.
What kind of potatoes for mashed potatoes?
There are only two kinds of potatoes that are perfect for mashed potatoes: Yukon golds (my absolute favorite) and Russets.Yukon golds: dense, buttery, rich, more potato flavor
Yukon golds are perfect for mashing because they’re starchy, beautifully yellow, and have a rich buttery potato taste. They’re also a more dense potato with a thin skin, and when you use them, you get a more luxurious mash.Russets: light, delicate, fluffy, mild potato flavor
Russets (or Idaho) potatoes are those big potatoes with the dusty skin that most people use for baked potatoes. These are also excellent for mashed: fluffy, dry, and starchy, when cooked right. Russets are the more mild potato of the two potatoes I recommend and if you’re a fan of lighter potatoes, they make a mash with a more delicate texture.How to make super smooth and creamy mashed potatoes
- Scrub and peel (or leave the skins on if you’re into that) the potatoes and cut into even pieces.
- Place the potatoes in a large pot of water and cover with cold water. Add a generous pinch of salt and bring to a boil over high heat.
- Turn the heat down to medium-high once the potatoes hit a rapid boil, making sure that the potatoes are still at a simmer. Cook until fork tender.
- Drain the potatoes. Use a slotted spoon or colander and drain the potatoes well.
- Mash! Push the potatoes through a fine mesh sieve for the smoothest, fluffiest potatoes you’ll ever eat.
- Stir in the butter and milk. Add the butter and milk, gently stirring until the potatoes reach your desired consistency. Taste and season generously.
- Enjoy!
Pesto Mashed Potatoes
There’s a pesto pasta dish from Liguria in Northern Italy that is fantastic. The fresh basil, toasty pine nuts, garlic, extra virgin olive oil, and nutty, umami filled Parmesan go perfectly with potatoes. It’s not much of a stretch to think of pesto and mashed potatoes and truly, they are a match made in heaven. Creamy, smooth mashed potatoes with flecks of green, grassy basil ribboned throughout is both a feast for the eyes and your tastebuds. It’s a super easy addition to your classic mash and makes it so incredibly flavorful. You can make your own pesto or use store bought, either way, these pesto potatoes are a winner.Pesto Mashed Potatoes
Pesto and mashed potatoes are truly a match made in heaven.
- 4 medium Yukon gold potatoes (peeled and quartered, ~2 lbs)
- 1/4 cup unsalted butter
- 1/2 cup whole milk
- 1 cup pesto
Place the potatoes in a large pot and cover with cold water by 1-2 inches. Add a large pinch of salt and bring to a boil over high heat then reduce the heat so the potatoes are simmering. Cook for 15-20 minutes or until fork tender. Drain well.
Mash or push the potatoes through a ricer or sieve back into the pot.
Place the pot over low heat and stir in the butter, whole milk, and half of the pesto until smooth. Taste and season with salt and freshly ground pepper.
Before serving, make a divot in the middle of the potatoes and add the remaining pesto on top. Alternatively, swirl the pesto into the potatoes, creating pesto ribbons throughout.
Cacio e Pepe
If you love cacio e pepe you’ll love these cheesy, peppery mashed potatoes. They key is to toast freshly ground black peppercorns in butter so they bloom and flavor the butter with a light floral pepperiness. Pepper and pecorino go together perfectly with creamy mashed potatoes – it’s heaven.Cacio e Pepe Mashed Potatoes
If you love cacio e pepe pasta you’ll love these cheesy, peppery mashed potatoes
- 4 medium Yukon gold potatoes (peeled and quartered, ~2 lbs)
- 1/4 cup unsalted butter
- 2 tsp freshly cracked black pepper
- 1/2 cup whole milk
- 1/2 cup pecorino (grated, plus extra to serve)
Place the potatoes in a large pot and cover with cold water by 1-2 inches. Add a large pinch of salt and bring to a boil over high heat then reduce the heat so the potatoes are simmering. Cook for 15-20 minutes or until fork tender. Drain well.
Mash or push the potatoes through a ricer or sieve back into the pot.
Using the pot that you cooked the potatoes in, gently melt the butter over low heat. Add the freshly cracked black pepper and stir, letting it toast slightly. Stir in the milk, potatoes, and pecorino until smooth. Taste and season with salt and pepper. Serve with extra grated pecorino on top.
Spicy Chili Crisp
This is probably the easiest and most tasty mashed potato glow up. If you’re a spice lover and find that potatoes are too bland, spicy chili crisp mash is for you. They’ll add zing to any main.Spicy Chili Crisp Mashed Potatoes
If you’re a spice lover, spicy chili crisp mash is for you
- 4 medium Yukon gold potatoes (peeled and quartered, ~2 lbs)
- 1/4 cup unsalted butter
- 1/2 cup whole milk
- 1/4 cup chili crisp
Place the potatoes in a large pot and cover with cold water by 1-2 inches. Add a large pinch of salt and bring to a boil over high heat then reduce the heat so the potatoes are simmering. Cook for 15-20 minutes or until fork tender. Drain well.
Mash or push the potatoes through a ricer or sieve back into the pot.
Place the pot over low heat and stir in the butter, and whole milk, until smooth. Taste and season with salt and freshly ground pepper.
Before serving, make a divot in the middle of the potatoes and add the chili crisp on top. Alternatively, swirl the chili crisp into the potatoes, creating spicy ribbons throughout.
Nori Brown Butter
The deliciousness of nutty brown butter combined with the salty umami flavors of roasted nori cannot be beat. This is a winning combination of flavors, especially when paired with the smooth creaminess of mashed potatoes.Nori Brown Butter Mashed Potatoes
Nutty brown butter combined with salty umami roasted nori
- 4 medium Yukon gold potatoes (peeled and quartered, ~2 lbs)
- 6 tbsp unsalted butter
- 2 sheets nori
- 2 tbsp rice vinegar
- 2 tbsp soy sauce
- 2 tbsp mirin
- 2 tsp sugar
- 1/2 cup whole milk
Place the potatoes in a large pot and cover with cold water by 1-2 inches. Add a large pinch of salt and bring to a boil over high heat then reduce the heat so the potatoes are simmering. Cook for 15-20 minutes or until fork tender. Drain well.
While the potatoes are cooking, lightly toast the nori using tongs and holding it 1-2 inches above the stove burner. Pulse the cooled nori in a spice grinder until very small or use a blender to blend until the seaweed turns into a powder.
Make the brown butter by melting the butter in a small pan over medium low heat. The butter will start to sputter and turn foamy. Once it turns a deep golden yellow and smells toasty, remove it from the heat and stir in the nori, rice vinegar, soy sauce, mirin, and sugar.
Mash or push the potatoes through a ricer or sieve back into the pot. Place the pot over low heat and stir in the nori brown butter and milk until smooth. Taste and season with salt and pepper, if needed.
Garlic Gruyere Aligot
This is a classic French inspired take on aligot potatoes: a super cheesy, rich fondue like potato dish. These potatoes are incredibly creamy and full of a mix of smoky gruyere and stretchy, melty mozzarella. The potatoes become a melty, stretchy mix between mashed potatoes and fondue. Seriously good.Garlic Gruyere Aligot Potatoes
A super cheesy, rich fondue like mashed potato dish
- 4 medium Yukon gold potatoes (peeled and quartered, ~2 lbs)
- 4 cloves garlic (minced)
- 6 tbsp unsalted butter
- 1 cup heavy cream
- 12 oz Gruyère cheese (shredded)
- 12 oz fresh mozzarella
Place the potatoes in a large pot and cover with cold water by 1-2 inches. Add a large pinch of salt and bring to a boil over high heat then reduce the heat so the potatoes are simmering. Cook for 15-20 minutes or until fork tender. Drain well.
Mash or push the potatoes through a ricer or sieve back into the pot.
Place the pot over low heat and stir in the garlic, butter, cream, and half of the cheese. Once the cheese melts, stir in the remaining cheese until the potatoes stretch like melted mozzarella. Taste and season with salt and freshly cracked pepper.

I Am... The crispiest, easiest roasted potatoes
British style roasted potatoes are the best potatoes: fluffy and soft on the inside with ultra crispy almost chip-like outsides. So much better than regular roasted potatoes. I am potato obsessed. Potatoes are and always will be my all time favorite vegetable. I love potatoes all the ways and a potato buffet would be my dream come true! It’s hard for me to choose a favorite potato dish but I will admit that I have a huge soft spot for roasted potatoes, or what I like to call them: British style roasties.
How to make roasted potatoes
- Parboil the potatoes. Parboil peeled potatoes in salted water until just cooked but not soft.
- Fluff up the potatoes. Drain the potatoes in a colander and give them a shake to rough and fluff up their edges. The fluffy edges will get extra crispy in the oven.
- Coat potatoes in oil. Coat the potatoes in oil, more on that below.
- Roast. Roast, flipping as needed, until crispy and crunchy on the outside and fluffy on the inside. Remove from the oven, toss in the scallions in and season with flaky sea salt.
So crispy, so potato-ey
Ultra crunchy and crisp outsides, a fluffy and mashed potato inside, and an addictive amount of scallions finished with a generous sprinkle of flaky sea salt.Best potatoes for roasting
First off, for the best roasted potatoes you have to use the best roasting potatoes. The best potatoes for roasting are a combination of waxy and starchy. The waxiness holds its shape so it can develop crusty, caramelized outsides and the starchiness is the creamy, buttery, silky, fluffy inside. The perfect combination of waxy and starchy is the beautifully yellow, sweet and buttery Canadian Yukon gold potato! They are my all-time number one potato choice. But, if you can’t find Yukon golds, you can use russets, which are just a touch more starchy – they tend to not hold their shape as much.Double Cooked Method
After potato choice, the key to these potatoes is the fact that they’re doubled-cooked. So many roasted potato recipes have you put raw potatoes in the oven, which is easy, but doing that won’t give you a potato with two distinctive textures. If you parboil your potatoes first, they get a head start so the oven doesn’t have to penetrate into the middles. Parboiling makes sure the insides are cooked and creamy. Since the potatoes go in the oven hot, the oven heat can concentrate on crisping up the outsides. Plus, when you parboil in salted water, you’re seasoning the insides of the potatoes.Three levels of crispiness
You can achieve three different levels of crispiness depending on how you want to make your potatoes. From crunchiest to crunchy:- Crispiest: Place the oil in a deep roasting pan and place it in a hot oven for 10 minutes until shimmery. Carefully remove the roasting pan, place on a heat proof surface and use a pair of tongs to place the potatoes in the hot oil, turning to coat, then roast the potatoes in the oven.
- Crispier: In a small pan, heat up the oil over medium heat. When hot and shimmer, very carefully pour it into it to a deep roasting pan. Use a pair of tongs to transfer the potatoes over to the hot oil and toss to coat then roast in the oven.
- Crispy: Place the potatoes in a roasting pan, drizzle on the oil and then use a pair of tongs to coat each potato then roast in the oven.
The secret to ultra crispy roasted potatoes
My favorite way of getting super crispy potatoes without the scariness of pulling a hot pan of oil out of the oven is a combination of numbers 2 and 3. I like to get my biggest cast iron, and heat it up with the oil over medium high on the stove. When it’s hot and shimmery, I carefully use a pair of tongs to add the fluffed up potatoes in, tossing, while the pan is still on the heat. Once everything is evenly coated in oilm I pop the whole thing into the preheated oven where everything gets super crispy and crunchy. The key to crispy potatoes is the hot oil and the hot pan in combination, so this is my number one choice for both, as well as safety.What is the best fat for roast potatoes?
- A neutral oil that has a high smoke point is best, something like: sunflower oil, safflower oil, grapeseed, or canola oil.
- If you want to increase your roast potato game and go for something ultra luxe, try duck fat. Duck fat is super rich and full of flavor.
- Why not butter? Butter has a low smoke point and will burn and smoke in a 425°F oven.
Roasted potato tips
- Start potatoes in cold water: Starting the potatoes in cold water makes sure that the potatoes are par cooked through evenly.
- Season twice: Salt the water when you’re cooking the potatoes (just like pasta) so the potatoes are seasoned. After they’re done getting roasted and crisp in the oven, finish them with flaky sea salt while still hot.
- Don’t crowd the pan: Give the potatoes some space. These potatoes need a bit of social distancing so they can get their crispy on.
- Use enough oil: If you want crispy potatoes, don’t skimp on the oil. I used 1/4 cup but if your roasting pan is really big you might need more.
- Make sure to flip: After the first 15 minutes of roasting, it’s time to flip so the sides that haven’t had any contact with the pan get a chance to crisp.
Air fryer roasted potatoes
As much as I love the air fryer, I say no. Technically you can, but the ultra crispiness of these potatoes comes from the fact that they have full, flush contact against a hot pan. The nature of air fryers is air circulation so their inserts are baskets with holes in them. That being said, you can air fry these, they just won’t be quite the same!How to store
Roasted potatoes will keep in the fridge in an air tight container for up to one week.To reheat
To heat up, place potatoes in an oven safe dish at 350°F for 10 minutes or until warmed through.What to serve with roasted potatoes
- ham because potatoes and pork are best friends
- stuffing because who doesn’t love carbs on carbs
- salad for health
Roasted Potatoes Recipe
Fluffy and soft on the inside with ultra crispy almost chip-like outsides.
- 4-6 potatoes (Yukon Gold or similar preferred)
- 1/4 neutral oil (high heat such as grapeseed or safflower oil)
- 1 bunch green onions (sliced)
- flaky sea salt
Preheat the oven to 425°F. Peel the potatoes and cut into even 2-inch pieces. Rinse the potatoes and place in a large pot just covered with cold water. Salt the water and bring to a boil. When at a boil, turn down the heat to a gentle boil and cook for 7-8 minutes until the potatoes are par cooked. Drain in a colander and shake to roughen up the edges. The potatoes will look fluffy.
Put the potatoes on a deep baking sheet or oven safe roasting dish and use a pair of tongs to coat each potato with oil.
Roast the potatoes for 30-35 minutes, flipping once or twice during the last 15 minutes, until golden brown and crispy.
Remove the pan from the oven and add the scallions. Toss briefly so the heat of the pan wilts them a little. Scoop everything out and sprinkle with flaky sea salt. Enjoy hot!
Pro tip: If you want REALLY crunchy roast potatoes, heat the oil up before roasting your potatoes, as in the above post.

I Am... The best food-related advent calendars this year
I LOVE advent calendars! There’s nothing better than opening a little surprise every single day. And food advent calendars!? I’m dead. Here in no particular order are the 8 best and brightest to make your December amazing every single day.
1. Bonne Maman Jam Advent Calendar
This one is a classic. Everyone who is into food has seen the Bonne Maman advent calendar. You get 23 mini spreads and one pot of honey to make your days just that much more sweet. Imagine having a toast feast on Christmas with all 23 little jars of jam!? Heaven.2. Vahdam Tea Advent Calendar
If you know someone who loves tea and warm drinks, this is the calendar! Vahdam is a premium Indian tea company and their teas are amazing.3. Sugarfina Candy Advent Calendar
If you have a sweet tooth or you want to make someone’s December even sweeter, Sugarfina’s candy shop advent calendar is going to be a hit. We got this one one year and we loved trying all the different gummies and chocolates.4. Peppermint Bark Advent Calendars
Is it even Christmas if you don’t have peppermint bark? William Sonoma is the OG and their peppermint bark advent calendar is perfection.5. Harry & David Snack Advent Calendar
SNACKS please? Give me all the crunchies, the sweets, the sours, and the savories. This snack advent has all the best selling Harry & David snacks, so you know you’re in good hands.6. Popcorn Advent Calendars
Movie night in December wouldn’t be complete without hot cocoa and popcorn, amiright? This Popcorn advent calendar will make the countdown to Christmas and movie night even more special.7. Murray’s Cheese Advent Calendar
I’ve never had a cheese advent calendar, but it sounds AMAZING. Imagine: a new cheese to try every day. You could do a cute little cheese plate for a different date night, for 12 days.8. Hot Sauce Advent Calendars
Spicy! Do you have a hot sauce lover in your life? Twelve days of hot sauce will warm them right up. Bonus not-totally-food-related:9. Mini Brands Advent Calendar
This is the CUTEST! It’s tiny, mini replicas of real foods: think mini cans of Pringles, Cambell’s Soup, and more. I feel like this is my ultimate advent calendar.10. Squishmallows Advent Calendar
It’s not food, but squishmallows are squishy and cute and who wouldn’t love a mini stuffy every day? This year we got ourselves a puzzle advent calendar and I’m so excited! Hope your December is filled with treats! xoxo steph Read More →
I Am... How to Make (and use!) Gochujang Butter
Do you love butter? How about spice? If so, gochujang butter is for you! Gochujang butter is deliciously sweet and spicy and goes amazingly on EVERYTHING. You need it in your life. The sweet-salty-buttery flavor is amazing on noodles, rice, steak, chicken, toast, really, it’s so incredibly good.
What is gochujang butter?
Gochujang butter is a sweet and spicy flavored butter that you can easily make at home. If you know what a compound butter is, think of that, but with gochujang. Compound butters are extra flavorful butters – essentially, butter mixed with other ingredients that add a sweet or savory flavor. In this case, our flavors are going to be sweet, savory, and spicy.How to make gochujang butter
All you need to do is mix together all the ingredients. Super simple. I like to thin out the gochujang first with the honey and rice vinegar so it blends with the butter more easily.- Stir. In a bowl, add the gochujang, honey, and rice vinegar. Stir until everything comes together and is smooth.
- Mix. Add room temp butter to the gochujang mix and mix until everything is evenly combined. Taste and adjust the gochujang if you need more spice, honey if you need more sweetness, and rice vinegar if you need more tang.
- Enjoy. Enjoy as desired! The butter gets better with age, so I recommend letting the flavors meld for an hour, but it’s absolutely not necessary!
Gochujang butter ingredients
- gochujang - the key ingredient that will add the spice and all the nice! Use the gochujang you have in your fridge or if you’re going out to buy some, make sure you check the spice level and choose accordingly.
- butter - we’ll need some room-temp butter for this so the gochujang and other ingredients mix in nicely. Go for your favorite unsalted butter. I like European churned butter because of it’s higher fat content. It has a more melty mouthfeel and fuller flavor. Whichever butter you go for, unsalted is what you want because you will be seasoning it.
- honey - adding a bit of honey highlights the spiciness and sweetness of gochujang. Remember the honey butter chip https://amzn.to/3Qwctw2 craze? Imagine adding gochujang to it – genius!
- rice vinegar - a bit of unseasoned rice vinegar is going to give our gochujang butter some tang and acidity. This will balance out the butter and make it even more addictive.
- garlic - usually I say the more garlic the better, but in this case, since we’re using raw garlic, one clove is perfect. Make sure you mince it up extra fine.
Gochujang Butter Noodles
For a quick meal, make some gochujang butter noodles. We love the thickness and chewiness of udon, but this will work well with any noodle, including pasta and instant noodle packs (with the seasoning packet discarded). Cook the noodles as directed by the package instructions. While the noodles are cooking, melt 2 tbsp of the gochujang butter in a non stick pan over medium heat. Add a 1/4 cup of the noodle cooking water to the pan and use a whisk to vigorously emulsify the butter and cooking water. Turn the heat to low. Just before the noodles finish cooking (you want them undercooked), use a pair of tongs to transfer them to the pan with the gochujang butter sauce. Turn the heat to medium-high. Toss the noodles in the sauce can continue to cook until the noodles are al dente, coated and glossy. Finish with an extra pat of gochujang butter if desired and enjoy immediately!What is gochujang?
For the uninitiated, gochujang is a Korean chili paste made with sun-dried chili peppers. The bright, ruby red paste has an earthy, slightly sweet hint, thanks to glutinous rice. Because it’s fermented, and also contains soybeans, it has all the umami flavors. It’s one of those condiments that isn’t single use. You can use it to make dipping sauces, in soups, stews, stir-fries, marinades, rubs, pasta, and even desserts! It’s one of the key ingredients in Korean food and and absolute staple in our fridge.What does gochujang taste like?
Gochujang is spicy, earthy, and has a tiny hint of sweetness. It’s bright yet has a depth of flavor due to fermentation. Gochujang paste on its own is a pretty strong punch you in the face flavor. It’s hardly ever used on its own and is more likely to be found in other sauces and dishes.Is gochujang spicy?
The answer is, yes and no. Gochujang paste comes in a variety of spice levels. In fact, the tubs have convenient spice level chart on them letting you know how spicy the gochujang you’re buying is. It’s measured in GHU (gochujang hot unit). The levels are: mild hot, slight hot, medium hot, very hot, and extreme hot. So, depending on which level you buy, it can be mild or quite spicy!What is gochujang made of?
Gochujang consists of dried chilis, sticky glutinous rice, soybean flour, and barley malt. All the ingredients mix together and ferment into a mature, sticky, spicy, delicious gorgeous red-hued paste.Where can you buy gochujang?
You can find gochujang in Asian grocery stores and sometimes even at your local grocery store. It’s sold in little (and giant) rectangular tubs. Sometimes it’s sold in squeeze bottles too. Take a look at the packaging, because sometimes they sell gochujang sauce (gochujang paste mixed with other ingredients) meant for dipping. You can also find it online. Some popular Korean brands are: Daesang, CJ Haechandle, Sempio, and Chung Jung OneHow to use gochujang butter
Gochujang butter is the ultimate condiment. Use it on anything and everything, liberally. Try it on:- steak
- risotto
- buttered noodles
- roasted honeynut squash
- baked potatoes
- mashed potatoes
- Parker House rolls (pictured above)
- cheddar scallion biscuits
- focaccia
Other ways to use gochujang
Gochujang comes in a big tub, so if you're not making pounds and pounds of gochujang butter (you might) here are some other uses for your gochujang:- Sweet and Spicy Roast Chicken and Potatoes
- Buldak Ramen
- Rabokki (Ramen and Rice Cakes!)
- Tteokbokki Korean Rice Cakes
- Korean Fried Chicken
- Gochujang Baked Salmon
- Buldak Chicken
- Spicy Bulgogi
- Sweet and Spicy Instant Pot Chicken Breast
Gochujang Butter
Gochujang butter is deliciously sweet and spicy and goes amazingly on EVERYTHING.
- 2 tbsp gochujang
- 2 tbsp honey
- 1 tbsp rice vinegar
- 1 clove garlic (finely minced)
- 1/4 cup unsalted butter (room temp)
In a bowl, whisk together the gochujang, honey, and rice vinegar until smooth.
Add the garlic and room temp butter and use a wooden spoon or rubber spatula to combine completely. Use as desired, or store in the fridge, in an airtight container.
Let cool and solidify in the fridge. The flavors will meld and the gochujang butter will become extra delicious if you let it meld least 1 hour before using.
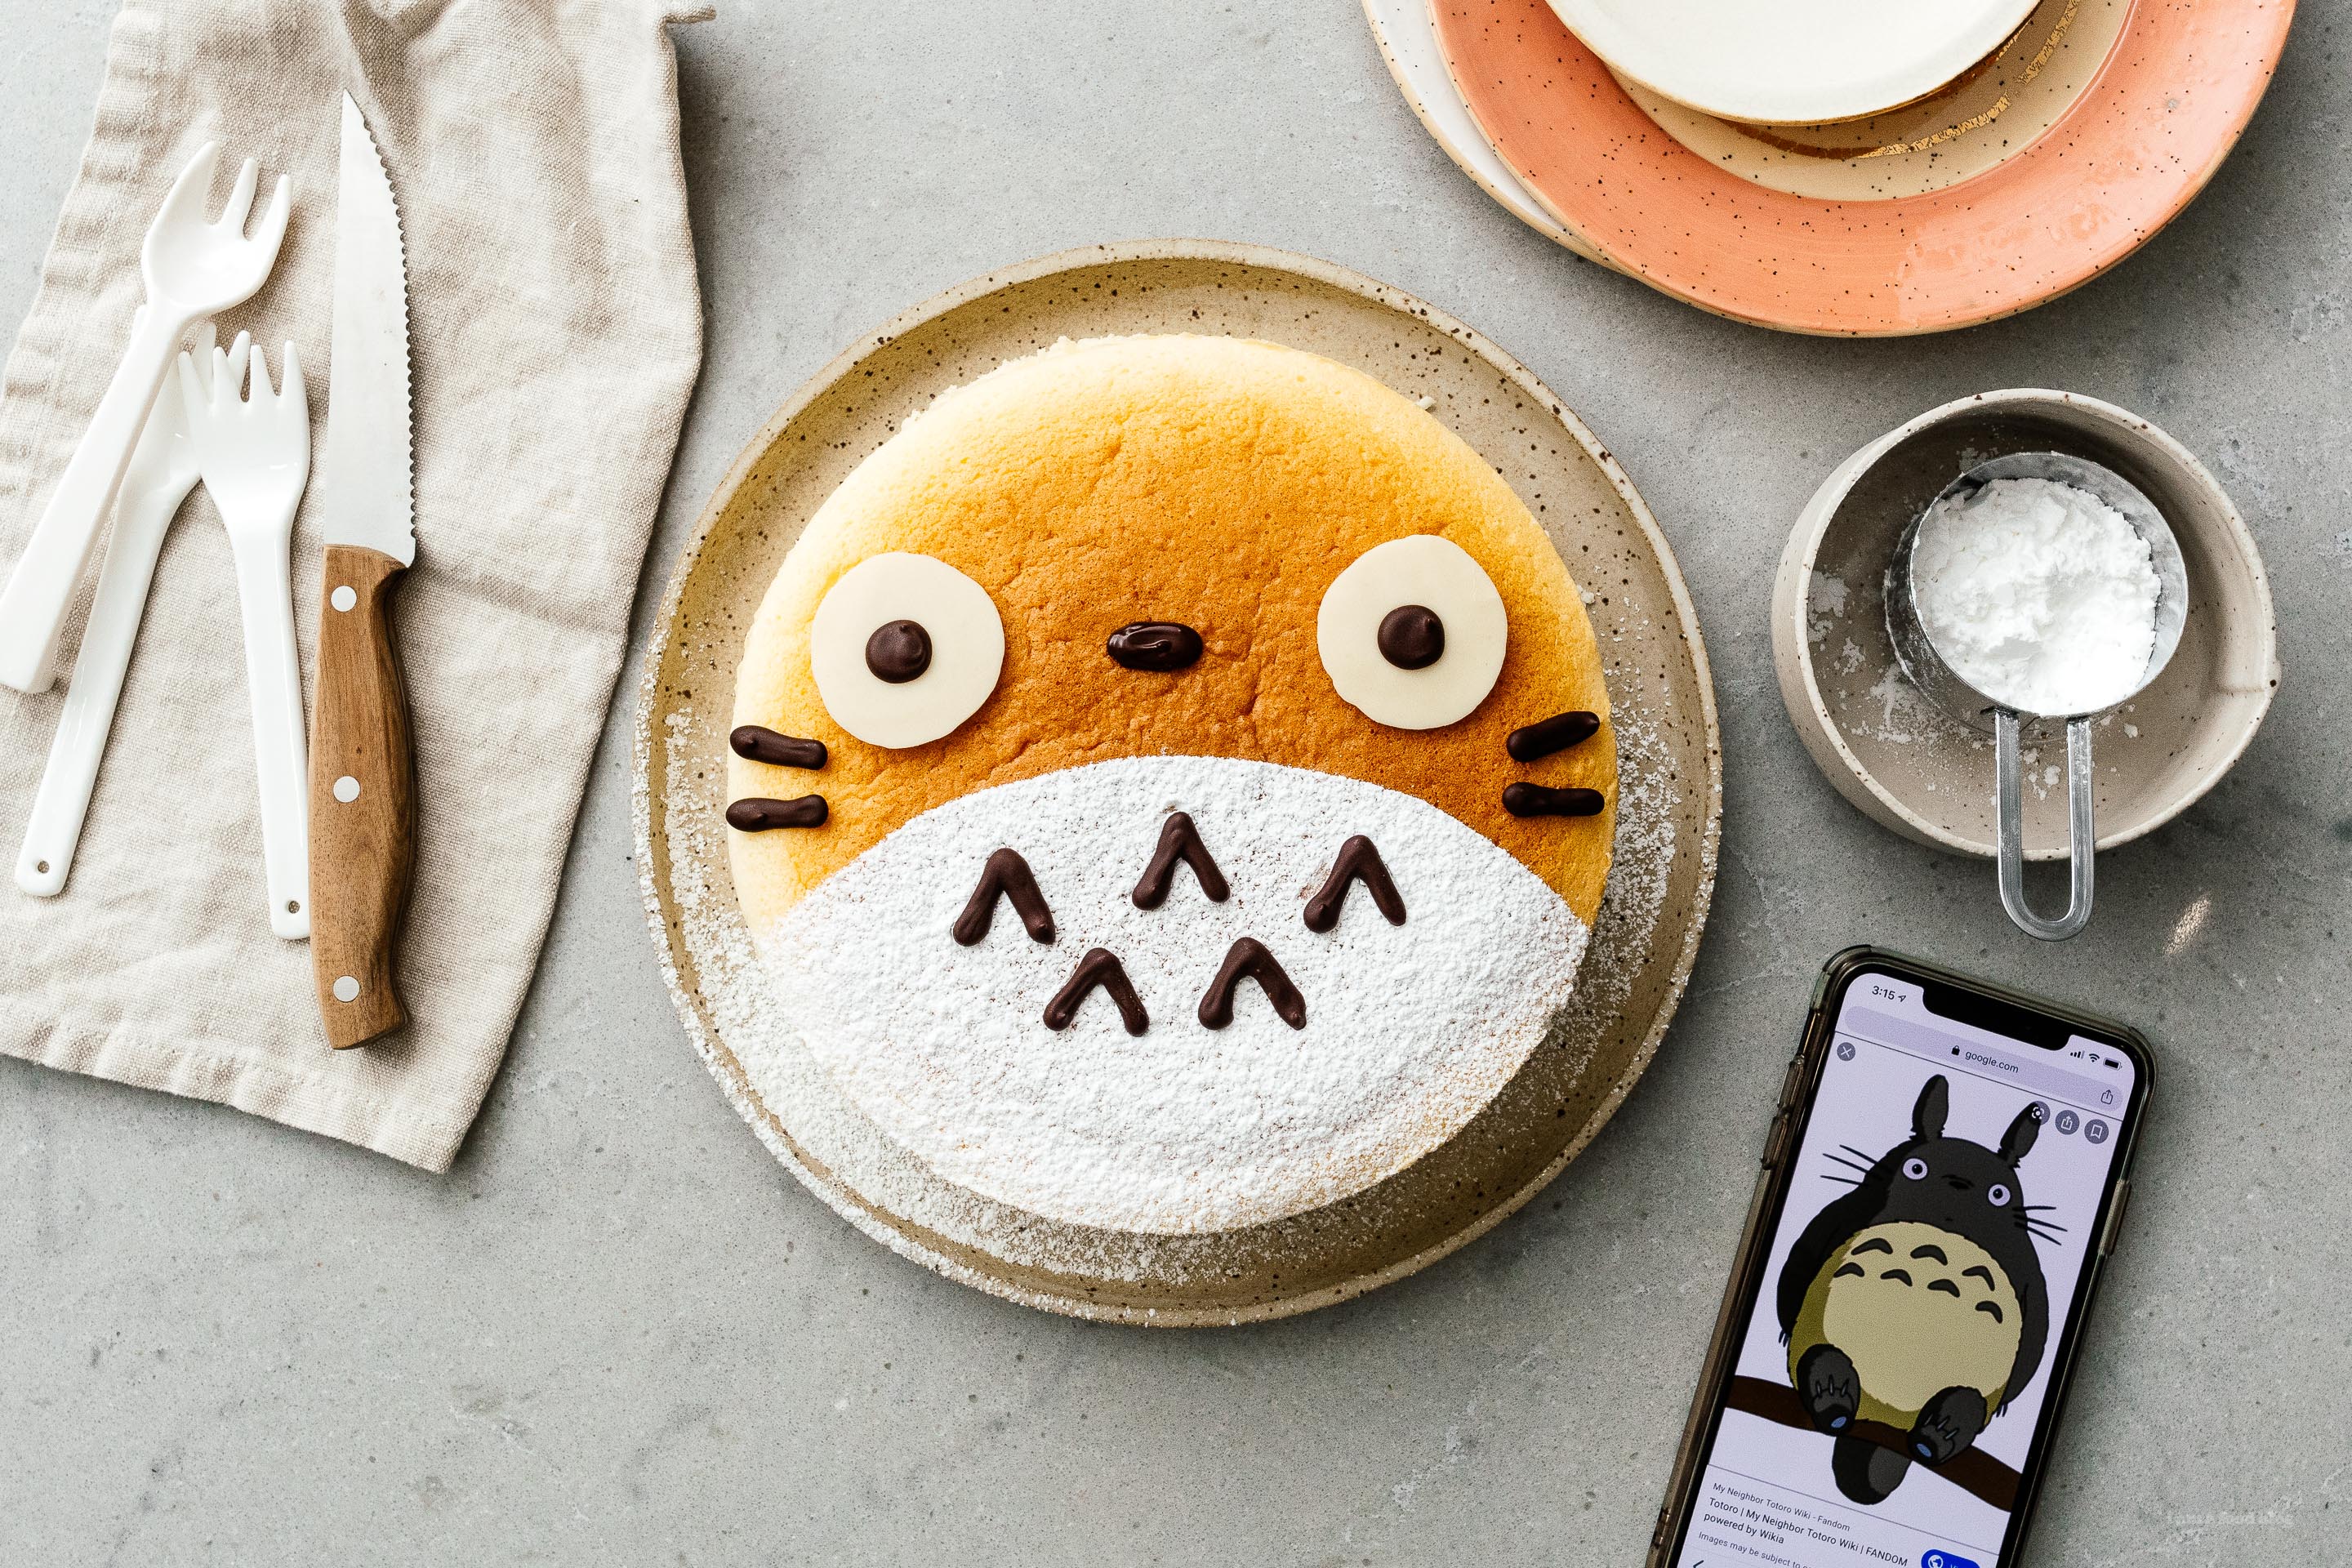
I Am... Totoro Cheesecake Recipe: Fluffy Japanese Cheesecake
The ultimate halloween treat is this super fluffy, super friendly Totoro cheesecake. I love him so much because he’s a fluffy Japanese cheesecake dressed up as Totoro. Can you imagine if there was a giant cheesecake that you could lie down on, just like this scene in Totoro? I think it would be heaven.
Read More →
I Am... 9 Must See Stops while Leaf Peeping on the East Coast
From Shenandoah National Park to the Great Smoky Mountains, here are 9 must see stops during your fall leaf peeping trip. If you’re a lover of fall leaves and autumn foliage, you NEED to visit the East Coast. Fall just hits different there. The leaves are a multitude of color, the air is crisp, and everything gets you into your feels. Take a little East Coast road trip and experience fall. Here are some highlights from our leaf peeping trip!
Where to see fall leaves in Virginia
Shenandoah National Park
Shenandoah National Park is beautiful all year round, but especially in the fall. You can’t go leaf peeping in the East without visiting. The best way to see the fall leaves is to do the Skyline Drive.Skyline Drive
The Skyline is a two lane road with 75 overlooks that lets you gaze at the Shenandoah Valley and the Piedmont plateau. It’s the main road through the Shenandoah, which means you can stop at the visitor centers and see the entirety of the National Park. It’s a beautiful drive, winding and full of fall trees. Make sure you plan your time - the speed limit is 35 and people pull out to the overlooks constantly for photos.The best drive for fall leaves
Blue Ridge Parkway
When people talk about leaf peeping, they usually go for the big guns: Shenandoah National Park and Great Smoky Mountain National Park. But, if you’re going on a leaf peeping trip, you would be a fool to not drive the Blue Ridge Parkway. The Blue Ridge Parkway is a scenic drive that links the two parks. It runs along the spine of the Blue Ridge, which is one of the main mountain chains of the Appalachian Mountains. It’s a beautiful drive and when we went, it wasn’t crowded at all, making it really enjoyable. The leaves along the parkway are absolutely beautiful. Stop on one of the many mile markers to take a peek at the scenic outlooks. I especially like Marby Mill, mile 176.1, which has a super picturesque watermill. It almost feels like you’re in a Charles Wysocki puzzle. Blue Ridge Parkway Start: Rockfish Gap, VA. The north end of the parkway starts Mile 0 at the Intersection of I-64 and Skyline Drive. End: Cherokee, NC. The Parkway ends at Mile 469, where it connects with US Route 441, the South Entrance to Great Smoky Mountains National ParkThe curviest fall leaf peeping road
Tail of the Dragon
If you’re a driving fan, you’ve probably heard of the legendary Tail of the Dragon. It’s a twisty, turn-y 11 mile drive that has 318 curves. The turns are tight, there are photographers along the way to take photos of your car (or bike) and the leaves are absolutely gorgeous. If you like winding roads, this is a must-do. The way the light hits the road combined with spectacular fall colors; it can’t be beat. Plus, at the end of the drive, there’s a beautiful lake. Pull out on one of the many pull outs on the side and bask in the leaves. When you get to the start of the Tail of the Dragon, there’s a little store that sells merch. You’ll see a bunch of people in the parking lot and it can kind of look intimidating, but everyone is really friendly. A lot of online guides make the Tail of the Dragon sound insane, but the drive isn’t that crazy. Just take your time and enjoy it, it’s definitely a must-do. Tail of the Dragon Start: Intersection of NC28 and US129 in North Carolina End: Tabcat Creek Bridge in Tennessee.Where to see the most stunning fall foliage
Great Smoky Mountains National Park
The Great Smokies is one of America’s most beautiful (and most visited) national parks, especially in fall when the leaves change into a endless array of fall colors. Looking out at the mountain ridges on a smoky (that’s means cloudy!) day is beautiful. The blue gradients of the mountains against the fall leaves in unbelievable. Add in a golden fall sunset and it’s one of those you never forget it moments.Chimneys Picnic Area
This cute little picnic area is located right inside Great Smoky Mountain National Park. It used to be an old campground and all the picnic spots are next to a rushing river. It’s incredibly picturesque, especially during the fall with the fall foliage. Pack a picnic and make sure you stop here and enjoy the water and the leaves. Maybe you’ll see a wild turkey or two!Clingmans Dome
Clingmans Dome, the mountain is the highest point mountain in the Great Smokies, the highest point in Tennessee, and the highs point along the Appalachian trail. There’s an architectural, space-age looking walkway that leads to a circular observation tower. From the top, the viewpoint gives you a panoramic 360 degree view. On a cloudy, smoky day, the view of the fall leaves is breathtaking. And, if you luck out on a clear day, you can see seven states from the top of the tower: Tennessee, Kentucky, Virginia, North Carolina, South Carolina, Georgia, and Alabama. There’s a short, but steep paved trail that leads to the observation tower. We thought it was a pretty easy walk but some people were taking breaks, so keep that in mind.Where to eat and drink on a leaf peeping trip
Sheetz/Wawa
If you’re on a road trip in the East, you can’t not stop by Sheetz and Wawa. The two Pennsylvania convenience store/gas stations/delis are a must visit. After all, you’ll need to fill up on gas for your drive. Sheetz and Wawa have a deep rivalry and personally, I don’t have a favorite. I recommend you try both. They both have amazingly clean washrooms and a HUGE selection of roadtrip snacks, especially chips (read more on Pennsylvania chips below!). They also both do fast food items and hot and iced coffees. Bonus, if you’re a nugget ice lover, they got that sweet, sweet, chewable ice. You might think this is a strange recommendation, but trust me, no East Coast road trip is an East Coast road trip without multiple trips to Sheetz/Wawa.Yuengling
If you’re in Pennsylvania, near Pottsville, consider a stop at Yuengling Brewery. It’s one of the oldest operating breweries in America and is still family-owned and operated. That’s really impressive in the world of beer! The name is an Anglicized version of the German surname, Jüngling, which means youngster. I don’t think you should make this a stop if it’s out of your way, but if you happen to be passing through and want a cute little activity, I recommended it. I always admire family run businesses that are still in business. You get to see super cute old ads and graphic design, learn about their ice cream, and if you want, you can tour the factory.Carolina BBQ
If you’re in Carolina, you have to have Carolina BBQ! The difference between BBQ and Carolina BBQ is in the sauce and the types of meats they specialize in. The Southern style BBQ you’re probably familiar with focus more on sliced and chopped brisket with either a dry rub or a sweet, thick BBQ sauce. Carolina style BBQ on the other hand, focuses on whole hog BBQ and their sauce is vinegar based. It adds contrast and tang to the richness of whole hog BBQ. They serve the sauce alongside the BBQ and baste with it. They cutely call it “mop sauce” because they use giant brushes to mop it on. Definitely try the pulled or chopped pork. I also really, really love the corn pudding in Carolina. It’s sweet, tender, and so, so good. If you haven’t had corn pudding before or if you’re not a fan, try it while you’re in the Carolinas, it will change your mind! Shoutout to Buxton Hall BBQ in Asheville, NC. We love their vibe, their BBQ, and their graphic tees. Like any good Carolina BBQ, they focus on local whole hog BBQ that they smoke for hours. They have a sauce bar where you can load up on all the Carolina sauce you want and their sides are SO, SO good, especially the corn pudding. I dream of it. https://www.buxtonhall.com/Cheerwine
If you love cherries and cherry flavored things, please, I beg you, try Cheerwine! I am a huge fan of cherry coke and cherry pepsi, but they do not hold a candle to the cherry-ness of Cheerwine. It’s the cherriest black cherry soda you’ll ever taste and it’s only available in North Carolina. It’s fizzy, it’s cherry-forward, and it is so, so delicious. Cheerwine is a North Carolina icon. As they say, it’s uniquely Southern and undeniably delicious. It’s been around since 1917 and is one of the only remaining independent soda companies around, still run by the Peeler family, four generations in. Definitely taste some Cheerwine when you’re in NC and stop by a grocery store to stock up. We did! Bonus: You can even get it in Cheerwine zero sugar if you’re watching your soda intake.Chips
Did you know that Pennsylvania is the Potato Chip capital of the US? They make the most chips in America. Because we drove down to the Smoky Mountains from upstate New York (there are beautiful leaves in upstate NY by the way) we passed through Pennsylvania and of course we had to buy ALL the chips. If you’re so inclined and have the time, you can stop by several chip factories and take chip production tours! Make sure you try: Snyder of Berlin, Hartley’s, Middleswarth, Dieffenbach’s, Good’s, Herr’s, Martin’s, and Utz! Shout out to the specialty flavors they have too: Carolina BBQ sauce and the Crab Chip.When is the best time for leaf peeping?
There’s a handy leaf peeping calendar that you can check on to see when the leaves reach peak color. It’s a little hard to time if you want peak leaves, but honestly, as long as your there once the leaves start to change but before they reach past peak, you’ll be good to go. Generally, that’s between late September to the middle of October, but it changes every year. The photos from this post are from Oct 17-25. Truthfully, north of North Carolina it was past peak when we went. Check out the Leaf Peeping CalendarWhat is the best way to leaf peep?
Honestly, leaf peeping is a car oriented activity. Obviously when you reach your destination there are hikes and walks you can enjoy, but you need a car to get to the prime leaf locations. If you are flying into the area, we recommend renting a car and planning out a road trip. Note, this is a super esoteric list of things that we LOVED on our roadtrip. We didn’t include everything because who wants to read 10,000 words on someone else’s vacation? Hopefully this gives you a little taste and makes you want to plan your own trip! Happy leaf peeping friends! Fall is my favorite season and I hope you experience some of the magic. xoxo steph Read More →
I Am... A Guide to Skiing the Powder Highway
Far up in the interior of British Columbia there’s a famed string of mountains that skiers and snowboarders dream about aptly called the Powder Highway. The Powder Highway passes through the Rockies, winding around alpine resorts, numerous backcountry lodges, and plenty of heli and cat skiing. The area is known for its consistent deep snowfall and is truly a dream trip. It's off the beaten path for most, so if you ever wanted to go all out with your skiing or snowboarding trip, this is the place to be.
What is the Powder Highway?
The Powder Highway is the official name for a circular loop through the Canadian Kootenay Rockies. The route passes by a string of mountain resorts as well as backcountry lodges, and numerous heli and cat skiing operators. The magic of the Powder Highway is in the snow. The cold air of the Rockies hits clouds loaded with moisture from the Pacific, making it dump huge amounts of extra dry, extra light BC champagne powder.Where is the Powder Highway?
The Powder Highway is in Canada, tucked into the southeast corner of BC, almost reaching the border of adjacent province, Alberta.Where to stay on the Powder Highway
All the resorts on the Powder Highway offer lodging in their villages. Airbnb is a good option too since you should have access to a vehicle and can stay in the small towns adjacent to the mountains. The mountains are mostly small enough that you can drive from the adjacent town to the mountain in less than an hour in most cases.How to travel the Powder Highway
The best way to experience the highway is via a car equipped with good snow tires. The closest major airport to the Powder Highway is Calgary International Airport (YYC). It’s about 3 hours to Golden, BC, which is where Kicking Horse Mountain Resort is located.Travelling the powder highway from Vancouver
Another popular option is to start from Vancouver (YVR). In this case, it's about a 6 hour drive to Revelstoke, which is the closest mountain. You can/should stop by some of the other mountains on the way, such as Big White or Sun Peaks, to break up the drive.Travelling the powder highway from the USA
If you want to fly in to a US town and rent a car from there, Spokane is your best bet, as it's only 3 hours from there to RED mountain resort.What kind of vehicle do I need for the Powder Highway?
A 4x4 vehicle with good snow tires is absolutely necessary. Canadian highways can get icy and the snow removal isn't as good as you might expect, owing to the fact that all Canadians are born knowing how to drive in snow. You probably won't need to carry chains if you have 4 wheel drive and snow tires, but they certainly will help on some of the steeper mountain passes.What are the mountains on the Powder Highway?
Many different alpine resorts dot the powder highway, each with their own charms. If you want to go to all eight, you can start anywhere on the loop.1. Revelstoke Mountain Resort
If you’re into skiing or snowboarding, you’ve probably heard of Revelstoke. It has a legendary reputation and people speak of it in breathless terms, in regards to both the terrain and snow. Revelstoke has the most vertical in North America and thrill seekers love the in bound big mountain experience.The snow
Above average amounts of light, fluffy, dry powder. That being said, because the mountain is so large, there’s a lot of variability in snow quality – the snow at the top can be amazing while at the base can be patchy.The lifts
There’s a main gondola (Revelation I) from the bottom of the mountain that takes you mid-mountain where you can decide to get off or switch to the next gondola (Revelation II) tay on to continue to the upper mountain. There are 3 other lifts that service the mountain that are fairly fast. Lineups are basically unheard of at Revy.Who is the mountain for?
The mountain is geared towards intermediates and experts but there are a couple of areas for learning on slightly more mellow terrain. If you’re with a group that has varying ability levels, it’s definitely a doable mountain, especially if it’s a group of beginners and experts. If you have someone who’s on the beginner intermediate arc, they’ll probably alternate between being bored and being scared out of their minds on the wide open green groomers – they tend to be a little pitchy.The lodging
There is lodging right at the base of the mountain, but Revelstoke the town is super charming and staying in town is just a short - as in, 5 minutes - drive away. You sacrifice the ski-in, ski-out ability, but there are lots of options and budgets to choose from. Plus the bottom of Revelstoke isn’t really a mountain village in the way you think at most resorts – it’s smaller with fewer offerings. Staying in town gives you infinitely more options for food. One of our favorite places to stay is Boulder Mountain Resort.2. Kicking Horse Mountain Resort
Kicking Horse isn’t particularly well known outside the ski and board community, but those in the know, know. KHMC has massive potential and so much fun, variable terrain.The snow
Light, dry powder. KH typically doesn’t get as much powder as the other resorts on Powder Highway, but what it does get is excellent.The lifts
There are 5 lifts at Kicking Horse, including the star of the show, the 8 person Golden Eagle Express Gondola, which takes you from the bottom of the mountain all the way to the very top. The other four lifts consist of: a beginner chairlift, a chairlift near the top that services one ridge, and two chair lifts that serve the lower mountain. At first glance, Kicking horse seems like a small mountain, but that's really only because the main lappable gondola is so well laid out.The levels
Kicking horse is more of an high intermediate, expert mountain, with 45% black runs and 15% double black runs. There is beginner terrain at the base of the mountain, but intermediates might feel a bit stuck doing the same runs unless they are aiming to level up their skills on expert runs. This isn't really a good mountain to be learning on.The lodging
The beauty of resorts is that the lodging is right at the base and Kicking Horse is no exception. They have multiple lodges, resort homes, and town homes to choose from via their website. You can also go the airbnb route. There are plenty of ski-in, ski-out rentals right on the slopes. Check out the Cedar House Chalets.3. Panorama Mountain Resort
Right at the heart of Powder Mountain, you’ll find Panorama. Surrounded by the Canadian Rockies, Panorama offers up a variety of terrain that’s perfect for everyone, from beginners to experts.The snow
Light, dry, snow, but questionable coverage, unless you hit a good storm cycle, then you’re in for a treat! If you are comfortable with hiking and skiing the double blacks, the Taynton Bowl tends to keep every bit of snow it gets, making for a fantastic time no matter what the snow conditions on the rest of the mountain are like.The lifts
There are 6 chairlifts at Panorama (plus some magic carpets and a mini village gondola). The lift system leaves something to be desired, especially if you want to ski top to bottom. There are a lot of cat tracks that connect the different ski areas together and while that’s not horrible, it can definitely discourage you from lapping your favorite runs. That being said, it’s one of the ONLY resorts that lets you boot pack your way to the area that is accessible by paid snowcat, so if you’re interested in side country that’s in-bounds, Panorama is an amazing choice.The levels
Panorama is an amazing mountain for basically everyone, so if you have a group with varying ability, this is the mountain to go to. For the experts, Taynton Bowl (you can ride a CAT to the top or bootpack) is one giant in-bounds backcountry style playground. There are pitchy groomers for intermediates, and there’s a Secret Forest discovery zone for the beginners/kids.The lodging
You can stay on the mountain - there’s a central check in and a bunch of different types of places to stay, from lodges to apartments to hotel/hostel room. Panorama is about 30 minutes from Invermere, the closest town. We definitely recommend staying on the mountain so you can have that ski-in, ski-out experience. The hotel offerings are a little old but they are working on renovating them.4. Fairmont Hot Springs Resort
This is officially a stop on the Powder Highway (thanks to the Kootenay Tourism Board) but it is probably not a stop you want to make if you are here for the skiing, the food, or the luxury accommodations. It's a little older and a little more neglected than the other stops.5. Kimberly Alpine Resort
Sunny days, reliable snow conditions, and easy lift line ups are the hallmarks of this under-the-radar resort. They market themselves as a family friendly resort, but they have plenty for everyone.The snow
Kimberley calls their snow Purcell powder (they’re located in the Purcell mountain range) and it’s light, fluffy, and dry. The central location in the middle of the Purcell range means that it gets fairly reliable cover. The snow that falls tends to stay nice and dry. They don’t get a huge amount of snow, but they have a lot of sunny days to make up for it.The lifts
Kimberley has 3 lifts that service their skiable terrain – one that runs up the front face of the resort, and two that access the backside of the mountain.The levels
Kimberley has varying terrain abilities. Beginners can stick to the frontside of the mountain where experts can check out the black diamonds on the backside. Intermediates will enjoy long groomies. Highlights consist of: plenty of glades, good fall lines, minimal lift lines, and night skiing, if you’re into that.The lodging
There are a couple of ski-in, ski-out options at the village with apartments, townhouses, and hotel rooms, but most people opt to stay in the town of Kimberly where you can stay in an airbnb or a hotel such as The Larix.6. Fernie Alpine Resort
Varied terrain with plenty of side and backcountry makes Fernie a great mountain. It’s on the laidback side with a chill vibes local mountain feel.The snow
LOADS of snow. The quality tends to be variable, but they do get a lot of it. If you’re lucky, you’ll be swimming in dry Rockies powder, if you’re not, you might get hit with rain at the base. Pray for powder.The lifts
There are 7 lifts, 2 of which are high speed quads. The lifts are fairly spread out, which means that there’s a lot of traversing between ski areas. Not the greatest lift system, but it makes up for it with relatively short lift lines and an uncrowded resort, especially on weekdays.The levels
There are five large bowls to play in and Fernie is one of the few mountains on the Powder Highway that really caters to all ability levels. It has great beginner terrain with a dedicated learning area free of speedsters. Intermediates will enjoy progressing into off piste areas that are close to groomed trails as well as wide open bowls. As for expert terrain, it’s amazing, especially off the Polar Peak chair, which boasts steep, long lines.The lodging
Slope side on Fernie has a lot of ski-in, ski-out condos as well as a village that has hotel style rooms. If you opt to stay off mountain, the town of Fernie has a cute little town centre that’s only 5 minutes from the mountain with lots of options. One of the best ways to avoid airbnb fees is to book directly with the local rental companies.7. Whitewater Ski Resort
Whitewater is a local mountain with a community ski resort feel. They are small, fly under the radar, and want to keep it that way.The snow
Powder galore with an annual snowfall of 12 meters (this is a lot). Dry, fluffy, and perfect.The lifts
There are 3 lifts at Whitewater. Seeing as the skiable acreage is small, they service the area pretty well. They’re not super speedy, but there are virtually no lines. They’re adding a brand new quad for the 23/24 season, which means that there will be an entirely new area of terrain accessible.The levels
The resort is on the smaller side so there’s not a lot of terrain, but it makes up for it in snowfall. It’s an all abilities mountain with gentle slopes for beginners, groomed cruisers for intermediates, and plenty of off piste steeps, bowls, glades, chutes, and trees for experts.The lodging
The 2023/24 season is bringing on mountain lodging into play with RV sites and a lodge with a suite. Other than that though, there’s no on-mountain lodging, so you’ll be staying in the cute nearby ski town of Nelson where you can find hotels, airbnbs, and even cute cabins.8. RED Mountain Resort
Red (they like to style themselves as RED) boasts 5 different peaks, 119 marked runs, and 3850 skiable acres, which is on the same level as Whistler -or- Blackcomb and about the same size as Revelstoke or Mammoth. They’re one of the oldest resorts in Canada, they’re independent, and proud. Tree runs, steeps, groomers, and wide open bowls makes this a great mountain for terrain.The snow
Red gets a fair amount of pristine, dry powder but they don’t get huge dumps like Whitewater, which is right next to it. Because Red’s elevation isn’t the highest, the snow has the tendency to deteriorate, especially on the sunny, south facing slopes. The snow, when it dumps, is amazing.The lifts
There are 7 fixed-grip lifts at Red, which means they’re slow, which is a definite con, but because the mountain is fairly uncrowded, it means short lift lines. Think of it as a nice break in between ripping the long runs.The levels
Red leans more towards an intermediate- advanced expert mountain, but it can be for everyone. For the intermediates, there are wide cruisers, well spaced off-piste trees. Beginners can explore Granite and Grey Mountain, and there’s a dedicated learning area at the base. Advanced skiers can play in the trees in Powder Fields and War Eagle Trees. Experts will enjoy the steep pitches, chutes, tight trees, and drop offs found on the north side of Granite Mountain.The lodging
Red has opened a new, stay mid-mountain alpine cabin area and they also have a modern hostel. There are on-hill condos, and a lux boutique hotel. Plenty of options for ski-in, ski-out and if that’s not your vibe, Rossland is just minutes away for airbnbs and hotels. I hope you consider the Powder Highway this season. May your all your days be powder days! Read More →
I Am... Super Juicy Crock Pot Turkey Breast
Free up your oven and join the crock pot turkey army: the juiciest turkey breast you’ll ever make - you won’t believe that it came from a crock pot! Turkey, love it or hate it, it’s definitely a Thanksgiving staple. I LOVE turkey, especially crock pot turkey. Don’t get me wrong, roasting turkey breast in the oven or making it in the Instant Pot is amazing, but there’s something extra juicy about making a turkey breast in the crock pot, no brining required!
Crock pot turkey?
Yes! When it comes to meals with multiple components, gadgets are lifesavers. The problem with making turkey and stuffing and mashed potatoes and mac and cheese and sweet potatoes is that they all inevitably need oven space. So, why not free up that space by using a crock pot? It’s perfect because using a crock pot takes all the guess work out and you end up with super juicy, perfectly moist, well seasoned turkey. Win-win-win. Since Mike and I won’t be making an entire turkey this year – although maybe we will make a quarter ham?! – crock pot turkey breast is the answer! This turkey has the beloved flavors of Hainanese chicken rice: pure turkey flavor with hints of warming ginger, sweet garlic, and scallions. The resulting turkey is delicately flavored and ends up tasting even more like turkey, if you know what I mean. We devoured it with a simple scallion rice pilaf and lashings of ginger soy gravy. It ended up being so comforting and warming.Why make crock pot turkey breast?
- It frees up your oven so you can bake pie. Or stuffing. Or whatever else you might want to make in the oven.
- If you don’t have an oven the crock pot is here to the rescue!
- Turkey breast in the crock pot is super forgiving because it’s cooked low and slow. The meat is juicy and tender and not at all dry or overcooked. Plus you’ll have drippings to make gravy.
Can you really cook turkey in a crock pot?
Yes! It’s juicy and tender and your house will smell amazing. Here’s how long you need to cook turkey in the crock pot:- 2-3 lbs: 3-5 hours on low
- 4-6 lbs: 5-6 hours on low
How to make crock pot turkey breast
- Compound butter. This is a fancy way of saying a flavored butter. Massage the butter into the skin and dot it all over the turkey breast.
- Aromatics. Make a bed of arromatics (shallots, ginger, garlic) that will add extra flavor to the turkey and gravy.
- Slow cook. Cook on low for 5 to 6 hours.
- Finish in the oven. Give the turkey breast a brief blast in the oven to crisp up the skin. This is totally optional.
- Make gravy. Use the drippings in the crock pot to make an insanely flavorful gravy.
Ingredients
You’ll need a turkey breast roast and some umami forward ingredients: butter, soy sauce, garlic powder, fresh garlic, ginger powder, fresh ginger, shallots, and chicken stock. A combination of fresh and powered ginger and garlic gives a double whammy - the powder is rubbed with soy sauce directly onto the turkey and the fresh is used to season the stock for the gravy.Boneless vs bone-in turkey breast
You can use either boneless or bone-in, but definitely get skin on turkey breast. The skin will keep the breast from drying out and will self baste the meat while it slow cooks. Plus, the golden brown turkey skin you get after broiling is gorgeous.Which crock pot to use?
Since we are a little family of two, we have the casserole crock, which holds 2.5 quarts. It's so cute and perfectly-sized for a turkey breast roast!Can I use an instant pot?
Yes! You can just use the slow cooker low mode and follow this recipe exactly the same, but you can even pressure cook and it'll taste just as good!
To make this turkey in the Instant Pot, place the aromatics in the bottom of the insert and place the turkey on top. The turkey should be raised a little, if it isn’t, add the Instant Pot rack to lift it up. Add 1/2 cup no sodium chicken stock and cook on high pressure for 6 minutes per pound of turkey. Quick release when done and broil in a high oven for crispy skin, if desired.
What to serve with turkey?
We love the classics: If you’re looking for classics with a twist, try:Crock Pot Turkey
Super Juicy Crock Pot Turkey Breast
- crockpot/slow cooker
- 2 tbsp butter
- 1 tbsp soy sauce (divided)
- 2 tsp garlic powder
- 2 tsp ground ginger
- 2 lb boneless skin-on turkey breast roast (or 4lbs bone-in)
- 1 head garlic (cloves peeled)
- 2-3 shallots (quartered)
- 1 whole ginger root (scrubbed and halved lengthwise)
- 2 tbsp cornstarch
- 1-2 cups chicken stock (no sodium preferred)
In a small bowl, mix together 2 tbsp butter with the 1.5 teaspoons soy sauce, the garlic powder, ginger power, 1 teaspoon of salt, and 1/2 teaspoon pepper. Pat the turkey breast with paper towels until dry. Optionally tie the breast so it keeps it’s roll shape. Dot the butter mix on the breast, concentrating on the top and sides.
Place the garlic, shallots, and ginger into the bottom of the crock pot. Position the turkey breast skin up so it’s sitting on top.
Cover and slow cook on low for 3-5 hours (for a 2 lb breast) or until the internal temperature reaches 165°F. When done, remove from the crock pot and place in an oven proof dish and let rest for 10 minutes.
While the turkey is resting, make the gravy: Strain the drippings with a fine mesh strainer into a large liquid measuring cup, pushing down on the solids to squish out any extra flavor. You’ll need 1 3/4 cups of liquid for the gravy so if you need to, add a bit of chicken stock or water to top it up.
Add the the drippings plus stock to a sauce pan over medium heat. In a small bowl, whisk the cornstarch with 1/4 cup cold water. When the stock comes to a simmer, whisk in the cornstarch slurry and let bubble and thicken. Remove from the heat and stir in the remaining 1.5 teaspoons of soy sauce, taste and season with salt and pepper.
If desired, crisp up the turkey skin. Turn your oven on broil high and place the turkey on the top rack and broil for 3-5 minutes or until the skin is crispy and golden, keeping an eye on it so it doesn’t burn. Slice and serve with gravy and/or the optional scallion oil.
Optional Scallion Oil
- 1/2 cup thinly sliced scallions
- 1/4 cup neutral oil
- 1/2 tsp salt (or to taste)
In a small pot, heat 1/4 cup oil over medium heat until it reaches 275°F. Remove the pot from the stove and very carefully pour over the green onions – they will sizzle and bubble up. Stir in salt to taste.
Other Notes
Serves 6 generously.
If your turkey breast is bigger than 2 pounds, cook it for 4-6 hours on low. Check the internal temperature with an instant read thermometer at 4 hours, aiming for 165°F in the thickest part.
Estimated nutrition doesn't include optional scallion oil.

I Am... Five Best Restaurants in Whistler
These are our five best restaurants in Whistler and we always make sure to hit them up. Nothing beats a comforting apres meal after a day on the slopes or a crisp, cold cocktail after a satisfying hike. We consider Whistler our home mountain and we're there all summer and winter long. These are our favorite haunts that we have to hit up every time we're there, whether it's for skiing or hiking or cycling. We’re always on the lookout for more, so if you have a favorite, please leave your suggestions in the comments below!
Best date night restaurants in Whistler
Wild Blue
Wild Blue is one of Whistler’s newest restaurants and also one of its best. The room is absolutely gorgeous, all blue velvet, dark wood, and warm inviting light. The vibes and ambiance are immaculate. If you’re looking for a super romantic date or somewhere to dress up and grab cocktails and a bite to eat, Wild Blue is where you want to be. The menu focuses on seafood, steak, and local produce. The seafood tower is a standout as are their seafood forward pastas and vegetable forward dishes. Bonus, their fries are pretty darn good too! Wild Blue 4005 Whistler Way, Whistler, BC V8E 1J1 Open: 7 days a week, 5pm-10pmBest Happy Hour in Whistler
Araxi
Araxi is known as one of Whistler’s best restaurants – they focus on Pacific Northwest plates and they are indeed amazing at dinner. That being said, our favorite thing to do is visit their cocktail bar. It’s a cozy and lovely space for a casual bite, happy hour, or après. Bonus points if you’re sitting at the bar where you can peek out the window and watch the snow fall. They have a large whisky and scotch selection and so many delicious cocktails (both classic and innovative) made with housemade infusions, bitters, and syrups. There’s also an extensive spirit free cocktail list made with made with non-alcoholic spirits for people who don’t drink. The oysters are super fresh and tasty, the fries are made from BC potatoes, and the cave aged gruyere fondue (see below) is always a fun treat. Definitely a romantic cozy vibe. Araxi 4222 Village Square #110, Whistler, BC V0N 1B4 Open: Mon-Thurs 5pm-10pm Fri-Sun 3pm-10pmBest casual restaurants in Whistler
La Cantina
Honestly, after a long day on the slopes, sometimes all you want to do is grab a quick bite before heading into the hot tub. If you’re looking for a quick and casual meal, our favorite is La Cantina. La Cantina has authentic street style tacos, burritos, and burrito bowls and trust me when I say, they are the best Mexican food in Whistler. The restaurant chain was started by a Mexican who put down roots in Whistler. You can dine in or take out, either way, it’s quick, filling, and super delicious. They have two locations, one in the Village and one located next to Nester’s. It’s a casual dine in place where you order at the counter, grab a seat and wait for your food. Super fresh and delicious. Plus, if you’re looking for vegan or vegetarian options, they’ve got you. They also have a sister restaurant, The Mexican Corner, which offers more classic Mexican dishes in a sit down service restaurant. Both places are amazing. At La Cantina we love the burritos and the burrito bowls! The chicken tinga is perfect and the grass fed beef pasilla is also amazing. La Cantina 129-4340 Lorimer Road, Whistler, BC V8E 1A5 209-7015 Nesters Road, Whistler,. BC V8E 0X1 Open: 7 days a week, 11am-9pmView this post on Instagram
Best brunch restaurants in Whistler
Hunter Gather
If you’re looking for a good brunch before leaving Whistler (or maybe you want to fuel up before hitting the slopes), Hunter Gather is where you want to be. It’s a casual counter eatery and tap house that serves locally crafted dishes and BC craft beer on tap. They’re open all day but we especially love their brunch/breakfast. The space is lovely, bright, and wide open. Menu-wise, we love the any of the eggs benedicts served on potato rosti. The rosti is essentially a giant, thick potato pancake made from local Pemberton potatoes. It’s super crispy on the outside and creamy and potato-y on the inside. I also love the waffles which come with Canadian maple syrup. In the summer they have a lovely patio where you can enjoy their many craft beers on tap. Super fun and super tasty! Hunter Gather 4368 Main St #101, Whistler, BC V8E 1B6 Open: 7 days a week, 9am-10pmView this post on Instagram
Best bakery Whistler
Purebread
Purebread is a legendary Whistler bakery. So much so that they’ve expanded to two Whistler locations, as well as nearby(ish) Vancouver and Squamish. They bake the most delicious pastries, cakes, bars, cookies, and breads. They also have coffee, making it a perfect morning stop to grab and go before heading out on a hike or the gondola to hit up the slopes. I especially love their savory scones, confetti cookie, and their chocolate bottom banana cake. Purebread 4338 Main St #122, Whistler, BC V0N 1B4 Open: 7 days a week, 8am-5pmView this post on Instagram
Best après Whistler
The Mallard Lounge
As a caveat, this isn’t about the best bar for the après party scene that you see on social with loud bass, sparklers, and people dancing on tables – if you’re looking for that, you’re looking for the Longhorn. If you’re looking for a cozy space filled with a roaring wood fireplace, live music, giant plush leather chairs and an overall mountain chalet vibe, you’re looking for the Mallard Lounge in the Fairmont Chateau. There are giant floor to ceiling windows where you can watch the snow falling gently to the ground and there’s a live musician to help dial in relaxing luxe vibes. Their fries are crispy, potato-y, and a perfect treat after spending the day on the slopes. They have a local meat and cheese charcuterie board and the nachos are definitely a must order if you’re indulging! The Mallard Lounge 4599 Chateau Blvd Unit 205, Whistler, BC V8E 0Z5 Open: 7 days a week, 11am-11pm Happy eating! Please let us know what your favorites are in Whistler, if you’ve been! xoxo steph Read More →
Latest Comment
“Bananas and coffee seem like such a strange combination at first but it really is delicious! Agreed that when the banana...”Jerrica L on Banana CoffeePopular
 2015 Holiday Giveaway
  One-Pot Lemon Scallop Pea Spaghetti
  Beer Battered Onion Rings, Jalapeno Aioli
  2014 Holiday Gift Guide and a Giveaway
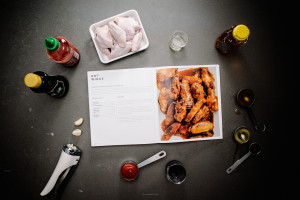 Easy Gourmet Hot Wings and a Giveaway!
 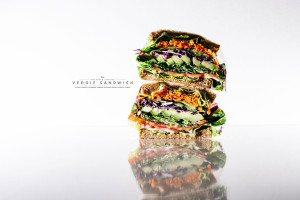 The Ultimate Veggie Sandwich
 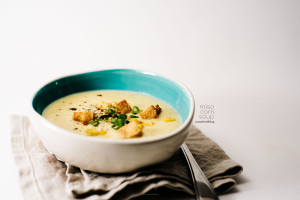 Vegan(!) Creamy Corn Soup Recipe
  Sunday Brunch: Grilled Cheese Eggs Benny
