
I Am... Juiciest Baked Chicken Thighs
These baked chicken thighs are simply but deliciously flavored with honey, mustard, and garlic. You probably have all the ingredients in your pantry right now. The sweetness of the honey pairs perfectly with the mellow savoriness of garlic. I love honey garlic anything and these mustard with honey garlic thighs are perfection. If you’re looking for something different, there are some other flavor suggestions further down. If you asked me what I could eat over and over again, it would have to be chicken thighs. They’re so incredibly versatile, full of flavor, and absolutely delicious. Give me thighs over breast any day.
The secret to juicy chicken thighs is tempering
Tempering is just taking the chicken out of the fridge and letting it sit on the counter in a cool spot. It will give you the juiciest, most properly cooked chicken you’ll ever eat. Taking the chill off your chicken equals evenly cooked meat. If you cook chicken straight from the fridge when it’s cold, the outside of the chicken will cook faster than the inside, giving them potential to dry out. The best thing to do is prep your chicken, let them temper/marinate for about 10-15 minutes, then turn on the oven. Your chicken should be tempered by the time your oven is ready.How to bake chicken thighs
For the juiciest oven baked chicken thighs you need bone in, skin on thighs. Baking in a hot oven helps crisp up the skin and the bone keeps the meat moist and juicy.- Pat dry. Use a clean kitchen towel or paper towels to dry the skin of your chicken. You want a dry surface so that it can crisp up. Moisture is the enemy of crispiness.
- Season. Place the thighs in a bowl and add the sauce, which has a bit of oil. The oil helps conduct heat which makes the skin crispy and the seasoning in the sauce adds flavor.
- Bake. The best way to bake thighs is skin up in a roasting pan or baking dish. Bake the thighs at 425°F for about 25-30 minutes, or just until the internal temp reaches 165°F.
On Garlic
A couple of people have mentioned that they don't want to dirty up a cutting board just for garlic. I agree! That's why I love garlic presses. Some might scoff at garlic presses as a uni-tasker that doesn't deserve space in your kitchen, but the truth is, a lot of uni-taskers make life way easier and more fun. Our garlic presses (we have 5!) have seen daily use ever since we got them. Our current fave is the basic OXO. It's simple, cheap, and dishwasher safe. Never wash another knife and cutting board just for garlic again.How long to bake chicken thighs?
- Boneless skinless chicken thighs: Bake at 425°F for 18-20 minutes.
- Bone in skin on chicken thighs: Bake at 425°F for 25-30 minutes if properly tempered.
- Bone in skin on chicken thighs: Bake at 425°F for 35-40 minutes if they’re coming right out of the fridge.
Bone in skin on vs. boneless skinless
This recipe suggests skin on, bone in chicken thighs because the skin crisps up beautifully and also self-bastes the meat underneath. Using bone in meat is always a bonus because meat cooked on the bone has more flavor and juiciness thanks to the fact that bone in meat cooks more evenly, preventing meat from drying out. Boneless skinless chicken thighs are delicious as well though - I use them in a huge amount of recipes and you can easily use them here too.Chicken thigh variations
- Lemon pepper
- Sesame soy
- Miso coconut
- Honey jalapeno garlic
- Crispy oven fried panko chicken thighs
- Teriyaki
- Paprika chicken
- Coconut curry
- Green chile
- Sriracha lime
- Lemon rosemary
Crispy oven baked chicken thighs
I love saucy, honey garlic mustard chicken, but I also love crispy baked chicken. If you’re a crispy chicken lover too, don’t worry, I’ve got you! Crispy baked chicken thighs are just as easy as regular baked thighs, all you do is add an extra crispy panko breadcrumb coating. Panko gives you super crispy crunchy skin and the honey garlic mustard marinade keeps the chicken extra juicy. Seriously good!How to make CRISPY oven baked chicken thighs
- Season and marinate the thighs as per the recipe.
- Place 2 cups of panko in a large, shallow bowl.
- Take the chicken and dip it in the panko, pressing to adhere on all sides.
- Place the chicken on a lightly oiled wire rack set in a baking sheet and bake as per the recipe, for 25-30 minutes or until the internal temperature of the chicken reaches 165°F.
Lemon pepper chicken thighs
Mix together 2 tbsp olive oil with 2 tsp freshly cracked black pepper, 1 tsp oregano, and the juice of half a lemon. Pour the lemon sauce on the thighs and top with thinly sliced lemons. Proceed the rest of the recipe below.Teriyaki chicken thighs
Mix together 2 tbsp light soy sauce, 2 tbsp mirin, 2 tbsp sake, 1 tbsp sugar, and 1 tsp cornstarch. Pour over the thighs and proceed with the recipe as below.Sweet and spicy chicken thighs
Mix together 1 tbsp neutral oil, 2 tbsp gochujang, 2 tbsp soy sauce, 2 tbsp honey. Pour the sauce on the thighs and proceed with the recipe as below.How do I reheat chicken thighs?
- In the microwave: place on a microwave safe plate and cover. Heat for 1 minute at a time until hot.
- In the oven: heat the oven to 325°F and place the chicken in an oven safe dish and cover with foil. Bake until warmed through.
FAQ
- Do I need to marinate chicken thighs overnight? If you have the time you can definitely marinate them overnight. I usually am super last minute and only marinate them for 1 hour. I wouldn’t marinate them for over 24 hours.
- Bone in or boneless chicken thighs? I personally love bone in chicken thighs because they have more flavor and are juicier because bone in meat cooks more evenly. Boneless chicken thighs are great for when you’re in a hurry and want to get dinner fast on the table. If you want to use boneless chicken thighs, you only need to bake them for 18-20 minutes at 425°F.
- Skin on or skinless chicken thighs? Skin on chicken thighs are delicious! The skin gets crispy and self-bastes the meat underneath so your thighs stay juicy. Skinless thighs will work too but they tend to be a touch dryer because they don’t have that layer of protection from the heat. Even if you don’t want to eat the skin, I recommend cooking your chicken skin on so you get the benefits.
- What is tempering? Tempering meat means that you take it out of the fridge and let it sit on your counter in a cool spot. It means that your chicken takes less time in the oven to cook and taking the chill off means more evenly cooked meat. When you cook meat straight from teh fridge, the outside of the chicken cooks faster than the inside because the heat takes longer to penetrate something that is cold all the way through.
- How do I bake plain thighs for things like salad? To bake plain thighs, just season the thighs with salt, pepper, and a touch of oil and bake them, omitting the honey mustard, and garlic. To get some browning on top, broil for 5 minutes, keeping an eye on the oven.
What can I serve with oven baked chicken thighs?
- avocado cucumber salad
- vegetable lo mein
- spicy chili noodles
- creamy garlic mashed potatoes
- crispy stovetop roasted potatoes
Baked Chicken Thighs
Perfect pantry juicy baked chicken thighs
- 2 lbs bone in skin on chicken thighs (6-8 thighs)
- 2 tbsp honey
- 2 tbsp whole grain mustard
- 1 tbsp dijon mustard
- 6 cloves garlic (minced)
- 1 tbsp oil
Lightly pat the chicken skin dry and season with salt and freshly ground pepper. Place in an oven safe baking dish.
In a small bowl, whisk together the honey, mustard, garlic, and oil. Pour over the chicken and make sure the thighs are evenly coated. Let temper in a cool spot in your kitchen for about 10-15 minutes then heat your oven to 425°F.
Bake the chicken for 25-30 minutes or until the internal temperature of the chicken reaches 165°F. Let rest for a couple minutes, then enjoy!

I Am... Boo Baskets
I love Halloween and spooky season. Give me pumpkin spice everything, fall leaves, and cozy scarves! So when I saw boo baskets trending on TikTok, I knew I had to make one for my boo! It's not too late to make one for yours, especially if you live in a place with fast shipping.
What are boo baskets?
Boo baskets are kind of like an Easter basket, but boo-themed. Or, rather, fall and Halloween themed. Most people have been hinting at their partners to make them one and there are some pretty cute ones out there!What to put in a boo basket?
Really, you can put anything in one! But here’s my loose “recipe.”Basket
You’ll need a large enough basket (or container) to hold all of your goodies. They have Halloween themed baskets out there, but if you have something at home that you use to hold blankets or a large bowl, this will work too. Bonus points if your person is obsessed with pottery and you get them a giant ceramic platter or bowl!Cozy item
It’s not fall if it’s not cozy! You want to find something warm and fuzzy that will remind your partner of you when they wrap themselves up in it, like a super soft blanket, hoodie, sweatshirt, or scarf. It doesn’t technically have to be fall or Halloween themed, but that is the them of the basket, so I say go all out and get the seasonal stuff. When else is your partner going to get a hoodie that proclaims their love for pumpkin spice?Mug
Fall is all about the hot drinks and you can’t have hot drinks without a mug. There are SO many cute Halloween mugs out there and a lot of them are affordable too. See the list below for ideas. If your boo doesn’t do the hot drink thing, you can always get them a Halloween themed glass for regular drinks.Drinks
A drink mix for the mug. Think pumpkin spice, chai, apple cider, that kind of thing. Alternatively, if your boo doesn’t like hot drinks, you can get a spiced alcohol like cinnamon whiskey or a fall themed cocktail mixer.Treats
This is the best part of a boo basket, in my humble opinion! Basically it’s like you’re going trick-or-treating for your boo. There are so many Halloween and fall themed treats out there. Visit a Target or stock up online. Make sure you get stuff your boo likes. You do know their favorite snacks, right!?Plushie
A soft plushie is perfect for a boo basket. If you want bonus points, the hot plushies right now are Jellycats. Squishmallows are over so don’t even go there. Pick out the perfect Jellycat and your boo will be over the moon. note - a boo basket is nothing without a cute note from you. A handwritten note is everything. There are a bunch of cute Halloween themed cards out there too!The best things on Amazon for boo baskets:
Baskets
- A kawaii purple and orange rectangular basket that’s as cute as your boo.
- This rectangular storage basket literally has boos on it
- This two toned rope basket is plenty big to fit all your boo basket items.
Cozy items
- A super soft velvet fleece blanket with a ghostie doing all the Halloween things.
- Soft and cozy orange plush blanket that glows in the dark, just the thing for cuddling up during movie night.
- A cozy spooky season sweatshirt for your boo to snuggle up in.
- A super soft plaid scarf so your boo can stay warm on your leaf peeping fall walks.
Mugs
- A sweet “Hello Fall” ceramic mug so your boo can warm their hands around it.
- This one is for those boos who are obsessed with tumblers. She’s cute, she’s maple, she’s just the right mug for your boo basket!
- There are two mugs in this set, one for you and one for your boo. I love the warmth of amber glass mugs. It adds a touch of that fall magic!
- This amber rocks glass isn’t a mug, but it’s perfect for those boos who don’t like hot drinks.
Drinks
- These great pumpkin Charlie Brown hot cocoa mix packs are the cutest.
- Salted caramel hot chocolate is definitely a fall favorite
- This warming chai mix is vegan and made with oat milk.
Treats
There are so many fall treats out there, I recommend going to Target or Walmart to check out their seasonal sections. That being said, you can grab these on amazon if you don’t have time to go shopping:- Would a boo basket be complete without Oreo boos?
- Chocolate pumpkin spice kind bars so you can take them when you go for a fall hike with your boo
Plushies
Jellycats have gone viral lately so they might be hard to find, but I kept the links here for jelly-inspo:- This mini ghost is so squishable and isn’t too big, making it perfect for fitting into a basket
- If your boo loves cats, this big boy black cat is purrfect
- A lil plush pumpkin that you can keep forever
- The CUTEST Jellycat acorn.
- If you want extra bonus points with your girl and she’s a Tiktok girlie, you have got to get this Jellycat coffee-to-go plush bag.
Card/note
Tips
Bake a sweet treat for your boo!
If you want extra brownie points (heehee) bake up a fall-themed sweet treat for your boo.- Pumpkin Bread - This is a copycat recipe for Starbuck’s pumpkin bread. So if your boo is a starbies lover, this is the one!
- Who doesn’t love cheesecake bars? A cheesecake you can pick up with your hands? Yes, please. If you want to go all out, you can decorate these lil guys to look like Totoro.
- One bowl pumpkin cupcakes - Tall, fluffy, tender, and super easy to make, pumpkin cupcakes definitely say “I love you.”
- Everyone loves chocolate chip cookies and trust me when I say that these will be the BEST you’ve ever baked.
K-Beauty Boo Basket Ideas
If your boo is super into Korean beauty and skin care, here are a couple of fall themed products that you can pop into their boo basket!- Pumpkin 24K gold mask - This lil pumpkin face mask helps with exfoliation and is fall themed!
- Pumpkin spice hand cream - If your boo is pumpkin spice fiend, this cocoa butter pumpkin spice hand cream is perfect.
- It’s not pumpkin, but carrots are orange too! These Skinfood calming carrot toner pads are viral and boo basket friendly!
How do I make boo baskets look cute?
- Be sure to get a large enough basket so everything fits inside. Use the cozy item (scarf, hoodie, blanket) to line the basket.
- Remove any packaging from the outsides: obviously if you ordered stuff online, take it out of the box and remove any protective plastic wrap. Don’t cut off any tags though, just in case.
- Neatly arrange everything in the basket. Larger items go in the back and smaller items get tucked into the front.
How to make a Boo Basket
Boo baskets are kind of like an Easter basket, but boo-themed.
- 1 basket
- 1 cozy item
- 1 mug
- 1 package hot drinks
- 2 fall or Halloween themed treats
- 1 soft plushie
- 1 heartfelt hand written note
Unwrap anything that came in packaging (but don’t take off any tags).
Line the basket with the cozy item, fluffing it up.
Place the mug, hot drink mix, treats, plushie, and note into the basket.
Arrange cutely.
Gift to your partner and bask in their love for you!

I Am... Million Dollar Tiktok Spaghetti
It's comfort food season! There’s a tiktok spaghetti bake that I’ve been dying to try because it looks so incredibly cozy and delicious. I’m not sure who posted it first and made it viral, so if you know, let me know in the comments. Either way, it looks amazing: spaghetti tossed in a creamy alfredo sauce topped off with a savory meat sauce all baked up with cheese on top. It’s all the things I love about pasta bakes: a golden brown cheesy blanket, lots of saucy noodles, piping hot, filling, and oh so savory.
What is Tiktok spaghetti?
Tiktok spaghetti is an oven baked casserole with creamy alfredo spaghetti topped off with a savory tomato meat sauce. It’s kind of like a deconstructed rosé meat sauce. Essentially it’s a riff off of million dollar spaghetti but with slight twist.How to make Tiktok spaghetti
- Make the meat sauce. We’re going to start by making our meat sauce so it has time to simmer. Soften diced onion and garlic in oil along with a touch of sugar. Add ground beef and brown, breaking it up. Stir in onion powder, garlic powder, oregano, and crushed tomatoes. Season with salt and pepper. Bring the sauce to a simmer and let the flavors meld while you cook the spaghetti and make the alfredo sauce.
- Cook the spaghetti. Bring a large pot of salted water up to a boil and cook the spaghetti according to the package directions, then drain well.
- Make the Alfredo sauce. Melt the butter in a sauce pan and stir in minced garlic and heavy cream. Let the cream and butter reduce and thicken slightly, then remove the pan from the heat and whisk in shredded parmesan cheese until smooth and creamy. Stir in chopped parsley and season with salt and pepper.
- Assemble. After the spaghetti is ready, toss it with the creamy alfredo sauce then transfer to an oven safe dish. Top it off with the meat sauce and finish the casserole by sprinkling evenly with shredded mozzarella and chopped parsley.
- Bake. Bake the Tiktok spaghetti in a 350°F oven until the cheese is melty and gooey. Enjoy hot!
Tiktok spaghetti ingredients
- meat sauce: this meat sauce is loosely based on Italian bolognese sauce. Generally it’s any dark red tomato-based pasta sauce with aromatics like onions, garlic, carrots, and celery. Ground meat is added, browned, and broken up into small pieces, and the whole thing is simmered for awhile to let the flavors meld.
- spaghetti: regular dried spaghetti, your favorite brand. We’re partial to Garofalo for baked spaghetti. It’s from Italy, it’s bronze dye extruded, and is 100% durum wheat semolina flour. PS - they sell it at Costco too.
- Alfredo sauce: classic Italian Alfredo sauce is butter, Parmigiano Reggiano cheese, and starchy pasta water. American Alfredo sauce tends to be slightly more creamy and thicker thanks to the addition of heavy cream and much more cheese. In this case, we’re going to make an American-style alfredo since we’ll be baking the pasta.
- cheese to top: when you bake a pasta, you have to top it with cheese to keep the noodles from drying out. For this dish, I like to use mozzarella to top, and, if you use bagged shredded mozzarella, I won’t judge, it’s what I use too. It’s mainly there to create a cheese seal to help everything stay moist in the oven while it bakes.
Tiktok spaghetti components
There are two different sauces you need to make: tomato meat sauce and alfredo.Meat sauce ingredients
- onion and garlic: onion and garlic are classic in meat sauce because they add so much flavor. This recipe calls for 1 medium onion and 8 cloves of garlic for all the garlic girls out there.
- sugar: we’re going to add a touch of sugar to our meat sauce to help amplify the sweetness of the tomatoes. Adding sugar balances out the acidity in tomatoes sauce. Typically, if you simmer tomato sauce for a very long time (or if you have summer sweet tomatoes) you won’t need to add sugar, but a touch of sugar really helps sweeten and balance the sauce without it needing to be on the stove for hours.
- seasonings: we’re also going to add in some garlic powder, onion powder, and oregano for a bit of extra oomph. The garlic, onion, and oregano are optional, but if you have them in your pantry, they add to the overall savoriness of the meat sauce. One thing I don’t recommend skipping is the fresh flat leaf parsley. It adds brightness, freshness, and has the added bonus of looking pretty.
- ground meat: lean ground beef is what we’re using. If you have ground “bork” at your grocery store (a mix of ground beef and pork) you can use that too. If you’re not using lean, make sure you drain off any excess fat so your sauce isn’t too greasy. You can also go for ground turkey, ground chicken or Italian sausage.
- crushed tomatoes: a can of crushed tomatoes is the base of our tomato sauce. In this case, I like crushed instead of whole or diced because we’re not cooking the sauce for hours. The texture and consistency of crushed tomatoes works best. That being said, you can use whichever kind of canned tomatoes you like – I even have a substitution down below for using jarred tomato sauce.
Alfredo sauce ingredients
- butter: butter is going to give our alfredo a creamy, buttery base. Go for unsalted so you can control how salty the sauce is.
- heavy cream: heavy cream aka whipping cream is what is going to thicken our alfredo sauce and make it extra rich.
- cheese: Alfredo sauce uses parmesan cheese and you should really use Parmigiano Reggaino, it tastes worlds different than the green shaker of cheese. If you go the real cheese route, it’s much cheaper and better to buy a block and grate it yourself using the fine side of a grater. It’ll melt more evenly into the alfredo sauce.
Extra easy Tiktok spaghetti
If you’re super busy and can’t make the meat sauce and the alfredo from scratch, you can definitely use some shortcuts by buying your favorite jarred pasta sauces. Simply brown lean ground beef and add it to your favorite jarred tomato sauce (we like Rao’s roasted garlic). You can also use jarred alfredo sauce (again, Rao’s is a solid choice), just heat it up and toss it with cooked spaghetti before topping it with the meat sauce and mozzarella. It’ll be faster than delivery and has all the feels of a home-cooked meal.What does Tiktok spaghetti taste like?
It’s creamy, cheesy, rich from the alfredo, and hearty and savory thanks to the the meat sauce. Like all pasta bakes, it's a savory, comforting, easy dish. It’s really good, especially if you love spaghetti and hate choosing between tomato and cream sauce. Really, it’s the best of both worlds.Tiktok spaghetti vs million dollar spaghetti
Tiktok spaghetti is a pasta bake with alfredo spaghetti topped off with a tomato meat sauce. It might sound like another dish you know, million dollar spaghetti, but it's not quite the same. Million dollar spaghetti is a pasta bake with tomato meat sauce, spaghetti, and mozzarella cream cheese layers. It’s like lasagna made with spaghetti.What kind of casserole dish for Tiktok spaghetti
If you don’t have a casserole dish, don’t worry, you can bake this spaghetti in any oven safe dish you have: a baking pan, a cake pan, a pie pan, a cast iron skillet, a dutch oven, or those disposable aluminum pans from the grocery store.What to serve with Tiktok spaghetti
Because carbs with carbs is the best comfort meal:- a garlicky kale salad for some contrast and healthy leafy greens
- garlic knots
- Texas toast
- plus, continue the burnt top trend by finishing off your meal with a creamy, delicious Basque cheesecake
Tiktok Spaghetti
- 2 tbsp olive oil
- 1 medium onion (diced)
- 8 cloves garlic (minced, divided)
- 1 tbsp sugar
- 1 lb ground beef
- 28 oz crushed tomatoes (1 large can)
- 2 tsp garlic powder (optional)
- 2 tsp onion powder (optional)
- 1 tsp dried oregano
- 16 oz spaghetti
- 1/2 cup butter (unsalted preferred)
- 2 cup heavy cream
- 1 cup Parmigiano Reggiano cheese (grated)
- 1 cup mozzarella (grated)
- 2 tbsp fresh flat leaf parsley (chopped)
In a large, deep skillet, heat up the olive oil over medium heat. Add the onion, half of the minced garlic, and sugar and cook, stirring, until the sugar dissolves and the onions and garlic are soft, 4-5 minutes. Add the ground beef and brown, using the back of a wooden spoon or a potato masher to break up the meat.
Stir in the crushed tomatoes, garlic powder, onion powder, and oregano. Bring to a simmer then reduce the heat to low. Let simmer while you cook the spaghetti and make the alfredo sauce. Be sure to taste and season with salt and freshly ground pepper.
While the meat sauce is simmering, heat the oven to 350°F and bring a large pot of salted water to boil over high heat. Cook the spaghetti according to the package directions, then drain well.
While the spaghetti is cooking, make the alfredo sauce. Melt the butter in a second large skillet over medium heat. Stir in the remaining garlic and heavy cream. Bring to a gentle simmer and slightly reduce, 3-4 minutes. Remove from the heat and whisk in the parmesan cheese until the sauce is smooth and melty. Taste and season with salt, freshly ground pepper, and half of the freshly chopped parsley.
Toss the drained, cooked spaghetti with the alfredo sauce, then transfer to an oven safe baking dish. Top evenly with the meat sauce.
Sprinkle on the mozzarella cheese and the remaining chopped parsley. Bake in the oven until the cheese is melty and slightly brown, about 20-25 minutes. Scoop up the different layers and enjoy hot!

I Am... Air Fryer Potatoes
Air fryer potatoes are probably the fastest roast potatoes you can make. The perfect side dish to bring to any potluck or BBQ. Crispy, crunchy, garlic-onion air fryer potatoes are my ultimate snack food. Forget chips, my new thing is making a big batch of these crispy baby potatoes and eating the heck out of it. The other day I made a pound of potatoes and I have to confess: I ate the entire thing. I was having a rough day and my usual go-to bag of ranch chips wasn’t in the house. In the fridge was a bag of baby potatoes, so I popped them in the air fryer, halved and tossed with olive oil and a huge amount of garlic and onion powder. Twenty minutes later the potatoes came out: impossibly golden, hot, and crispy. So much better than a bag of chips. Even better, it wasn’t that kind of mindless shovel eating that happens when I eat chips. No, it was thoughtful, enjoyable, hmm, this nugget is just a little creamier that the last one, will the next one be crunchier, kind of eating. It was roast potato contemplation at its best.
Why you should make air fryer potatoes
If you love potatoes, air fryer potatoes are for you! You don’t have to turn on the oven and the result is 100% the same, maybe even better. The air that circulates around in an air fryer makes the outsides crispy all over and the insides perfectly soft. Plus they’re healthier than deep fried wedges or roasties because you hardly use any oil. Air fryer potatoes also cook up faster because air fryers are smaller than ovens so there isn’t as much space to heat up.How to make air fryer potatoes
- Prep. Scrub, dry, and cut your baby potatoes in half. Or, if you’re using regular potatoes, cut them into evenly sized pieces.
- Toss. Toss the cut potatoes in olive oil, garlic powder, onion powder, salt, and peppper.
- Air fry. Add the dressed potatoes to the basket of your air fryer and air fry at 400°F for 20 minutes, stirring or shaking halfway.
- Eat. Remove from the air fryer and enjoy hot!
The best potatoes to use
I like using baby/new potatoes - they’re small and creamy and when you cut them in half they have both an exposed half and a half with a bit of potato skin. You can also use regular potatoes, just cut into small pieces.How long to cook air fryer potatoes
20 minutes is what you need for perfectly tender and creamy on the inside and crispy and crunchy on the outside golden brown potatoes.What temperature should you air fry potatoes
400°F is the ideal air fry temperature for air fryer potatoes.What air fryer do you have?
If you’re wondering which air-fryer we have, it’s this one. It’s quiet and easy to clean and has a pretty big basket.Other potato flavors
- Ranch - 1 tsp each buttermilk powder, dried parsley, dried dill, onion powder
- BBQ - 1 tsp each smoked paprika, onion powder, brown sugar, garlic powder
- Sour cream and onion - 1 tsp each buttermilk powder, onion powder, garlic powder
- Spicy - 1 tsp each smoked paprika, onion powder, brown sugar, garlic powder, chili powder
- Everything bagel - 1 tablespoon everything bagel spice
What to serve with potatoes
- Everyone loves steak and potatoes
- Super tender salmon and potatoes are a match made in heaven
- Lemon pepper chicken for a fast and healthy meal
Air Fryer Potatoes
These crispy, crunchy, garlic-onion air fryer potatoes are probably the fastest roast potatoes you’ll ever make.
- air fryer
- 1 lb baby potatoes (halved)
- 1 tbsp olive oil
- 1 tsp garlic powder
- 1 tsp onion powder
- salt and freshly ground pepper
In a large bowl, toss the halved potatoes with oil, garlic powder, onion powder, and salt and pepper until well coated.
Add the seasoned potatoes to the air fryer basket - I like to line the basket with foil for easy clean up. Cook at 400°F for 10 minutes. Shake the basket or stir the potatoes and cook for another 10 minutes until golden, crisp, tender, and cooked through.
Enjoy hot!

I Am... Easy Parmesan Garlic Knots
Warm garlic knots fresh from the oven should be a controlled substance. I can inhale an entire tray, even when I'm eating them alongside something like this delicious bolognese with pasta. I made the knots from scratch here, but you can easily use store bought pizza dough for somewhat immediate results.
Why garlic knots?
Garlic knots are the best part of pizza night! I love those tender and soft on the inside, crispy on the edges knots dripping with garlic butter. Pure carb-y perfection. I like them with sauce, without sauce, I even eat them cold. I’m a garlic knot monster!How to make garlic knots
First off, I want to say, you don’t have to make the dough from scratch. You can buy pizza dough and make these and you will still experience the immense joy homemade garlic knots will give you.- Make the dough. Or buy it. no one is judging. If you make it, all the ingredients go in a stand mixer until everything comes together a ball. After the dough is a ball, you cover it and let the dough proof until doubled.
- Shape the knots. When your dough is nice and puffy, you punch it down and shape the knots. Push the dough into a log and cut it into 8 strips. Roll the strips out a bit, then knot the dough. Cover the knots with a plastic blanket and let them take a nap until fluffy.
- Bake the knots. Brush the knots with garlic butter then bake them up until golden and delicious.
- Give the knots a butter bath. Double dip the knots for even more garlicky goodness. Shower them with parm and parsley too.
- Enjoy!
Why you should go homemade
If you are wondering why go to all this work:- the satisfaction of homemade dough
- you can freeze them
- they are super soft and fluffy
- golden brown and delicious
- dripping with garlic butter
- a generous dusting of parm and parsley
What if I don’t want to make dough?
Just buy it! I do, all the time. Pizza dough usually comes in 1 lb balls and it is perfect for this recipe.Air fryer garlic knots
If you’re looking at this post and thinking, “this is great and all, but can I use the air fryer?” the answer is yes! All the knots in the photos were made in an air fryer. Prep the garlic knots as described, preheat the air fryer at 400°F for 5 minutes, then air fry them for 10-12 minutes at 350°F, or until golden. Give them a dunk in the extra butter when they come out.Garlic Knots
You can make the dough from scratch or use store bought, either way, these knots are addictive.
for the Garlic Knots (or sub with 1lb store bought pizza dough)
- 3/4 cup warm water (177ml)
- 1 tsp instant dry yeast (3g)
- 1/2 tsp sugar (2g)
- 2.25 cups all purpose flour (270g)
- 1 tsp salt (6g)
- 1 tbsp olive oil (30ml)
Parmesan Garlic Butter
- 1 tsp garlic powder
- 1/4 cup butter
- 6 cloves garlic (crushed)
- salt (to taste)
- 2 tbsp finely grated parmesan
- 2 tbsp fresh flat leaf parsley (chopped)
In the bowl of a stand mixer, add the water, yeast, sugar, flour, salt, and olive oil, in that order. Knead with the dough hook until the dough comes together into a ball, adding 1 tablespoon of water if too dry and 1 tablespoon of flour if too sticky. Using lightly oiled hands, gather the dough into a ball and place in a lightly oiled bowl and cover. Let proof until doubled 1-2 hours.
On a lightly floured surface, punch the dough down, shape into a long log, and cut into 8 equal strips. Roll each strip into an short rope and tie into a knot. Dust with garlic powder, cover and let rest for 30 minutes. Towards the end of the rise time, heat the oven to 400°F.
Make the garlic butter: melt the butter, add garlic and cook, stirring occasionally, until just soft but not brown, about 2-3 minutes.
Brush the knots with the garlic butter (save the remaining garlic butter for after the knots are baked) and bake for 13-15 minutes or until golden brown. Remove from the oven and dunk into the remaining butter. Sprinkle with parmesan and parsley. Enjoy plain or with pizza sauce!
For air fryer garlic knots, air fry 10-12 minutes @ 350°F, or until golden.
To store: leave knots at room temp, in a container for up to 2 days at room temp or in the fridge for 1 week.
To freeze: let cool completely then freeze in a freezer safe bag for up to three months. Let thaw at room temp and reheat as desired.

I Am... Velveeta Mac and Cheese
Homemade Velveeta cheese sauce with tender mac is what mac and cheese dreams are made of. If you’re looking for the creamy mac and cheese of your childhood, this is it. These days we have fancy mac and cheese with gruyere and breadcrumbs and all that, but do you ever dream of just easy plain mac and cheese, like the box kind, but without the powdered cheese and that mushy pasta? Enter this Velveeta mac and cheese. It's the perfect side dish for holidays, BBQs, and cookouts.
Have you ever seen a prettier mac and cheese?
This mac and cheese is a people pleaser! I mean, right now the only people I’ve been serving it to are myself and Mike, but boy oh boy does it hit the spot, especially after coming in from a crisp and cold walk. Super hearty and heartwarming, so cheesy and so easy. This super easy homemade recipe is made on the stovetop and can be enjoyed as is, or baked. I like it straight from the stovetop into a bowl, with a spoon because it’s the ultimate in cozy. I love this mac and cheese because it works as both a main and a side. I’ll serve it up with a salad as a main or as the most amazing side at Thanksgiving. Velveeta mac and cheese can do it all!Why Velveeta cheese?
Velveeta is the absolutely best nostalgic cheese. It’s the cheese I grew up eating and it makes for the SMOOTHEST cheese sauce ever. It’s makes mac and cheese gooey, cheesy, creamy, and so good. Velveeta shells and cheese is the ultimate taste memory that brings me right back to all the good things about being a kid.What other cheeses can I use?
The reason why this particular Velveeta mac and cheese is amazing is because it uses the super smooth power of Velveeta but also has the extra added bonus of 1/2 cup of shredded cheddar. You can’t skip out on the Velveeta, but you can switch out the cheddar for your favorite cheese! Try:- cheddar - this is the classic, but you can switch it up by choosing between sharp, mild, or medium. Sharp cheddar has the strongest cheddar taste, medium is in the middle, and mild is subtle and milky.
- mozzarella - extra gooey and stringy mac and cheese with pizza feels.
- parmesan - complex and full of umami with lovely nutty notes for a little bit of a more elevated mac and cheese.
- gruyere - smooth and velvety and full of flavor. Gruyere is nutty and earthy and using it in mac and cheese will remind you of fondue.
- smoked gouda - super creamy and melty with delicious smoked flavors. A campfire-ish mac and cheese for those cozy feels.
- fontina - a super melty cheese that is buttery and just a little nutty.
- cream cheese - this is a dark horse but it’ll add even MORE smoothness and creaminess. It’s especially good in crock pot mac and cheese.
How to make Velveeta mac and cheese
- Cook the pasta. Bring a large pot of salted water to a boil and cook your mac (or pasta of choice) according to the package directions, then drain well.
- Make a roux. While the mac is cooking, make a roux by melting butter in a saucepan. When it’s melted, add in the flour and spices and stir until everything comes together.
- Add the milk. Pour the milk in slowly, stirring so the sauce is smooth and creamy. When you’re done adding in the milk, let the sauce come to a simmer so it thickens up.
- Melt the cheese. Add the Velveeta – it’ll melt easier if you cube it up – and stir until until the sauce is creamy.
- Stir in the mac. Add the drained mac, mix everything up and enjoy!
Stovetop Velveeta mac and cheese
To be honest, my favorite kind of mac and cheese is stove top mac and cheese because I don’t want to wait for baked! I just prepare the Velveeta mac and cheese and eat it straight from the pot.Baked Velveeta mac and cheese
Sometimes mac and cheese with a crispy baked top can’t be beat. If you’re a baked mac and cheese lover, just pop the mac and cheese into a casserole dish, top with some extra cheese and bread crumbs and bake at 350°F for about 20-30 minutes, or until the top turns golden, crispy, and crunchy.Instant Pot Velveeta mac and cheese
- Add 2 cups (8 ounces) uncooked macaroni, 1 3/4 cups water, 2 tbsp butter, and 1/2 tsp each of garlic powder, onion powder, and dry mustard powder to the Instant Pot insert and stir well.
- Cook on high pressure for 4 minutes then quick release and carefully open the lid. Stir in 1/2 lb cubed Velveeta, 1/2 cup of shredded cheddar, and 1/2 cup milk until the cheese melts and coats all the mac.
Crockpot Velveeta mac and cheese
- Add 2 cups (8 ounces) uncooked macaroni, 2 cups milk, 1/2 lb cubed Velveeta cheese, 1/2 cup shredded cheddar, 2 tbsp butter, 1/2 tsp each of garlic powder, onion powder, and dry mustard powder to the Crock Pot and stir well.
- Set on low for 1.5 hours with the lid on, stirring occasionally.
- Test for doneness at the 1 hour mark and add milk, 1/4 cup at a time if the cheese sauce starts to get too thick.
The right pasta shape
Elbow mac is THE shape for mac and cheese, but sometimes you want something a little more adult. Try these if you're (somehow) bored of the classic smile shape:- Penne - fun fact: penne was intended to look like a fountain pen's nibs. Penne comes smooth and ridged, but the ridged ones are the best for picking up sauce.
- Ziti - ziti are like straightened out macaroni and they're the closest modern version of the original maccheroni noodle. Be sure not to rinse these pasta between cooking and saucing or the sauce won't stick as well.
- Rigatoni - rigatoni sometimes feels like the overlooked shape for mac and cheese but it's actually one of the best. The large diameter of tube picks up cheese both on the inside and out, and the ridges pick up even more cheesy flavor than elbow mac could. It's the most adult shape, to be honest.
- Gemelli - gemelli means twins and they're like the DNA shape in pasta form. They're two tubes, twisted around each other.
- Casarecce - from the top view these look like little S's. Because of the shape, they seem to have two layers when you bite down and have a firm and satisfying chew you just don't get with a single layer pasta.
- Bucati corti - These are like little telephone cords, cut into 2 inch lengths. They're a super yummy shape to eat and the nooks and crannies carry a lot of extra cheesy sauce.
- Cavatappi - also known as Scooby Doo pasta, these are fun spirals that bounce when you pick them up. They're like the giant version of bucati corti.
Mac and cheese variations
- Pumpkin mac and cheese - stir in 1/2 cup of pumpkin puree
- Green chile mac and cheese - stir in 1 small can of chopped green chiles
- Cheeseburger mac and cheese - stir in 1 lb of seasoned browned ground beef, 1/2 cup diced onion, 1/4 cup tomato paste
- Taco mac and cheese - stir in 1 lb of seasoned browned ground beef, 2 tablespoons of taco seasoning, and 2 chopped tomatoes. Top with Mexican 4 cheese blend.
- Bacon mac and cheese - sprinkle on crispy bacon
- Tuna mac and cheese - stir in 2 cans of drained tuna and 1 cup of frozen green peas
- Green mac and cheese - stir in 2 tablespoons pesto, and 2 cups cooked chopped broccoli
How to make a double portion of Velveeta mac and cheese
If you need to make even MORE Velveeta mac and cheese, there’s a handy recipe scaler that you can use below. Just change the “serves 4” to how many you need to serve. Just make sure that you use the ounce measure for the pasta because the scaler only changes the ounce amount for the pasta.Make ahead Velveeta mac and cheese
You can absolute make this mac and cheese ahead of time and then either bake it in the oven with breadcrumbs on top or reheat it on the stove with a splash of milk, stirring until it becomes loose and gooey. It comes together super quickly but I totally understand how making things ahead for dinner parties and big events makes things easy. I think it heats up perfectly the next day and some how tastes even better?Can you freeze mac and cheese?
Yes! you can either store it in the fridge tightly covered for a week, or freeze in an air-tight container or heavy duty freezer bag for up to 1-2 months. Don’t forget to label and date it!How to reheat mac and cheese
Pop it in the microwave, covered and loosen with a bit of milk if needed. You can also cover it with foil and bake it in a low oven (325°F) until hot, about 20 minutes. Stir in a bit of milk after warmed through if needed.What to serve with mac and cheese
A little bit fancier
If you love mac and cheese and want to expand your horizons, give Tini’s Mac and Cheese a try! xoxo StephVelveeta Mac and Cheese
If you’re looking for the creamy mac and cheese of your childhood, this is it.
- 8 oz macaroni (about 2 cups dry, or other small pasta of choice)
- 2 tbsp butter
- 2 tbsp flour
- 1/2 tsp garlic powder
- 1/2 tsp onion powder
- 1/2 tsp dry mustard powder
- 1.5 cups milk (of choice)
- 1/2 lb Velveeta cheese (cubed)
- 1/2 cup shredded cheddar
Cook the macaroni in a large pat of salted water according to the package directions and drain well. In a large saucepan, melt the butter over medium heat. When melted, stir in the flour, garlic powder, onion powder, and dry mustard, until smooth and incorporated.
Pour the milk into the pan in a thin stream while whisking, until smooth. Keep on medium heat, stirring occasionally, until the sauce bubbles and thickens, 3-5 minutes.
Add the cubed Velveeta and shredded cheddar and stir until melted and creamy.
Add in the drained macaroni, mixing until evenly coated, taste and season with salt and pepper. Enjoy!
To bake: Scoop the mac and cheese into a oven safe casserole dish, top with 1/4 cup of shredded cheddar and 1/4 cup panko breadcrumbs or crushed ritz crackers and bake at 350°F until the cheese melts and is golden and crisp, 20-30 minutes.

I Am... Beef Tenderloin with a Giant Sauce Board
You should treat yourself. It’s been a rough year and you need something luxurious. This year you need a beautifully rosy, fork-tender, juicy beef tenderloin! You’re probably thinking, aren’t beef tenderloins giant and serve 8-10 people? The answer is yes. But there are also center cut tenderloins that are mini and serve just 4. That’s perfect for you, your other, and LEFTOVERS. Or maybe just a really, really hearty meal. Either way, if you’re looking to make a large beef tenderloin or a slightly smaller one, here are all the tips and tricks for making the best roast beef in your life, aka roast beef tenderloin. Note: this year beef tenderloin is expected to be really expensive and hard to come by for a lot of different reasons, so if you traditionally plan one for the holidays, it might be worth asking a butcher about it now, or consider switching to a slightly more accessible but still fancy cut like our prime rib roast or even pork tenderloin.
What is beef tenderloin?
Beef tenderloin, also known as eye fillet or filet is cut from the loin. The tenderloin is found underneath the ribs, close to the backbone. This part of the cow does very little work which is why is is the tenderest part of beef. Cooked properly, it’s got a melt-in-your-mouth buttery texture and is extremely juicy and delicious. It naturally comes in a nice round-cylinder shape with no bones which means it’s really easy to carve into medallions and serve.Is beef tenderloin the same as filet mignon?
Tenderloin and filet mignon come from the same part of beef and even have the same shape and size, but technically, they’re not the same cut. Filet mignon is part of beef tenderloin but tenderloin is not filet mignon. It gets pretty in-depth, but all you need to know is that filet mignon are cut from a certain part of tenderloin and when you buy a whole tenderloin, some parts are the filet mignon and some parts are just going to be tenderloin. Is this really important though? I say no, just tell yourself and your guests that you’re serving them up filet mignon steaks ;)Where is the best place to buy beef tenderloin?
Not going to lie, beef tenderloin is probably one of the most expensive pieces of meat out there. If you’re looking for the most affordable beef tenderloins, go to Costco. They sell beef tenderloins that are a fair bit cheaper than say, Whole Foods. That being said, the tenderloins at Costco – just like everything else there – are giant, so keep that in mind. If you’re looking for a smaller, center cut tenderloin, visit your local butcher where you’ll be able to find a tenderloin that’s about 3.5-4 pounds compared to the 6-10 pound giants at Costco.Should I buy a trimmed or untrimmed beef tenderloin?
When buying beef tenderloin you’ll notice that they come in trimmed and untrimmed, also sometimes called denuded. If you’re excellent and confident about your knife skills you can save yourself some money and get an untrimmed tenderloin. Personally, we always go for trimmed because part of the beauty of a tenderloin is the nice cylindrical shape and nothing beats the years of experience a butcher has trimming tenderloins into perfect pieces.How big of a beef tenderloin should I buy?
Generously, go for 3/4 lb of tenderloin per person. If you’re having a large amount of sides, 1/2 lb should be more than enough.The best way to cook beef tenderloin
The best way to cook beef tenderloin is to start in a high oven to sear and brown the outside, then turn the oven low so that the inside cooks at a very slow and low rate. It’s a brilliantly simple foolproof method that ensures you don’t mess up a very expensive piece of meat. The outside ends up with a nicely browned crust and the insides are ultra-tender and perfectly pink.How to cook beef tenderloin
- Heat your oven to 475°F. We’re going to start by blasting the tenderloin with super high heat.
- Pat the tenderloin very dry and salt generously while the oven is preheating,
- Tie the tenderloin in 1 inch intervals to ensure that it’s compact and evenly sized throughout. Make sure you dip your butcher string in some oil so it doesn’t stick to the roast.
- Rub the loin all over with oil and coat with crushed peppercorns. Insert an oven probe into the thickest part of the tenderloin.
- Roast at 475°F for 15 minutes then turn the oven down to 200°F and roast until the inside reaches your desired temperature.
- Remove, let rest, slice, and enjoy the deliciousness.
How to tie beef tenderloin
Beef tenderloins are nice and round in the middles, but unless you get a smaller, center cut tenderloin, you’ll find that the edges are tapered. We want to wrap these up and tie them so that everything is compact and round, ensuring that the edges don’t get overcooked.To tie your beef tenderloin:
- Cut some butchers string into 12 inch lengths.
- Soak the strings in oil.
- Tuck the tapered ends underneath themselves to create the same thickness throughout the tenderloin.
- Use the oiled strings to tie the tenderloin in 1 inch intervals.
Beef tenderloin ingredients
We’re keeping this beef tenderloin super simple so we can let the beef shine. All you need is: whole beef tenderloin, neutral oil, salt, whole crushed peppercorns.Beef tenderloin sauces
I love a naked salt and pepper tenderloin with all of its elegant simplicity, but sometimes I want to be punched in the face with flavor too. So here are six different sauces you can pair with your beef tenderloin. We did a choose your own adventure sauce board and it was awesome to go from simply seasoned to trying a different sauce on each bite! Each sauce recipe will make about 1 cup sauce.① Classic Creamy Peppercorn
Add 1/4 cup brandy or cognac to a pan and reduce slightly over medium heat. Stir in 1/2 cup no sodium beef broth and 1/3 cup cream. Add 1-2 tsp crushed whole peppercorns and simmer, stirring occasionally, until thickened to your liking. Season with salt to taste.② Mustard Cream Sauce
Add 1/4 cup white wine to a pan and reduce slightly over medium heat. Stir in 2 tbsp dijon mustard and 3/4 cup heavy cream. Bring to a gentle simmer, stirring occasionally, until thickened to your liking. Season with lots of freshly cracked black pepper and salt to taste.③ Garlic Soy Chimichurri
Combine 2 tbsp toasted sesame oil, 2 tbsp rice vinegar, 1 tsp soy sauce, 2 cloves crushed garlic, and 1/4 cup chopped cilantro in a small bowl and let sit for 10 minutes for the flavors to meld.④ Garlic Herb Butter
Melt 1/2 cup butter with 4 cloves crushed garlic in small pan over low heat. Remove from the heat and stir in 2 tbsp chopped fresh herbs (rosemary, sage, thyme) and season with salt and freshly ground pepper to taste.⑤ Sichuan Peppercorn
Combine 2 tbsp Sichuan chili oil, 2 tbsp soy sauce, 2 tbsp toasted sesame oil, 1 tbsp black vinegar, 2 cloves crushed garlic, 2 thinly sliced scallions, and 1 tbsp chopped cilantro to a small bowl and let sit for 10 minutes for the flavors to meld.⑥ Wasabi Cream Sauce
Combine 2 tbsp sour cream, 2 tbsp mayonnaise, 1/2-1 tbsp wasabi and 2 thinly sliced scallions in a small bowl and let sit for 10 minutes for the flavors to meld.⑦ Red Wine Shallot
Add 1 tbsp butter and 1 thinly sliced shallot to a pan and sauté over medium low heat. Sprinkle on 1 tbsp flour and cook lightly. Slowly stream in 3/4 cup stock and 1/4 cup red wine while whisking. Simmer and thicken, season with salt and pepper to taste.Pro tips when cooking beef tenderloin
- Dry the surface throughly. Patting the skin dry with paper towels will dry out the surface which will help the tenderloin brown when it’s in the oven. Moisture is the enemy of browning.
- Salt so that the surface of the skin is dry. Ditto on salting - salt draws out moisture so the surface can brown more evenly. Be generous because the inside of the meat won’t be seasoned. Make it rain salt! But not too much because overly salty meat is a travesty
- Tie the tenderloin. Tenderloins have tapered tips that need to be tucked and tied so they cook evenly. Use a meat probe. A meat probe will ensure the middle of your tenderloin is a juicy, rosy ruby pink.
- Let it rest! Let the meat rest before slicing into it.
- Don’t forget about carry over cooking. Pull your tenderloin when it reaches just a couple of degrees under the temperature you’re aiming for. While you’re resting, the internal temperature will rise by a few degrees because of carry over heat. Ours rose by 12ºF while resting.
The importance of a meat thermometer
A meat thermometer is essential when cooking a big piece of meat. You spent a large chunk of your paycheck on this, so let’s not do the whole squishing your thumb/touching your earlobe. Do yourself a favor and get an oven probe; one that beeps when the target temp is hit. They can be really cheap, extremely expensive wireless app driven, or something in between. If you have an instant read or thermocouple style thermometer , be sure to check often so the tenderloin doesn’t go over temp.Roast beef cooking temps
For a quick and easy reference, roast beef is roughly done at:- Rare: 125ºF
- Medium-rare: 135ºF
- Medium: 145ºF
- Medium-well: 155ºF
- Well done: ??♀️
Why isn’t my beef tenderloin pink?
Oops, you probably left it in the oven too long. But fear not! If when you slice into your tenderloin right away and it’s not as pink as you like, just wait. Roast beef becomes more pink and rosy after you cut it and the juices are exposed to the air. On that note, most of the tenderloin recipes on the internet show a super bloody rare middle. If you want your tenderloin to be on the very pink side, pull it out of the oven at 115°F and the carryover heat should bring it to 120°F for the super pink look. Also, the majority of tenderloin recipes you see are very small center cut tenderloins, 3-4 pounds, which take much less time to cook, so if you’re looking for a very pink middle, make sure you keep an eye on the time and use a meat probe.How to neatly slice roast beef
You’ve invested time and money into your glorious beef tenderloin, don’t hack at it and get those weird saw marks! To get the cleanest, nicest slice:- Get your biggest knife. You’ll need the length. Give it a sharpen and wash it off. When was the last time you sharpened your knife?!
- Hold the beef tenderloin on a cutting board with your non-dominant hand. Position the very tip of the knife, at a 30° angle on the edge of the tenderloin that is closest to your body.
- Push the knife away from your body, almost perpendicular to the cutting board. Use the whole length of your knife so that the heel of your knife is now at the opposite edge of the tenderloin, the side farthest away from you. The knife should slide right into the tenderloin, about 1/3 to half of the way down.
- Pull the knife back towards your body, giving it a bit of pressure so that the tip of the knife is now where it started, at the end of the tenderloin closet to you. You should be about another 1/3 or so of the way down through the tenderloin.
- Finally, push the knife away from you one last time and you should have a nice clean slice. Keep your motions smooth and gentle and let the sharpness of your knife do the work.
How to store leftover beef tenderloin
Wrap it up tightly and store in an air tight container in the fridge. Beef tenderloin should keep for 3-4 days.How to reheat beef tenderloin
If you have leftovers, this is how to reheat beef tenderloin: Place slices covered, in a low 200°F oven, for 20-30 minutes or until warmed through. OR microwave it in 30 second increments. Believe it or not, the inside will still be red and juicy. If it’s not hot after the first 30 seconds, continue to microwave in 15 second intervals.What to serve with beef tenderloin
POTATOES! It’s always the answer:
- Roasted Potatoes: Crisp, Fluffy, and Potato-y
- Instant Pot Mashed Potatoes
- Potato Snack: 64° Eggs, 72° Potatoes, Toast
- Crispy Duck Fat Oven Roasted Potatoes
Greens are good too:
- Easy Roasted Air Fryer Asparagus
- Crispy Air Fryer Roasted Brussels Sprouts
- Crispy Air Fryer Roasted Broccoli
And bread-y carbs because bread:
Beef Tenderloin
The best roast beef tenderloin!
- Meat thermometer with probe
- 1 beef tenderloin (trimmed, about 5-6 lbs)
- neutral oil
- salt
- 1/2 cup peppercorns (crushed)
Pat the tenderloin dry with paper towels. Season with salt. Soak some butcher string in oil then tie the tenderloin every 1 inch or so, being sure to tuck in the tails so that the tenderloin is an even thickness throughout.
Rub the tenderloin with oil and coat in crushed peppercorns. Heat the oven to 475°F.
Place the tenderloin on an oiled roasting rack over a rimmed baking sheet and insert a meat probe set for your desired doneness. When the oven is hot, place the tenderloin in the oven and roast at 475°for 20 minutes.
Turn the heat down to 200°F and roast until the center is 120°-125°F for rare to medium rare, about 2-2.5 hours, depending on size.
Once the meat reaches your desired temperature, remove from the oven, tent with foil and let rest for minimum 10 minutes. Slice into 1 inch pieces, arrange on a platter, and enjoy.
Sauce Ideas:
Classic Creamy Peppercorn
Add 1/4 cup brandy or cognac to a pan and reduce slightly over medium heat. Stir in 1/2 cup no sodium beef broth and 1/3 cup cream. Add 1-2 tsp crushed whole peppercorns and simmer, stirring occasionally, until thickened to your liking. Season with salt to taste.
Mustard Cream Sauce
Add 1/4 cup white wine to a pan and reduce slightly over medium heat. Stir in 2 tbsp dijon mustard and 3/4 cup heavy cream. Bring to a gentle simmer, stirring occasionally, until thickened to your liking. Season with lots of freshly cracked black pepper and salt to taste.
Garlic Soy Chimichurri
Combine 2 tbsp toasted sesame oil, 2 tbsp rice vinegar, 1 tsp soy sauce, 2 cloves crushed garlic, and 1/4 cup chopped cilantro in a small bowl and let sit for 10 minutes for the flavors to meld.
Garlic Herb Butter
Melt 1/2 cup butter with 4 cloves crushed garlic in small pan over low heat. Remove from the heat and stir in 2 tbsp chopped fresh herbs (rosemary, sage, thyme) and season with salt and freshly ground pepper to taste.
Sichuan Peppercorn
Combine 2 tbsp Sichuan chili oil, 2 tbsp soy sauce, 2 tbsp toasted sesame oil, 1 tbsp black vinegar, 2 cloves crushed garlic, 2 thinly sliced scallions, and 1 tbsp chopped cilantro to a small bowl and let sit for 10 minutes for the flavors to meld.
Wasabi Cream Sauce
Combine 2 tbsp sour cream, 2 tbsp mayonnaise, 1/2-1 tbsp wasabi and 2 thinly sliced scallions in a small bowl and let sit for 10 minutes for the flavors to meld.
Red Wine Shallot
Add 1 tbsp butter and 1 thinly sliced shallot to a pan and sauté over medium low heat. Sprinkle on 1 tbsp flour and cook lightly. Slowly stream in 3/4 cup stock and 1/4 cup red wine while whisking. Simmer and thicken, season with salt and pepper to taste.

I Am... Honeynut Squash
Honeynuts are cousins to butternuts, but trust me when I say, they’re so much better. Do you like butternut squash but sometimes think it’s a bit too big? If so, super sweet and personal-sized honeynut squash is here to save the day! If you’ve ever seen a what looks like a tiny version of a butternut squash you’re lucky enough to have spotted a honeynut in the wild!
What is honeynut squash?
Have you guys heard of honeynut squash? I’ve seen it floating around on menus and the internet, but the first time I saw one in real life was at a farmer’s market. It felt so special – apparently I’m nerdy like that. Honeynuts are kind of rare, like a unicorn squash: they’re are on their way to being sold in all the grocery stores, but right now they’re still kind of a farmers’ market and specialty store kind of thing. 2025 edit: I see them all the time at local grocers like Whole Foods and (as mentioned in the comments) Sprouts and other places too. Honeynuts are essentially tiny butternut squashes created to be a better tasting, tinier squash. A chef (Dan Barber) met up with a squash breeder (Michael Mazourek) and asked him why he couldn’t make a smaller, tastier squash. After a couple of years, honeynuts were born. Honeynuts are not just smaller than butternuts, they’re also sweeter. You don’t need to peel the skins, and when roasted, they take on a caramel, almost malty flavor. The flesh is smooth and tender without any of the stringiness you get from larger squashes. They’re the perfect personal-size squash and are absolutely delicious. The first time I saw honeynuts, I exclaimed “wow, they’re SO CUTE!” about 16,000 times, picked through the box of honeynuts to find my forever honeynut and carefully cradled him home. I cracked him in half, scooped out his insides, roasted him to a deep golden honey color, then ate him with yogurt, pickled shallots, and honeyed walnuts. So GOOD. I felt truly blessed.How to roast honeynut squash
- Heat the oven. Heat the oven to 425°F. We’re going for high heat so that the squash can caramelize and become soft and tender.
- Halve the honeynut squash. Wash and dry the honeynuts then use a large sharp knife to cut them in half lengthwise from stem to base. Use a spoon to scoop out the seeds and pulpy insides.
- Roast. Drizzle the cut sides with a bit of oil and season generously with salt and pepper. Roast, skin side up on foil lined baking sheet for 20-30 minutes (depending on size) or until fork tender.
What does honeynut squash taste like?
If you love squash, honeynut squash tastes like the best gosh darn squash you’ll ever eat. It’s flavorful, sweet and nutty, with a hint of caramel and malt. They’re what butternut squash dream of being. Plus they have twice the amount of beta-carotene of butternut squash!Where to buy honeynut squash
Honeynut squash season is late September to early October. You’ll find honeynut squash at local farmers’ markets, Whole Foods, Trader Joe’s and sometimes even your regular grocery store. They’re very seasonal, so when you see them, pick some up! They’re getting more and more popular so you’ll probably see them popping up more and more.How to pick a good squash
Honeynut squash are orange when they’re ripe so look for a squash with no green. You want a firm squash with no soft spots and the stem attached. They’ll keep for quite some time (a couple of months in a cool dark spot) but you should eat them when they start to wrinkle because that means they’re starting to dry out.The best way to cook it
The best way to eat a honeynut is to roast it! Roasting it brings out its intense sweet flavors. Because they’re so tender, you can also cook them on the stove top, like I did in this Pan-Roasted Honeynut Squash with Creamy Garlicky Pasta.Can I eat the skin?
Yes, the skin is completely edible, just like a delicata squash. This is the best part because it means no more peeling squash!Honeynut squash vs butternut squash
The best part of honeynut is that it’s a lot easier to prep then butternut. If you hate peeling, cutting and taking the seeds out of butternuts, honeynuts are here to save the day! They’re so much more tender and have a finer texture so they slice like a dream. You can also eat their skins, which are thin and similar to the skin on delicata. Win, win, win!What can I use instead of honeynut squash?
If you can’t find honeynut squash, its closest cousin is a butternut, although butternuts aren’t as sweet and a tiny bit stringier. You can also use any other winter squash. If you love honeynut squash, try this pan roasted honeynut squash with pasta! It’s fall in a bowl: creamy, cozy, garlicky pasta with honeynuts and swiss chard. Have you guys had honeynuts? Do you want to? Tell me all your honeynut dreams!Honeynut Squash with Honeyed Walnuts
Super sweet personal-sized honeynut squash is here to save the day!
- 1 honeynut squash
- 1 shallot (thinly sliced)
- 2 tsp vinegar
- 1 tsp sugar
- 1/2 tbsp butter
- 1 tbsp honey
- 1/4 cup walnut halves
- 1/4 cup greek yogurt
- 2 tbsp cucumber (shredded)
- 1 pinch ground cumin
Heat the oven to 425°F. Carefully halve your honeynut squash and scoop out the seeds. Drizzle with a bit of oil and season generously with salt and pepper. Roast in the oven, skin side up on a foil lined baking sheet, for 25-30 minutes, or until browned and tender.
While the squash is roasting, make your side dishes if desired.
Quickly pickle your shallots: Place thinly sliced shallots in a small bowl with vinegar, sugar, and 2 tablespoons of water. Stir and let sit while you make the honeyed walnuts.
Honey roast your walnuts: In a small non-stick pan, melt your butter along with the honey over medium heat. Add the walnuts and toss with the honey and butter until it bubbles and caramelizes. Remove the nuts from the pan and let cool completely.
In a small bowl, mix together the yogurt, cucumber, and a pinch of cumin. Taste and season with salt and pepper. Swoosh onto a plate and add the squash on top. Garnish with the shallots and honeyed walnuts. Enjoy!

I Am... Super Easy Smooth and Creamy Hummus Recipe
My most favorite thing to make with dried chickpeas is hummus and this hummus recipe is my go to. So creamy, so dreamy, so many feels for a humble little bean. Do you love hummus? I can (and have) eaten it by the spoonful, no edible vehicle needed. Most recipes on the internet used canned chickpeas but after tasting this hummus made from chickpeas you’ve cooked yourself, you may never go back! When you make hummus from scratch, from dried chickpeas, you get to use hot-n-freshly cooked peas meaning your hummus is warm. If you’ve never had warm hummus before, stop everything and make this hummus recipe because it is a game changer.
What is hummus?
In case you aren’t familiar with it, hummus is a delicious vegan dip/spread made from chickpeas, tahini (more on this later), lemon, garlic, and spices. It’s originally from the Middle East and is popular around the world thanks to the fact that it’s both delicious and nutritious. It has a rich and long history and you’ve probably seen it at the grocery store in little tubs but you can make it at home easily - better than store-bought. Usually it’s eaten as a dip/appetizer, drizzled with olive oil and herbs, served up with fresh pita. You’ll also find it garnished with cilantro, tomatoes, onions, and cucumbers and served up with falafel or as part of a mezze platter with a bunch of different prepared small dishes, such as tzatziki, muhammara, or baba ganoush. You can also use it as a spread in sandwiches or wraps, serve it with a bunch of fresh vegetables for scooping, dollop it on salads, eat it with eggs, or just scoop it up with a spoon (my favorite method!)What goes in hummus/hummus ingredients
Chickpeas (garbanzo beans)
Chickpeas (or garbanzo beans) are the bulk of hummus. They’re super nutritious: both high in protein and low in fat with a bunch of vitamins and fiber. You can buy them dried or in cans but we prefer dried chickpeas.Why use dried chickpeas?
I get it, it’s super convenient to pop open a can of chickpeas and make hummus. It’s fast and easy and it tastes pretty darn good too. BUT, soaking and cooking your own chickpeas is so much more flavorful and cost effective. You can add extra aromatics to the water you cook them in and they take up less space in your pantry. Win, win, win! We have a giant container of dried chickpeas in the pantry just for the express purpose of adding to coconut curry chickpea and other soups, making falafels, making Taiwanese chick-pea nuggets, and crispy cacio e pepe chickpeas.Tahini
Tahini is a paste made from toasted ground hulled sesame. It has the consistency of a nut butter and is toasty, fragrant, and super delicious. It adds a nutty creaminess to hummus and can’t be skipped. You can make it at home (recipe coming soon!) or simply buy it at the store. A jar should make several batches of hummus.Lemon Juice
You absolutely need a bit of freshly squeezed lemon juice to make your hummus sing. It adds a welcome bit of acid and freshness to contrast the richness of the tahini and chickpeas. You can tweak the lemon juice amount you add just to your liking. If you’re a lemon-head, squeeze a bit extra on!Garlic
A garlic clove (or two) adds a tiny bit of heat – because it’s added in raw – and bite. If you’re not a fan of fresh garlic, you can go with roasted which will be more sweet and mellow, but the raw garlic in hummus is what gives it an addictiveness that will make you want to eat more.Salt and Spices
Don’t forget to salt your hummus because under-salted hummus is just sad. Cumin adds a warm earthiness. You can sprinkle on a bit of smoked paprika, sumac, or a bit of aleppo at the end for a bit of jazz too if you like!Extra Virgin Olive Oil
I don’t put any olive oil in the actual hummus, but we ALWAYS finish with a nice drizzle of fruity extra virgin olive oil.Super creamy smooth hummus recipe
Now that we know what we need, here’s how to do it: 1. Soak your dried chickpeas overnight. I like to add a little bit of baking soda which helps soften the chickpeas, but it’s completely optional. 2. Cook the chickpeas. Pop the rinsed off soaked chickpeas into a pot with a LOT of water and simmer for about an hour or until the chickpeas are very soft. At this point you can add some aromatics in if you’re feeling adventurous - I kept it simple here but you can add any alliums (onions, shallots, green onions, leeks, etc). Keep them big so you can pick them out before blending. 3. Blend! Well, wait, you can also peel your chickpeas if you’re crazy about super-smooth hummus. It taste a little extra time and some people swear that that’s what makes their hummus super smooth but if you use baking soda and cook you chickpeas enough I don’t personally think it’s necessary. But if you need a little meditative time, this is when you would peel your chickpeas! Back to blending. We use a mini food processor to blend everything up. You want to start by blending the tahini, lemon juice, garlic, and a bit of ice cold water until smooth and fluffy. The ice water is what helps the tahini whip up into a smooth emulsion. Start with the tahini and lemon because it’s a lot easier to smooth out the tahini when there’s nothing else in the food processor. After your tahini lemon mix is smooth and fluffy, add your drained chickpeas and blend until completely smooth. Give it an extra minute after you think it looks done to make sure everything is super creamy. The best time to eat hummus is right after you’ve made it and it’s still warm. SO DREAMY. Pile some on a plate, make swoosh in the middle, fill it up with a puddle of extra virgin olive oil, sprinkle on some herbs or some chopped up tomatoes, cucumbers, and onions and go to town. PS - Once you master the classic hummus recipe, try this miso hummus with crispy onion furikake, it’s TO DIE FOR.Super Easy Smooth and Creamy Hummus Recipe
- 1/2 cup dried chickpeas
- 1 tsp baking soda (divided)
- 2 garlic cloves (unpeeled)
- 3 tbsp fresh lemon juice (or to taste)
- 1/3 cup tahini
- 2 tbsp ice water
- 1/8 tsp ground cumin
Place chickpeas and 1/2 teaspoon baking soda in a medium bowl and add cold water to cover by 2 inches. Cover and let sit, at room temperature overnight, until chickpeas have doubled in size. Drain and rinse.
In a large saucepan, combine the soaked chickpeas and remaining 1/2 teaspoon baking soda and add cold water to cover by at least 2 inches. Bring to a boil, skimming if needed. Reduce the heat to medium-low, partially cover, and simmer until chickpeas are tender and squish easily between your fingers, about 45–60 minutes. Drain and set aside.
While the chickpeas are cooking, place the garlic, 2 tablespoons + 2 teaspoons of the lemon juice, and tahini in a blender or food processor and pulse until smooth. With the motor running, Add the ice water, 1 tablespoon at a time (it may seize up at first) until mixture is very smooth, pale, and thick.
Add the drained chickpeas and cumin and process, scraping down the sides as needed, until very smooth, about 4 minutes. Thin with water if a looser consistency is needed. Taste and season with lemon juice, and cumin, as desired.

I Am... Dirty Soda
Icy, fizzy, and creamy, dirty soda is the perfect sweet treat to sip on when it's hot, or even when it's not. If you’re not from Utah, you’re probably thinking: what the heck is “dirty soda” and why would I ever want to drink it? But, if you’ve ever stoped by a Swig or Sodalicious, you know. Oh, you know. Dirty soda is seeing a surge in popularity thanks to Tiktok and Olivia Rodrigo and I am here for it.
What is dirty soda?
Dirty soda is fountain soda mixed with flavored syrups and cream, all served up over nugget ice. There are literally millions of recipes you can make and you can definitely find a flavor catered to you. The original version is: Diet Coke over ice, with coconut syrup, lime juice, and half and half. It’s creamy and refreshing all at the same time. Think of dirty soda as a customizable non-alcoholic fizzy cocktail.Where did dirty sodas come from?
Dirty sodas are from Utah, where there’s a large Mormon population. Because Mormons don’t drink alcohol (or coffee!), dirty sodas came about as a fun way to enjoy non-alcoholic mixed drinks.What makes it “dirty”?
It’s the cream! I am not sure why – if you know, let me know in the comments – but adding the cream is what makes it dirty. Maybe it’s because cream and soda doesn’t go together smoothly until you mix it?Wait, aren’t these just melted floats?
Remember floats? Soda topped off with a perfect scoop of vanilla ice cream? I LOVE floats, especially root beer floats. Essentially, dirty sodas are a variation of a ice cream float, but with heavy cream instead of ice cream.Can I make dirty soda at home?
Yes! It’s super easy to make dirty soda and it just takes regular grocery store ingredients. In fact, hold a dirty soda party and have a bunch of sodas and mix ins and customized to your heart’s galore. There are bunch of flavored coffee creamers these days and they work perfectly if you don’t want to buy coffee syrups.How to make dirty soda
- Ice: First, start off with a large glass of ice. Nugget ice is preferable (more on that below) but obviously most people don’t have $700 nugget ice machines at home so go with whatever ice you have.
- Syrups: To the ice, add your syrups of choice. For the classic dirty soda, we’re going to add 2 pumps of coconut syrup (1 tbsp) and 1 tbsp of fresh lime juice.
- Soda: Next, we’re going to top it off with Diet Coke.
- Cream: The cream is what makes it dirty! Pour on the heavy cream and watch as it swirls in prettily.
- Stir and enjoy. Give everything a stir and sip!
What is nugget ice?
If you’ve ever had the ice at Sonic, you’ve experienced the joy of nugget ice. I am truly obsessed with nugget ice. So much so that Mike seriously thought about buying me a nugget ice maker for me for my birthday. I love that squishy, crunchy, chewable ice. I’m not alone in my love either, nugget ice has a cult following. Sadly, I don’t have a nugget ice maker, (update: I do now! it’s this one and it works great!) but loads of ice is key in dirty sodas: it keeps them ice cold and also helps waters them down to the perfect drinkable sweetness. Nugget ice is definitely superior - the ice is chewable, and it’s somehow light and fluffy with aeration which let’s the soda soak into the ice, equalizing the ratios of the sweetness of soda. Above: sadly, not true nugget ice.What else can you use coconut syrup for?
If you’re a coconut lover like me, you probably won’t have an issue using up a bottle of coconut syrup, but if you need some ideas, here’s what you can do:- coconut lattes: make a regular latte and sweeten to taste with coconut syrup
- cold brew with coconut syrup: sweeten cold brew to taste with coconut syrup
- coconut lemonade: leave the sugar out of your favorite lemonade recipe and sweeten with coconut syrup to taste
- coconut banana smoothies: blend together 1 small frozen banans with 1/2 cup coconut milk and coconut syrup to taste
Dirty soda ideas
- DDD: Dr. Pepper + coconut syrup
- Malibu: Dr. Pepper + coconut syrup + vanilla syrup
- Naughty and Nice: Dr. Pepper + English toffee syrup + half and half
- Buttery Beer: Root beer + butterscotch syrup + vanilla cream
- Riptide: Sprite + cranberry + raspberry + fresh lime
Other fun drinks to try
- Whipped lemonade (pictured above)
- Coconut cloud smoothie
- Mango smoothie
- Blueberry ginger ale spritz
- Lemongrass mint lime spritz
- Mint mojito coffee
Dirty Soda Recipe
Think of dirty soda as a customizable non-alcoholic fizzy cocktail.
- 1 tbsp coconut syrup (~2 pumps, see notes)
- 1 tbsp lime juice
- 12 oz Diet Coke
- 2 tbsp heavy cream
- ice (as needed)
In a large glass filled with ice, layer on the coconut syrup, lime juice, Coke, and heavy cream. Stir well and enjoy!
You can sub the coconut syrup and heavy cream for 2 tbsp of coconut creamer.

I Am... Air Fryer Grilled Cheese
All you need is ten minutes for this perfect air fryer grilled cheese and it might be the best way to make grilled cheese. It's time to catch up to 2025 when everyone owns an air fryer and it's actually good! This air fryer grilled cheese is hands-off, quick and easy perfection with extra crispy toasty outsides and gooey melty cheesy insides I love grilled cheese sandwiches. They’re one of my all time favorite comfort foods. I love simple, classic grilled cheese and fancy grilled cheese - to me, all grilled cheese is good grilled cheese. But, when I’m starving and I need grilled cheese almost instantly, an air fryer grilled cheese is my go-to.
Why air fryer grilled cheese?
Remember when I said all grilled cheese is good grilled cheese? Well, I lied. I absolutely abhor any kind of burnt grilled cheese. Or even worse, when the outsides are toasted but the cheese isn’t melted. For such a simple sandwich, there are so many things that can go wrong if you’re not patient at the stove. That’s why air fryer grilled cheese is amazing. It comes out the same every single time you make it. Once you set the temp and time, you can just chill out and let the air fryer do its thing. No fiddling with looking at how golden your bread is, no burnt bits, and thankfully, no unmelted insides.How to make air fryer grilled cheese
Making a grilled cheese sandwich in the air fryer is much the same as making one on the stove in a pan, minus the standing at the stove. Here’s how you do it:- preheat - preheat your air fryer while you’re prepping your sandwich.
- butter - use softened room temperature butter to generously butter two slices of bread.
- build - place one slice of the buttered bread in the basket of the air fryer and top with two slices of cheese. Place the other slice of bread on top of the cheese, butter side up.
- air fry - air fry the sandwich for 3-5 minutes, then flip and continue to air fry until perfectly golden.
- enjoy - remove, slice if desired, and enjoy!
What kind of cheese for air fryer grilled cheese?
There’s only one cheese for classic grilled cheese: American. It’s the perfect melty, cheesy filling for a grilled cheese. Yes, you can get fancy with sharp cheddar, gouda, or whatever your favorite cheese is, but if you want pure comfort food, American cheese is what you want. For those times I don’t go with American cheese, I like one slice of cheddar and one slice of mozzarella.What is American cheese?
Contrary to what you’ve heard, American cheese is cheese. It’s perfect for grilled cheese sandwiches because it’s mild, creamy, and has a low melting point. American cheese has a bad reputation because it’s processed, but in reality, all cheese is processed. What people are really complaining about is the fact that it’s pasteurized, which makes people think that it’s “plastic.” American cheese is in fact, made from cheese, more specifically cheddar or Colby cheese that’s been melted with sodium citrate (a citric acid salt aka salt from the the acid found in citrus fruits) so it can be pasteurized into a creamy texture that doesn’t separating. Anyway, that was just a long way of me saying that American cheese is real cheese and it’s good!The best bread for grilled cheese
For a classic grilled cheese so all you need is simple sandwich bread. It’s up to you if you want to go for white or whole wheat, but if you’re having a grilled cheese sandwich, I recommend white bread. My favorite kind of white bread for grilled cheese is super soft shokupan/Japanese milk bread but obviously I don’t always have homemade bread hanging out in the kitchen. My next favorite choice is any sort of fluffy, super squishy sandwich loaf.Tips and tricks for a perfect air fryer grilled cheese
- use room temp butter so you don’t tear your bread trying to spread hard butter on soft bread. If you don’t have room temp butter, melt some in the microwave and brush the bread with the melted butter. If you don’t have butter, you can always substitue mayonnaise.
- preheat the air fryer, even if it’s not for a long time. Just press the preheat button while you’re assembling your sandwich. It really does make a difference in the heat transfer and toasting of the bread.
- use 2 slices of cheese. It seems like overkill, but one sandwich with two slices of cheese is the way it should be. You want enough cheese in the middle of your grilled cheese to melty and gooey. No one likes a grilled cheese that skimps on the cheese.
- choose regular sandwich bread thick bread. The bread to cheese ratio is perfect when you go with a regular thickness. This is not the time for thick slices of bread; too thick and your grilled cheese won’t be as crispy.
- add a rack or a small baking sheet to the basket and place the bread and cheese on top if you don’t want your grilled cheese to have air fryer basket marks.
Which air fryer is this?
We have a Cosori air fryer with a clear window. I love it because you can peek inside without opening the drawer. So much of knowing when something is done cooking is about appearance and the little window lets you see everything that’s going on inside. I also love that it’s so big. It doesn’t look absurdly large but it fits a lot of food inside and it hasn’t let us down yet. It’s kind of hilarious but Mike and I love it so much that we joke all the time about getting a second one so we can air fry multiple things at once. (not sponsored, btw) That’s it, air fryer grilled cheese for the win. Hope your future is cheesy! xoxo stephAir Fryer Grilled Cheese Recipe
Quick and easy perfection with extra crispy toasty outsides and gooey melty cheesy insides.
- 2 slices bread
- 2 slices cheese (of choice, American preferred)
- 1 tbsp butter (room temp)
Preheat the air fryer to 400°F. While the air fryer is heating, butter both slices of bread.
Place one slice of bread, butter side down, in the air fryer basket.
Top the slice of bread with 2 slices of cheese.
Place the other slice of bread on top, with the butter side facing up.
Air fry until golden brown, about 3-5 minutes, then flip and air fry for an additional 1-2 minute or until the grilled cheese reaches your desired toastiness.

I Am... One Day No-Knead Focaccia
If you love bread, this recipe is for you: no knead, one day, full proof, homemade bread. Specifically, an impressive bubbly, crispy, gloriously golden tray of no knead focaccia is the stuff bread dreams are made of. I love bread so much. I have a sourdough starter (named Justin Bread-ber) that I love so much that I have both dehydrated and frozen back ups of him. Bread is absolutely magical. That being said, I know that bread can be intimidating even though it is the easiest thing to make. I mean, people baked bread back in the day when there was no electricity or ovens. But no-knead focaccia is the best thing to start with. If they can do it, you can do it. I believe in you.
What is focaccia?
Focaccia is a delightful oven-baked Italian flatbread that is made with yeast. It comes in rounds, rectangles, and squares. It’s bubbly and squishy and has a signature golden brown top that’s dimpled and adorned with olive oil, flaky salt, and herbs. There are so many regional types of focaccia that you could do a focaccia tour of Italy twice around and still find different kinds to eat. It’s a beauty of a bread because there are so many varieties topped with different ingredients.How to make no knead focaccia
- Measure - start off by measuring out the flour, water, yeast, and salt. It’s best to use a kitchen scale, but if you don’t have one, I’ve included cup measurements. Thankfully bread is super forgiving and you don’t need to be extra accurate.
- Stir - Stir the flour, water, salt, and yeast together in a bowl until everything comes into a shaggy ball.
- Proof - Cover the dough and let it proof for 30 minutes in a warm spot in your kitchen. After 30 minutes, lightly wet your hands and grab some of the dough and fold it over and in on itself. After each fold, turn the bowl 90 degrees. In the end you’ll complete 4 folds. Cover and let the dough proof for another 30 minutes. After 30 minutes, lightly wet your hands and grab the dough with both hands, scooping it up and holding it over the bowl. Some of the dough will naturally fall down towards the bowl. Tuck the ends that fall down towards the bowl under the dough. Turn the bowl 90 degrees and repeat. The dough will look like a blobby rectangle.
- Dimple - Drizzle olive oil in a cake pan and place the blobby rectangle directly into the olive oil. Use your fingers to gently spread out the dough and dimple slightly. Cover and let rise for 30 minutes to an hour, or until doubled and poofy. Right before baking, drizzle generously with olive oil and dimple the dough: use your fingers to press down into the dough, almost all the way to the bottom of the pan.
- Bake - Bake the focaccia in a preheated 450°F oven for 20-25 minutes or until golden and baked through. Let cool in the pan for 30 minutes before enjoying warm or at room temp.
No knead focaccia ingredients
- flour - regular all purpose flour is what we’re using. If you have bread flour on hand, it will give your focaccia more structure and therefore more fluffiness, but it’s not absolutely necessary.
- salt - bread is only 4 ingredients and salt is essentially for flavor. If you want to get fancy you can use flavored salts on top, but in the dough, simple fine table salt is best because it dissolves easily into water.
- yeast - we’re going for instant yeast, the kind that comes in little packets or jars. Just look for yeast that says “quick-rise” or “fast-rising.”
- water - this is a 90% hydration dough meaning there’s quite a bit of water in it. The large amount of water is what makes it super easy to stir up the dough so we don’t need to knead it. We want a warm-ish water so the yeast has a happy environment to grow. In this case, warm means warm but not hot to the touch.
- olive oil - you can’t have focaccia without olive oil. Giving your baking pan a nice drizzle of oil means your focaccia gets a crisp and almost deep fried bottom crust. A generous drizzle of olive oil on top and in the dimples of focaccia is signature. Make sure you’re using an olive oil you like the flavor of.
- toppings - you can keep it simple and just go for olive oil and salt. You can also go a with a bit more and add your favorite fresh herbs. Really, you can top this with anything: tomatoes olives, cheese, garlic, go wild!
Why no knead focaccia?
The beauty of no-knead bread is that the ingredients do all the work for you. You don’t need a mixer, a bread machine, or to even really use your arm muscles. Everyone can make no-knead bread, with little to no equipment. No-knead bread is the gateway bread, the bread will show you how it’s possible to make homemade bread yourself!How does no knead bread work?
Typically, when you make bread, please excuse this pun, you need to knead it. Kneading bread is what develops the gluten in the dough, making bread chewy. It also incorporates air which is what makes the dough puff up and inflate when proofing and baking. No gluten and no air means flat, dense bread. So, then, how and why does no-knead bread work? It’s science! No-knead bread uses a relatively long rising (fermentation) time instead of kneading to develop gluten. No-knead breads have a very high hydration, meaning they have a lot of water in the dough, making it easy to mix with a wooden spoon or silicone spatula. Instead of kneading a small amount of water into a large amount of flour, an almost equal mix of water and flour and simply stirred together. Time and yeast do the rest of the hard work by producing a bubbly, strong, elastic network that holds air well.What is lukewarm water for bread?
We want water that’s warm to the touch, but not hot, if you want to get specific, we’re looking for between 80°F and 100°F.How to do stretch and folds
Stretch and folds are super simple. It helps if you think of your bowl as cardinal or compass directions. The top of the bowl is North, the bottom is South, right is East and left is West. Lightly wet your hands and scoop underneath the dough at North. Pull the dough up and fold it over down South. Then, scoop under the dough South and fold it up towards North. Do the same with East and West. You will have completed 4 folds.How to do coil folds
Coil folds are stretch and folds but in the opposite direction. Instead of folding the dough up and over on top of itself, you’re folding it underneath. Lightly wet your hands and use both hands to reach underneath the dough and pull up so the dough is hanging from your hands. Some of the dough will naturally fall down or stick to the bowl so it’ll look like you’re holding a very floppy cat. Tuck the two floppy ends underneath the bulk of the dough, first the top floppy part, then the bottom floppy part, kind of like you’re folding a letter in thirds. Turn your bowl 90° and do another stretch and fold. Your bread should look kind of like a loose blobby rectangle.No knead focaccia tips and tricks
Here are some tips and tricks to make your focaccia the best it can be:Cold fermentation
Some people are very particular about the flavor of yeast. I’m one of them. I definitely prefer slow, cold fermented doughs which means if I have enough foresight, I will almost always make my dough the day before and let it cold ferment in the fridge. What this means is stopping (also card retarding) the proofing. When you put dough in the fridge, the coldness slows down the yeast growth and stops the yeast from digesting the flour. Slower yeast growth leads to better flavor development because there is less off gassing. If you do a cold ferment, you’ll want to put your dough in the fridge after the second set of coil folds, once you have put your dough into the baking pan. Keep it wrapped up and just pop it in the fridge. The next day, about 2-3 hours before you want to eat your bread, take the pan of focaccia out of the fridge and let it sit at room temp or in a happy proofing temperature for 2 hours or until doubled and very poofy.What temperature for proofing no knead focaccia
If you’re really particular and want to have the ideal temperature for your focaccia to thrive, you’ll want your ambient air temperature to be 85°F. Nice and toasty for all the yeasties to grow and bubble. Some ovens have a proofing setting and if yours does, go ahead and use it. Otherwise, you can always pop your proofing focaccia into your toaster oven or microwave; just be sure to leave a sign on the door so no one accidentally kills all your hard work.What kind of pan for no knead focaccia
You can really use any kind of pan you want as long as it can contain your dough. If you use a rimmed sheet pan your focaccia will be thinner and if you want a fluffier, thicker focaccia, you should use a cake pan. This recipe will fit nicely into an 8 inch cake pan or a rimmed quarter sheet pan. In this post, I used an 8.6 x 6.6 inch rectangular pan.When to dimple?
Most people dimple their focaccia at the end, right before they pop it in the oven. The truth is, you should dimple twice: right when you put your dough in the baking pan and then again right before you bake. Dimpling the first time helps expel any extra air which will give your focaccia a good crumb. Dimpling right before you bake means you’ll get more airy bubbles and a good crumb. Because the dimples are little pockets where the olive oil can pool, you’ll want to have just the right amount. Dimpling right before you bake helps you know that you’ve proofed just enough. The dimples will stay indented and the dough around dimples will be bubbly and airy.Bread heads
For all the bread heads out there, this is a 90% hydration dough which makes it super fluffy and bubbly. Here are the baker percentages if you want to adapt the recipe:| Ingredients | Grams | Baker’s % |
| flour | 240 | 100% |
| salt | 5 | 2% |
| instant yeast | 2.5 | 1% |
| water | 225 | 90% |
More breads
Once you’ve dipped your toes into bread making, try these recipes out:- Parmesan garlic knots - seriously the BEST garlic bread knots you’ll ever have
- Soft and fluffy Parker House rolls - these are so soft and pillowy, you’ll want to make a bed and sleep on them
- Sourdough of course - Try your hand at sourdough. Step-by-step instructions on how to cultivate your very own starter and make your first loaf with wild yeast
- Pretzels - Homemade pretzels are a serious flex, they take a bit more time than these regular bread but they are so worth it
- And even Pretzel Dogs - it’s almost Oktoberfest so why not make some pretzel dogs
One Day No-Knead Focaccia
Make impressive bubbly, crispy, and gloriously golden focaccia with almost no effort.
- 2 cups all purpose flour (240 grams)
- 1 tsp salt (5 grams)
- 3/4 tsp active dry yeast (2.5 grams)
- extra virgin olive oil (to taste)
- flaky sea salt (to taste)
- fresh rosemary (to taste)
In a large bowl, whisk together the flour and the salt.
In a small bowl or liquid measuring cup, add 225 grams (about 1 cup) warm water. Sprinkle on the instant yeast.
Stir the yeast into the water then add to the bowl with the flour and salt. Use a silicone spatula to mix well, until everything comes together in a shaggy ball. Scrape down the sides if needed, then cover and let rest for 30 minutes.
After 30 minutes, use lightly wet hands (or you can use nitrile kitchen gloves) and complete a set of stretch and folds, picking up the dough and folding it over on itself. Cover and rest for 30 minutes.
After resting, complete a set of coil folds, sliding your slightly wet (or gloved) hands underneath the bulk of the dough and picking it up over the bowl, letting the weight of the dough fall down. Tuck the ends under each other, turn the bowl 90 degrees and do another coil fold.
At this point, you can cold ferment your dough in the fridge (see the above post) or transfer the dough to an olive oiled cake pan.
Gently press the dough out to the edges and dimple slightly with oiled hands. Cover and proof for 30 minutes.
After 30 minutes, lightly oil your hands and dimple the dough again. Cover and let rest for another 30 minutes or until completely doubled and very poofy.
Heat the oven to 450°F and drizzle the top of the focaccia generously with olive oil. Dimple one last time and sprinkle on flaky sea salt and fresh rosemary.
Bake for 20-25 minutes or until the top of the focaccia is golden and crisp and the focaccia is cooked through (you can use an instant read thermometer inserted into the middle, it should read between 190–210°F). Remove and let cool for 30 minutes, then slice and enjoy!

Latest Comment
“Bananas and coffee seem like such a strange combination at first but it really is delicious! Agreed that when the banana...”Jerrica L on Banana CoffeePopular
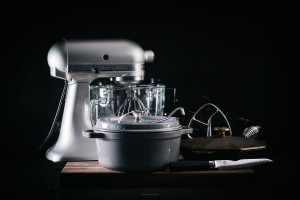 2015 Holiday Giveaway
 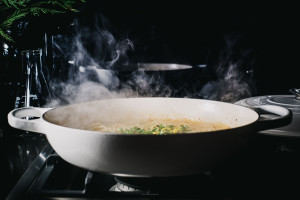 One-Pot Lemon Scallop Pea Spaghetti
  Beer Battered Onion Rings, Jalapeno Aioli
  2014 Holiday Gift Guide and a Giveaway
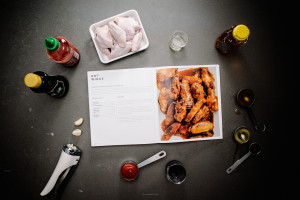 Easy Gourmet Hot Wings and a Giveaway!
 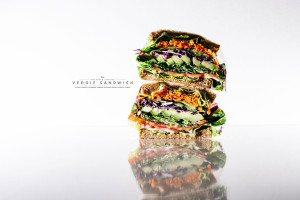 The Ultimate Veggie Sandwich
  Vegan(!) Creamy Corn Soup Recipe
 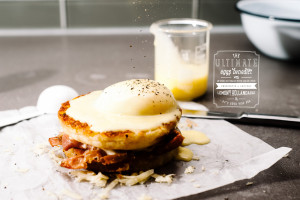 Sunday Brunch: Grilled Cheese Eggs Benny
